Like it or not, Facebook Timeline is here to stay. May as well make the most of it with a really kickin’ cover photo! Technology challenged? Me too…but it is easy, I promise!
Go to PicMonkey.com – simple, free, and more than a little cheeky, this is my favorite photo editing site.
Click on the button on the left that says “create a collage”.
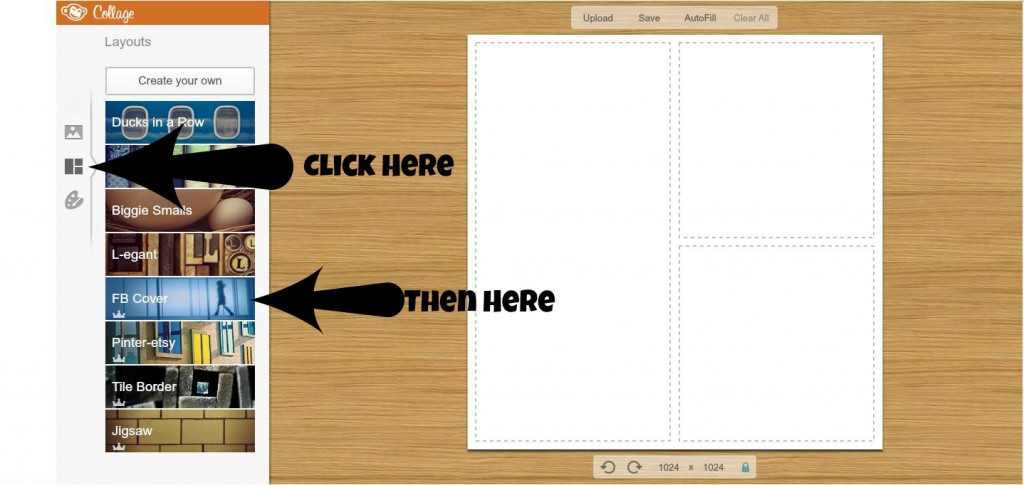
Then, click on the middle of the choices on the left – the one that is three boxes. It will bring up a menu of preset collage choices. Click on the one that says “FB Cover”. See the screen shot below.
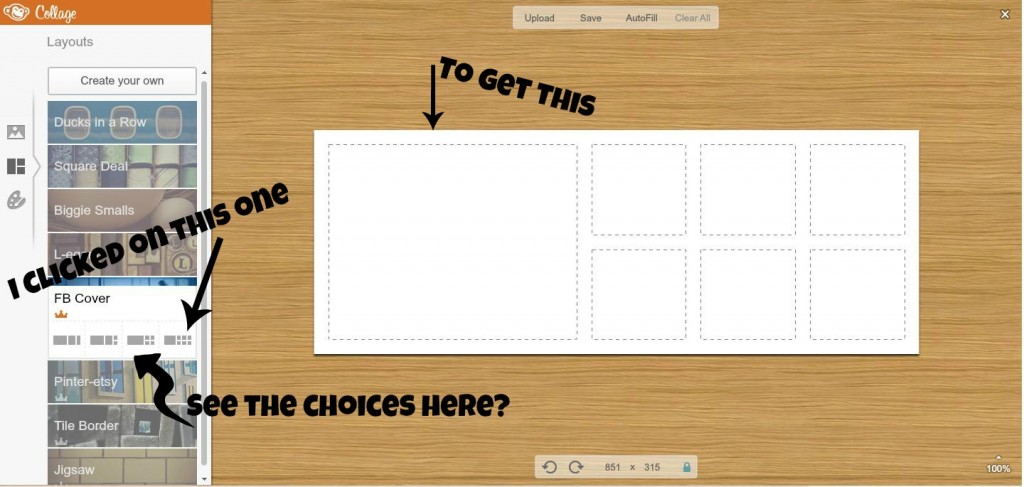
That will open up four photo layout choices. You can choose whichever one you want. See the screen shot below.
Each of those little dotted squares is a place that you can put a photo.
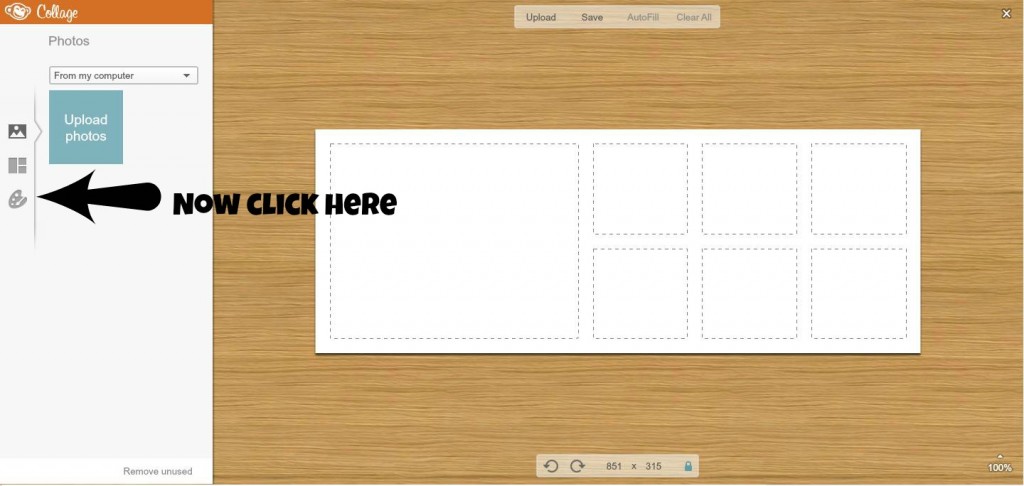
Now click on the picture above the layout one: 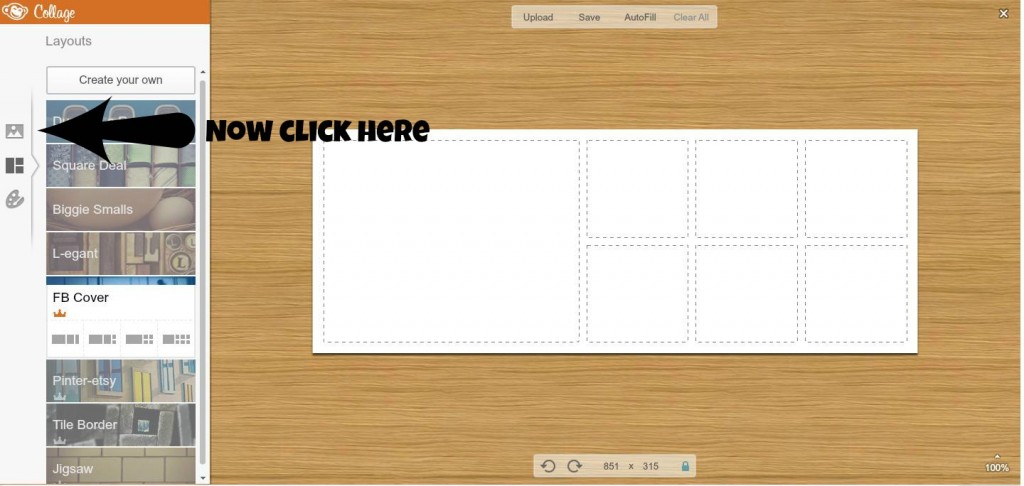
You’ll see a blue box that says “upload photos”. Click on that and now you can choose photos from your computer. You can choose more than one at a time by holding down the ‘ctrl’ key when you select them. The pictures you select will fill in on PicMonkey on the left side by the blue “upload photo” box. Now you can just drag them into place in the collage. Move them around until you like the placement. Remember that your Profile Photo will slightly overlap the left bottom corner of your collage, so plan accordingly.
If you hover your cursor between the boxes, you will see a blue line. Drag this to resize the boxes. When all the photos are sized and placed as you want them, it’s time to embellish!
Click on the artist palette:
Play around with the options there to change your background color and the size of the photos, or round the corners. If you want to stop there, then save the photo by clicking on “save” at the top of the page and save it somewhere you can find it easily (I usually just save it to my desktop). Then go to Facebook and upload it as your new cover photo.
OR, you can take it to the next level by uploading it back into Picmonkey as a new picture.
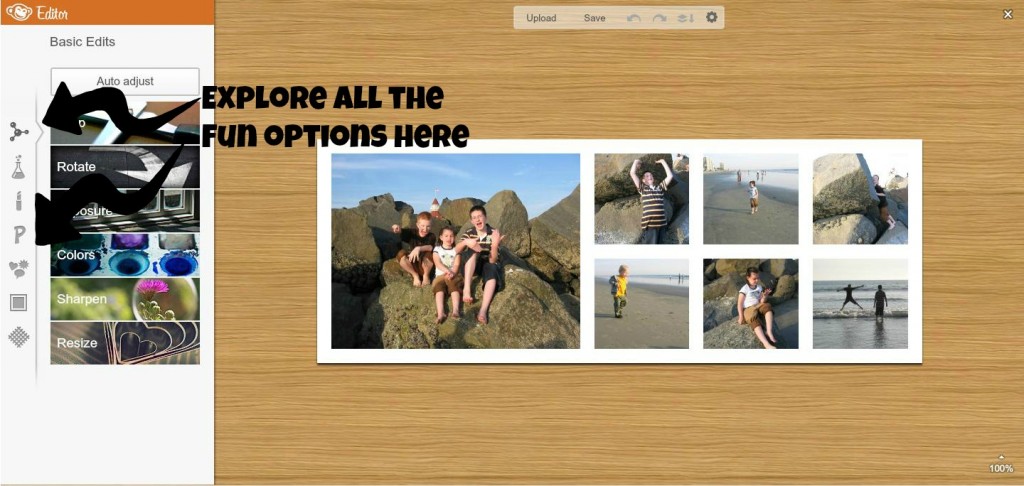
This time, click on “Edit a Photo” instead of “Make a Collage” and upload the collage that you just made and saved. At this point, you can no longer manipulate the collage, you will just be able to embellish it as a single photo. Here’s an example of what the page in PicMonkey will look like now:
See all those options that are on the left now – the list of little grey pictures? As you click on each of the little pictures, it will bring up – right to the right of them – a list of choices under each option. Play with them to see what they do with your photo. Everything is reversible until you save it, so just take some time and go for it!
Here is what my actual current Facebook cover photo looks like: 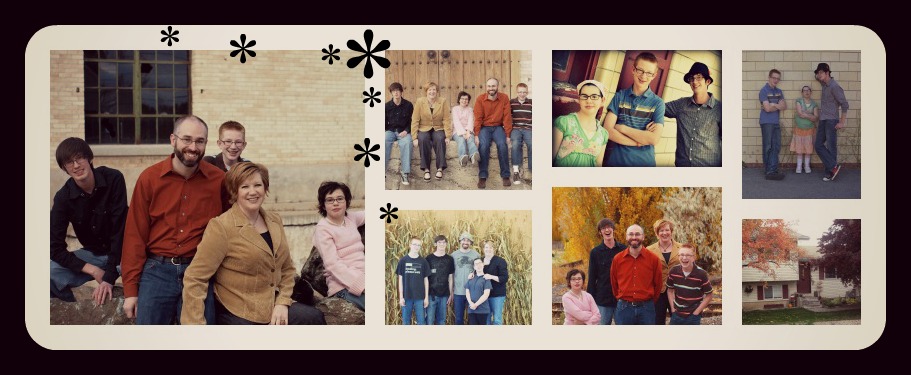
I changed the sizes of the small photos, rounded the corners of the collage, added a border around the whole thing, manipulated the exposure and coloring, then added the asterisk stickers.
Once you have a finished product, save it, upload it as your cover photo on Facebook Timeline, then sit back and enjoy the compliments!

