
5 Tips for Making Your Camping Trip Cheaper
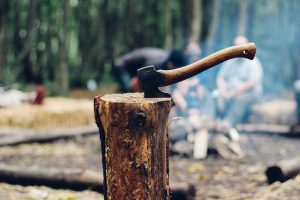
Are you planning a camping trip this spring or summer? Are you stressed about what it will do to your budget? I know that camping is supposed to be the cheap way of vacationing, but it can be a strain on your budget if you don’t do it the right way. If you are a camping newbie, or if it’s been a while I’ve got these 5 tips for making your camping trip cheaper that you are going to want to follow up on:
- Borrow. If you don’t have camping equipment, don’t be afraid to ask friends or family to borrow theirs. This is especially true if you don’t have any other camping trips scheduled in the future, if it is going to be a one-time thing then just borrow for the trip.

- Shop sales, clearance and second hand. You don’t have to spend hundreds of dollars on a tent. Hit up the sales and clearance racks, or even check out a thrift shop or online marketplaces such as FB marketplace, OfferUp, etc to find deals on camping gear.
- Plan your meals in advance. Camping food can be cheap, but it can also cost a lot of money, so the key here is to plan in advance so that you don’t make a last minute run for expensive snack food. Pack up sandwiches, burritos, or other easy to pack foods so that you are set and ready to go.
- Bring firewood with you. Bring firewood with you in order to save money, so you aren’t having to buy firewood that is sold at the campground. I know it’s not always easy to pack wood in your vehicle, but you may find that you will save big! Even more that you may expect.
- Use old pots and pans. You do not need to buy fancy cookware for your fire. Just use your old pots and pans for it, or hit up the second hand store and buy some old pots and pans that you use specifically for camping.
Do you like to go camping? How do you keep it under budget?
5 Tips for Finding An Extra $100 In Your Budget This Week

Okay guys, let’s get real here. How many of you have found yourself in a tough financial place before where you just absolutely needed to have some more money ASAP., It’s not always as easy as just making it happen though, I get it. That’s why it is time to get serious about your budget and “finding” money that you didn’t think you had.
Here are my favorite 5 tips for finding an extra $100 in your budget this week:
- STOP BUYING COFFEE. Seriously. This little thing single handedly destroys budgets of many, many people. Make your own coffee at home and you can easily be $25 ahead for the week.
- NO RESTAURANTS. Just like the coffee, eating out is a huge expense that people don’t really think about. In fact, the average American family spends at least $3000 per year on eating out. That is over $50 saved right there!
- RETURN YOUR RECYCLE-ABLES. Do you live in a redemption state? Here in Oregon, where I live, we are charged a deposit when we buy soda, bottled water a several other drinks. When we return them we get $0.10 per bottle or can back. Many people don’t see the potential in returning this, but I do. It doesn’t take too long to end up with $10 or $20 back in your pocket!
- SHOP YOUR PANTRY. Before you head to the grocery store, take a long look at your pantry and fridge and see what you actually have in there. I’m going to bet that you have enough to create at least a couple of dishes that you don’t have to pay for. That’ll save you some money.
- RICE AND BEANS, BEANS AND RICE! Eat cheap for a while. It may get boring, but would you rather eating boring and keep your money or would you rather have a couple of tasty meals and be broke. Seriously, beans, rice, eggs and oatmeal are all very inexpensive meal ideas that will help put you in a different financial spot.
What’s your favorite way to save or earn money in a hurry?
Fun Food Ideas for St. Patrick’s Day
 St. Patrick’s Day is on Sunday and my kids are so excited. Besides wearing green, we don’t do much else to celebrate this day. This year I thought it would be fun to have some St. Patrick’s Day foods throughout the day. That basically means food that is green…right? Here are a few fun ideas that you can do to make your day a little more festive…and green.
Breakfast: Start your day with this Sweet Potato Corned Beef Hash. This looks amazing. If you don’t want to go to this full effort you could always make pancakes or waffles and turn them green, that’s easy peasy.
Lunch: Maybe take a break from the Corned Beef for lunch?? Instead of another meat, you could make these delicious Irish Nachos. You could serve these with a veggie or fruit tray, just to give your stomach some nutrition!
Dinner: For a traditional Irish dinner, you’ll want to do the Corned Beef and Cabbage. This is a great recipe you can follow- all done in a slow cooker! YAY. That’s my kind of cooking.
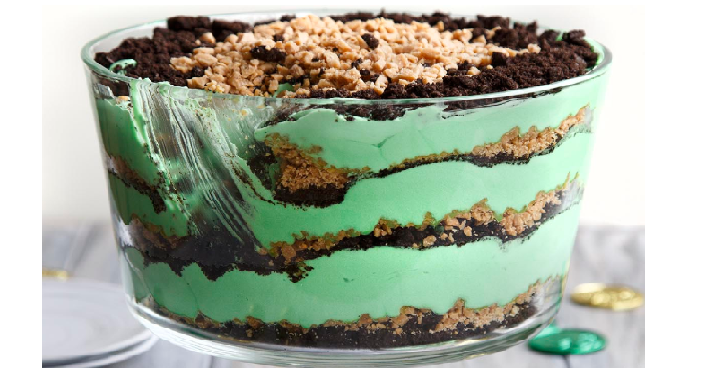
Dessert: End your day with this yummy Paddy’s Pudding. It’s simple and looks so yummy.
Drink: If you missed our post last week, then head here and check out this recipe for Shamrock Lime Punch.
Simple St Patrick’s Day Scavenger Hunt!

My kids love St Patrick’s day but with it landing on a Sunday this year there’s not the fun of going to school in all your green! So I thought this year we’ll do a little something more than I usually do. I’ve put together this simple yet fun scavenger hunt for the kids. They’ll follow the clues and at the end of the hunt they’ll find their pot of gold with some fun simple “green” items. Here’s the clues you can print and use too!
Clue #1 Keeping food cold is important you see, this is the place where milk just may be
Clue #2 Keys open doors to our home in our town. They also turn “something” so we can get all around
Clue #3 My shoes stay on my feet the whole day through, “someone else’s shoes” is where you will find the next clue
Clue #4 “Knock, Knock” is the sound that comes from this place! It means someone’s here & you’ll see a new face!
Clue #5 Here we gather together to enjoy a few meals, go under this place & I just might hear you squeal
Clue #6 If our clothes get dirty here is where they’ll go, find the next clue & the last treasure you’ll know!
At the end for their treasure I’ll put a box of lucky charms, gold chocolate coins, maybe some green jello and the ingredients to make a fun treat! Now lets hope they remember to wear their green or I’ll be out with my pinchers!
How to find Cheap Last Minute Activities for Spring Break

So, your kids are just about to be off for Spring Break (or they already are?!) What are you doing? Did you slack on planning any activities, or are you just too broke to look for something grand? No worries! We can show you how to find cheap, last minute activities for Spring Break!
Check Groupon
I know, I know, I am always going on and on about it, but that is for good reason! Groupon is a great place to find sweet deals on all kinds of fun activities! Plus, they almost always have promo codes to use to save even more money. I have taken my kids to our local Wildlife Safari, Yurt Camping, Paintballing and I even took them to an Elk Farm once! I didn’t spend more than $20 on any of these activities.
Call your Library
In the information age, many of us forget about how resourceful the library can be! Seriously though, give them a call and see if they have any activities running for kids during spring break.
Head to the Park
Again, the age of the internet has kids so busy online that they have almost forgotten how to have fun! I took my boys to the park the other day when we finally had some good sunshine and oh my goodness did they have fun! My 11 year old was running around playing like the little boy that I almost forgot about (he is so active in school and sports, I forget that he is only 11). My toddler had the best time of his life. I’m not even kidding, he cried for an hour after we left and has asked every single day since then about the swings and the slide.
What are you doing this spring break? Are your kids out already? My kids are out the last week in March and I am already scanning Groupon for stuff for us to do!
5 Tips to Throwing a Fantastic BBQ

I don’t even know if I can handle winter for the next week and a half, I am so over it! How about you? In fact, the sun was shining here for a few hours yesterday and I tried to convince my husband to fire up the grill! Lol I NEED my summer fun!
Do you love BBQs in the spring and summertime? I do! I am all about it. That’s why I decided to talk a little bit today about backyard bbqs! Do you want to step up your backyard BBQ game? If you are looking for some ideas on how to throw an awesome BBQ, you are looking in the right place!
Here are 5 tips to throwing a fantastic BBQ:
- Pot Luck. When you invite your guests, say yes to their offers to bring something. This is great for several reasons. LESS MESS. LESS WORK. AND LESS MONEY SPENT!!
- Stick with Basics. If you want to have a low stress BBQ, stick with offering the basics. There is no need to go crazy making fancy foods here. Hot dogs, burgers, chips, potato salad, etc.
- Have a good selection of yummy cold drinks! Having a good selection of refreshing drinks can make or break your party, especially when it is hot outside. Iced tea, soda, beer, chilled wine, juice for the kiddos! Even a nice pitcher of Ice Water can be a crowd pleaser.
- Don’t forget Dessert. Seriously…you need to have cool desserts on hand, even if they are popsicles or ice cream bars. This is especially true for summertime BBQs when it is hot outside. One of my favorite BBQ desserts? Grilled peaches served with vanilla ice cream. It’s so good!
- Skip the Decor. Your friends are there for food, fun and friendship, not to judge your BBQ decorating skills. Skip the decor all together or string up some lights or citronella candles or torches.
Do you have any tips for throwing the best BBQ?
5 Tips for Saving Money on Your Monthly Utilities

How much do you pay for utitilities each month? It seems like I am paying a fortune and I am tired of it! This month alone I paid $60 to water, $350 to power and another $40 to garbage. For the purpose of this article, I am not even going to talk about the phone bill. The stupid thing is, I know how to get these bills down, I have just been really lazy about it lately. That is changing now though! Here are my 5 tips for saving money on your monthly utilities that I plan to go back to ASAP, because I know they work.
- Turn the heat down. I hate being cold, but I think I hate being broke more, so the heat will be turned down ASAP. Even a drop of 5 degrees is going to make a big difference in our monthly bill.
- Unplug everything! Seriously, I have been reading lately about people who literally unplug everything in their homes unless they are using it. Some of these people pay just $20 per month on their power! While I don’t see us getting down that far, I am certainly going to be unplugging some stuff!
- Line dry our clothing. I have recently joined some budgeting groups on FB to get some fresh ideas on saving money and I see a lot of people using drying racks in their homes instead of a dryer. I think I can get behind that idea to some degree. I mean, I have 3 kids so there is only so much room I have to dry indoors, but once summer hits I will definitely be utilizing the clothesline more.
- Request a smaller garbage can. I know that I need to be more vigilant about my recycling and then I can request a smaller garbage can which would save me about $10 per month! I can think of a lot of things I can do with an extra $120 this year.
- Use less water. Turn off the water while brushing, take a 5 minute shower instead of a 10 minute one, etc. Every little bit helps, right?
5 Tips for Saving Money on Your Cell Phone Each Month

Remember back in the day when we had our home phone bill and that was it? Those days are long past, my friends. Now we have cell phones, internet, and sometimes even a home phone (do you still have one?). These can all get pretty pricey, but they don’t have to break the bank. I know for me the key was to get my cell phone bill under control in order to save money. If you are in the same boat, then here are 5 tips for saving money on your cell phone each month that will help you get your budget under control:
- Pay off your phone. Do you have a phone that you are paying for each month? Can you afford to pay if off? If so, do it now. Depending on the type of phone you have, you may save up to $40 each and every month.
- Skip the smartphone. Could you handle life without a smartphone? That was a joke. Of course you can (unless you use it for work, etc.). Why not go back to the old flip phone. I know quite a few people who do this and they have really reasonable bills each month.
- Go pre-paid. I have been learning a lot about savings in these areas and I am finding that pre-paid services are FAR cheaper than contracts. Why is this? I don’t know, but I like the idea of it! You can often find unlimited everything plans for $40 per month!
- Try a different company. Where I live, the only service that works is Verizon, so I have no choice but to use them. If you don’t have those same restrictions, shop around! See what companies will work for you and what you can save the most money on.
- Skip the insurance. Other than Apple Care which I only recently learned about (my daughter is the only one with an iPhone though), I typically skip the insurance. This may not be true for high dollar new phones, but once you have a phone that is a little bit older you don’t need it. These plans are expensive ($5-$10 per phone, each month) and even if your phone breaks and you submit it to insurance to get a new phone you will have to pay a high deductible ($50-$100). You can almost always find a used phone for the price of the deductible and whatever you have been paying monthly.
Shamrock Lime Punch Recipe
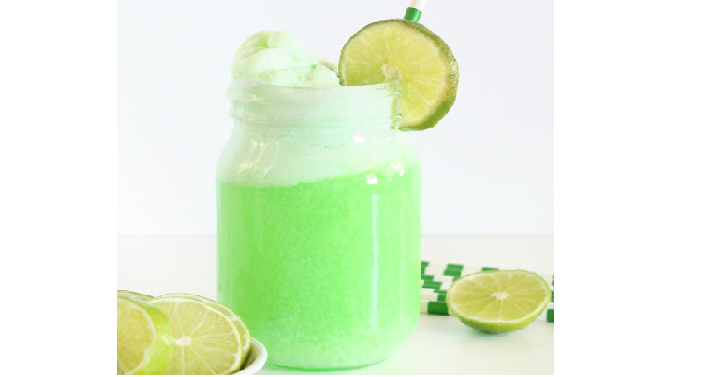
It’s the month of green and leprechauns. My kids always look forward to St. Patrick’s Day and I honestly don’t know why. I’m not one to go all out for this holiday, I make it super simple. One thing I do like to do is have a few fun, different things we do that day. We eat Lucky Charms in the morning and then have some time of treat. I was looking at this yummy punch and new the kids would love it. It’s simple and the perfect St. Patty’s Day surprise.
Shamrock Lime Punch Recipe
(Recipe & Picture by The Crafted Sparrow)
Ingredients:
- 7up or Sprite
- Lime Kool-Aid mix
- Lime sherbet
- 20 oz. Can Pineapple Chuncks (We will use the Pineapple juice)
Directions:
- Get a pitcher and make your Kool-Aid mix according to directions on the package. You can use only 1/2 sugar instead of 1 cup.
- Add the juice from the 20 oz Can of Pineapple Chunks (you can save the chunks for smoothies another day).
- Grab a drinking glass and put in two scoops of lime sherbet, fill the glass 1/3 way full of the Kool-Aid mixture.
- Fill the rest of your cup with lemon-lime soda.
- You can add more lime sherbet if needed.
- Add a straw and a wedge of lime and you’re done!
A Simple Easy Step By Step Guild To Making Your 72 Hour Kits!
Emergency preparedness seems to be a hot topic right now. With everything that’s been happening it’s a smart idea to have at least your 72 hour bags packed and ready to go. But what’s most important to put inside you might ask? Here’s a simple guide I’ve put together to get you started on the right foot.
- Really the most important is your food. You want to make sure you have enough food and water in each bag (or dedicate one bag for the whole family) to live on for 72 hours. I love the buckets I see with everything you need inside. Or you can easily put together each person’s kit with what you have in your home. They have awesome ideas on Pinterest of what you can put inside. Just be sure you write the date on the bag so you know when they expire and when you need to change them out. We’ve also included a water bottle with a purifier in our bags.
- Clothing is next. I just finished gathering together items from each of our closets to put in your 72 hour bags. I got 2 sets of underwear for each person, a set of warm jammies for the kids as well as pants and 2 long sleeve shirts. These were all things we had on hand, it didn’t cost us a dime. We still need to add shoes to our bags and I’d like to get wool socks but that will come when we have the funds. Make this plan work for you and your family, don’t go into debt trying to get your family prepared for a natural disaster.
- In both my husband’s and my bag (and now that my kids are a little older I want to get them their own as well) we have a Personal Hygiene bag in which we keep travel sizes of:
- 1 Shampoo 2 oz.
- 1 Liquid Soap 2 oz.
- 1 Lotion 2 oz.
- 1 Razor
- 1 Toothbrush
- 1 Tooth Paste
- 1 Comb
- 1 Sunscreen Towelette
- 1 Bug Repellant Towelette
- 1 Emery Board
- 1 Bar Soap
- 1 Lip Balm
- 1 Sewing Kit
- 1 Dust Mask
- 3 Wet Wipes
- 1 Rolled Tissue
- 1 Facial Tissue
- 1 Hand Sanitizer
- 1 Handy Wipe Towel
- 5 Female Hygiene pads (You’ll see I have female hygiene pads in this kit, my goal is actually to get a diva cup since you’re able to clean and reuse those.)
- Also in the adults’ bags you’ll find a First Aid Kit. You could easily go through what you have on hand and put together your own kit but inside ours is:
- 1 8″X10″ Dressing
- 1 5″x9″ Compress
- 1 4″x4″ Gauze Pad (2 pack)
- 1 3″x4″ Non Stick Pad
- 1 2″x3″ Non Stick Pad
- 1 2″x2″ Gauze Pad (2 pack)
- 1 Knuckle Bandage
- 1 Fingertip Bandage
- 2 Butterfly Bandages
- 5 3/4″x3″ Band Aids
- 5 1″x3″ Band Aids
- 1 1/2″ Paper Tape Roll
- 2 Vinyl Gloves
- 1 2″ Stretch Gauze Roll
- 2 Alcohol Prep Pads
- 2 Antibiotic Towelettes
- 2 Triple Antibiotic
- 1 Hydrocortisone
- 2 Ibuprofen (2 pack)
- 1 Burn Cream
- 1 First Aid Information Sheet
- 2 Safety Pins
- 1 Scissors
- 1 Tweezers
- Inside the next kit is your basics. There’s a few items I’ve bought and put in my kids bags but most of these items are for adults. Here’s what’s inside:
- 1 LED Flashlight and 3 AAA Batteries
- 1 Sierra Cup 8 oz
- 1 2.25 oz Gel Fuel
- 1 Emergency Poncho
- 1 Emergency Blanket
- 1 Hand Warmers (2 pack)
- 1 Multifunction Pocket Knife
- 1 5-in-1 Survival Whistle/Compass/Mirror/Match Container/Striker
- 1 Box Waterproof Matches
- 1 Water Purification Tablets 10 pack
- 2 Baggies
- 1 Garbage Bag
- 1 Pencil
- 1 Pocket Notebook
- My kids actually have a few extra things inside their bag. They have an ID card that has all their information on it with their picture. Then they picked a small stuffed animal and put it inside for comfort if there is ever a natural disaster. They also have a child combo kit which is a combination of both the first aid kit and basic kit but kid friendly. Inside they’ll have:
- 1 Emergency Poncho
- 1 Emergency Blanket
- 1 Hand Warmer (2 pack)
- 1 Whistle
- 1 Camp Cup
- 1 Light Stick (12 Hour)
- 1 Color Book
- 3 Crayons
- 1 Comb
- 1 Tooth Brush
- 1 Tooth Paste
- 3 Wash Ups
- 1 Rolled Tissue
- 5 3/4″ x 3″ Band Aids
- 2 Extra Large Band Aids
- 1 Triple Antibiotic
- 1 Hydrocortisone
- 2 Antiseptic Towelettes
- 2 Vinyl Gloves
I hope this isn’t overwhelming for you. The point of this post is to give you an idea of where to start and what you want inside your 72 hour kits for each person. Just start with the most important items and make your way down the list. A lot of these items you’ll probably find in your home but if you don’t have something just make a note of it and when you have a little extra money in your grocery budget snag your items. Keep it simple and stress free!
Ridiculously easy ways you can save $50 this week

Could you use a little bit of extra cash right now? I kid I kid…we all need a little extra cash, am I right?
Would you like to hear about some ridiculously easy ways you can save $50 this week? I know $50 doesn’t seem like much money, but what if you could save $50 each and every week? That $50 weekly would quickly add up to saving $200 each month and $2400 every single year. What could you do with an extra $2400? That $2400 could go to boosting your budget, to building your savings, to paying off debt, to booking a vacation…the possibilities are endless!
OK here it is folks! Here are some ridiculous easily easy ways you can save $50 this week.
- Breakfast for dinner. I recently discover that making a bowl of oatmeal with a couple of eggs cost less than 50 cents per meal. Why not do this for dinner a couple of nights a week? That’s worth some big savings to me. How about you?
- Hitch a ride. Do you carpool to work? If you said no why not? Have you ever looked into the benefits of carpooling? When there are are several of you taking the same vehicle you could easily save $50 a week in fuel costs alone! Bonus? You get to use the carpool lane!!
- Wash your own car. Do you drive-through car washes often to keep your card looking it’s best? I will admit that until recently, I did this often (my husband hates when our cars are dirty). I also recently discovered that many people do this each and every week. In my neck of the woods the cheap car wash is close to $10. Why not just wash your vehicle yourself at home?
- Brown bag it for lunch. While I think it is considerably less, let’s say that your cost to pack your own bag lunch is $4. This is $6 less than the average $10 lunch. This means that you will save $30 per week solely on lunch costs!
3 More Unique Ways I Will Save $1000+ This Year

Yesterday we talked a little bit about some unique ways that I plan to save big money this year (hey…to me, $1000 is big money). Well, I wasn’t fully transparent with you, because I also have a couple of more things that I plan to do this year to save money. I am all about doing it in unique ways though, so I am sticking with that theme for this post. So…without further ado, here are more unique ways I will save $1000 this year.
Selling plasma. Have you ever sold plasma before? I haven’t, but I just scheduled an appointment to do so and I hear that I can make several hundred dollars in the first month of doing it. I have been warned that I don’t want to do it too often, so this will likely be my first and only time doing it, but hey…a couple of extra hundred bucks will be really helpful in my life right now.
Turning down my heat. I live in the northwest and while we don’t have the cold weather that a lot of the people around the globe do, we have had a cold winter this year and I do NOT like to be cold. That’s why turning my heat down, even just a couple of degrees seems crazy to me, but I am going to do it. I figure the lower my thermostat is, the less my furnace has to work. I’m thinking mid-to-upper 60s will help the bill, while making sure we don’t freeze.
Have meatless meal days. We have decided to cut meat out of our diet for several days each week. Instead we will stick to beans, eggs, or other budget-friendly protein source. Breakfast for dinner is always a good option!
Tell me all of your unique money saving ways!!!! I need inspiration!
3 Unique Ways I Will Save $1000+ This Year

March has just begun folks! Even if your 2019 isn’t off to the money saving start you were hoping for, you still have time! I personally have a couple of bills that I would like to have paid off so I have been scouring Pinterest and looking for clever ways to make and/or save as much money as possible. Here are some of my favorite ideas that I have found and a couple that I have done on my own:
Save all of my tens. That’s right baby. Every single time I get a $10 bill in my hand it goes into a special place at home. I started doing this at the beginning of the year and I have saved about $300 so far. The thing is, with these tens I would typically have driven through the coffee shop or grabbed lunch at a drive through for the kids. No more! My tens are sacred!
Save specific change. We have a change jar here at home, but I won’t lie, I tend to get into it often to grab a couple of quarters for this or that. It’s just too easy to do. I recently read on Pinterest though to save just dimes. According to the article that I read, if you save just dimes in a two liter soda bottle, by years end you will have around $700. I don’t know if this is exactly true, but I am going to give it a shot. $700 sounds good to me and honestly, dimes are not what I grab for when I raid the change jar anyway, so this one should be easy.
Set a goal for X number of meals eaten at home each week. Let’s break this down, there are 7 days in a week and 3 meals per day. That is 21 meals per week. My kids play sports and we have found ourselves hitting the drive through far more often than we should on those busy nights. To combat this, we have decided that we are going to set a goal of eating 20 meals at home each week this month. This does include lunches made at home, but eaten at school or at work. That gives us the option of only eating out 1 time this week. I have a family of 5 and a meal out can easily exceed $50 (even at fast food, it is not unheard of to go beyond $30 per meal out). $50 saved is $50 well earned, my friends!
What are some unique tricks that you have used in your money saving journey?
5 Tips to Know Before You Visit Sand Dunes- Fun Winter/Spring Destination
 If you are getting antsy for a vacation during these dreary winter months, you’ll want to check out sand dunes. We recently got back from the Imperial Sand Dunes in California and it was an absolute blast. It’s the perfect time of year to go, not super crowded and the temperatures was perfect. If you’ve never been to sand dunes before, it’s definitely different than most vacation spots. There are some tips and tricks that you’ll want to know before hand. Check these out!
- Check the weather forecast before you go. The days leading up to our trip we constantly checked the weather. The wind is what you want to be looking at. If you have wind higher than 10 mph then it could not be fun. Remember, that fine sand will be blowing in your face. The best temperature is around 70 degrees, that’s why the winter/spring is a great time to travel to sand dunes.
- Be ready for the sun and possible wind. The weather can change drastically, bringing in some high heat. You’ll want to be prepared with all of the sun essentials- sunscreen, lip balm, wear hats, sun glasses and long sleeve and pants. Also be sure to bring dust masks! We wear these a lot when we are even at the campground.
- Follow the signs and rules at your sand dune destination. At Imperial you must follow a few rules like have flags on your sand vehicles, time restrictions of riding and age requirements. Do a little research before you go to your destination so you know what you need.
- Ride with other people. When you are out riding in the sand dunes it’s always nice to go with another vehicle. That way if you get stuck, you have someone to pull you out!
- Bring fun items like sleds and sand toys. Yes, you can actually sled down the sand hills. It’s amazing. Be aware, walking in the sand is super tiring. So you’ll want to bring your water on your trips to the sand. You can also bring some sun umbrellas so you can sit out on the sand too.
Fun & Creative Things You Can Do at the Beach!
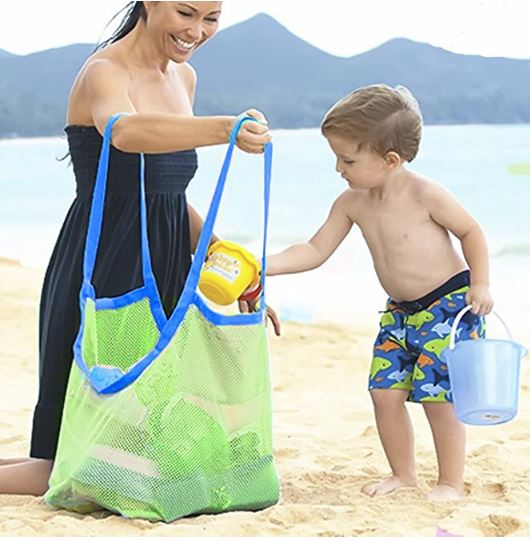
I’m so excited for summer and the warmer weather! We have a couple trips planned to the beach that we’re all looking forward too! I’m sure we won’t have any problem making memories and having fun but I’ve come up with some fun unique things to do in the sand that maybe you haven’t thought of! Check them out!
- Have a sand sculpture competition – you could put mom and dad on opposite teams and get busy making your best sculpture!
- Write messages in the sand – from your names to shapes and drawings you can do so much with simple a stick.
- Sand Volcanoes – using the chemical reaction of baking soda and vinegar you can make a sand volcano. Build your volcano with a bottle as your core. Then fill your bottle with baking soda (you can add sand to the bottom of your bottle if it’s a larger bottle, then it doesn’t take as much baking soda) then add the vinegar and watch it erupt.
- People watch – this reminds me of the scene in Date Night where they’re at the restaurant and watching people as they make up their conversation and life story.
- Make a relay race – this can include everyone from adults down to kids. Use cups to fill up a sand whole or a bucket you have.
- Create a scavenger hunt – come up with some items everyone has to look for. Then use those items and make sand art with them.
- Color Sand – there’s a couple different ways I saw you can do this. First you’ll just need zip lock bags and food coloring. Add your sand to the bag and a few drop of your food coloring. Zip the bag up and shake it up until the sand starts to change color. Second, take some sidewalk chalk and grate it up (using a food grater) then mix in your sand until it’s all colored. Both these way sound fun and something we’re going to try.
- Play Pictionary or Tic Tac Toe – These are simple games you can play right in the sand. You could come up with some pictures to draw while you’re there or create your list before you go.
- Target Shooting – dig a whole, make a circle or put a stick into the ground and use it as a target. Make it a game and see whole can hit the target first. (Just make sure you’re smart in which way you’ll be throwing your items, don’t want to hit anyone.)