
Items You Should NEVER Throw Out!
Case lot sales have been popping up all over and you’ve probably started checking out your storage and what needs to be thrown out. But before you do checkout these items that almost never go bad. Because honestly who wants to be throwing out money!
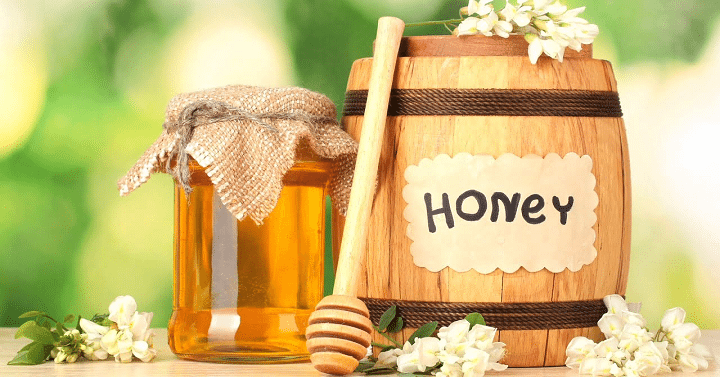
Honey
Stock up on your honey because if stored right it’s not going to go bad. If it starts to crystallize just warm up the honey to restore it. I’ve done this either in the microwave with small amounts or in a pot of warm water.
Baking Soda/Cornstarch
So baking soda will lose its potency in about 18 months but you can always clean with it! I use it when cleaning my carpets, cleaning my stove, shower and more. But cornstarch, as long as it remains dry the shelf life of it is really indefinite.
Water
Anytime I can stock up on bottled water for under $.10 each I grab a couple packs. I know Macey’s just had there’s on sale for less which was awesome! But the FDA has claimed that even if the taste is “off” it’s still safe to consume.
Brown/White Sugar
These might start to pack together but simply break it apart or heat it up slightly to restore it. These are essential in your food storage when it comes to baking.
Dried Beans
If you didn’t know beans are a great protein item to have in your storage especially for emergency situations. Dried beans will not go bad and you can create some yummy meals with different beans. I recommend making sure you have a good stock pile of dried beans in your food storage.
Rice
Which is awesome since rice and beans go together! Store it right and you can store rice indefinitely.
Hard Grains
These have a good 10-12 year shelf life. Store them in an air tight container and they’ll store even longer. So get your buckwheat, dry corn, soft white wheat and more stored up.
White Vinegar
It’s a great item that doesn’t usually last long in my house. I use it for lots of my cleaning as well as in my dishwasher and ever so often in my cooking too.
Powdered Milk
When it comes to thinking about your long term storage powdered milk should be close to the top of your list. Not only will it store for up to at least 30 years (with proper storage) it’s used in all sorts of recipes. We even put it in our shakes every morning.
5 Reasons Your Kids Should Be Doing Chores

Do your kids do chores at home? Do you find yourself stressing over whether or not you should start implementing chores? I am a firm believer that kids should absolutely do chores at home and there are some really great reasons behind it. If you are working on whether or not this works for your family, check out these 5 reasons your kids should be doing chores.
- Teaches them life skills. It’s true, chores teach life skills. As much as we may not want to think about it, our children will grow up and be independent someday. We want them to succeed at that, which means they need to learn how to take care of their own home when they are adults.
- They feel like they are part of the family. The home is for the whole family. Kids who help out with chores feel more involved with the family when they help to care for the home. That is not to say that they won’t complain, but there is a definite sense of belonging and togetherness that comes when the entire family pitches in with chores.
- Eases your workload and stress. Seriously. You have enough to do don’t you? Having a little bit of help from your kids really will take a little bit of stuff off of your shoulders which will ease that stress.
- Kids who do chores are better teammates. Kids who participate in taking care of responsibilities with the other family members actually become better teammates and classmates for their school and sports games and projects.
- Teaches independence and builds confidence. Kids need to learn independence as they grow. Teaching them the skills of housework helps to teach them to do things for themselves and it helps to build their confidence.
30 Places Kids Eat for FREE!

Eating out is probably my favorite thing to do with my family but with our tight budget and growing family it’s getting too expensive. So we’ve decided the best way for us to still eat out with our kids is to get their meals for FREE! You’ll want to note that each location is different but this will give you a good idea as to what places will offer free meals to kids!
Monday
- Chili’s
- Cody’s Original Roadhouse
- G.I. Friday’s
- Fudruckers
- Red Robin
Tuesday
- Applebee’s
- Chick-fil-a
- Denny’s
- IHOP
- Famous Dave’s
- Lone Star Steakhouse
- Moe’s Southwest Grill
- Pizza Hut
Wednesday
- Golden Corral
- East Coast Wings
- Jason’s Deli
- Qdoba Mexican Grill
Thursday
- The Locker Room
Friday
- Chicken Out Rotisserie
Saturday
- Quiznos
- Baja Fresh
Sunday
- White Castle
- Steak ‘n Shake
- Firehouse Subs
- Arriba Mexican Grill
- Cickey’s Barbecue Pit
- Qdoba Mexican Grill
- Go Rama
- Hooters
Don’t forget to look at your local restaurants for their specials and don’t be afraid to ask if they offer free kids meals. You’ll also find some locations offer discounted kids meals on select days as well which is another great option!
Easy Fresh Peach Pie Recipe
 It’s peach season! Right now is a great time to load up on peaches and make all sorts of yummy desserts. If you have peach trees and are overloaded with peaches, be sure to check out this easy step by step guide to canning peaches. Then with all of your leftovers, make this yummy dessert. This easy peach pie recipe is a yearly tradition that the whole family loves.
Easy Fresh Peach Pie
This recipe makes 2 pies
1 Can Frozen Orange Juice (slightly melted)
2 Cans Water
1 1/4 Cup Sugar (less if peaches are super sweet)
1/2 Cup Cornstarch
1/4 teaspoon Salt
Cut up Peaches (4-5 depending on size)
2 Pastry Pie Shells (cooked)
Whip Cream (optional)
Directions:
Cook sugar, cornstarch, salt, and water until thick. Cool slightly and add in the frozen orange juice. Stir until orange juice has melted and mixed in. Chill slightly and add peach slices. Put the mixture in your cooked pie crusts. Chill in the refrigerator until set. Top with whip cream and serve! YUM.
4 Simple Laundry Tricks that will Save You Time

With the school year back in full swing, many of us are facing even more laundry than we tackled during the Summer. I know my kids are always changing clothes for playtime and sports practice, etc. If this sounds like you, here are 4 simple laundry tricks that will save you time.
- Make a When to Wash it Schedule. Not everything needs to be washed with each use. Jeans for example can be worn several times before you wash them (assuming there are no messes that need cleaning ASAP). In fact, jeans will last much longer the less you wash and dry them.
- Reuse Towels. This one is kind of on the same topic as #1, but towels don’t need to be washed after over and over again as long as they are hung dry after each use. We keep a hook for each member of our family in the bathroom and they hang their towel there for the next day’s shower. I typically wash towels once to twice per week.
- Have the kids help. If your kids are old enough have them wash their own laundry. I have been making my kids do their laundry since they were 10 years old and it saves me a lot of time and gets them thinking about whether or not they really want to just throw their clean clothes on the floor as kids often do)
- Wash like laundry together. I like to keep some laundry together when I wash it. For example, I always wash towels together and it really does make the laundry go quicker. I can fold a load of towels in less than a minute. Maybe it’s just me and my hatred of laundry, but having a big stack of the same thing makes that stack of laundry seem far less intimidating.
6 Things to Avoid Packing in Your Kids Lunch

With the school year back in full swing for most of us, I thought we could all use a good reminder of what we shouldn’t be sending to school in our kids’ lunches. Whether for expense or for health reasons, you should keep certain things out of their lunch bags.
Here are 6 things to avoid packing in your kids’ lunch this school year.
- Soda. Kids simply don’t need soda, it is as simple as that. Many kids and adults alike are chronically dehydrated due to the current popular diet which includes lots of soda and way too little water. Send them with a water bottle instead of soda. If they “need” flavor, send them with infused water.
- Juice boxes. Again with the sugary drinks. While I do recognize that juice is often better than soda, it doesn’t even compare to water.
- Candy. Candy is okay after holidays or on special occasions in my opinion, but other than that, steer clear of this kind of junk food. There is no health benefit, it’s bad for their teeth and kids don’t need that mid-day sugar rush than crash. Send them with fruit instead.
- Pre-packaged meat and cheese meals. Pre-packaged meat and cheese meals are full of sodium, nitrates and preservatives. None of which are good for you. Make a homemade veggie and cheese meal instead.
- Peanut butter sandwiches. You should skip out on peanut butter sandwiches for 2 reasons. One, many children are now allergic to peanuts, so it is always good to avoid putting those kids at risk. Also, many store bought peanut butters are full of sugars and other additives. Stick with all-natural peanut butter or try an all natural hazelnut spread.
- Chip bags. I’m not against chips per say, but it really is a waste of money to buy individual chip bags. It’s cheaper to buy a big bag of chips and bag them up yourself.
How to Build Your Own Emergency Kits – Easy Step-by-Step Guide
 With all of the devastation of Hurricane Harvey, a lot of us have emergency preparedness on our minds. If you haven’t already made your own emergency kit, now is the time to do it. With an emergency kit you will be better prepared to survive when a catastrophe happens. Here is an easy step-by-step guide to help you build your own emergency kit.
Step #1
Make a Plan. You can make a 24 hr or 48 or or 72 hour kit for your family. I would recommend making a 72 hour kit for your family. List out how many people you have in your family and think about each person as you go through this list.
Step #2
Gather Bags. You will need to get a bag for each person in your family. Look around your home. Get old backpacks that you aren’t using or buy some new ones. Now is the perfect time to grab backpacks since they are going on clearance in just about every store.
Step #3
Get Water. You need about 1 gallon of water per person for the 72 hours. That would be (8) 16 oz water bottles to make up a gallon or you can get bigger bottles to make it more manageable.
Step #4
Gather your food. You will need to gather enough food for 3 days for each person in your family. The easiest thing to do is get food that you will actually eat. You will want to get items that has a long shelf life too. Some suggestions are: Canned soup, peanut butter, granola bars, canned meat, canned fruits, canned vegetables, freeze dried fruits or meats, fruit snacks, hard candy, specially packaged milk, honey, protein bars, vitamins. I always thought I had to get certain emergency foods, but that’s not the case. Just get long shelf life foods and change them out every 5 years or so. Remember you don’t need a gourmet meal when you are in survival mode, just enough food to keep you sustained and healthy.
Step #5
First Aid Kit. This can be a DIY first aid kit or a store bought one. It doesn’t need to be anything fancy. Get a container like a pencil box and add the following items to it: Band aids (variety of sizes), Antibacterial ointments, plastic gloves, gauze and tape, small scissors, Q-Tips or cotton balls, medicines (cold, pain, baby, allergy), thermometer, tweezers.
Step #6
Batteries & Other Essentials. You’ll want to put in the following that would be super helpful for emergencies. Flashlights, batteries, hammer, wrench, pet supplies (if applicable), manual can opener, whistle, blankets and a change of clothes for each person. I would recommend doing long sleeve and pants per person in their bags. That way if it’s winter you are prepared, if it’s warmer you can cut them down to size.
Those are the basics of what you would want to gather for your emergency kits. Now you can get more fancy or make it super simple. Either way you will be better off than not having anything at all.
How to Save on Prescription Medications!

We recently had to put my daughter on a prescription medication and when I got to the pharmacy to pay I realized there might be ways you could save on your prescription medications that you didn’t realize! So if you have family members that take medication daily or even if it’s a one-time deal, check out these ways you can save at the pharmacy!
Ask for generic – just like your over the counter medications, go with generic. These have the same active ingredients as the brand name drugs but usually cost a lot less. It’s a great way to start when you’re trying to save money. Note that not all medications are available as a generic but the pharmacist will usually give you that version once you make the switch.
Check your insurance – You’re paying for it, use it right. If there’s a medication you’re filling that seems too high and the pharmacist says it’s not covered by your insurance, try giving your insurance a call. Explain which medication the doctor prescribed and see if there’s an alternative. You’ll want to double check with your doctor if you’d like to switch but this could save you a good chunk of change.
Ask for Patient Assistance Programs – this is one you’ll have to qualify for but it’s a program that a lot of drug companies will offer to patients. You can send them an email or letter or even talk to the pharmacist for help contacting the drug company.
Watch for “deals” – Some pharmacies will offer promotions if you transfer your prescriptions over to their pharmacy. Watch for these advertisements but you could also ask your current pharmacist if they have an promotions going on. Or some will have coupons for certain drugs or manufacturers.
Compare prices – Believe it or not each pharmacy has different prices for different prescriptions. Shop around and see which one can give you the best price. There are apps for this to make it easier – GoodRx is a well-known one in which it will compare prices of medications at various pharmacies.
Having to pay for medication can be difficult sometimes but it’s not worth skipping or avoiding. Take care of yourself and see the doctor often, it can save you money in the long run by catching things quicker and keeping you healthier longer.
Why you should be visiting Farm Stands and Farmers Markets
Do you have a farmers market in your area? How about roadside produce stands? I live in the heart of prime farmland and I have probably 10 fresh produce stands within 5 miles of me and I love it. If you have the ability, you too should be visiting these farms often and stocking up on delicious and healthy fresh fruits and veggies.
If you think it’s easier just to go to the grocery store, you should read these reasons why you should be visiting farm stands and farmers markets near you:
Fresh produce. The produce you buy here has come from a farm very near you which means it is FRESH. Unlike much of the produce that you find at your local grocery stores where you have no idea how long it has been on a truck or in storage. As a result, the produce simply tastes better!
Produce Lasts longer. Because of the reasons listed above, you don’t always know how long you are able to store your produce, but you can be relatively sure that any produce that you buy from a farm stand was picked within the last several days. I love this for my squash and apples specifically since I know I can store them for much longer than typical produce so I tend to stock up.
Support local businesses. Buying local means that you are supporting local businesses and local farmers. I love buying my produce from farm stands for many reasons, but this one is my favorite. I love to support my neighbors!
More organic/non-GMO options. If maintaining an organic and/or non-GMO diet is important to you, buying from local farm stands and farmers markets is a great way to do just that since many smaller, local farms grow more naturally, than a big commercial farm does.
It’s cheaper. It’s true, local farm stands have much lower overhead than your big chain grocery stores and you will most often find that the produce is significantly less expensive!
5 Tips for Cutting Your Power Bill This Winter

Winter will be here before we know it and that means that many of us should start preparing for those utility bills to start rising. If you have had enough of giving all of your money away to the power companies don’t fret, there are ways that you can save!
If you are ready to start cutting down on your utility costs, here are 5 tips for cutting your power bill this Winter:
Have an audit done. In many areas, you can call your power company and request and audit. A specialist will come in and do an audit of your home and tell you where you can increase your energy savings.
Start early. You may think that “Hey, it’s August, why am I worried about my power bill now.” But there is good reason to start worrying now. It is better to start now so that you can fend off receiving that high bill to begin with. You may as well take it one step at a time without having to rush through.
Lower your thermostat. Lowering your thermostat even by a degree or two can make a big difference in your heat bill. Let’s face it, you really aren’t going to notice a 2 degree difference.
Install weather stripping. Go through your home and install weather stripping around your windows and doors. This will prevent cold air getting in and warm air getting out.
Dress in warmer clothing. Consider wearing socks and a sweatshirt when you are at home. You will keep yourself warmer without having to turn up the thermostat.
Install heavy drapes. Install heavy drapes throughout the house in an effort to keep the cold air out. I did this recently and have discovered that not only does this keep my house warm in the Winter, but it also has helped to keep my house cool in the Summer. It’s a win-win.
What are your favorite cost saving energy tips?
5 Ways to Thank Your Kids’ Teacher

With many kids back in the swing of the school year and many still waiting to go back, now is a great time to have a little reminder of all of the ways that you can say thank you to your child’s teacher!
Gift Cards. Gift cards might just be the best type of gift to give teachers. I always buy my kids’ teachers gift cards to local coffee shops as well as Amazon and Walmart gift cards for those times when they are having to buy school supplies for all of their students.
Personalized Gifts. Everyone loves personalized gifts. Making a personalized coffee mug or calendar is idea as they can use it at work and it doesn’t take up too much time.
Bring them coffee. At the beginning of the year be sure to ask your child’s teacher how they take their coffee so that randomly throughout the year you can surprise them with a coffee to start their day. There is no need to wait until Christmas or teacher appreciation day to tell them thank you. It can be done anytime!
Organize a gift from the entire class. Teachers can get completely overwhelmed with 20+ gifts being placed on their desk on the holidays or Teacher Appreciation day. Why not get in touch with the other parents of the class and ask if they would like to go in together on a larger, class gift. We did this one and ended up buying two high dollar gift cards. We bought a $50 coffee shop gift card and a $50 restaurant gift card. She was able to buy plenty of morning coffees for a while, plus she was able to go out for a nice dinner with her hubby.
Volunteer your time. I know you are busy, but teachers can really use your help! If you have any flexibility in your schedule, you really should consider volunteering your time to help out in the classroom. This helps the teacher to keep things in order during big class projects. If you can’t donate your time, consider donating food and supplies for class parties, etc.
How to Throw an Inexpensive Birthday Party
 Oh birthday parties. I have such a love/hate relationship with them. My kids absolutely love going to parties and having them, but for the mom it can be a little overwhelming and expensive! There are a few quick tips to help you out when throwing a party on a budget. Here are a few ideas that should keep you from spending too much:
- Start planning early- If you procrastinate you will be buying items on the whim which usually will end up costing more money. If you have a theme then start months before hand and watch for when items go on sale.
- Digital birthday invites- There are so many ways to make an invite that can be e-mailed for FREE. This will save on making and printing out invites.
- Use what you have on hand- Look around your home and see what decorations and games you already have at home. No need to re-invent the wheel right? Use leftover plates, balloons, and games.
- Have the party at your home or a free location- No need to go somewhere and spend a fortune to have a good time. Have a party at your home, a local park, or on the beach.
- Make your own cake and treats- making your own cake will save you tons of money. Grab a $0.99 cake box and decorate it with fun items from the dollar store. There are super cute ideas on Pinterest that can help with decoration.
- Play games and activities that don’t cost money- there are so many fun games that kids enjoy that don’t require you to buy an extra items. Play classic games like: Red Rover, Duck Duck Goose, Pin the Tail on the Donkey (or other variations), scavenger hunts with clues, relay races and more.
I’ve noticed if I’m enthusiastic about whatever we are doing, it will naturally rub off to the kids. They will be excited about whatever activity we have planned and I don’t have to pay a lot of money for that!
Quick & Easy Back to School Hairstyles!

This year has already proven we’re going to have crazy busy mornings especially with having to do two little girl’s hair before school starts! So I wanted to share with you guys what we’ve done to make for easier mornings with some quick hair ideas!
I’ve also printed these ideas out and put them on their bathroom mirror. Then in the morning they tell me what number they want – it lets them be more in control with me still getting a say in what we do. I was able to pick which hair styles I could do quickly in the morning instead of searching on Pinterest, only for my girls to pick out all the extravagant ones I wouldn’t be able to pull off. So here’s my list of hair styles!


This cuts a lot of stress out of our mornings! What have you done to make sure your mornings to smoothly before school starts?
5 Ways to Prepare for the Holidays Now

I am a big believer in not going overboard during the holidays, but that doesn’t mean that I don’t know how easy it is to do. When my children were very young I found myself splurging on the gifts because I wanted them to have just the best time ever! I didn’t really focus on the reality that my children were young enough that there was no way that they were going to remember the days at all! Since then I have significantly pared down my holidays and I partially do so by preparing in advance.
Here are 5 ways for you to prepare for the holidays now so yours can be simple and non-stressful.
Set a budget. Set a budget now and stick to it. If you know exactly how much you have to spend and you follow that budget strictly, you will have no stress about going into debt for Christmas.
Gift Closet. If you haven’t started a gift closet now, start one now. A gift closet is a closet or a box or a cabinet where you store gifts that you buy throughout the year. This is where I buy clearance items or other great deals and keep them to give away as gifts for Christmas or for birthdays.
Start Crafting. If you are creative, start getting your craft one my friends! Homemade gifts are always a big hit and they really help to curb your budget.
Plan your schedule. Get together with other family members and start planning holiday events, parties, etc. I like planning these things a couple months in advance so that you can pick up decor and supplies spread out over time to save money and keep it less overwhelming.
Relax. Seriously, relax. You still have time and as long as you start slowly, this holiday season will be smooth sailing!
School Lunches Made Easy- Mix & Match These Lunch Ideas
 For most of us school will be starting soon if it hasn’t started already. I don’t know about you, but I’m stressing about school lunches. My kids are pretty different in their eating habits which makes me frustrated at times. I’ve decided to try something new this year and mix and match different combinations of entrees/snacks, veggies/fruits, treats, and a drink. This way I can have those different items that will please all types of eaters. Hopefully this will help you out too! Here is what you do…
Depending on how big of appetite your kids have will determine how many items to put in. I would normally choose 1-2 items from each of the categories below. Treats would only be once or twice a week.
Entree/Snacks:
Sandwich (Meat, PB&J, Tuna)
Pizza
Quesadilla
Muffins
Hot Dog
Pita & Hummus
Make your own lunchable- cut up meat, cheese & crackers
Spreadable cheese & crackers
Boiled Eggs
Go-Gurts
Cheese Sticks
Popcorn
Pretzels
Peanuts
Granola Bars
Fruit/Veggies:
Carrot Sticks
Celery with peanut butter
Broccoli with ranch
Cucumbers
Cherry Tomatoes
Watermelon
Grapes
Apple Slices
Orange Slices
Banana
Dried Fruits
Peach Slices
Pear Slices
Mandarin Oranges
Cherries
Cantaloupe
Kiwi
Treats:
Fruit Snacks
Rice Krispie Treat
Brownies
Cookies
Fruit Leather
Drinks:
Water
Milk
Chocolate Milk
Capri Suns
Juice Bottles
I always like to write a quick note and hide it in my kids lunches. Sometimes it’s a good luck note, an I love you note, or even a joke or riddle. They love it!