
New at Zulily! ASICS Women – up to 50% off – athletic apparel!

Zulily.com LINK
ASICS Women – up to 50% off – athletic apparel!
ASICS brings harmony to the body and soul. Designed for performance, their bright shoes and apparel support everyday athletes. Go for a run and experience the comfort and function that fit your active lifestyle.
A PYP Best Blog! Update a Boring Ceiling Fan!
Just in case you missed this article on updating a boring ceiling fan the first time we shared it a couple of years ago, we are republishing it. After Sharon wrote this blog originally, we got an awesome response. This is one of the PYP Best Blogs!
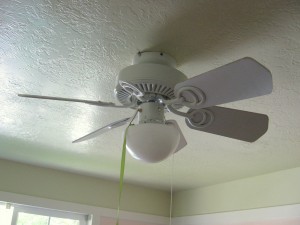
This is the ceiling fan that was in my daughter’s room when we bought our house:
I used the leftover fabric from the roman shade that I made for her room and a bottle of Mod Podge and the whole project took about an hour.
Start by removing the fan blades. They come off easily with a screwdriver. Use this opportunity to give both fan and blades a good scrubbing!
Most fan blades will be reversible with a different color on each side so that you can change them out if you want to. This fan had brown wood grain on the other side, and since I can’t see myself EVER using it that way, that is the side I decided to cover.
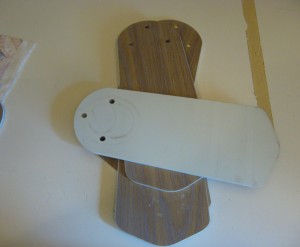
Lay a fan blade out on the backside of the fabric and trace around it once for each fan blade, then cut them out.
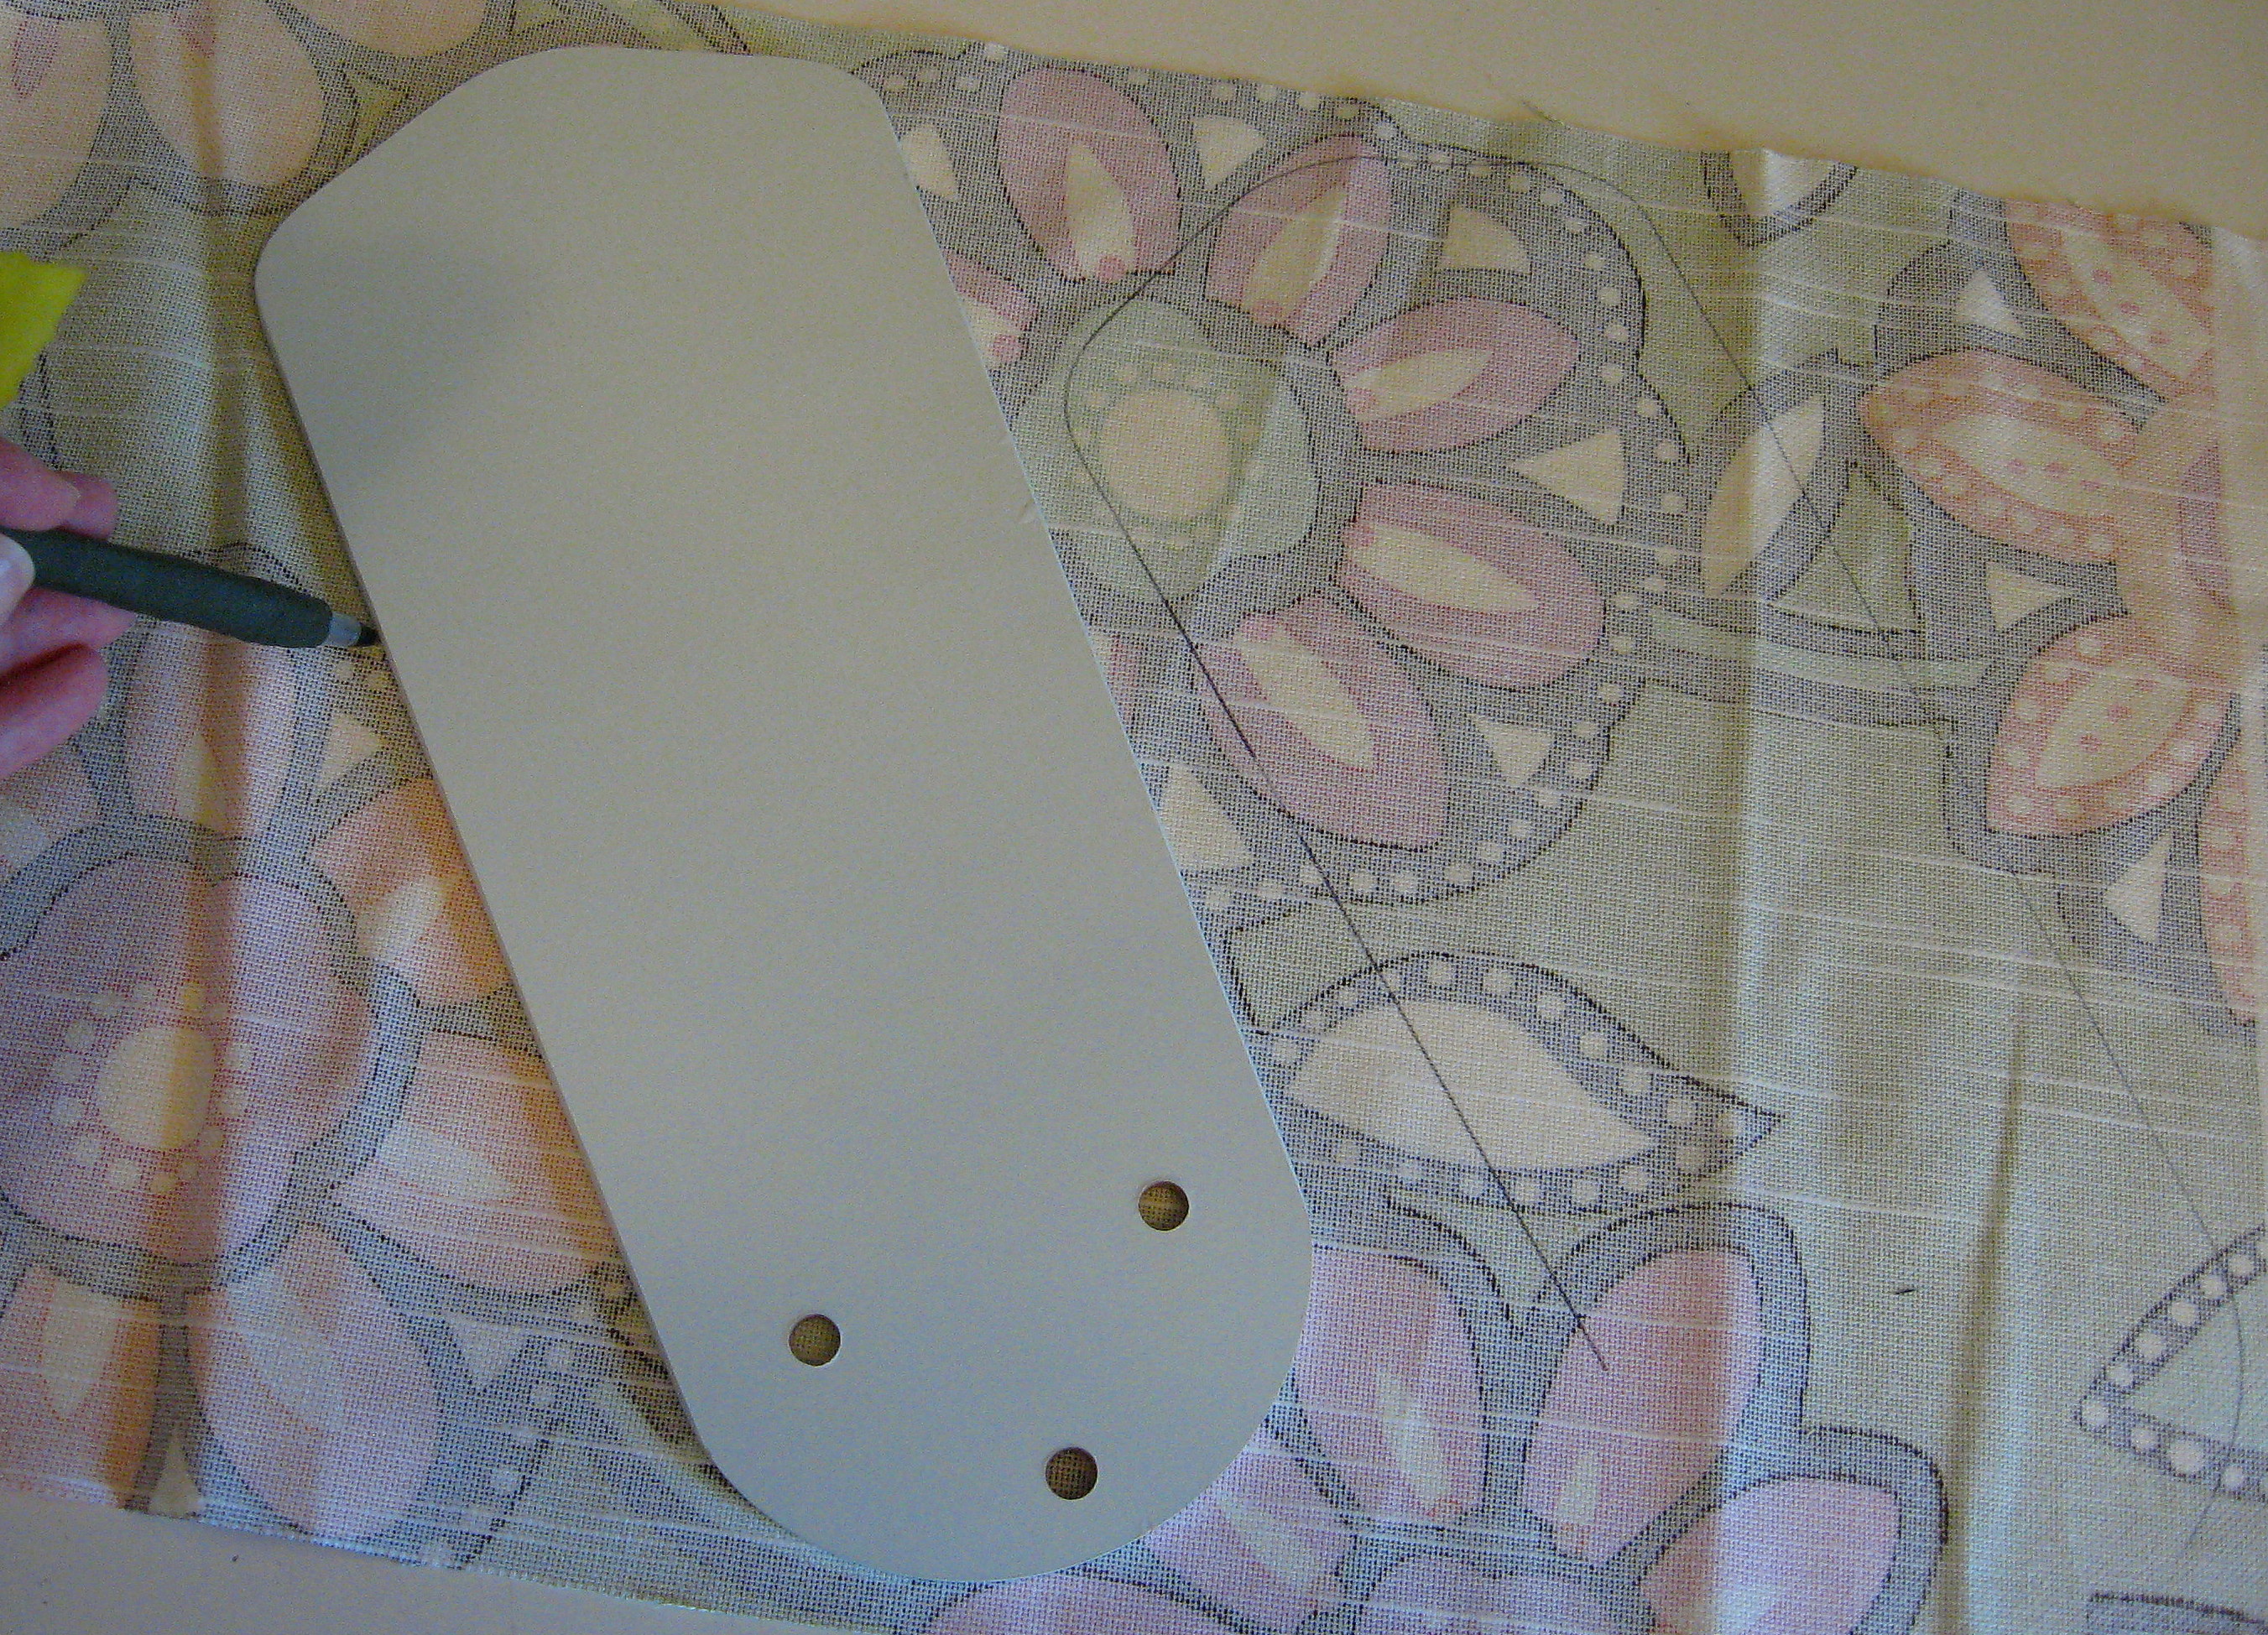
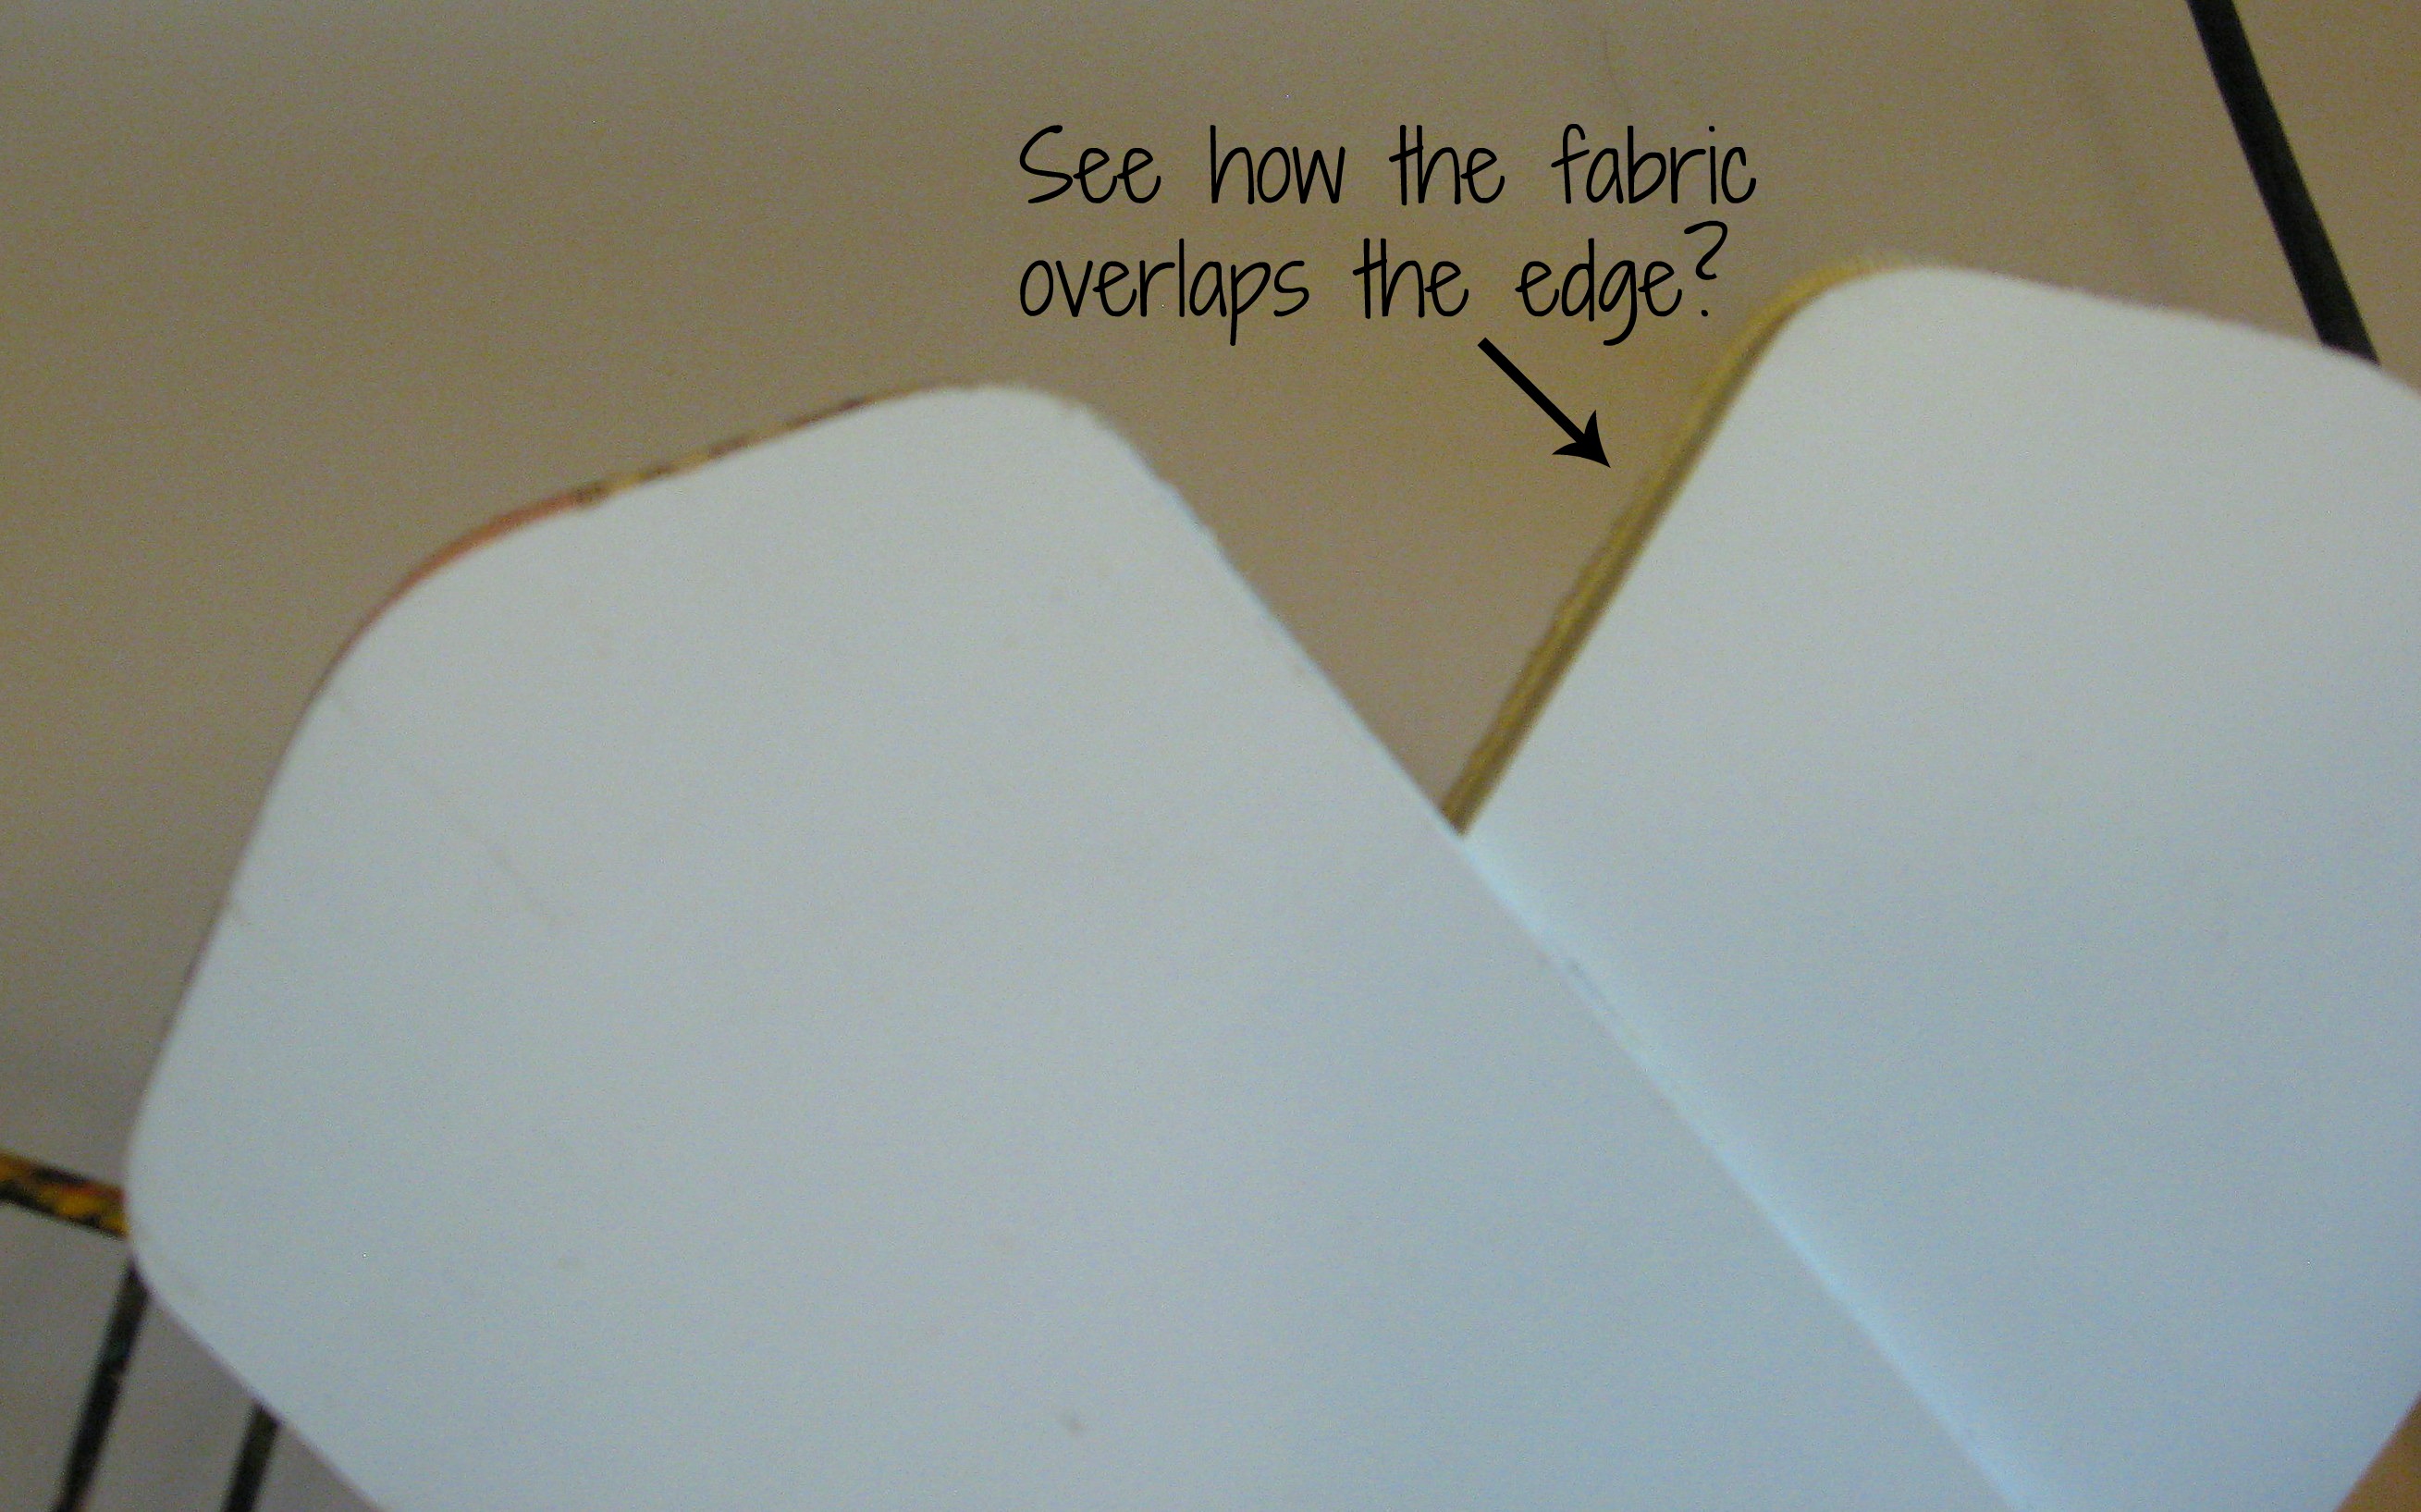
Err on the side of cutting too big and not too small. You don’t have to be too careful about the fabric fitting on exactly – if it hangs over just a touch it will be fine because no one will ever see the tops!
Now put a generous coat of Mod Podge on the fan blade
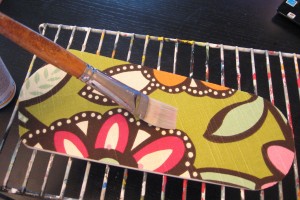
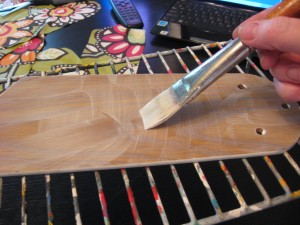 and then put the fabric on it. Smooth it down with your hand as it begins to dry; I didn’t even iron the fabric first. Between the Mod Podge and the smoothing, it will get the wrinkles out!
Let that dry about 15 minutes, then put a coat of Mod Podge on top of the fabric to seal it. Let that sit until it is completely dry,
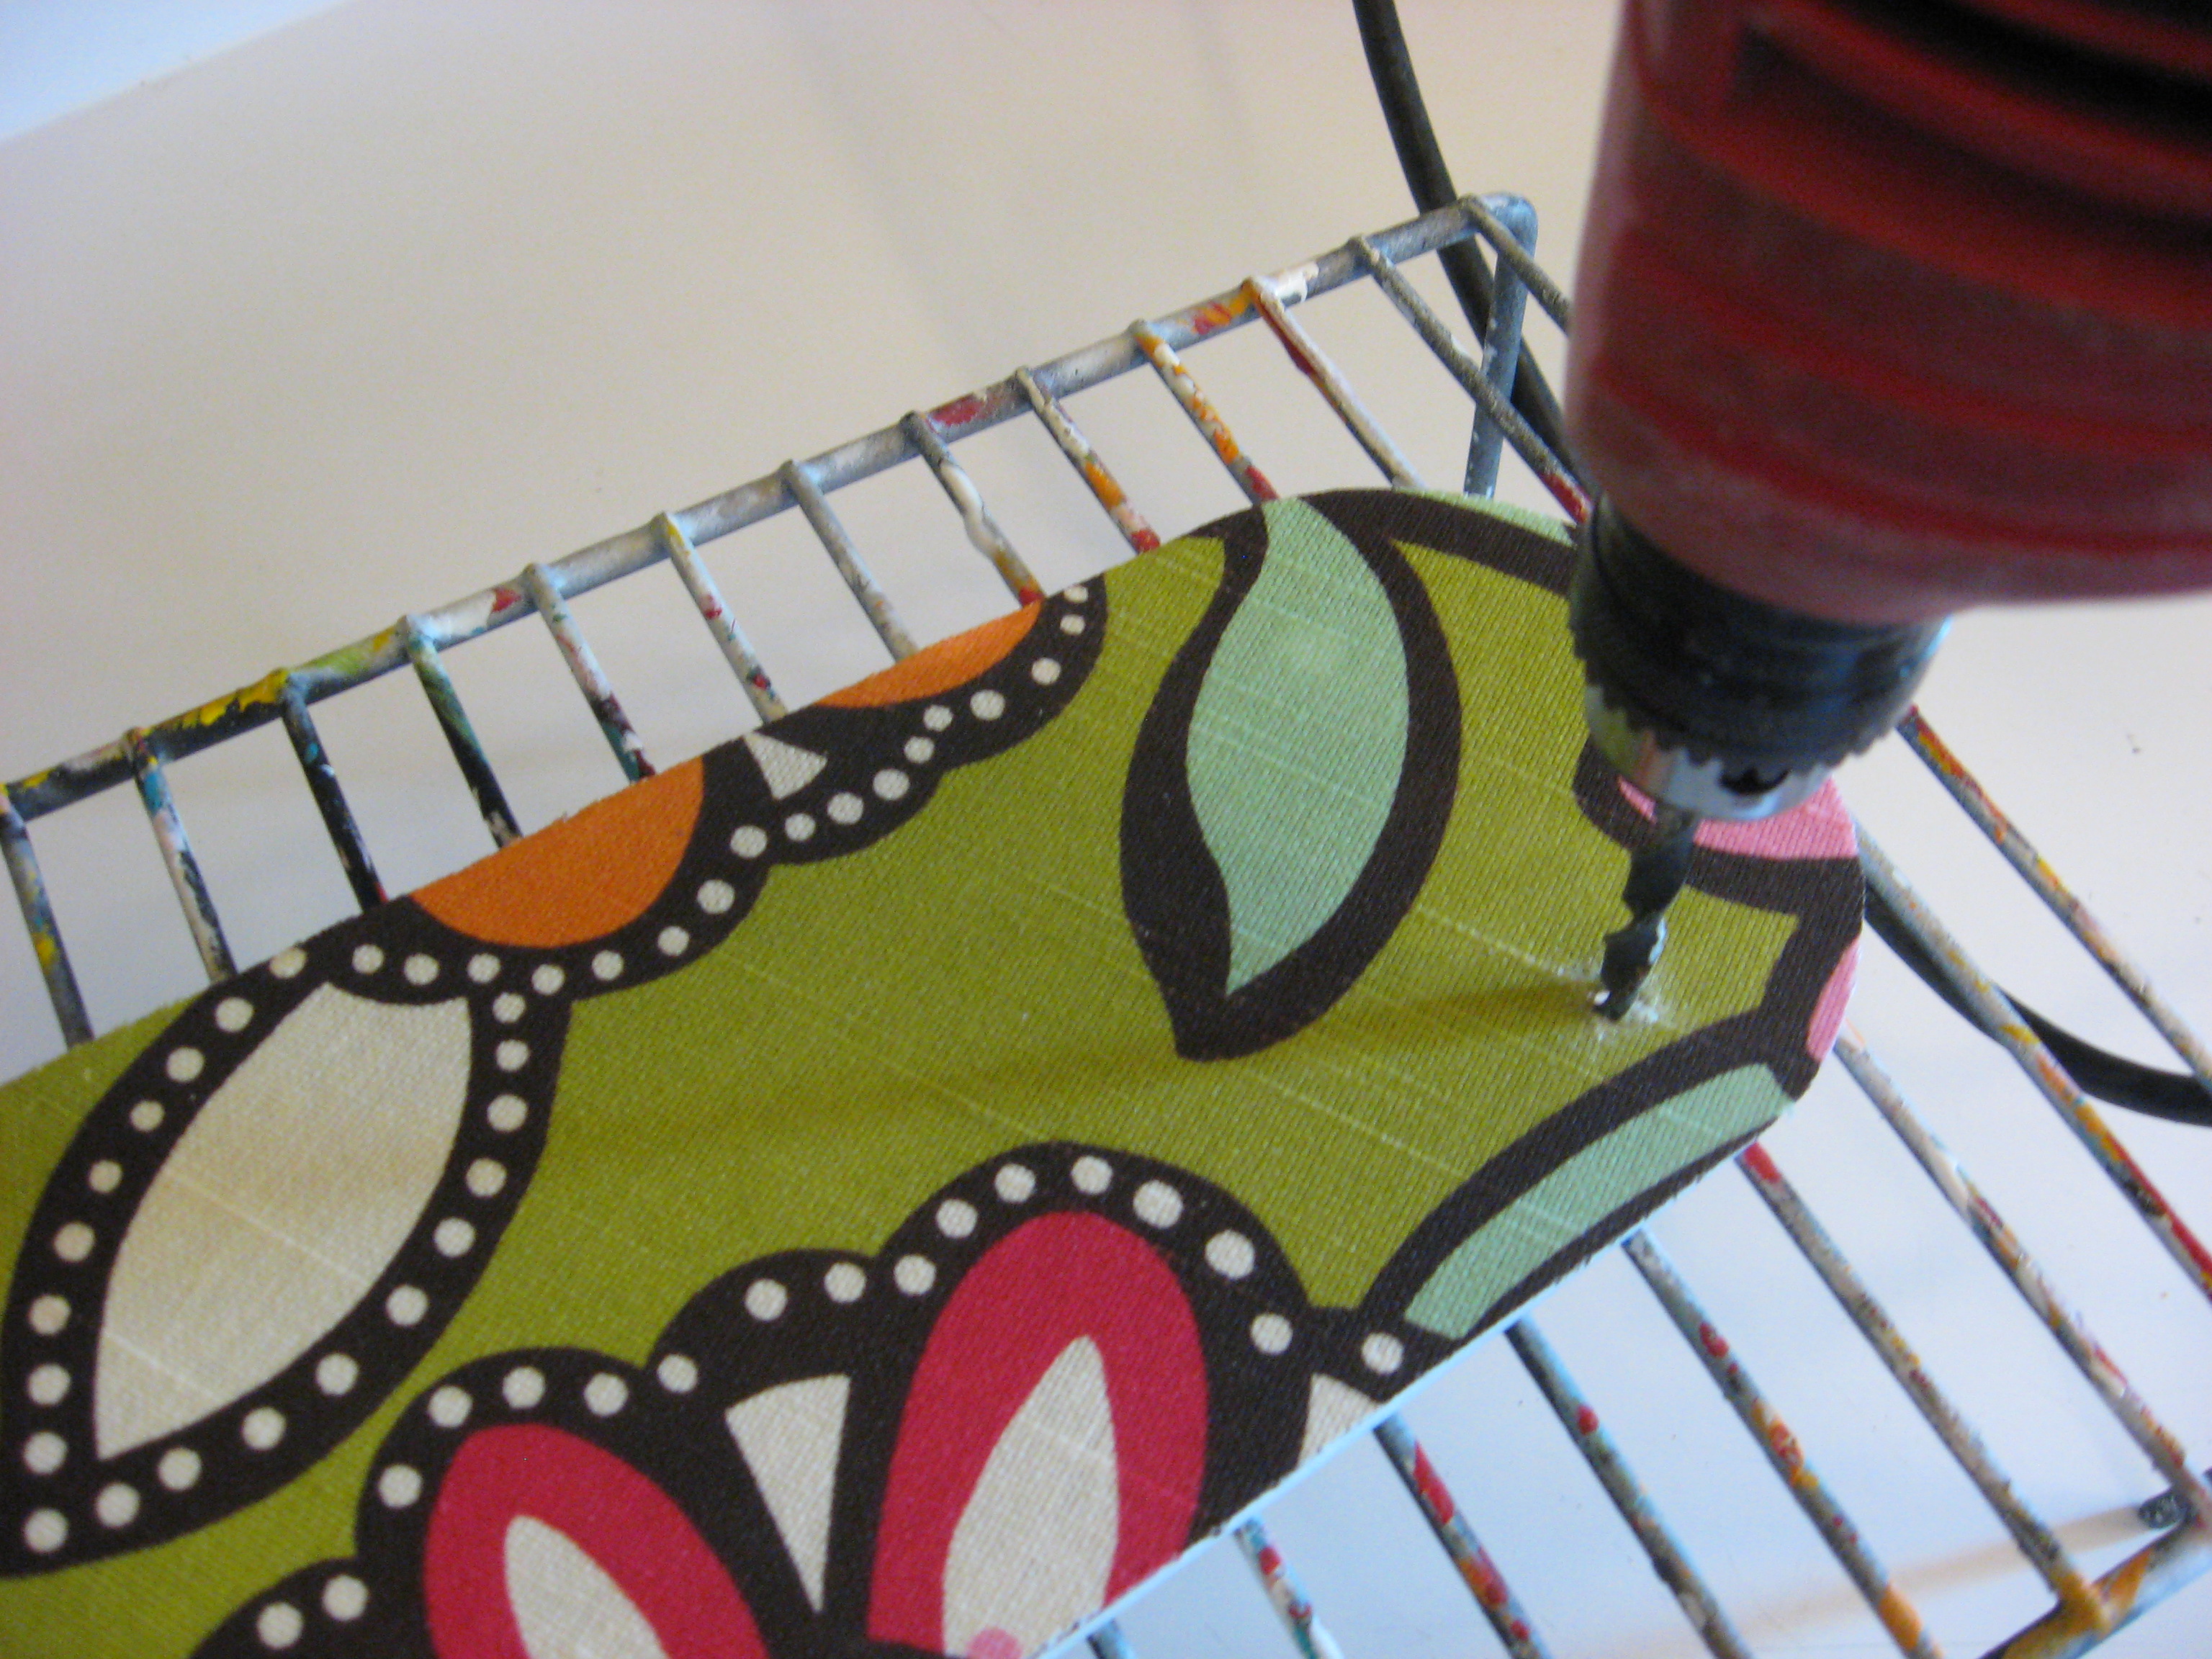
 then use a drill bit to drill a hole through the fabric where the screw holes are in the fan blade. Make sure the Mod Podge is totally dry or the fabric will come twisting off when you start to drill through it (uh…you know. I’m IMAGINING that is what would happen anyway…..)
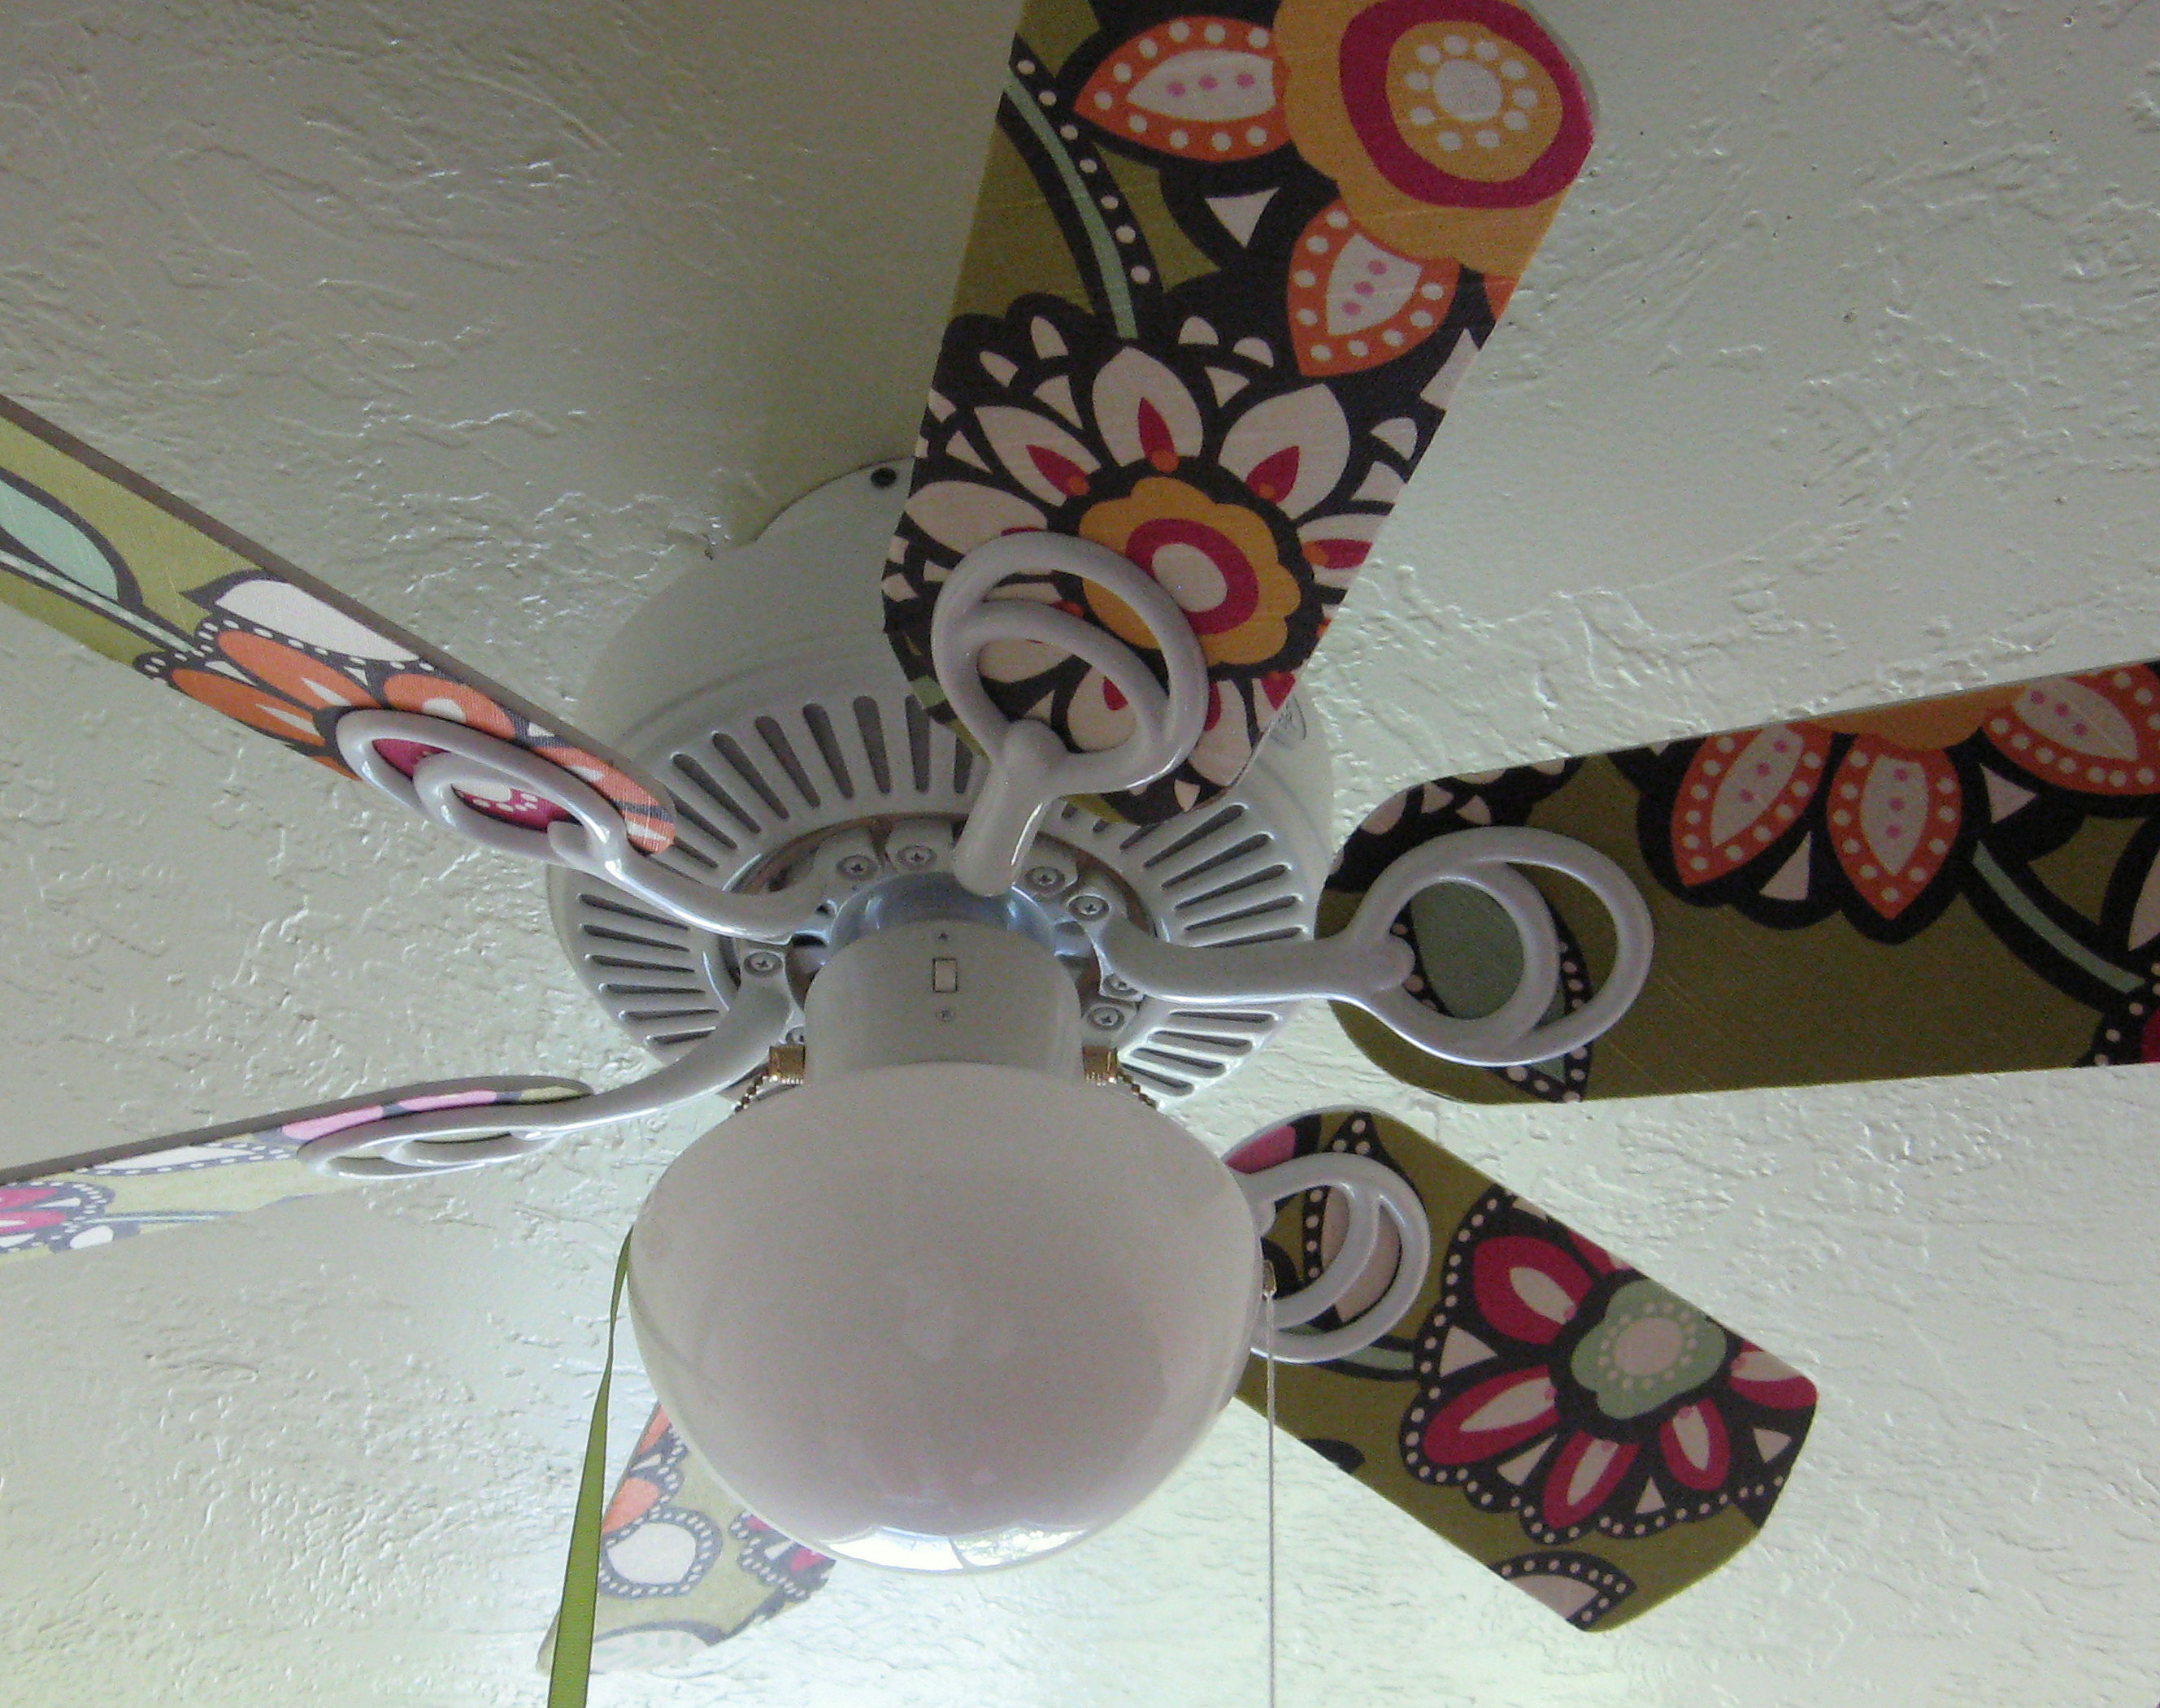
Screw the finished fan blades back into place and enjoy!
Joanns Online Christmas in July Sale! Free Shipping!

Online Christmas in July Sale!
Use code YSQA207 when you spend $12.75 or more!
Joanns.com LINK
PickYourPlum! Metal Monograms with Names, Canvas Bags, Elastic Headbands!


A Household Name – Metal Monograms with Names
We’re taking names, guys. And you’re next.
Starting at $19.99 (50% off) Retail: $39.99
Bring on Back to School – Canvas Bags
Back to school requires a cute back to school bag.
Starting at $7.99 (60% off) Retail: $19.99
We’re With the Band – Elastic Headbands
Who doesn’t need a good headband?
Starting at $2.99 (75% off) Retail: $12.00
Plus lots more CUTE deals!
LOTS of cute deals! Inexpensive shipping!
Dr. Martens: Women – up to 55% off – iconic edgy boots!

Zulily.com LINK
Dr. Martens: Women – up to 55% off – iconic edgy boots!
Dr. Martens believes in standing for something. Representing durable, stylish and comfortable footwear, they are a celebrated favorite among young and old for their lasting construction methods, high-quality materials and old-school designs. Each pair features a cushy sole and a slip-resistant design that’s crafted to last season after season.
PickYourPlum! State Necklaces $5.99! Resin Flowers $1.99! Floral Tutu Dress $12.99!


The State You’re In – State Necklaces
Because home is where your heart is.
Starting at $5.99 (70% off) Retail: $19.99
A Little Bloom Goes a Long Way – Resin Flowers
Floral arrangements even you can put together.
Starting at $1.99 (77% off) Retail: $8.99
On Pointe – Floral Tutu Dress
Take dress-up to a new level.
$12.99 (48% off) Retail: $24.99
Plus lots more CUTE deals!
LOTS of cute deals! Inexpensive shipping!
PickYourPlum! Masking Stickers! Tres Elegant Necklace! Chevron Gable Boxes Pack of 5!


Make it Stick – Masking Stickers
Stick it to ’em.
Starting at $2.99 (66% off) Retail: $8.99
#plums4good – Buy One Get One to Give – Tres Elegant Necklace
Who knew macaroni could be so elegant?
Starting at $6.99 (72% off) Retail: $24.99
Think Inside the Box – Chevron Gable Boxes Pack of 5
It’s best to think outside the box.
Starting at $2.99 (60% off) Retail: $7.50
Plus lots more CUTE deals!
LOTS of cute deals! Inexpensive shipping!
New at Zulily! Fall Preview: Silver Jeans Co. – up to 60% off – women’s & plus-size!

Zulily.com LINK
Fall Preview: Silver Jeans Co. – up to 60% off – women’s & plus-size!
Having crafted perfect-fitting jeans for over two decades, Silver Jeans Co. offers a time-tested collection that blends modern and vintage details with intricate washes and creative designing. The company is dedicated to producing quality denim and other apparel, giving its fashion-savvy but cost-conscious customer trend-setting styles at affordable prices.
A PYP Best Blog! Making Paper Stars!
Just in case you missed this article on making paper stars the first time we shared it a couple of years ago, we are republishing it. After Sharon wrote this blog originally, we got an awesome response. This is one of the PYP Best Blogs!
I’ll show you two different ways to fold a paper star. They are both fun projects to do with your kids and they make cute and easy 4th of July decor when you use red, white and blue paper.
Star #1
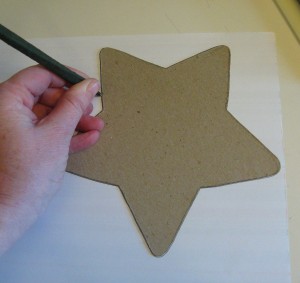
Start with any paper, and any size and shape of star. Trace the star shape onto the paper and cut it out.
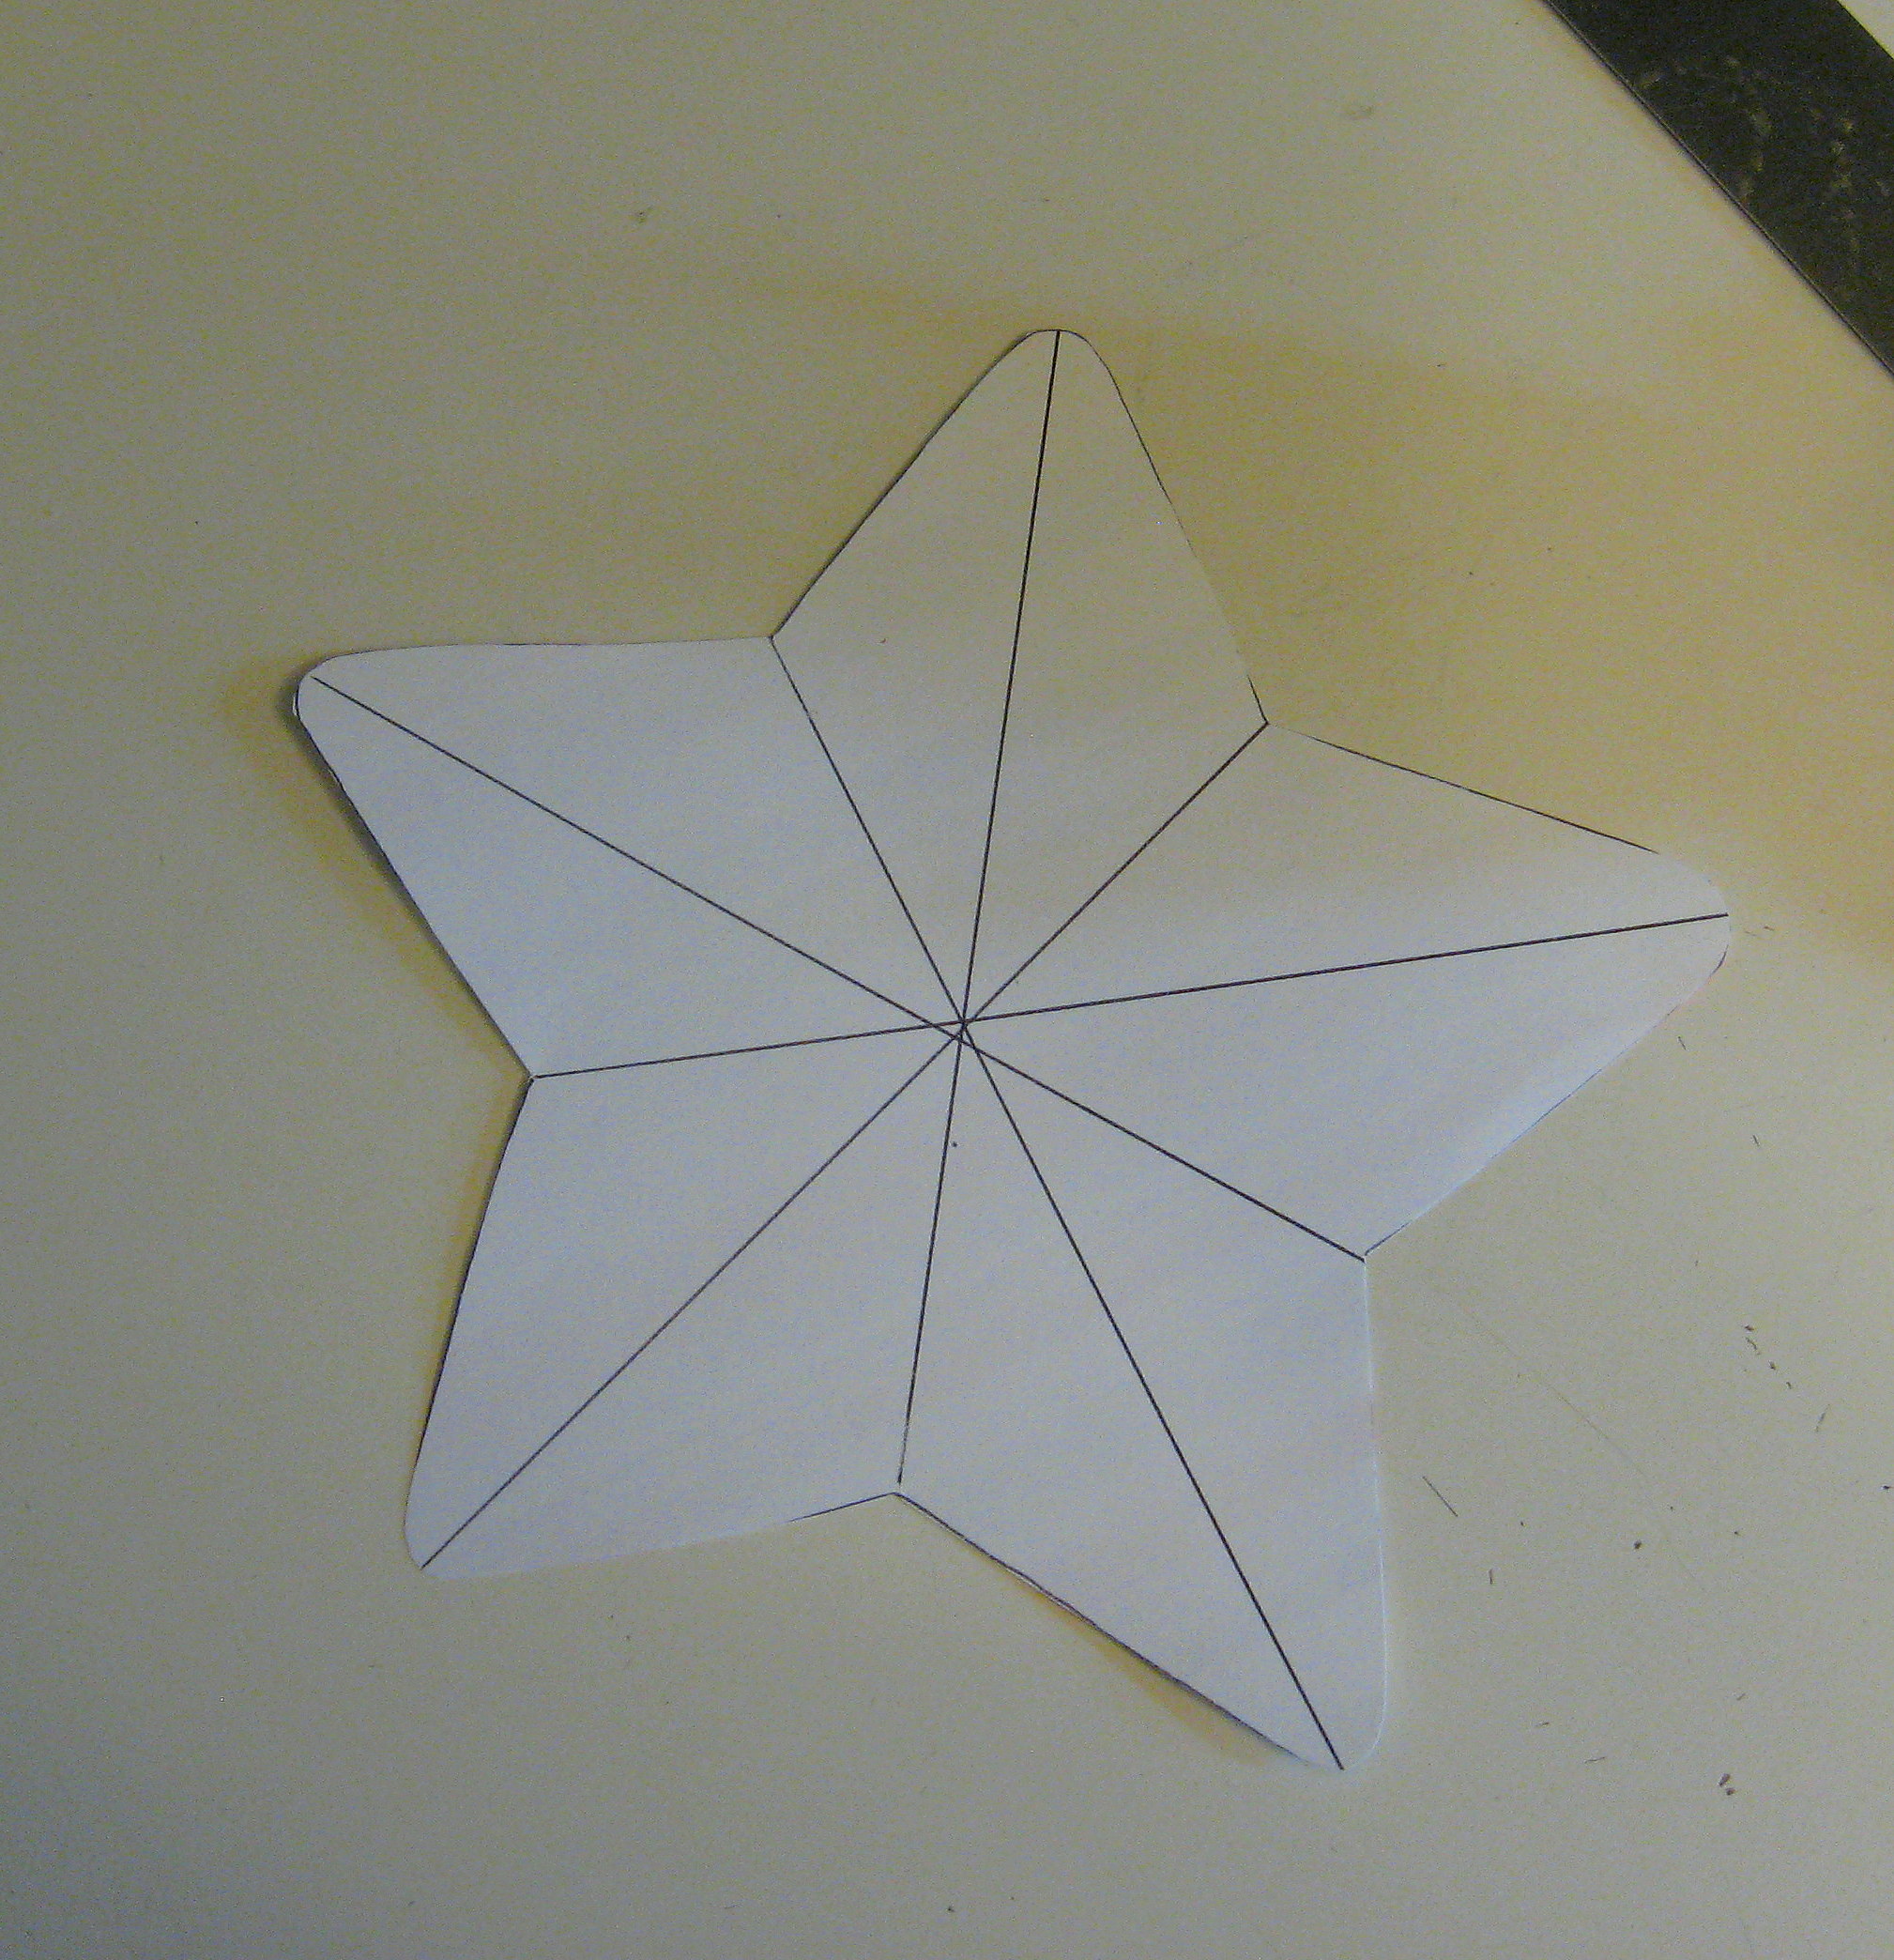
Using a ruler, connect each star point with the “valley” opposite it and fold.
I have drawn lines here to show you where you will fold – you don’t need to draw the lines (you should, though, probably be more careful to make sure all folds meet in the middle!)
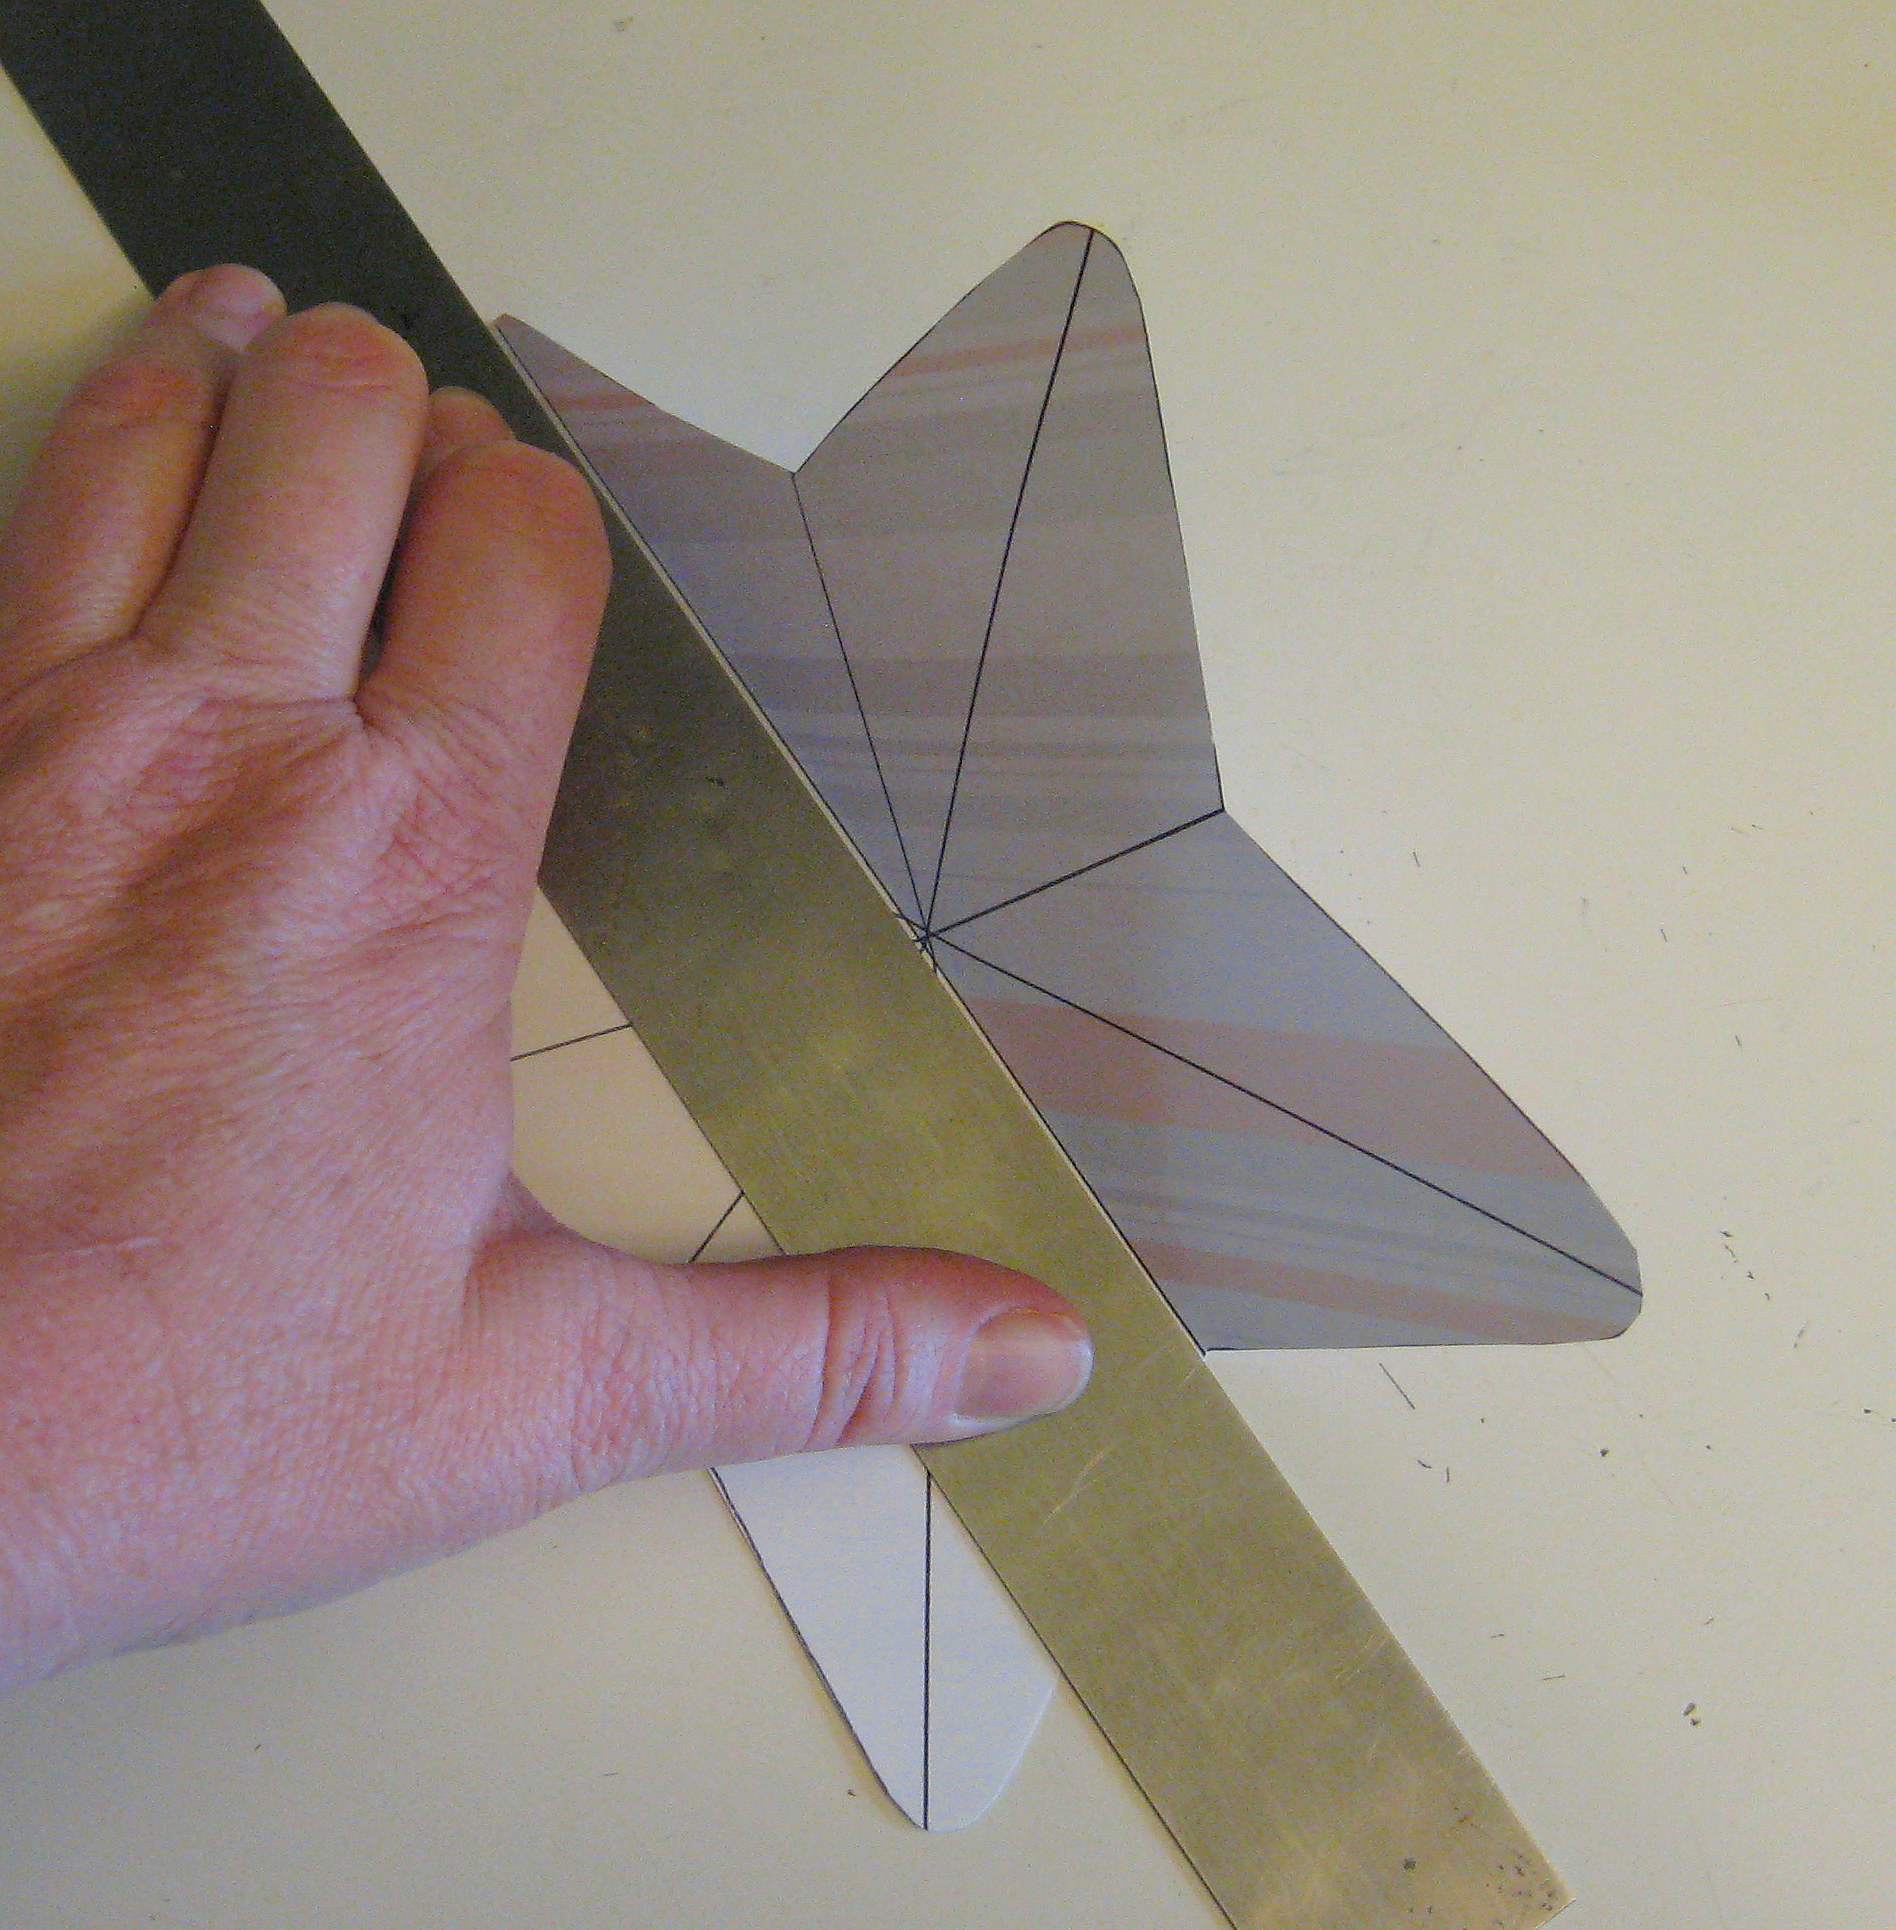
Make a nice sharp crease by using a bone folder, or if you don’t have one, you can use a pen cap or another ruler.
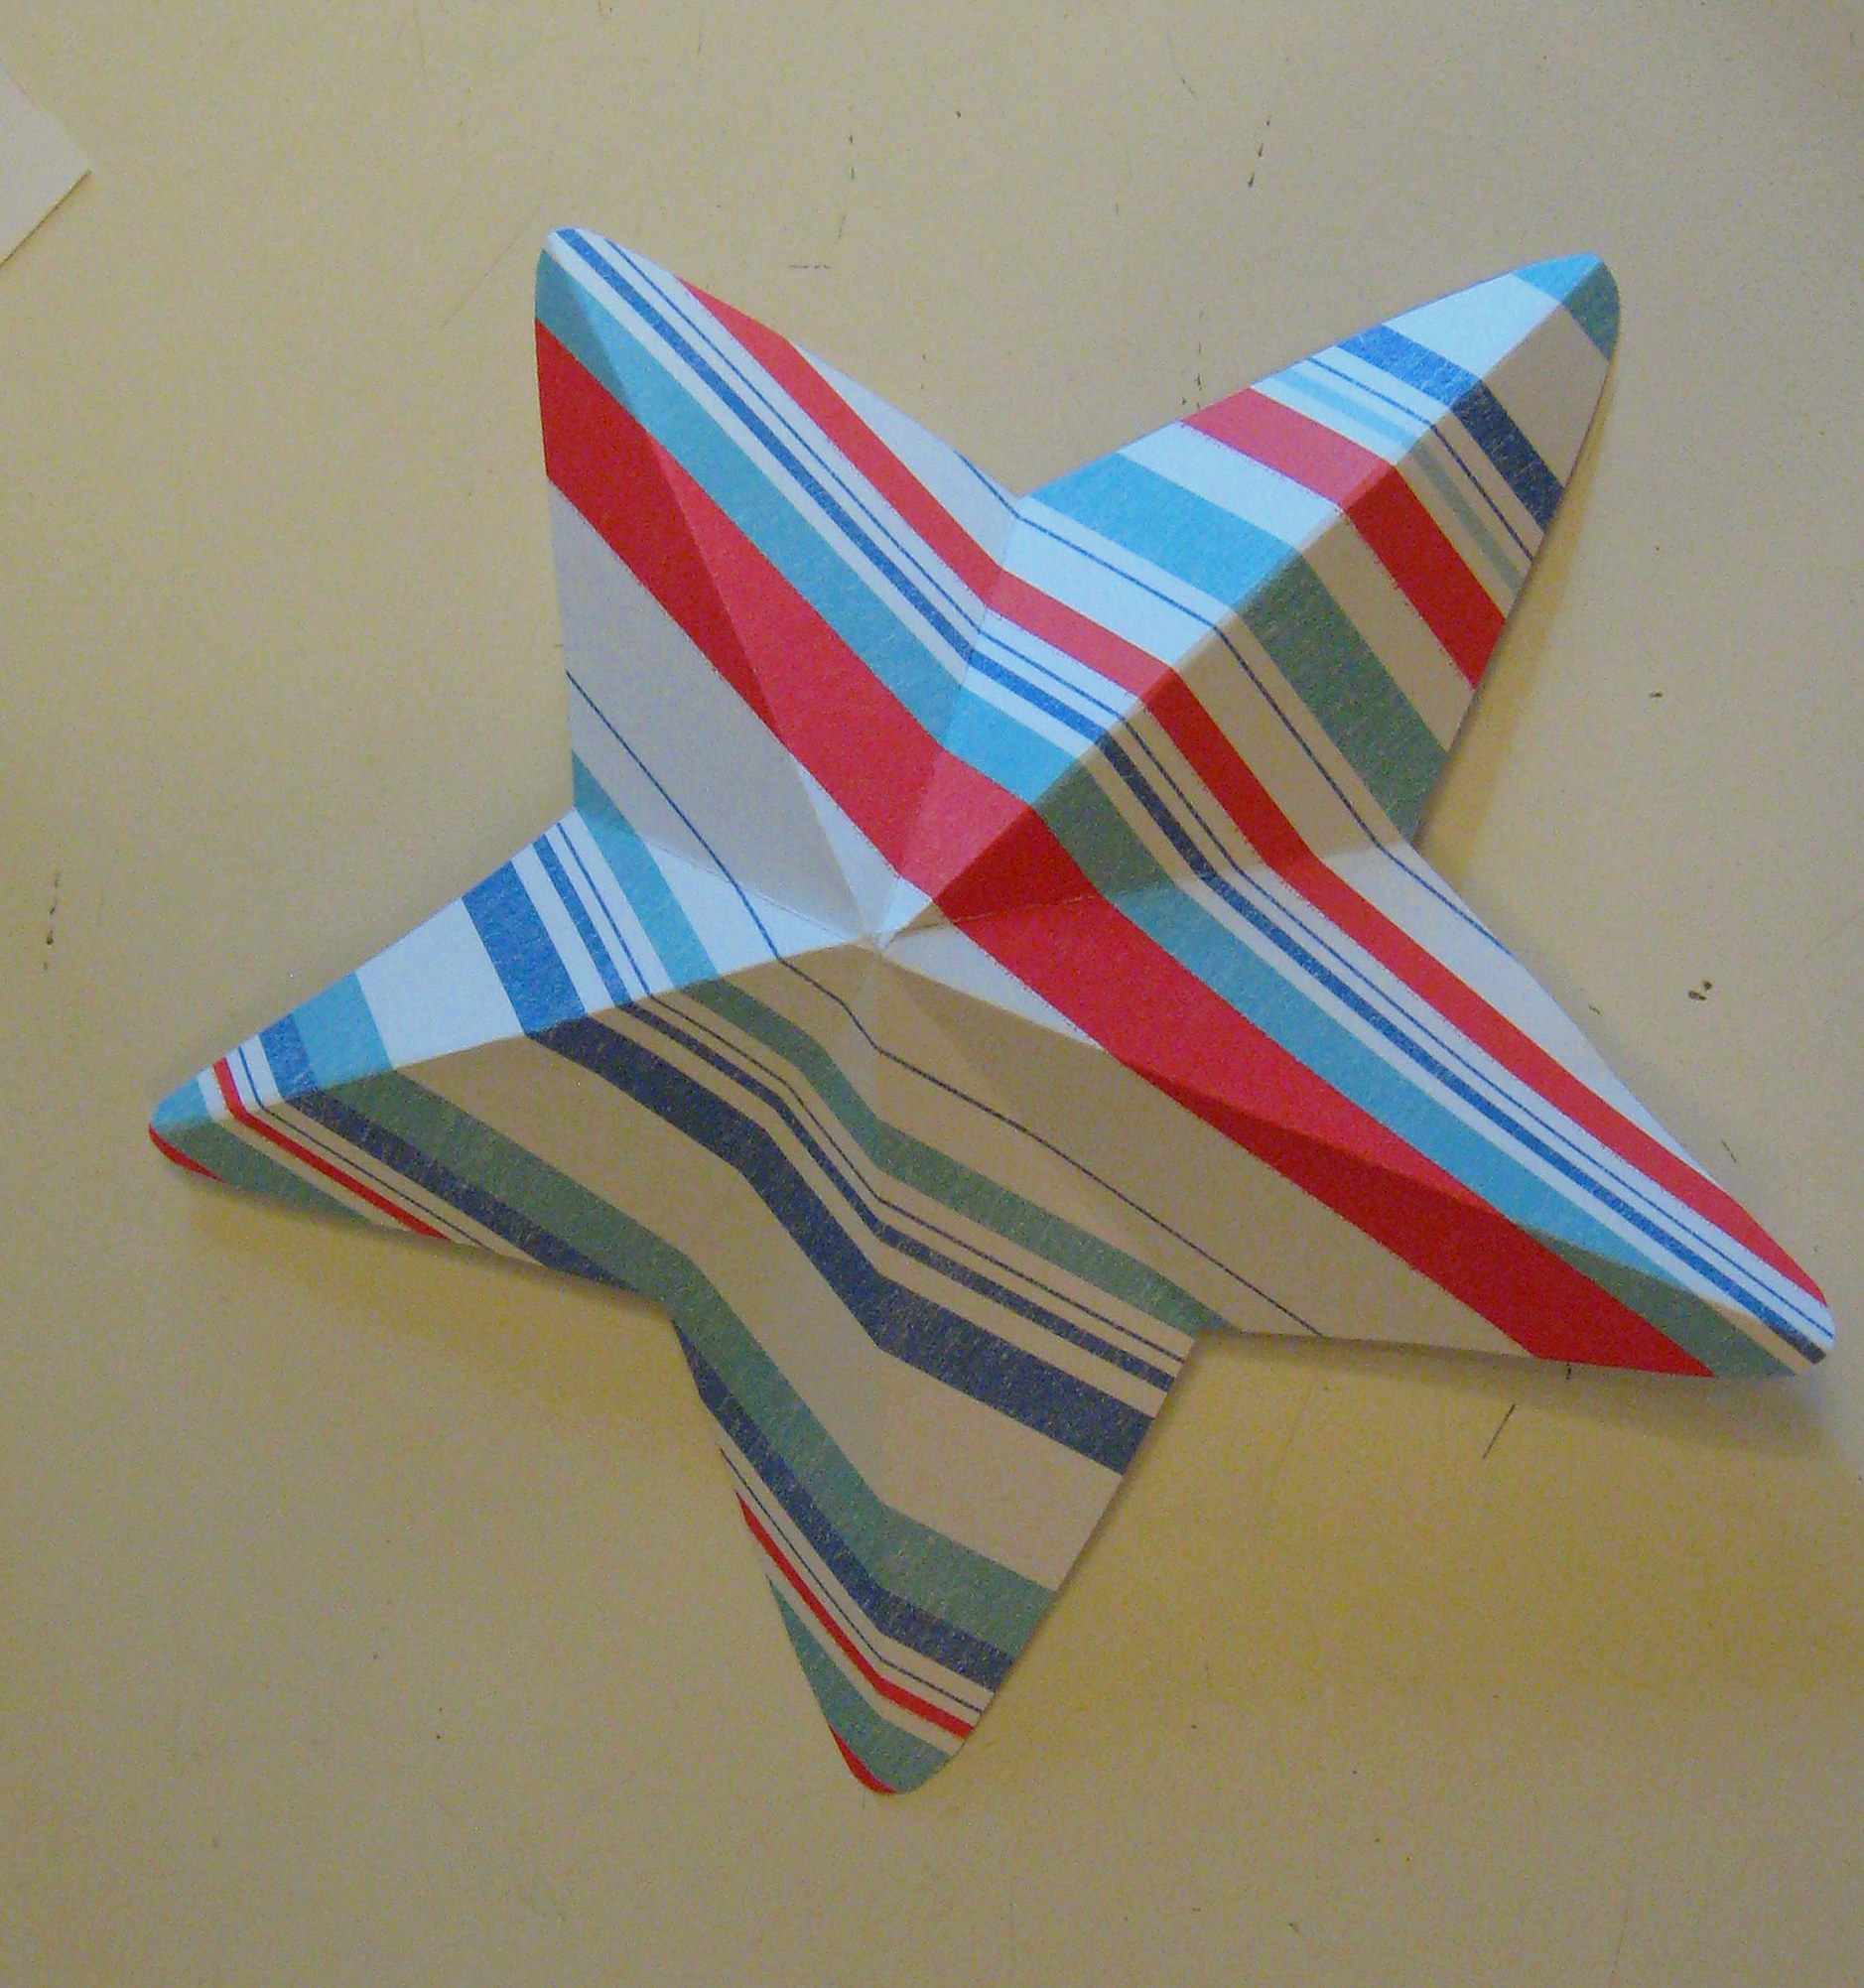
Now flip the star over to the right side and make the folds go the way you want them to go – folds from the center to a point will point up and the folds from the center to a “valley” will point down – like this:
Once you’ve perfected it with paper, try it with metal! I cut apart some pop cans and folded them the same way.
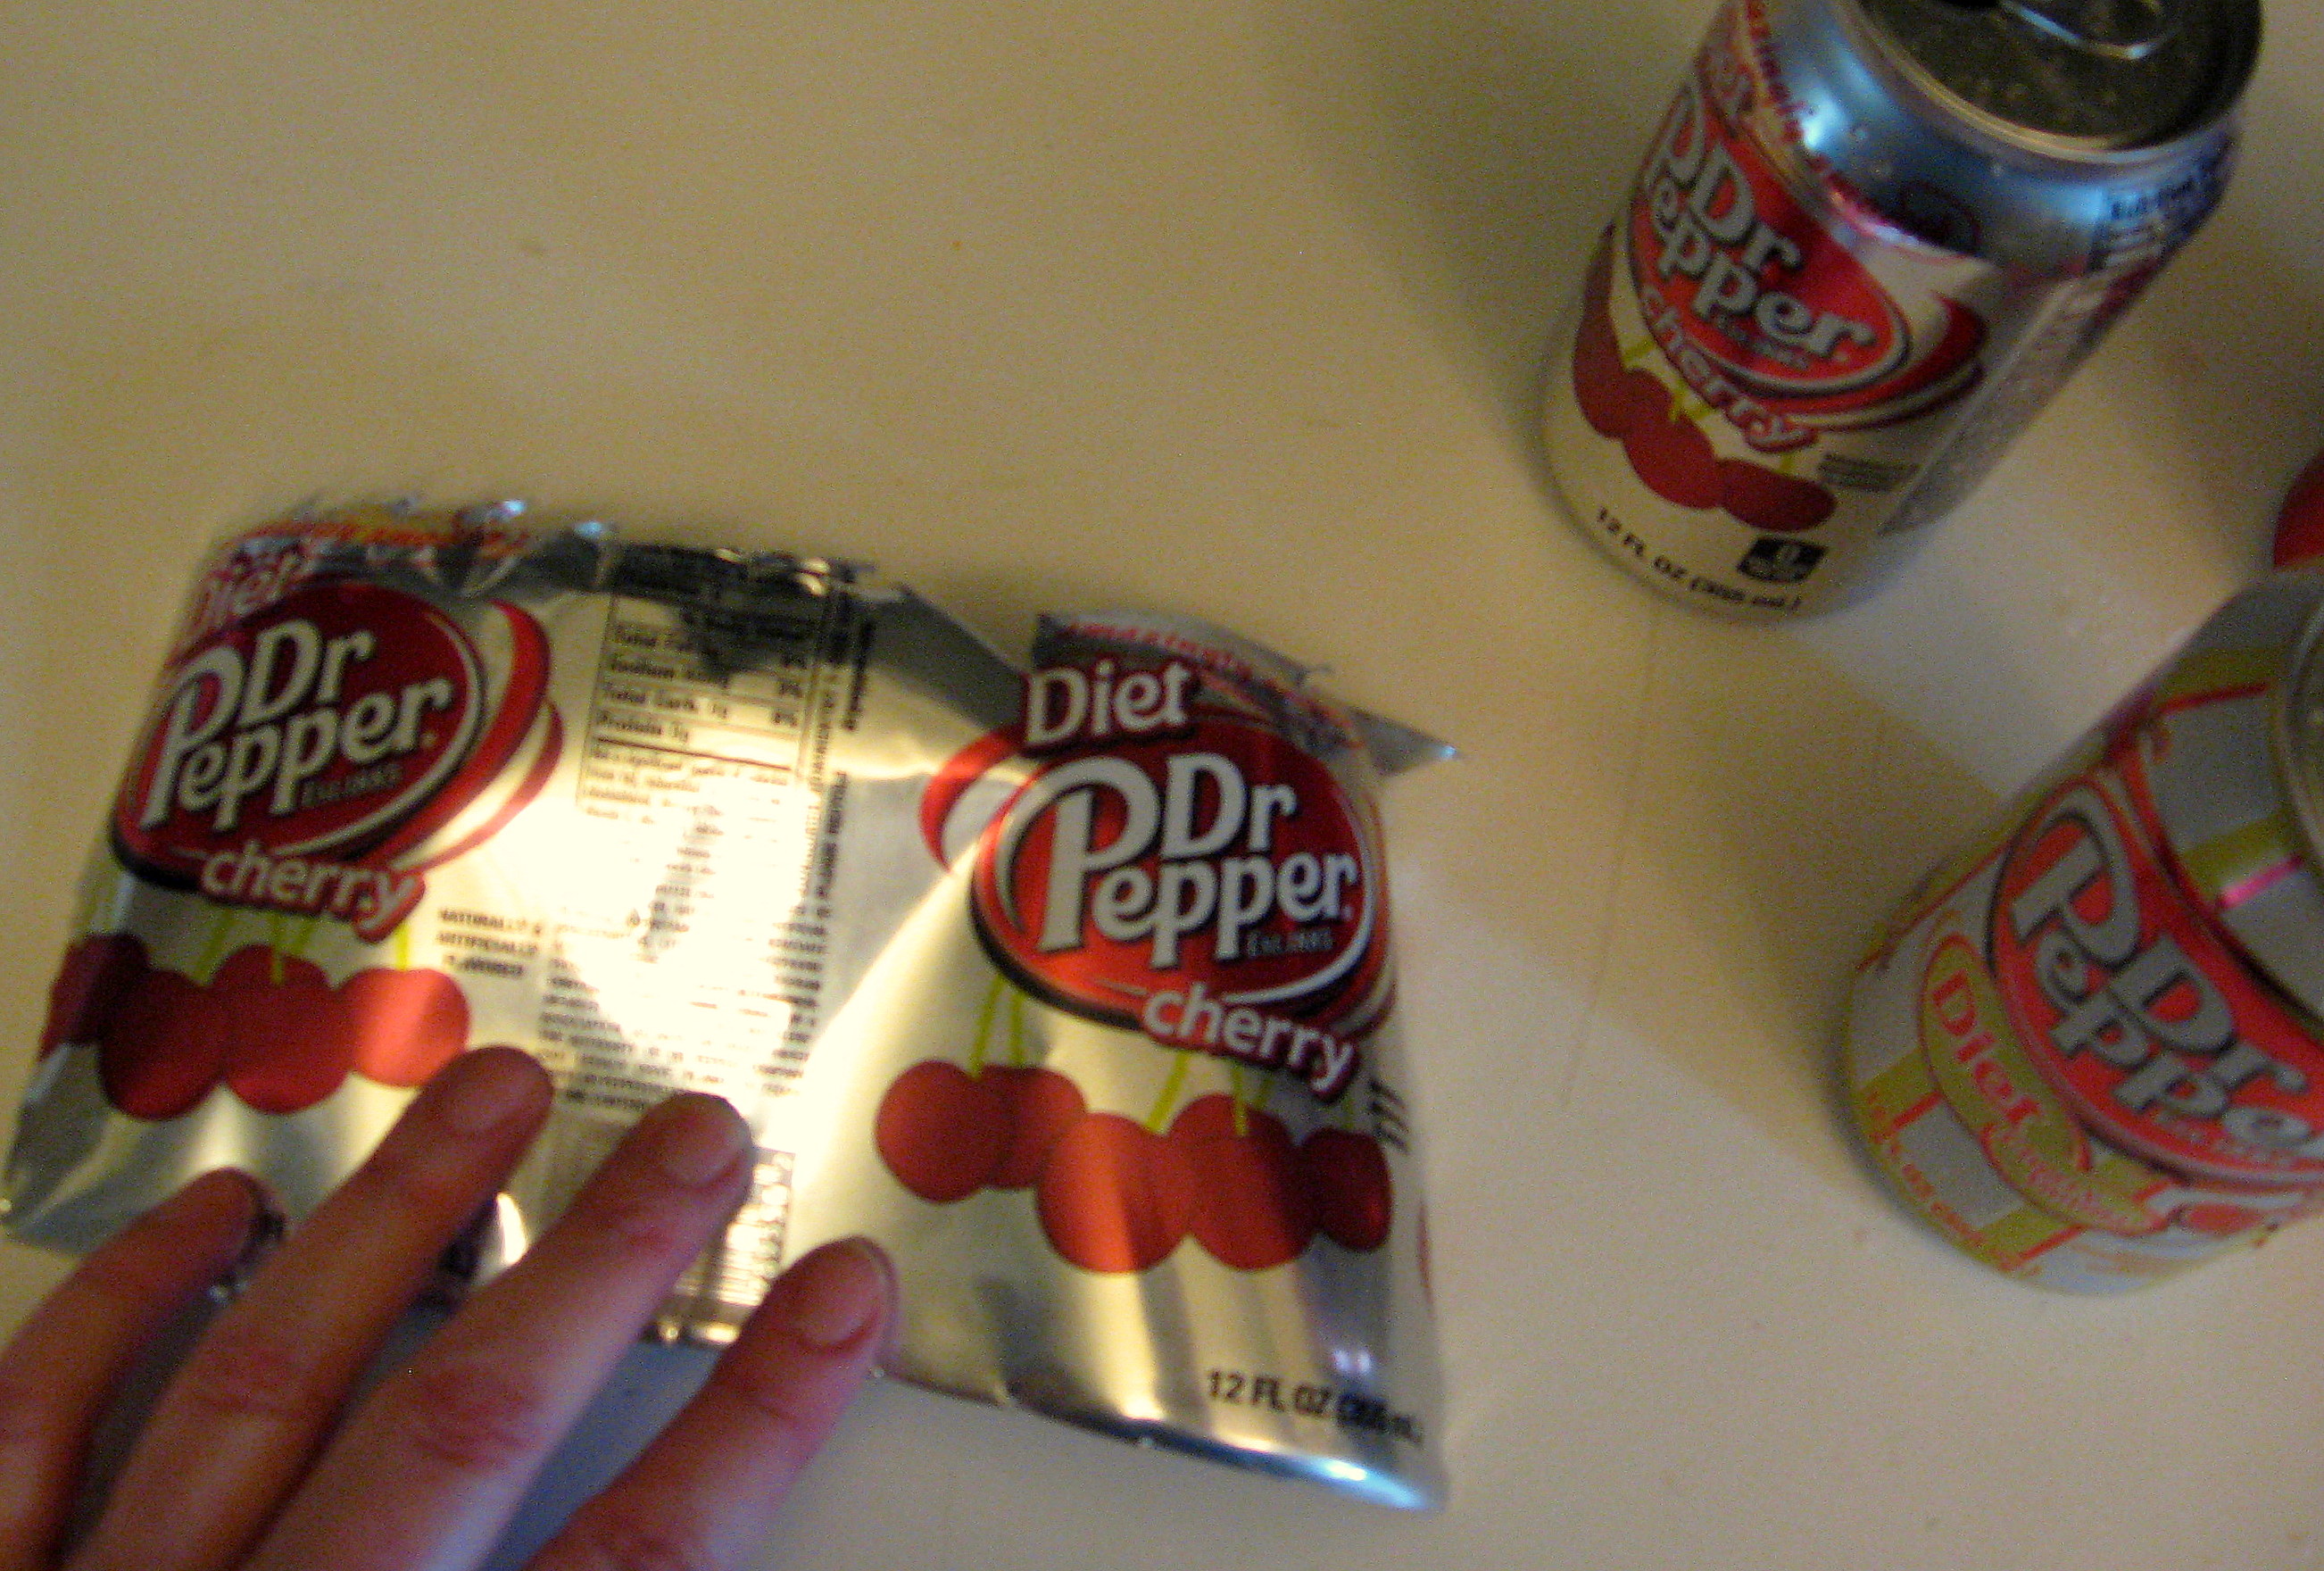
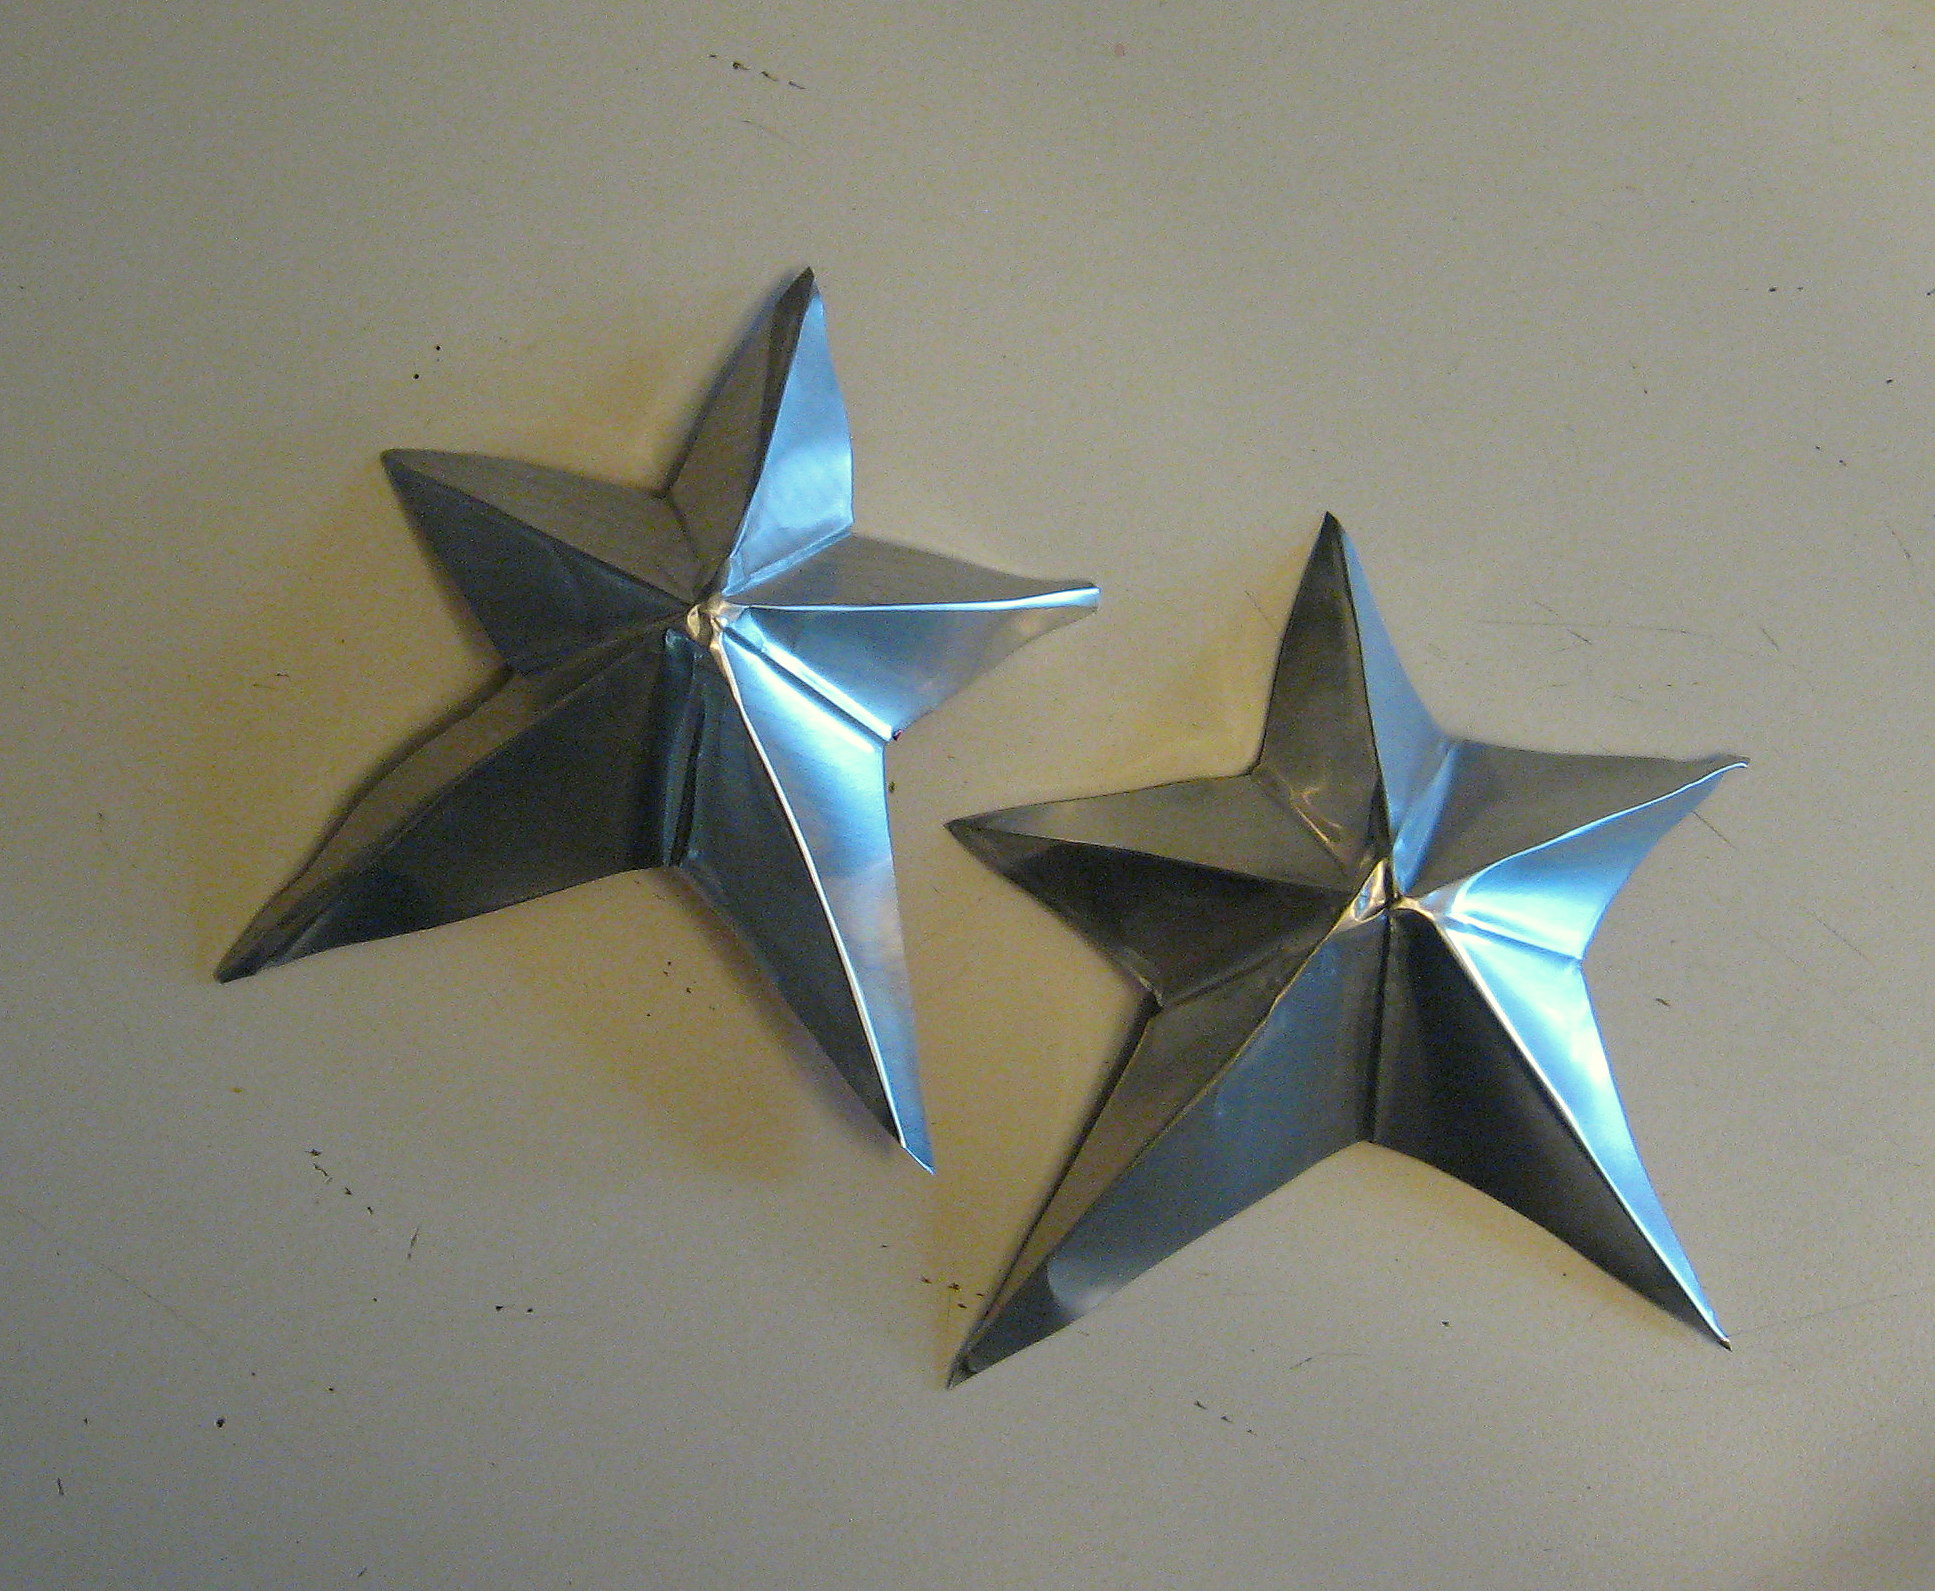
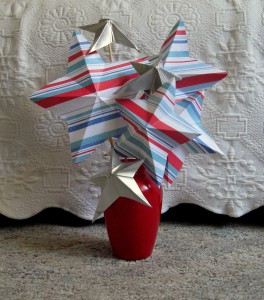
You can put a string through one point and hang them from the ceiling, or string them together to make a garland. We opted to hot glue them to small dowels and display them in a vase.
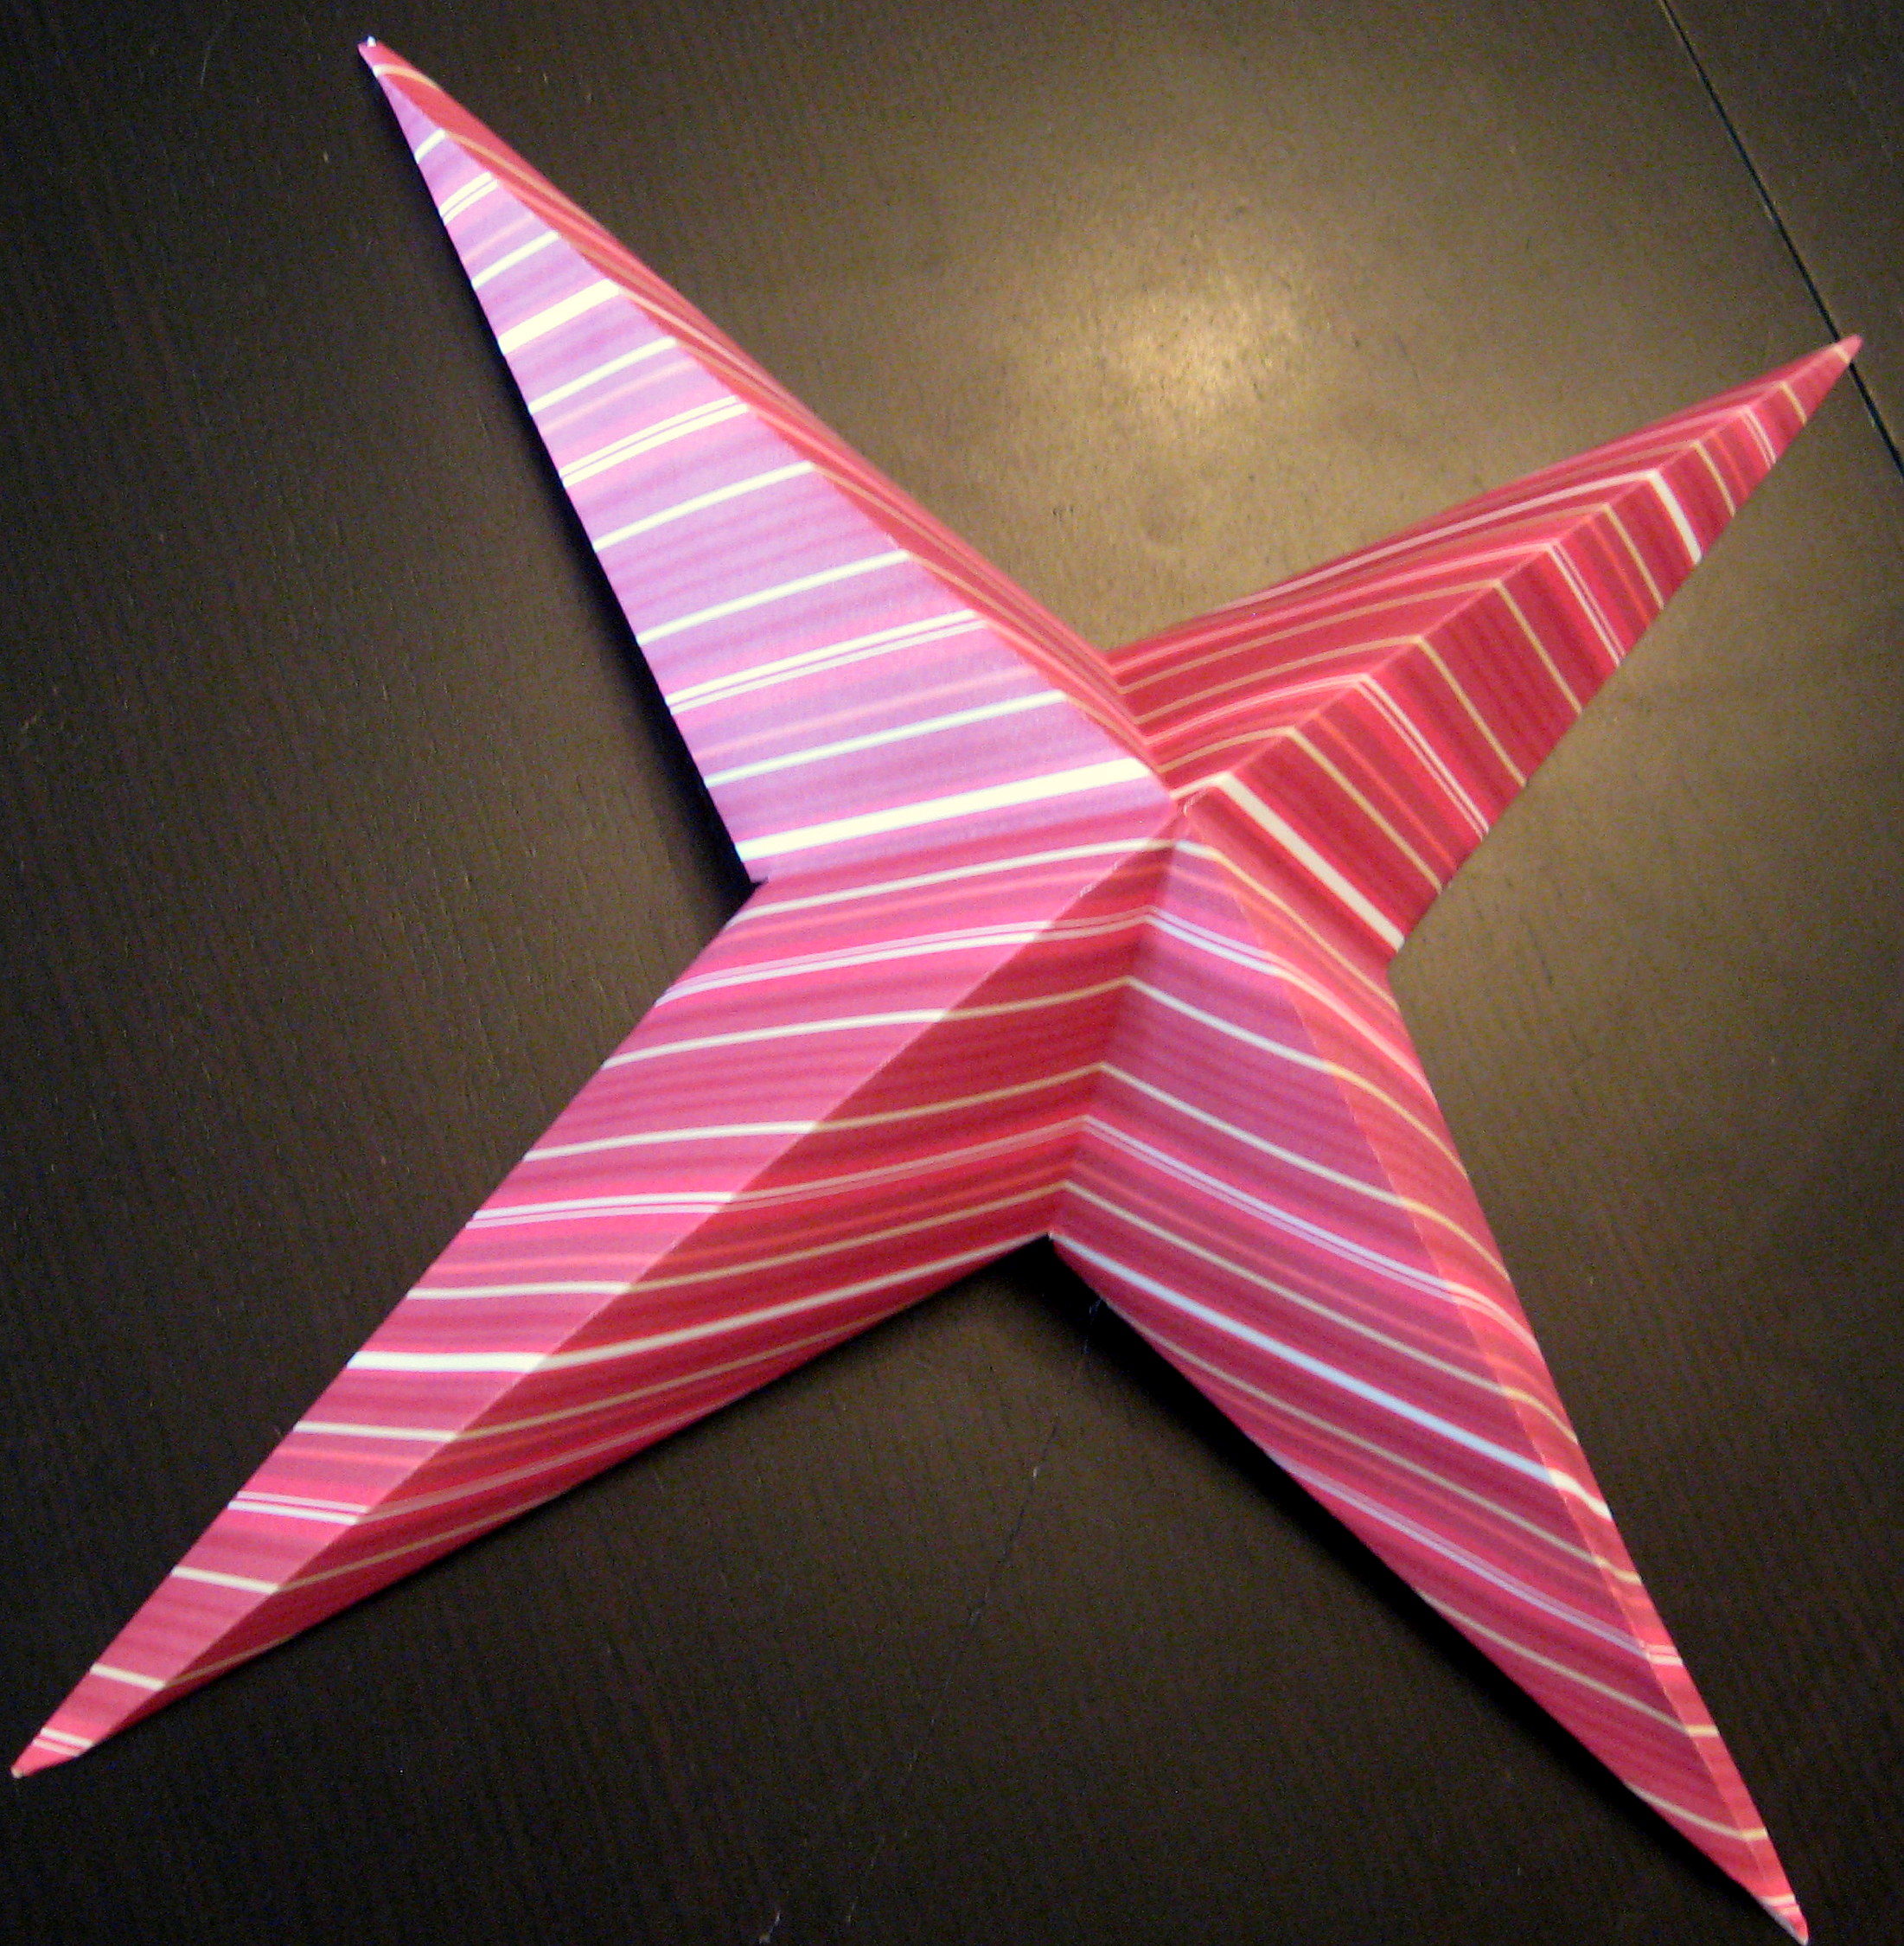
Star #2
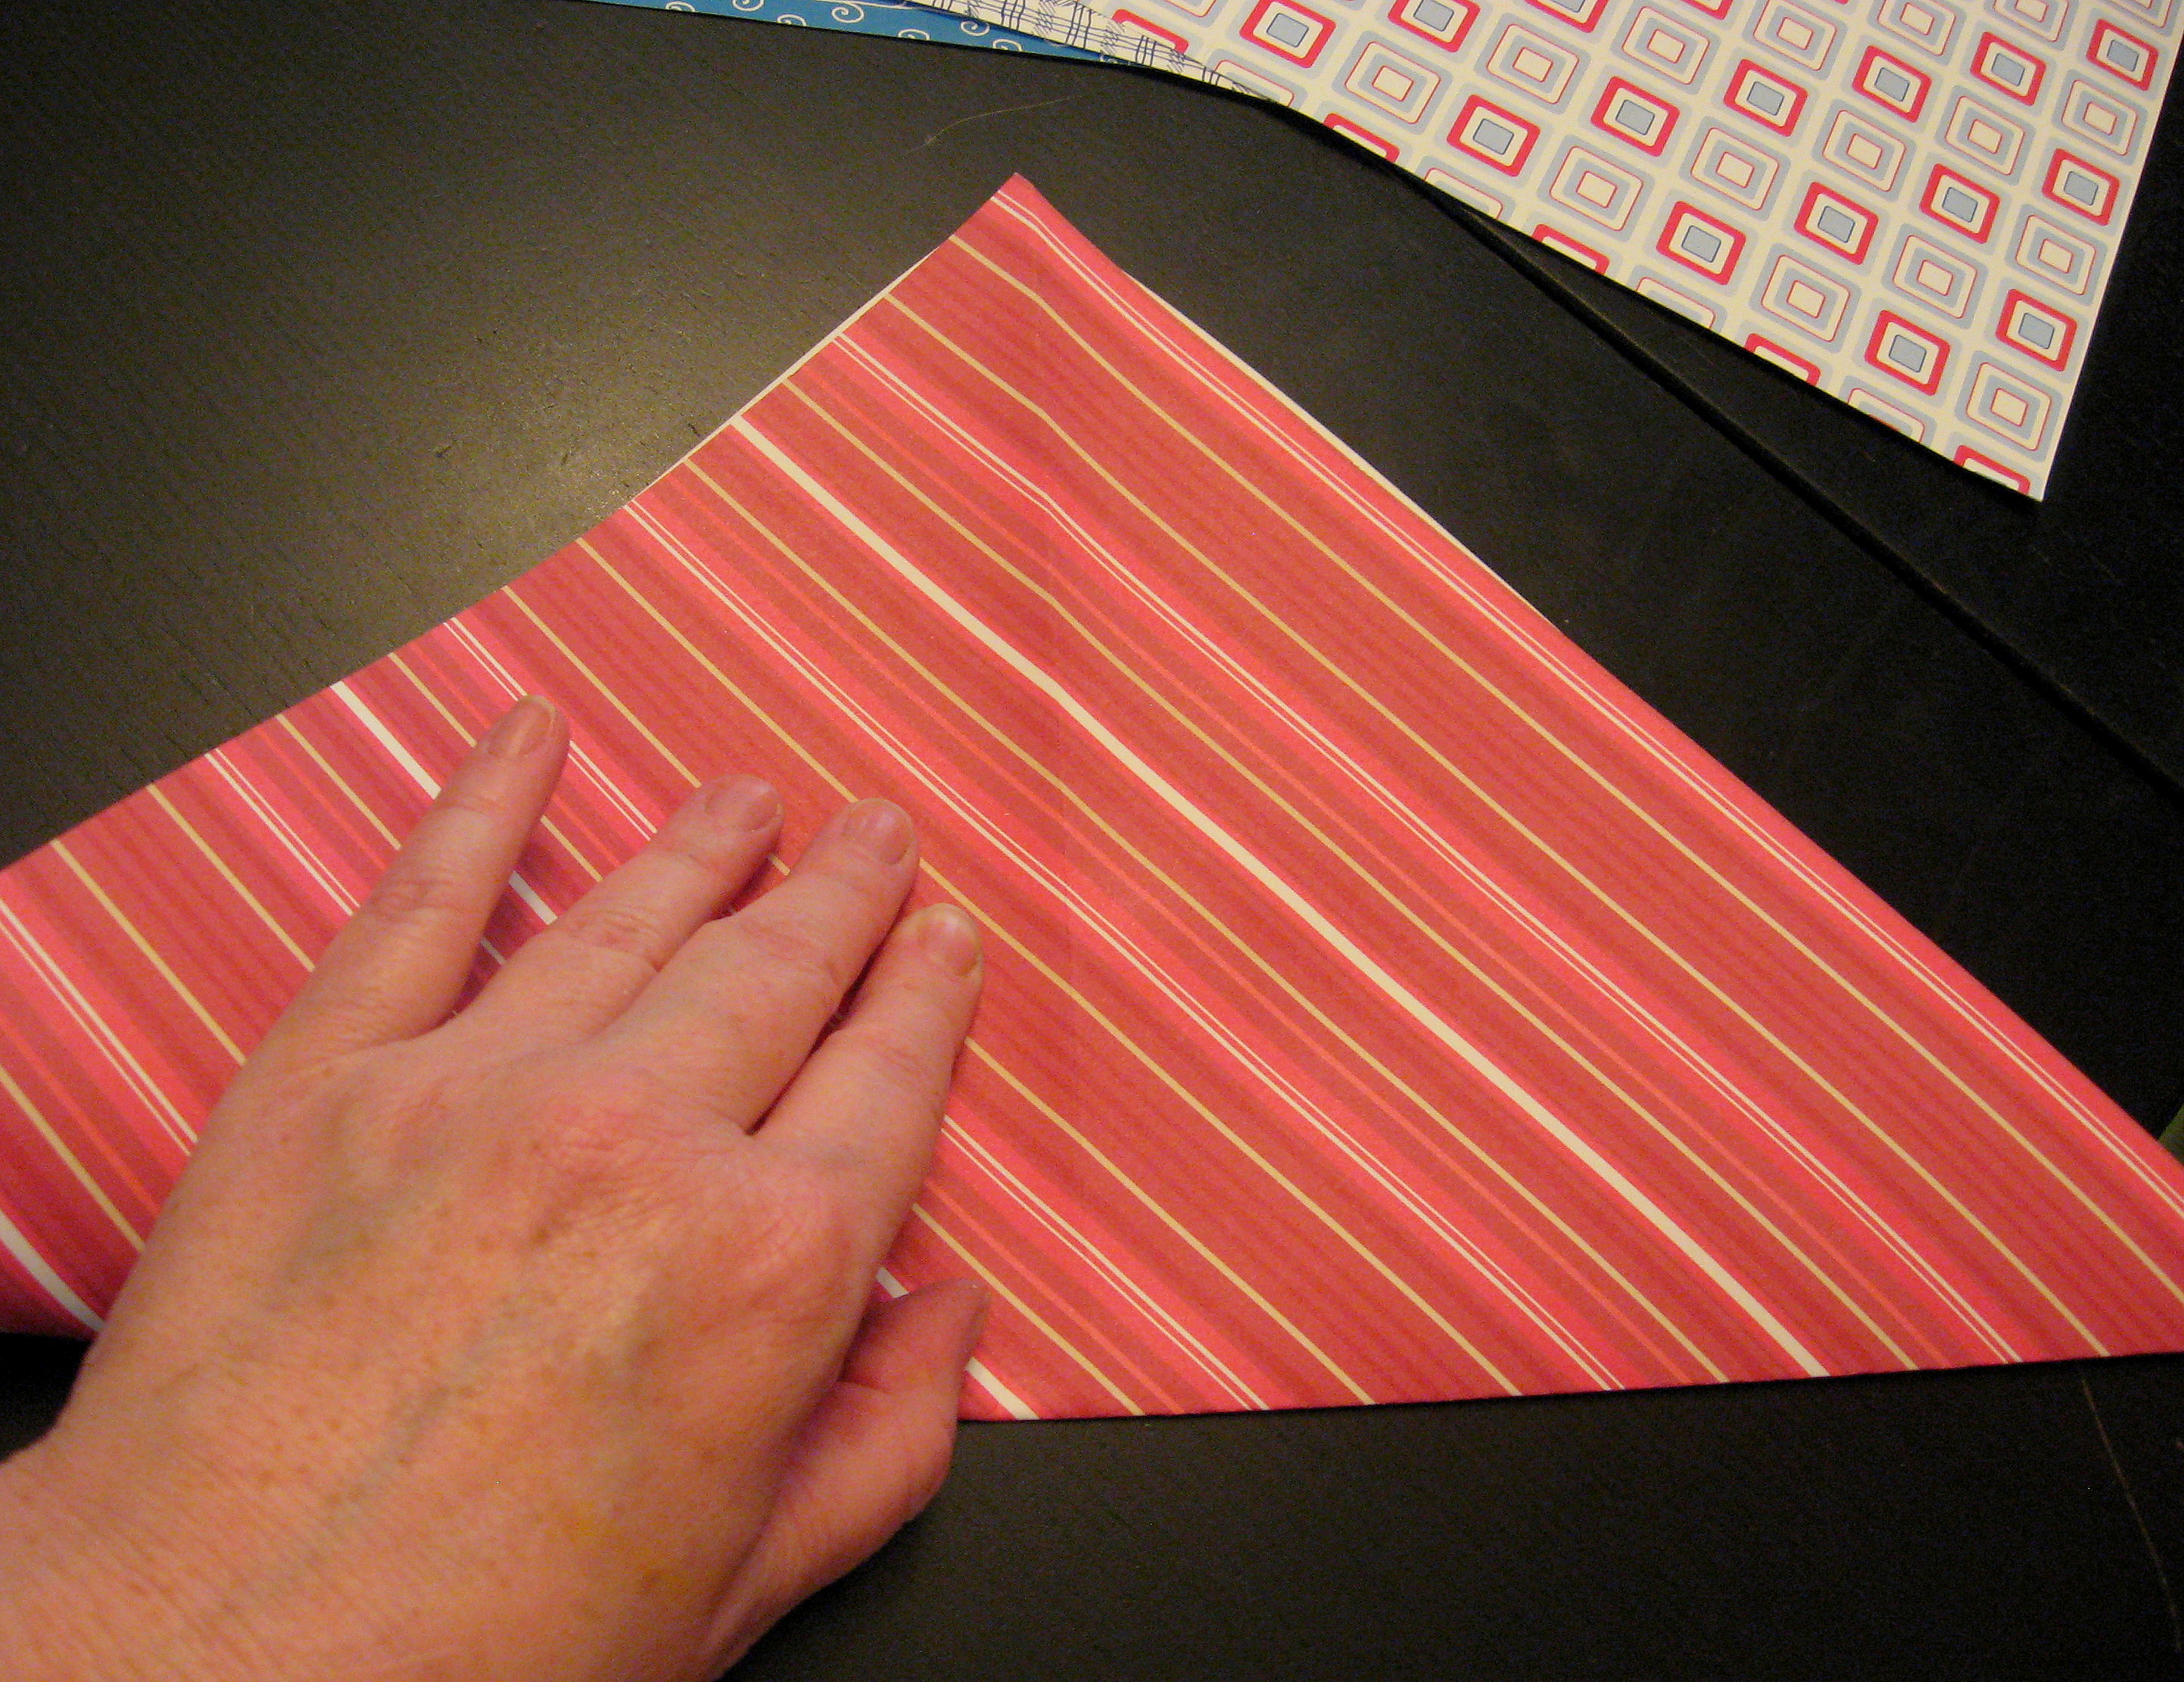
You can use any size of paper for this star, but it needs to start out as a square and you will need two squares for each star. I used 12 X 12 scrapbook paper. I made my stars 2 different colors, but they look great all the same color too.
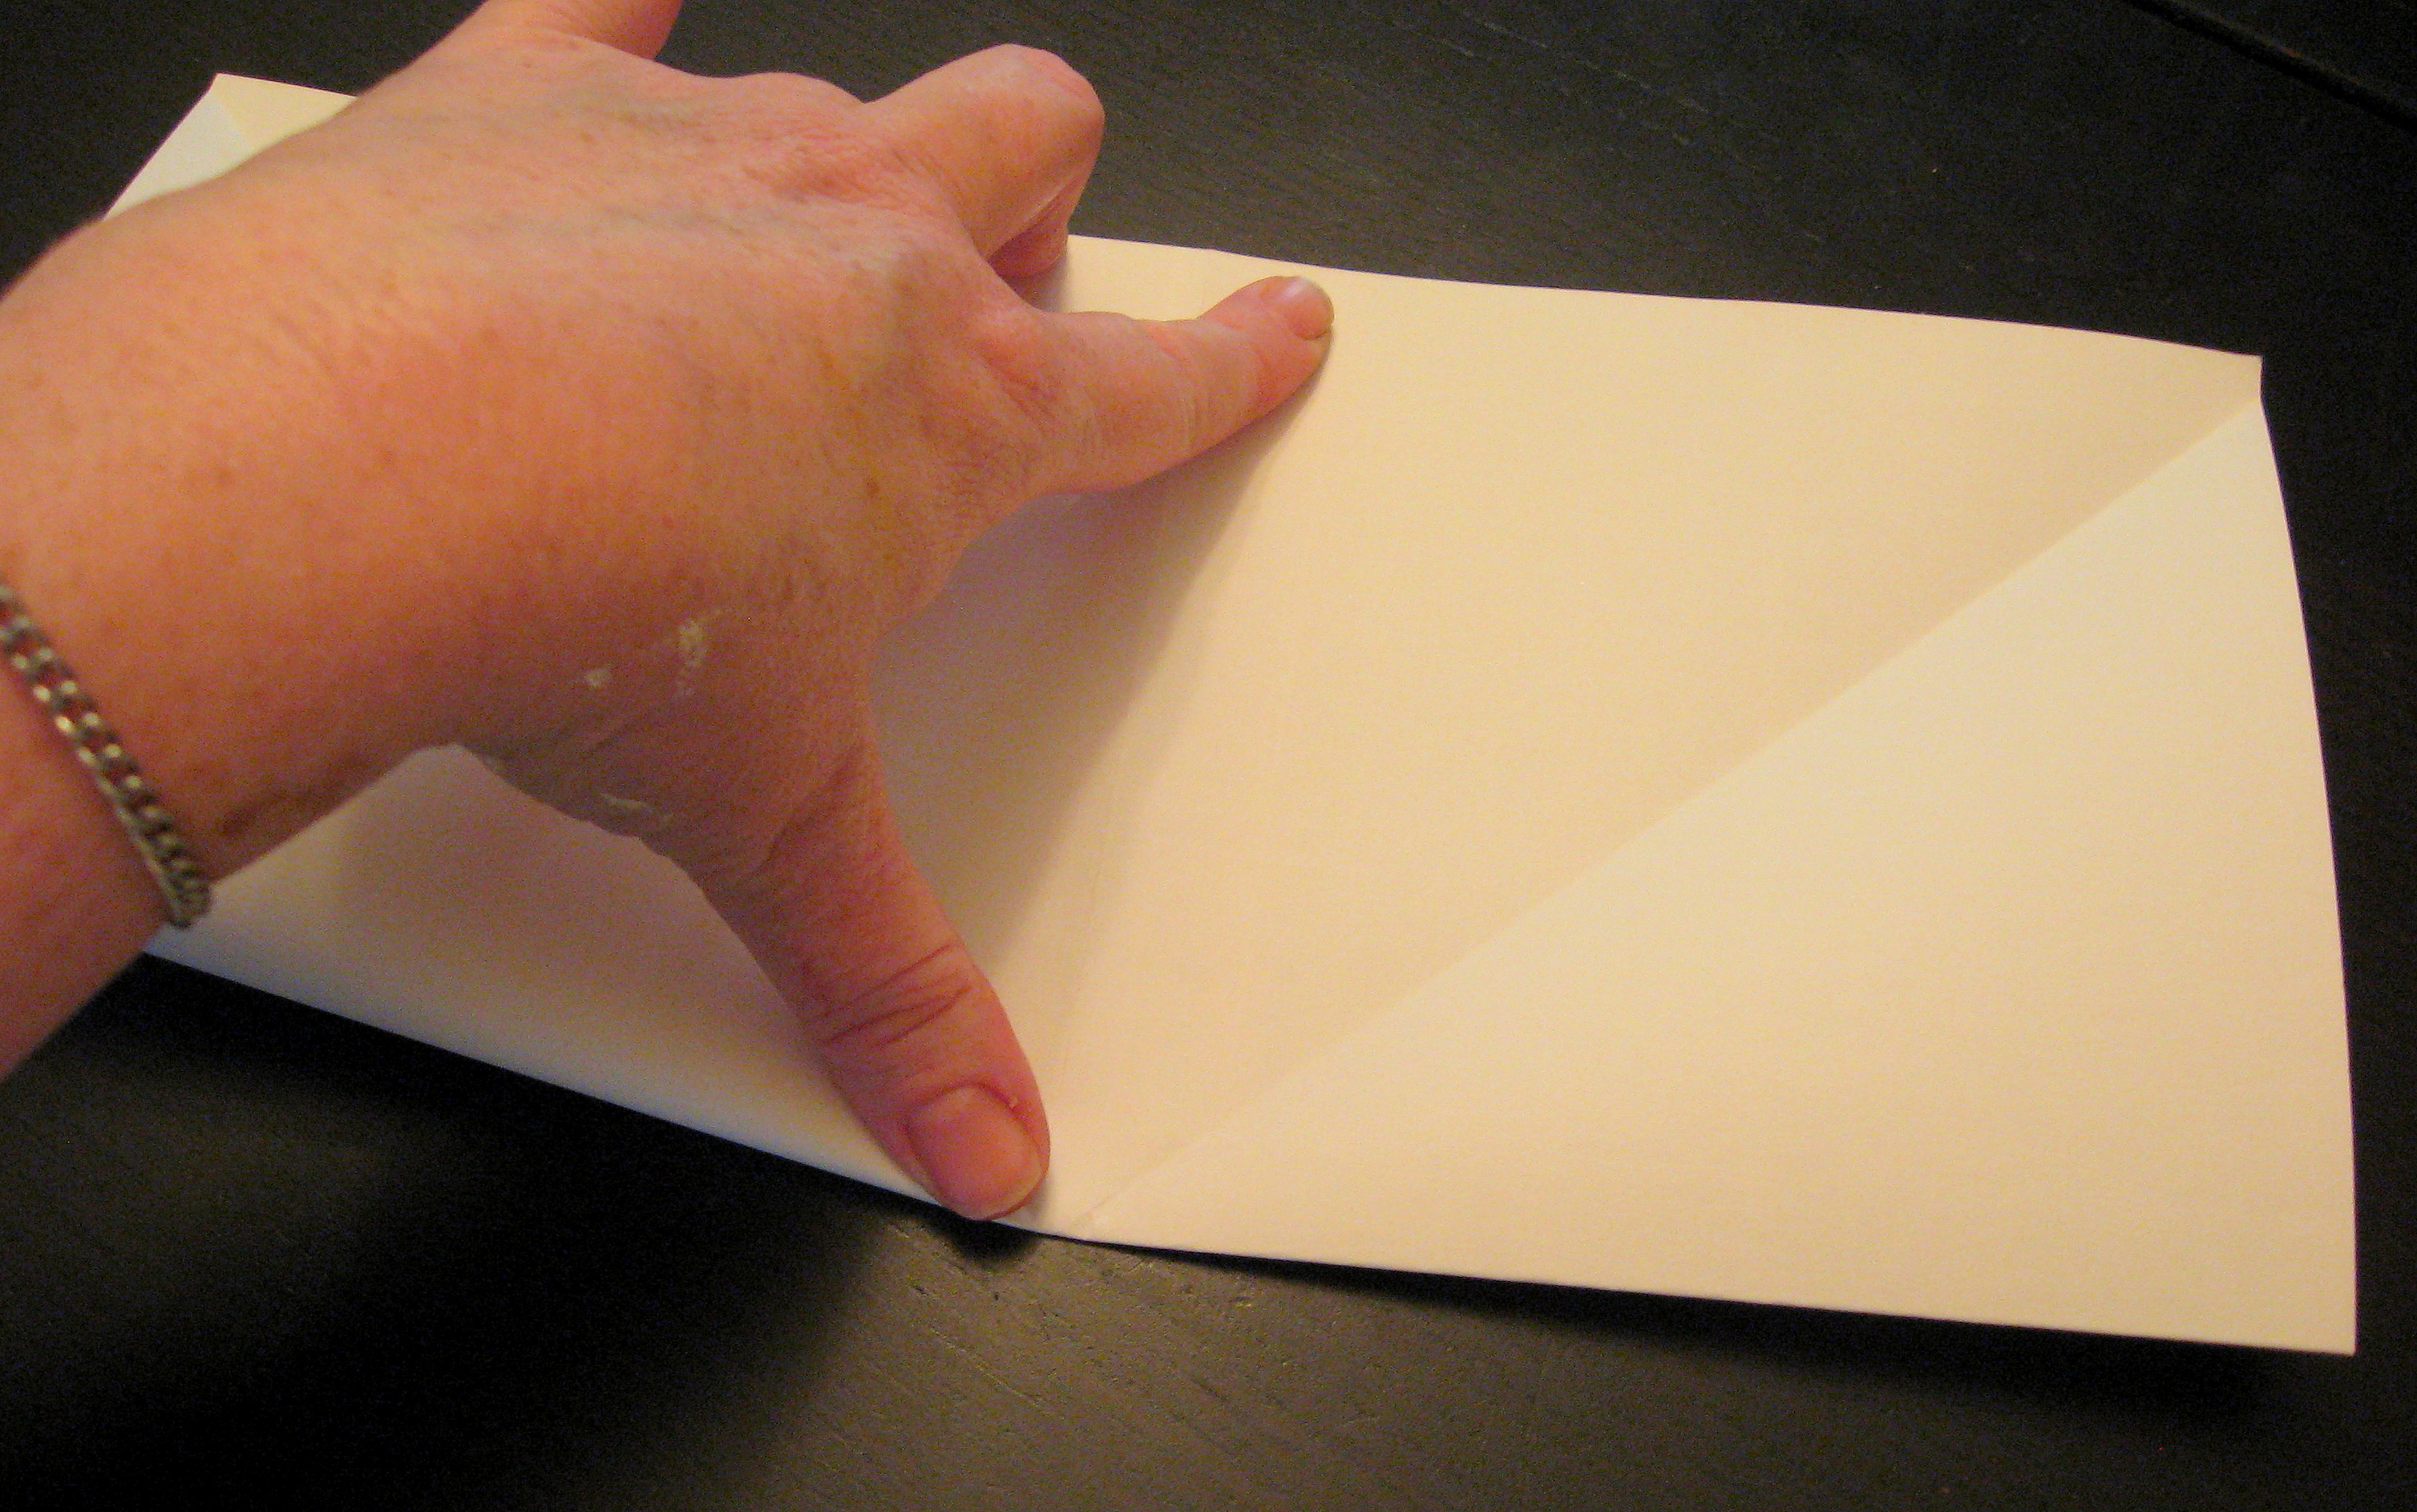
Start by folding the paper corner to corner on the diagonal; then open back up and fold on the other diagonal.
Now fold in half one way, then open back up and fold in half the other way.
Open the paper back up and cut along the folds that you just made – the horizontal/vertical ones, not the diagonal ones (see arrows in the picture below). Cut about 2 1/2 inches in on each fold.
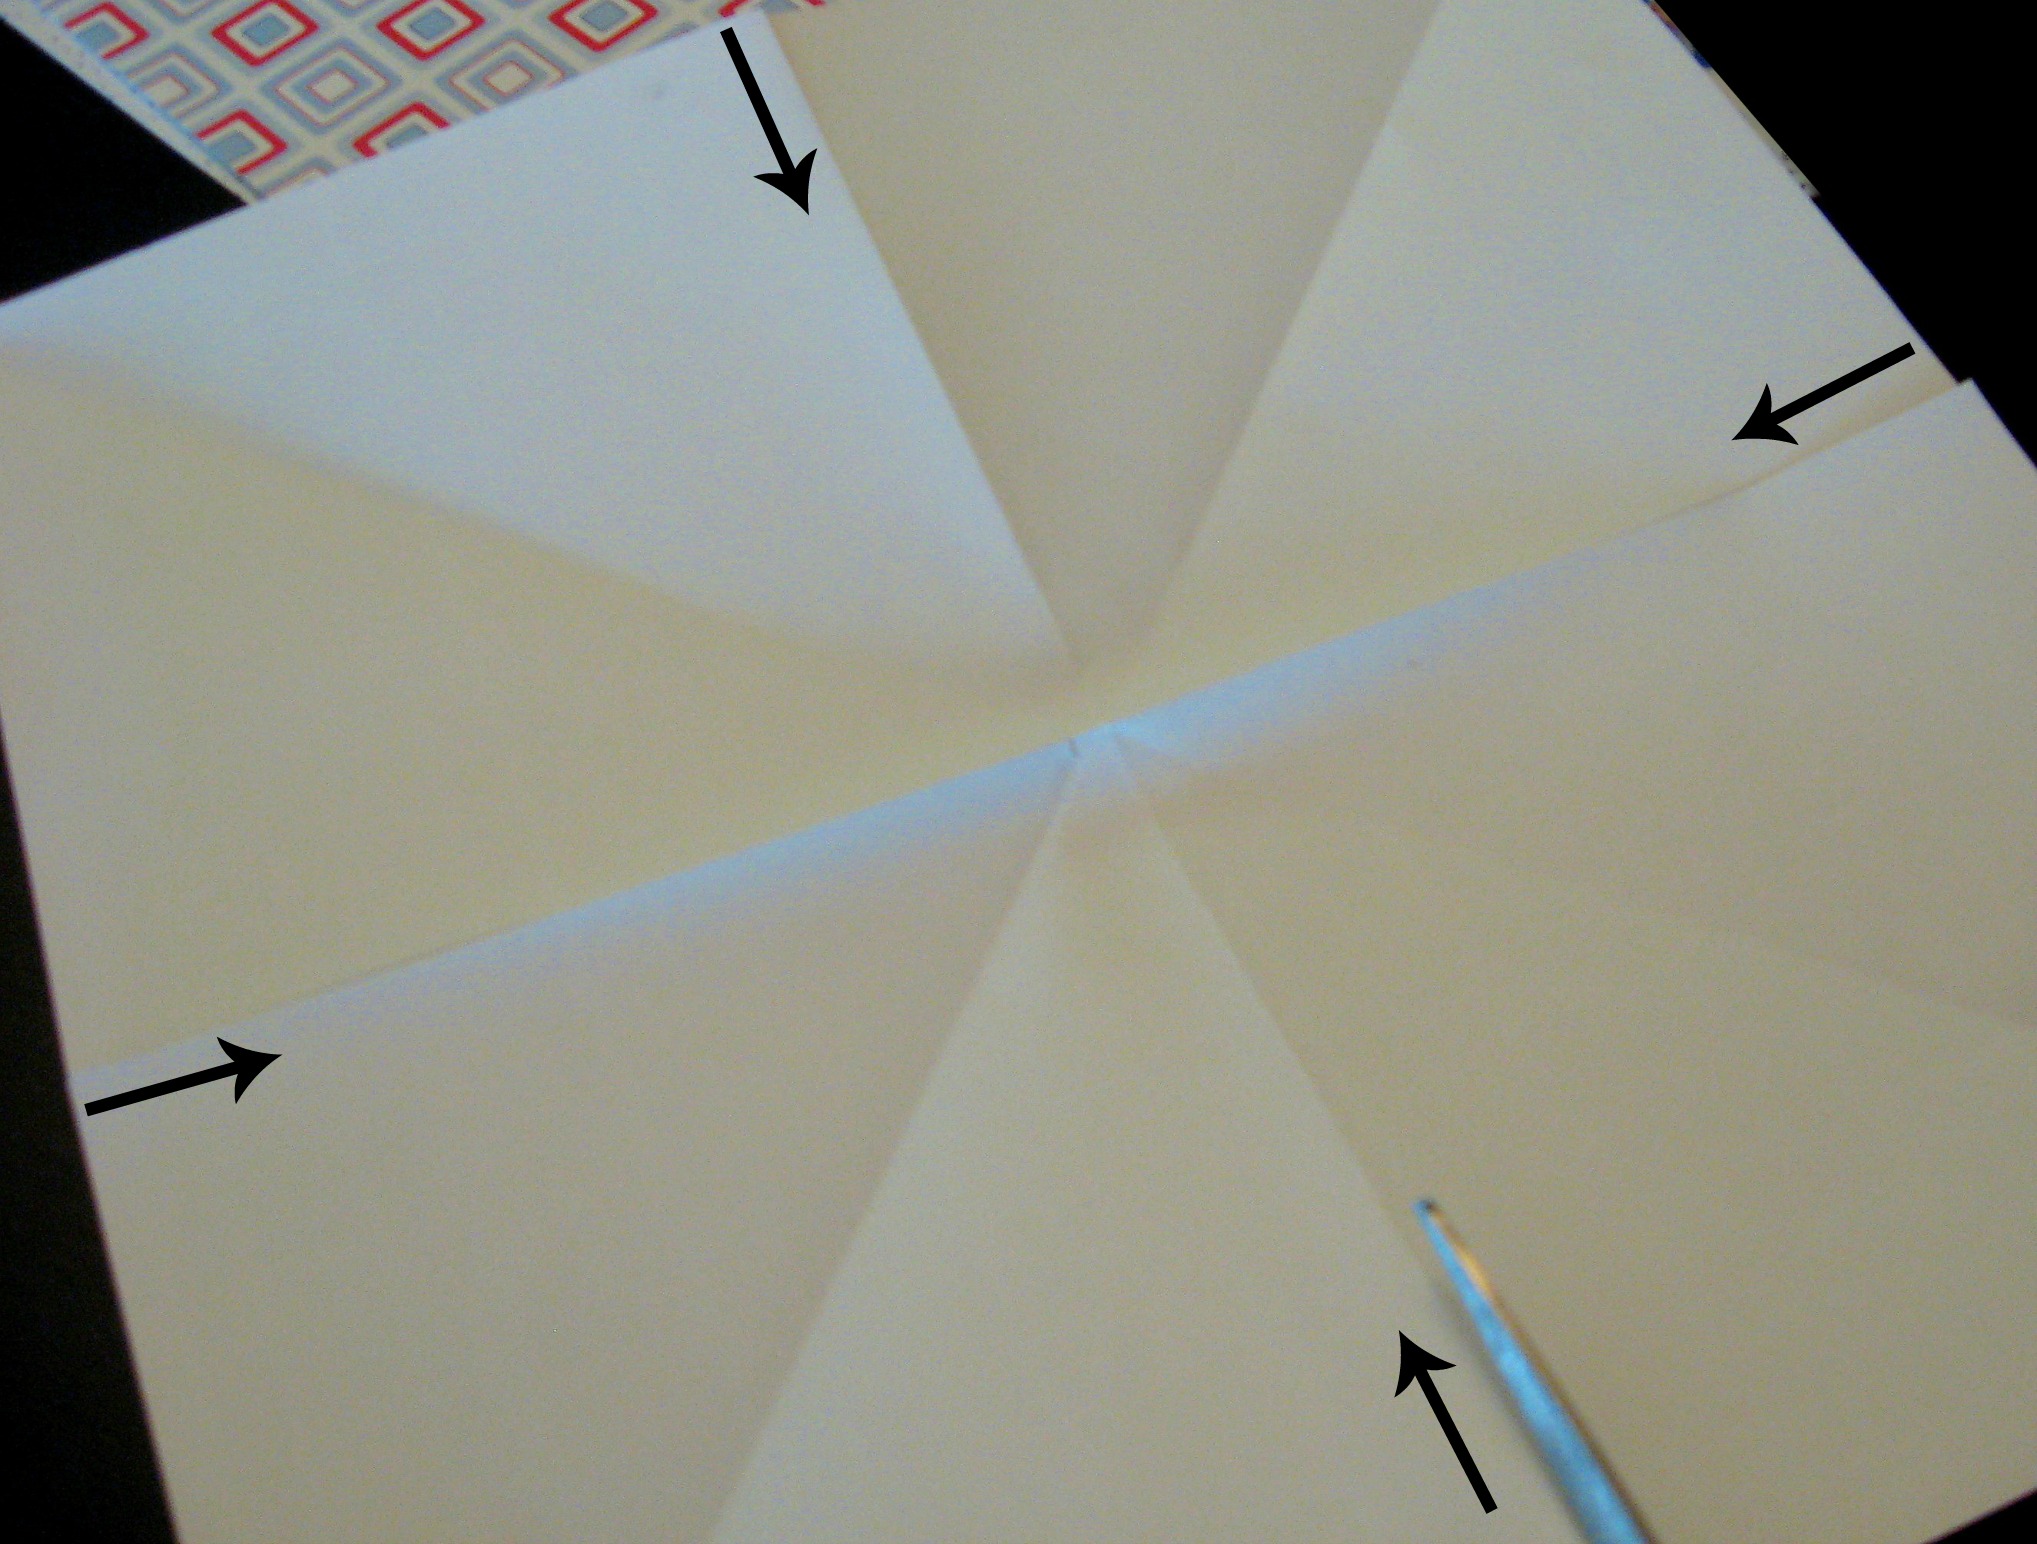
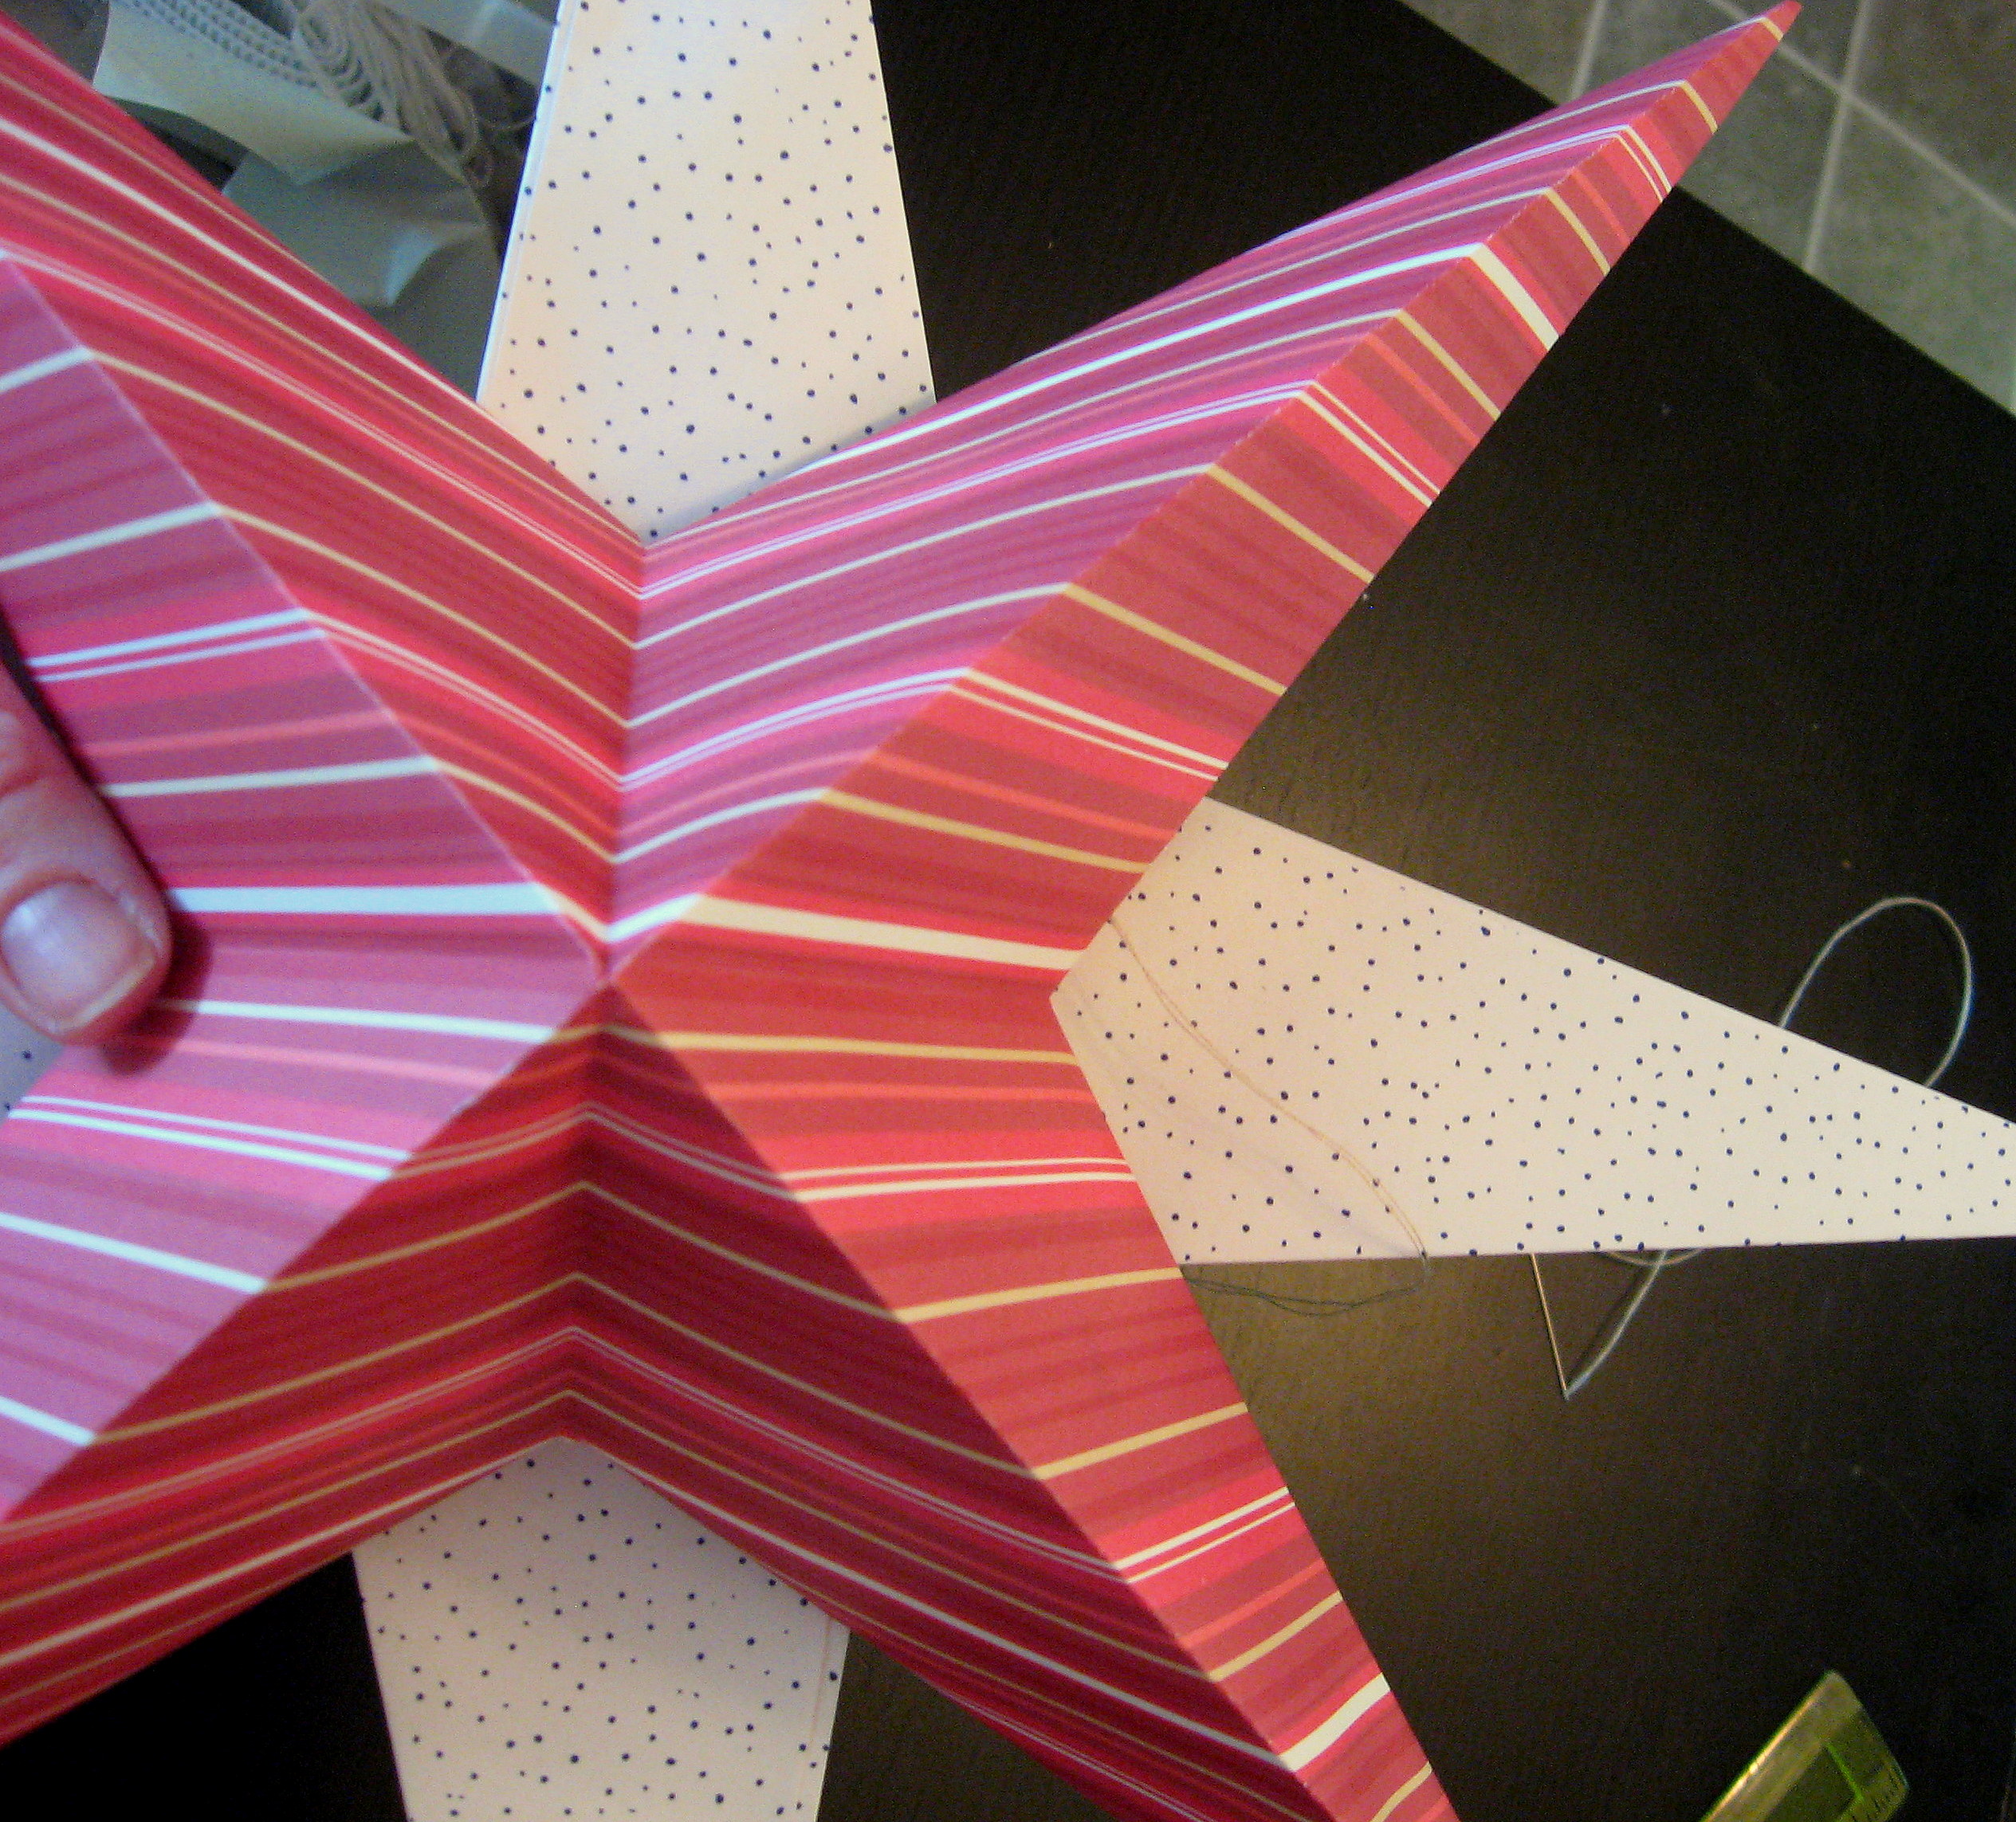
Now fold each cut edge in to meet at the diagonal fold and form a sharp point at the end.
For each point, put glue (I used a glue stick) on one of the flaps:
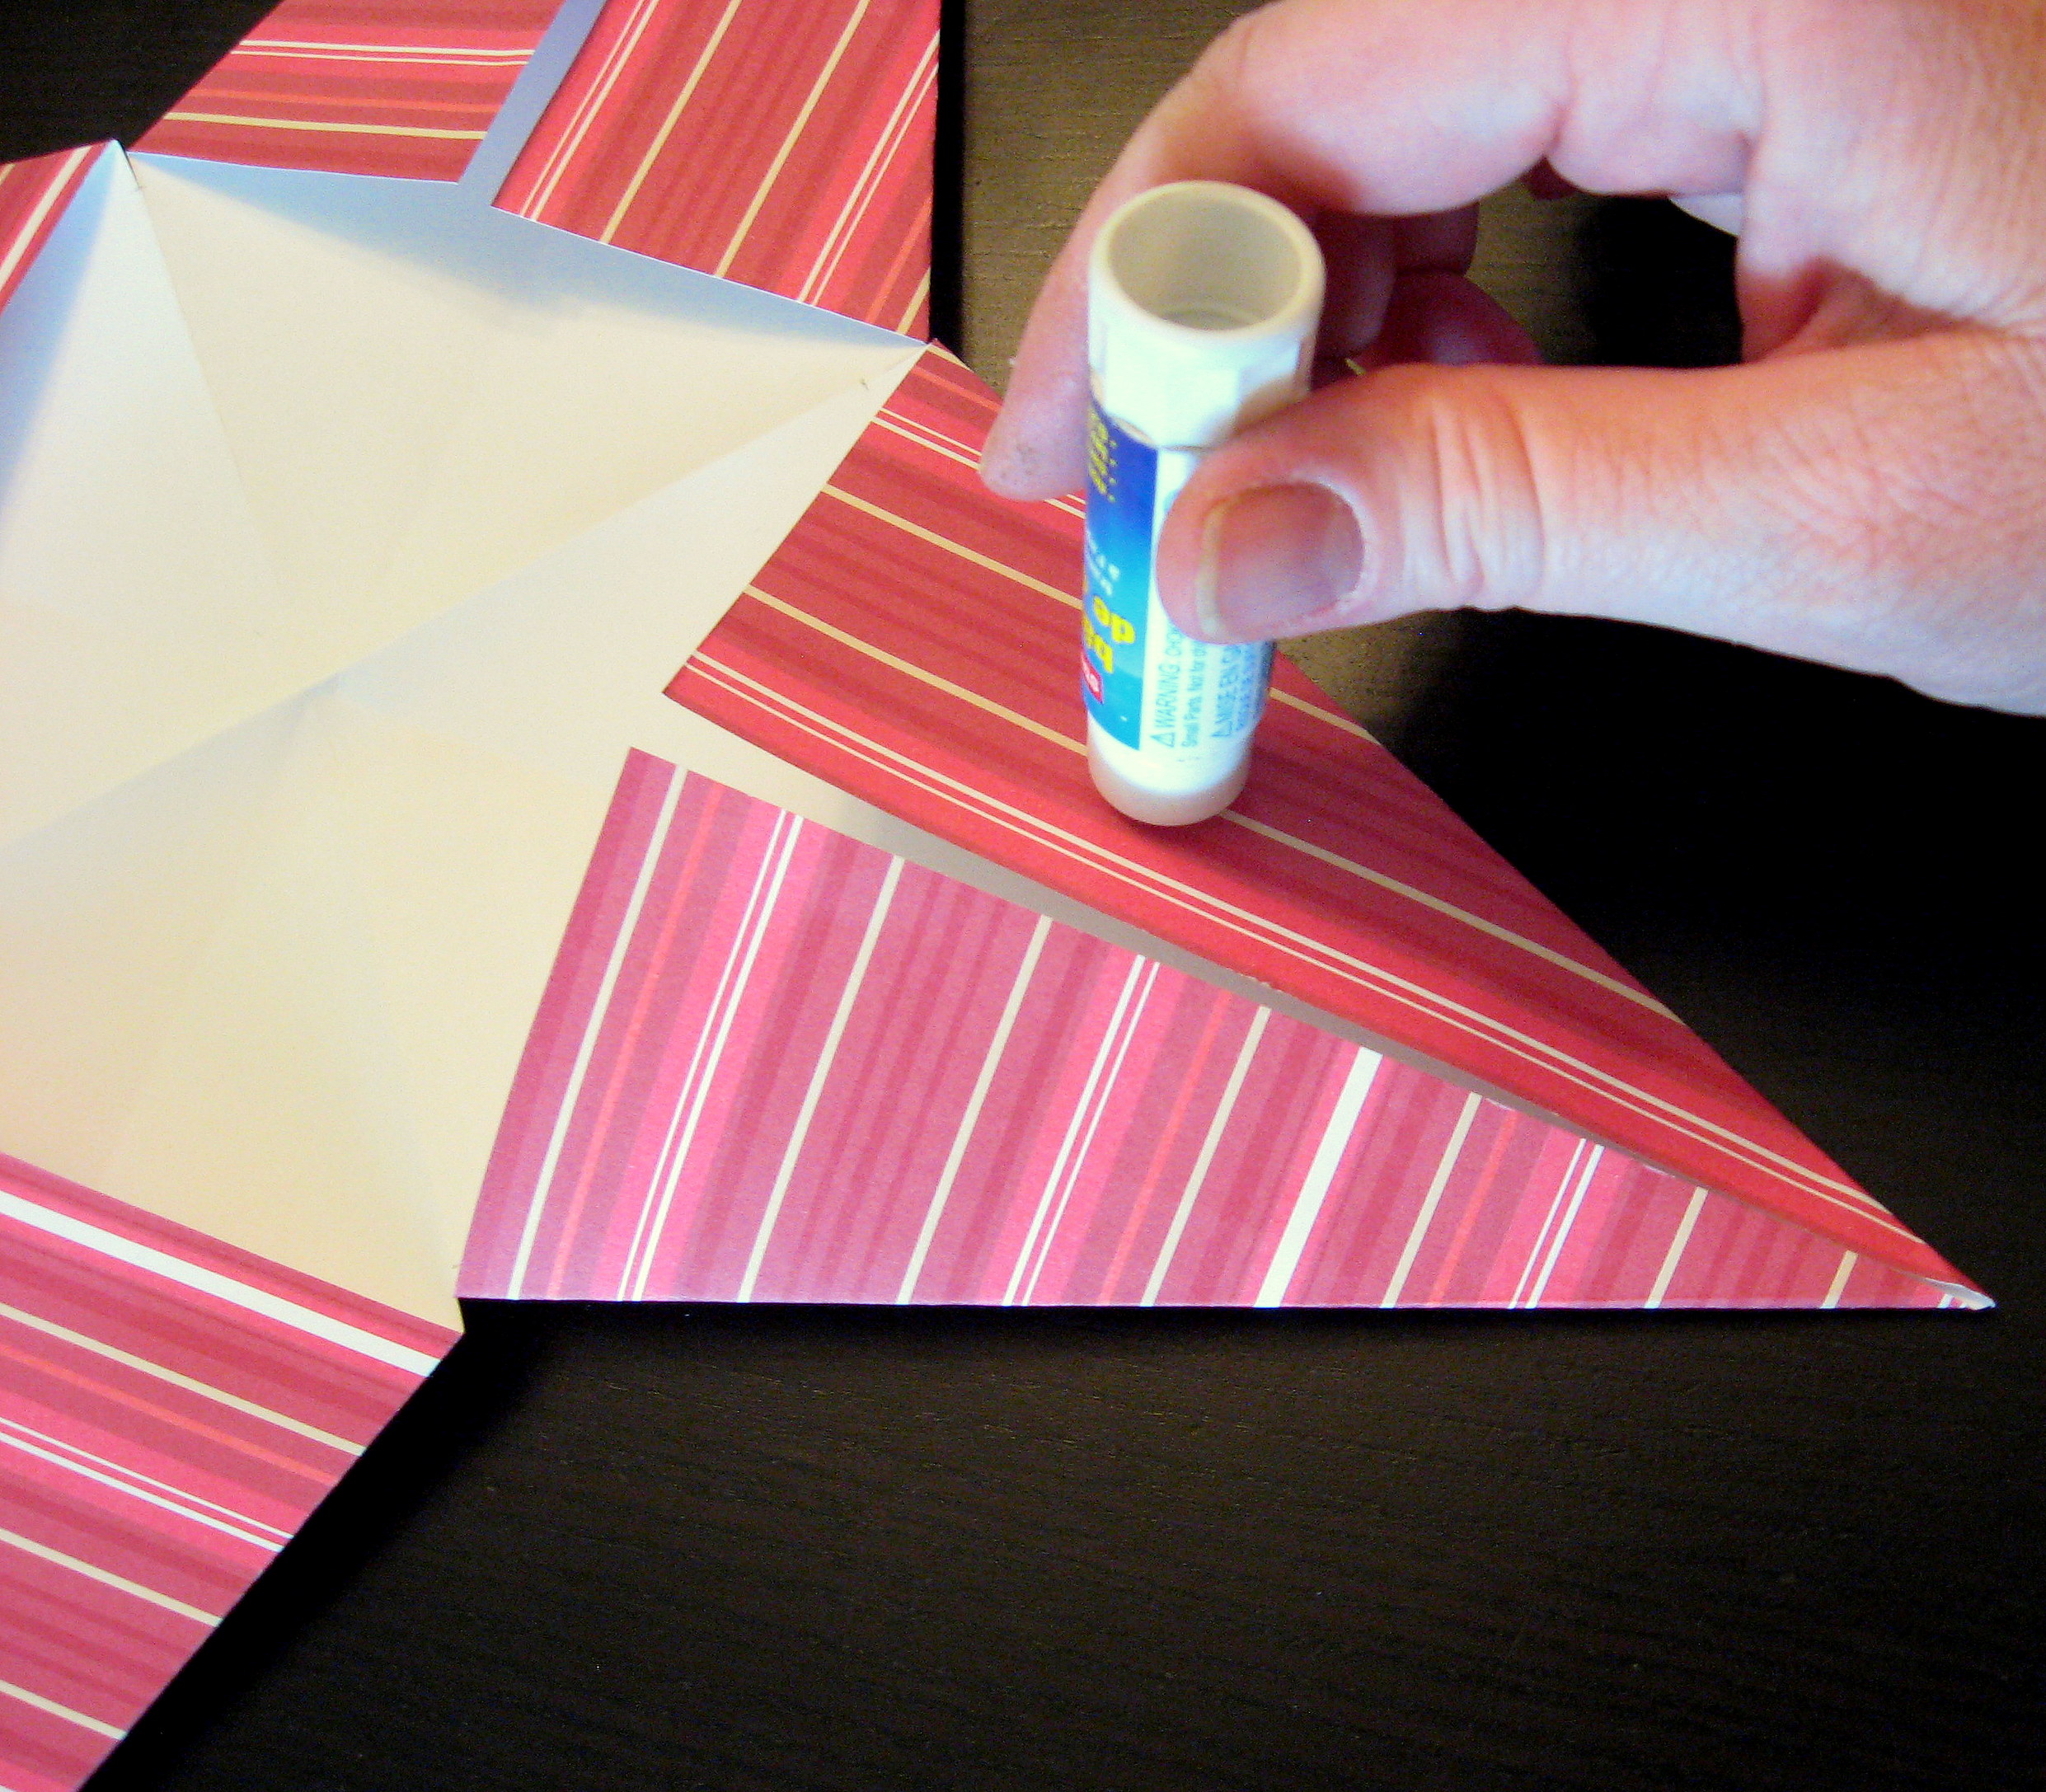
then position the other flap on top of it and hold for a minute until it dries.
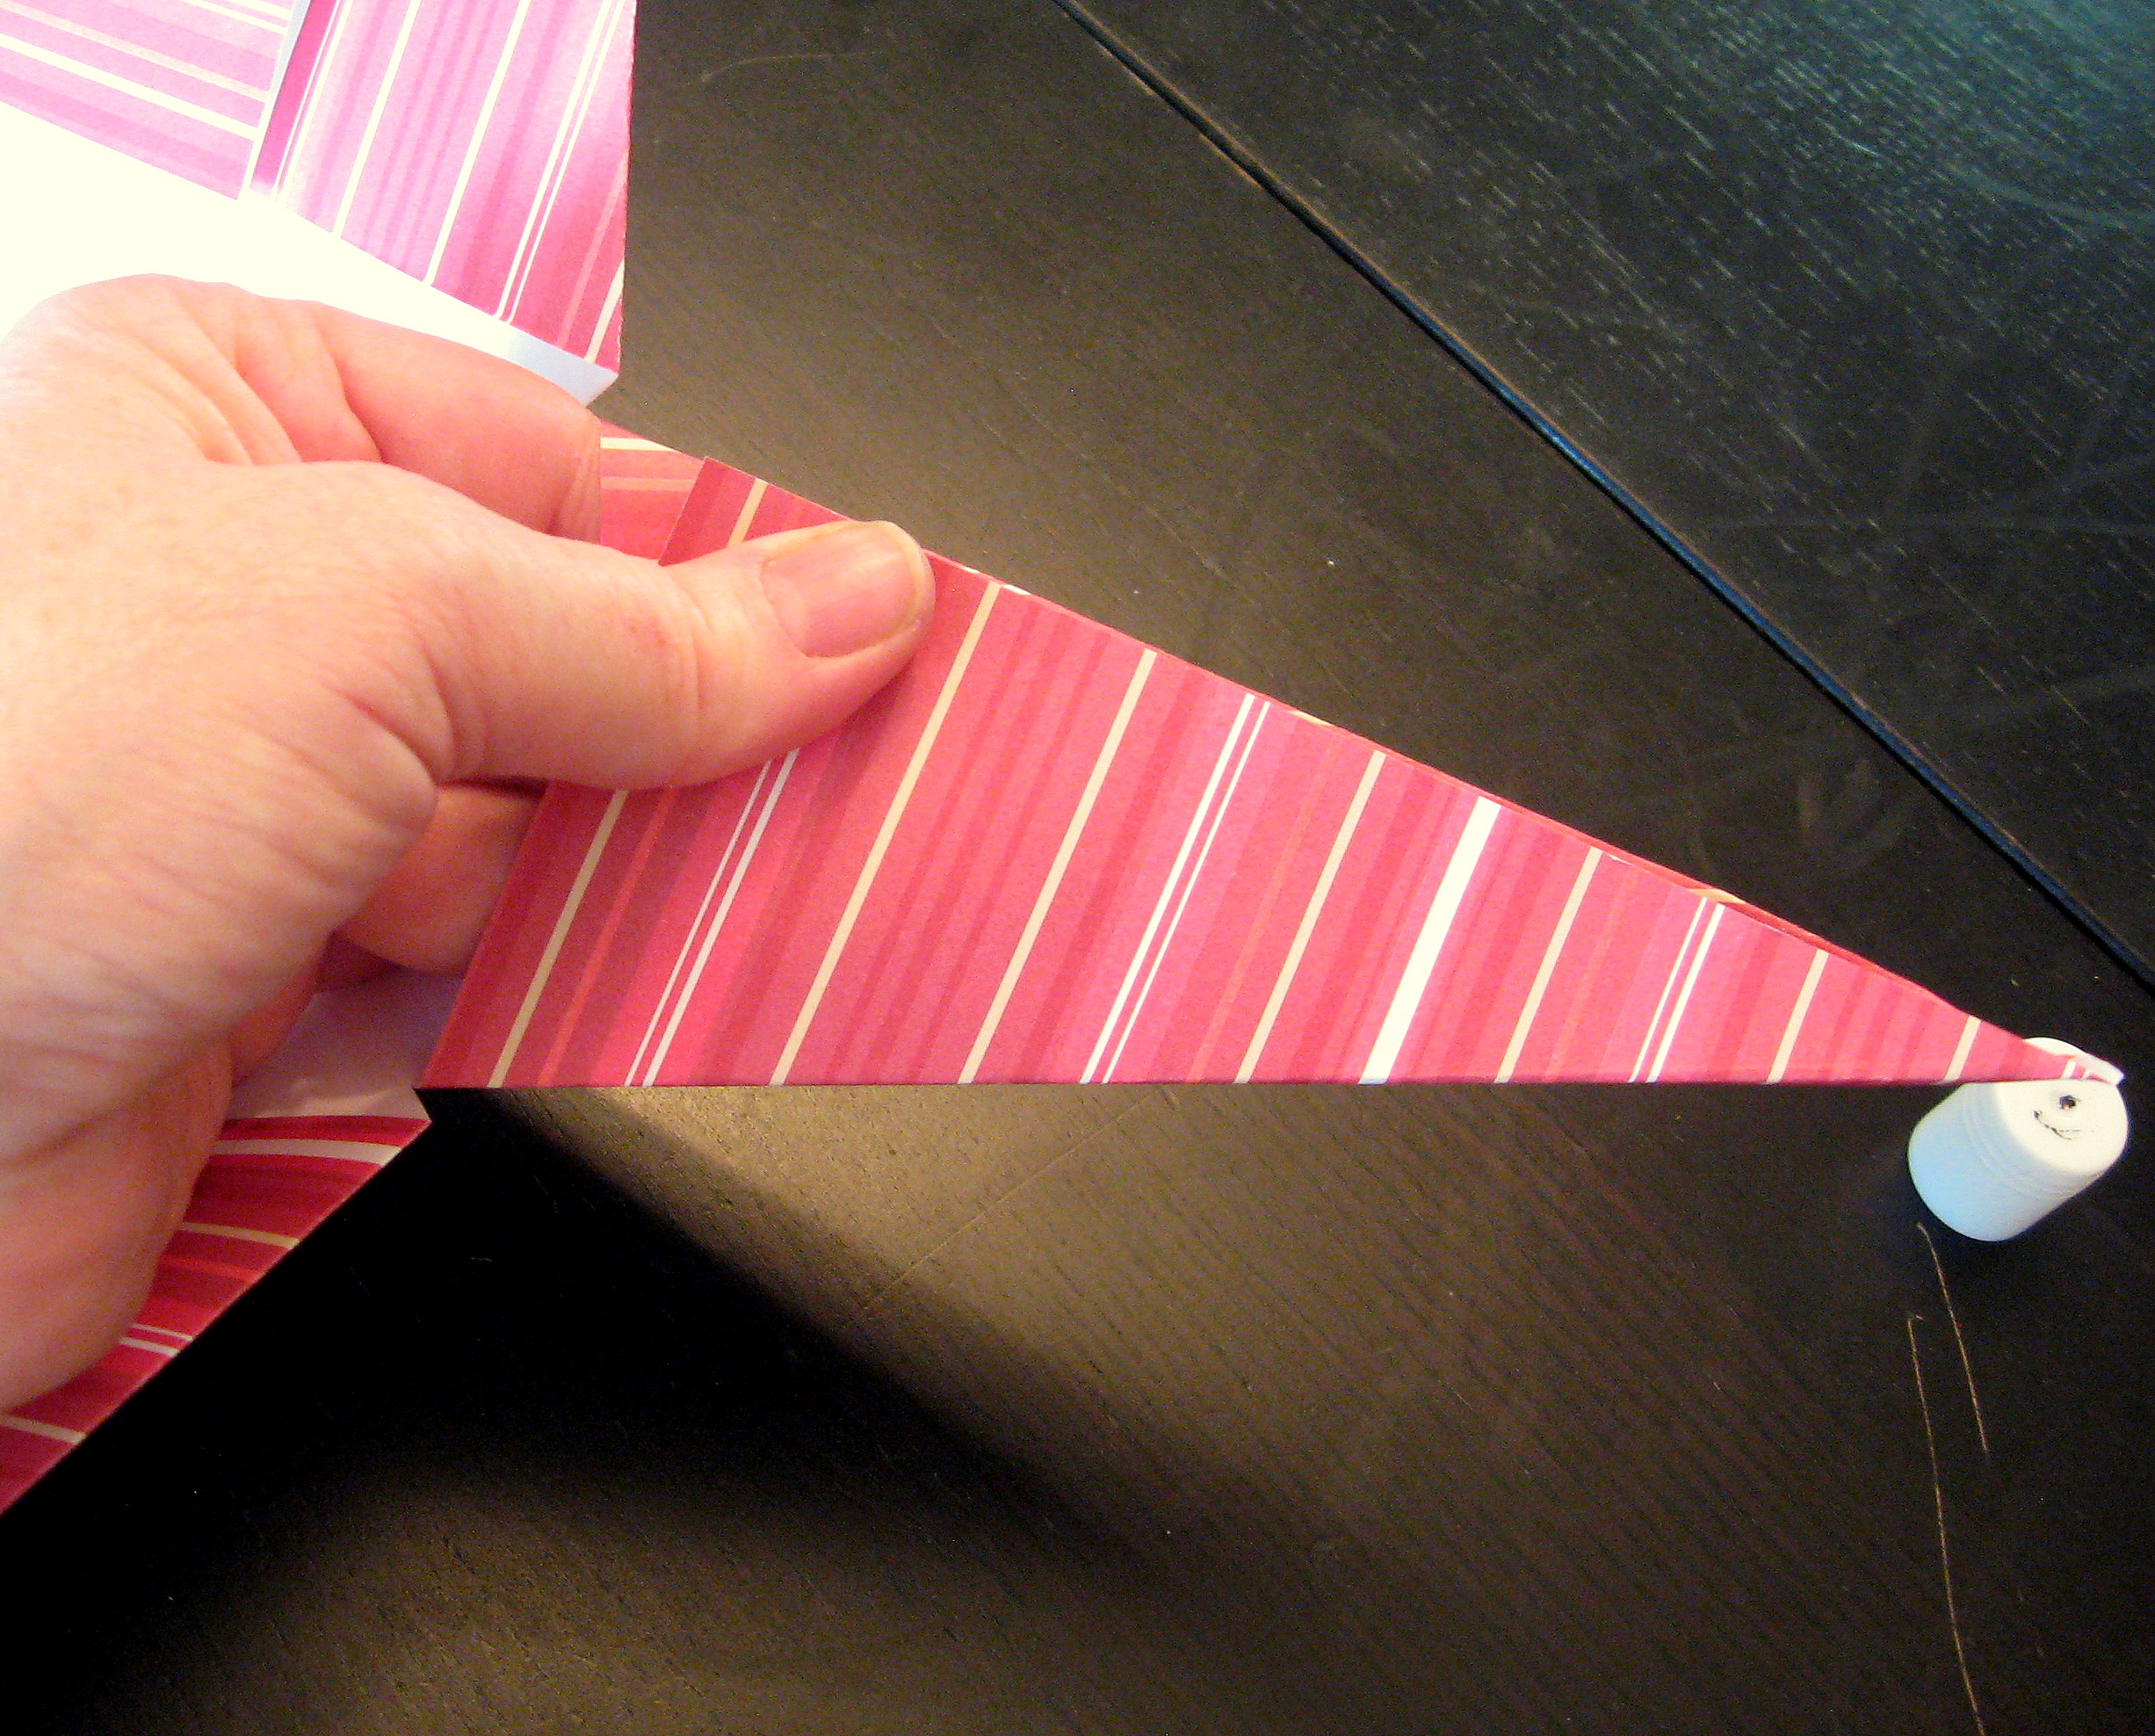
Once all 4 points are glued, it will look like this:
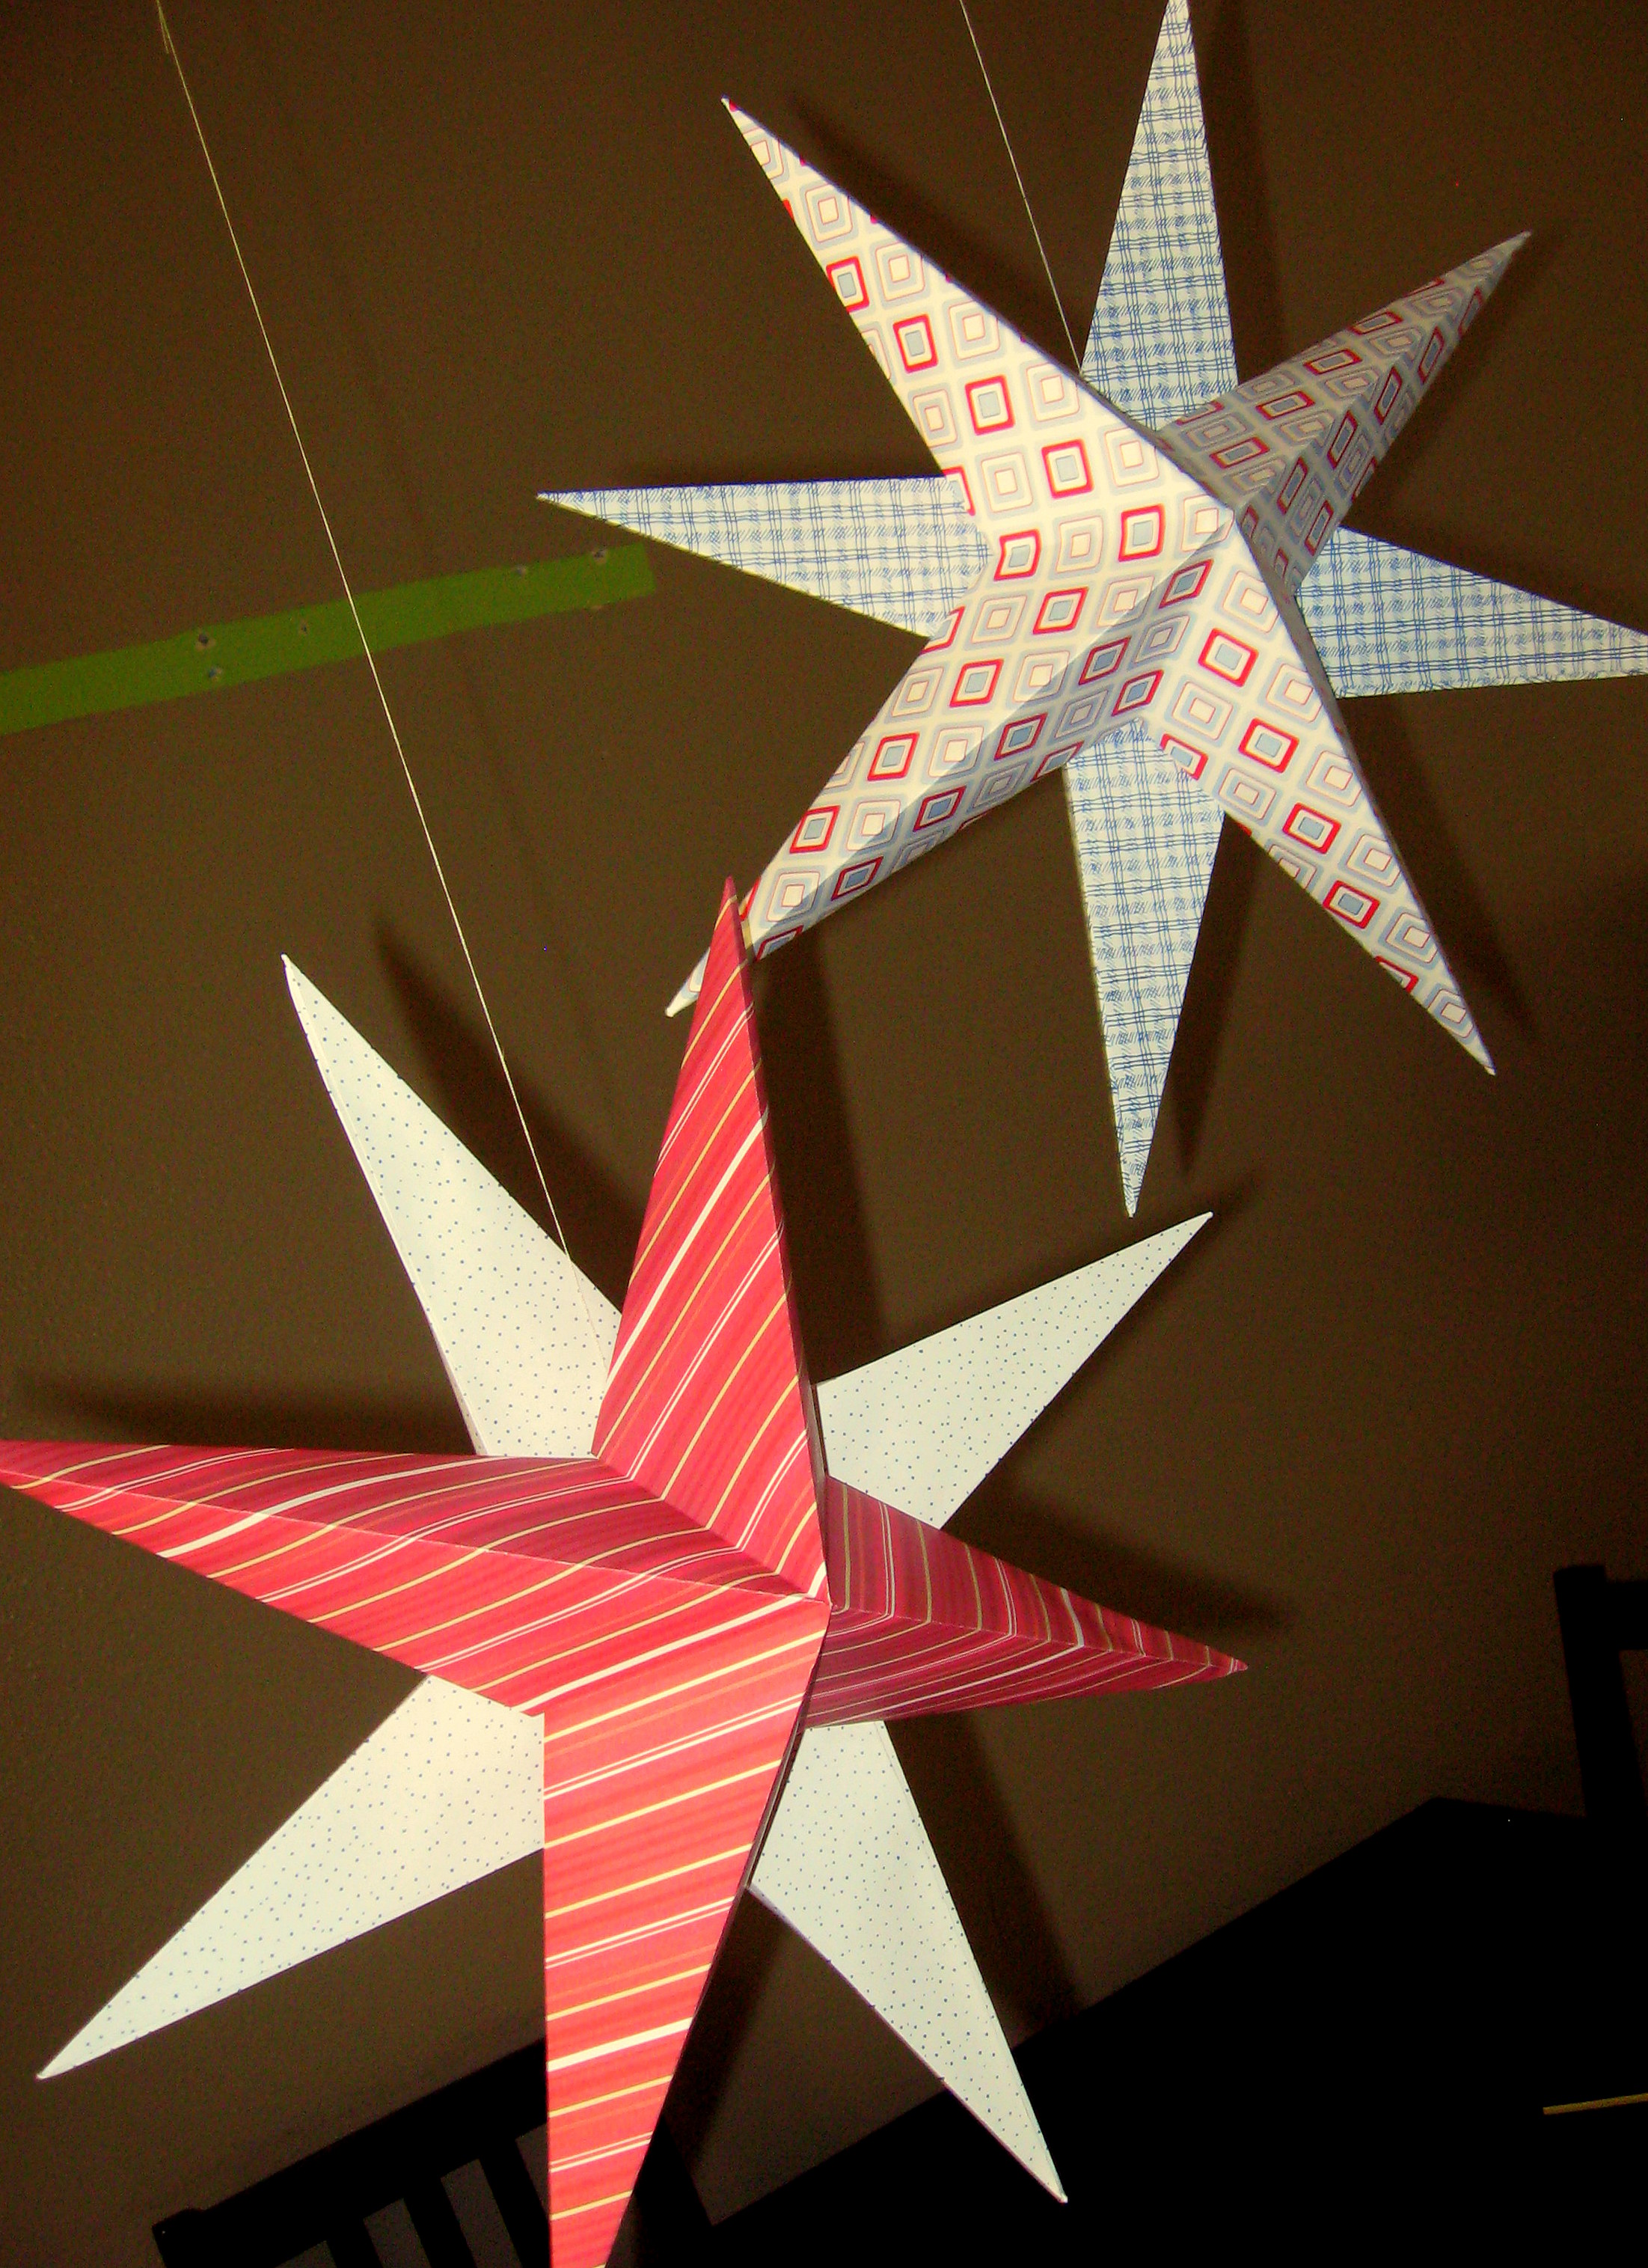
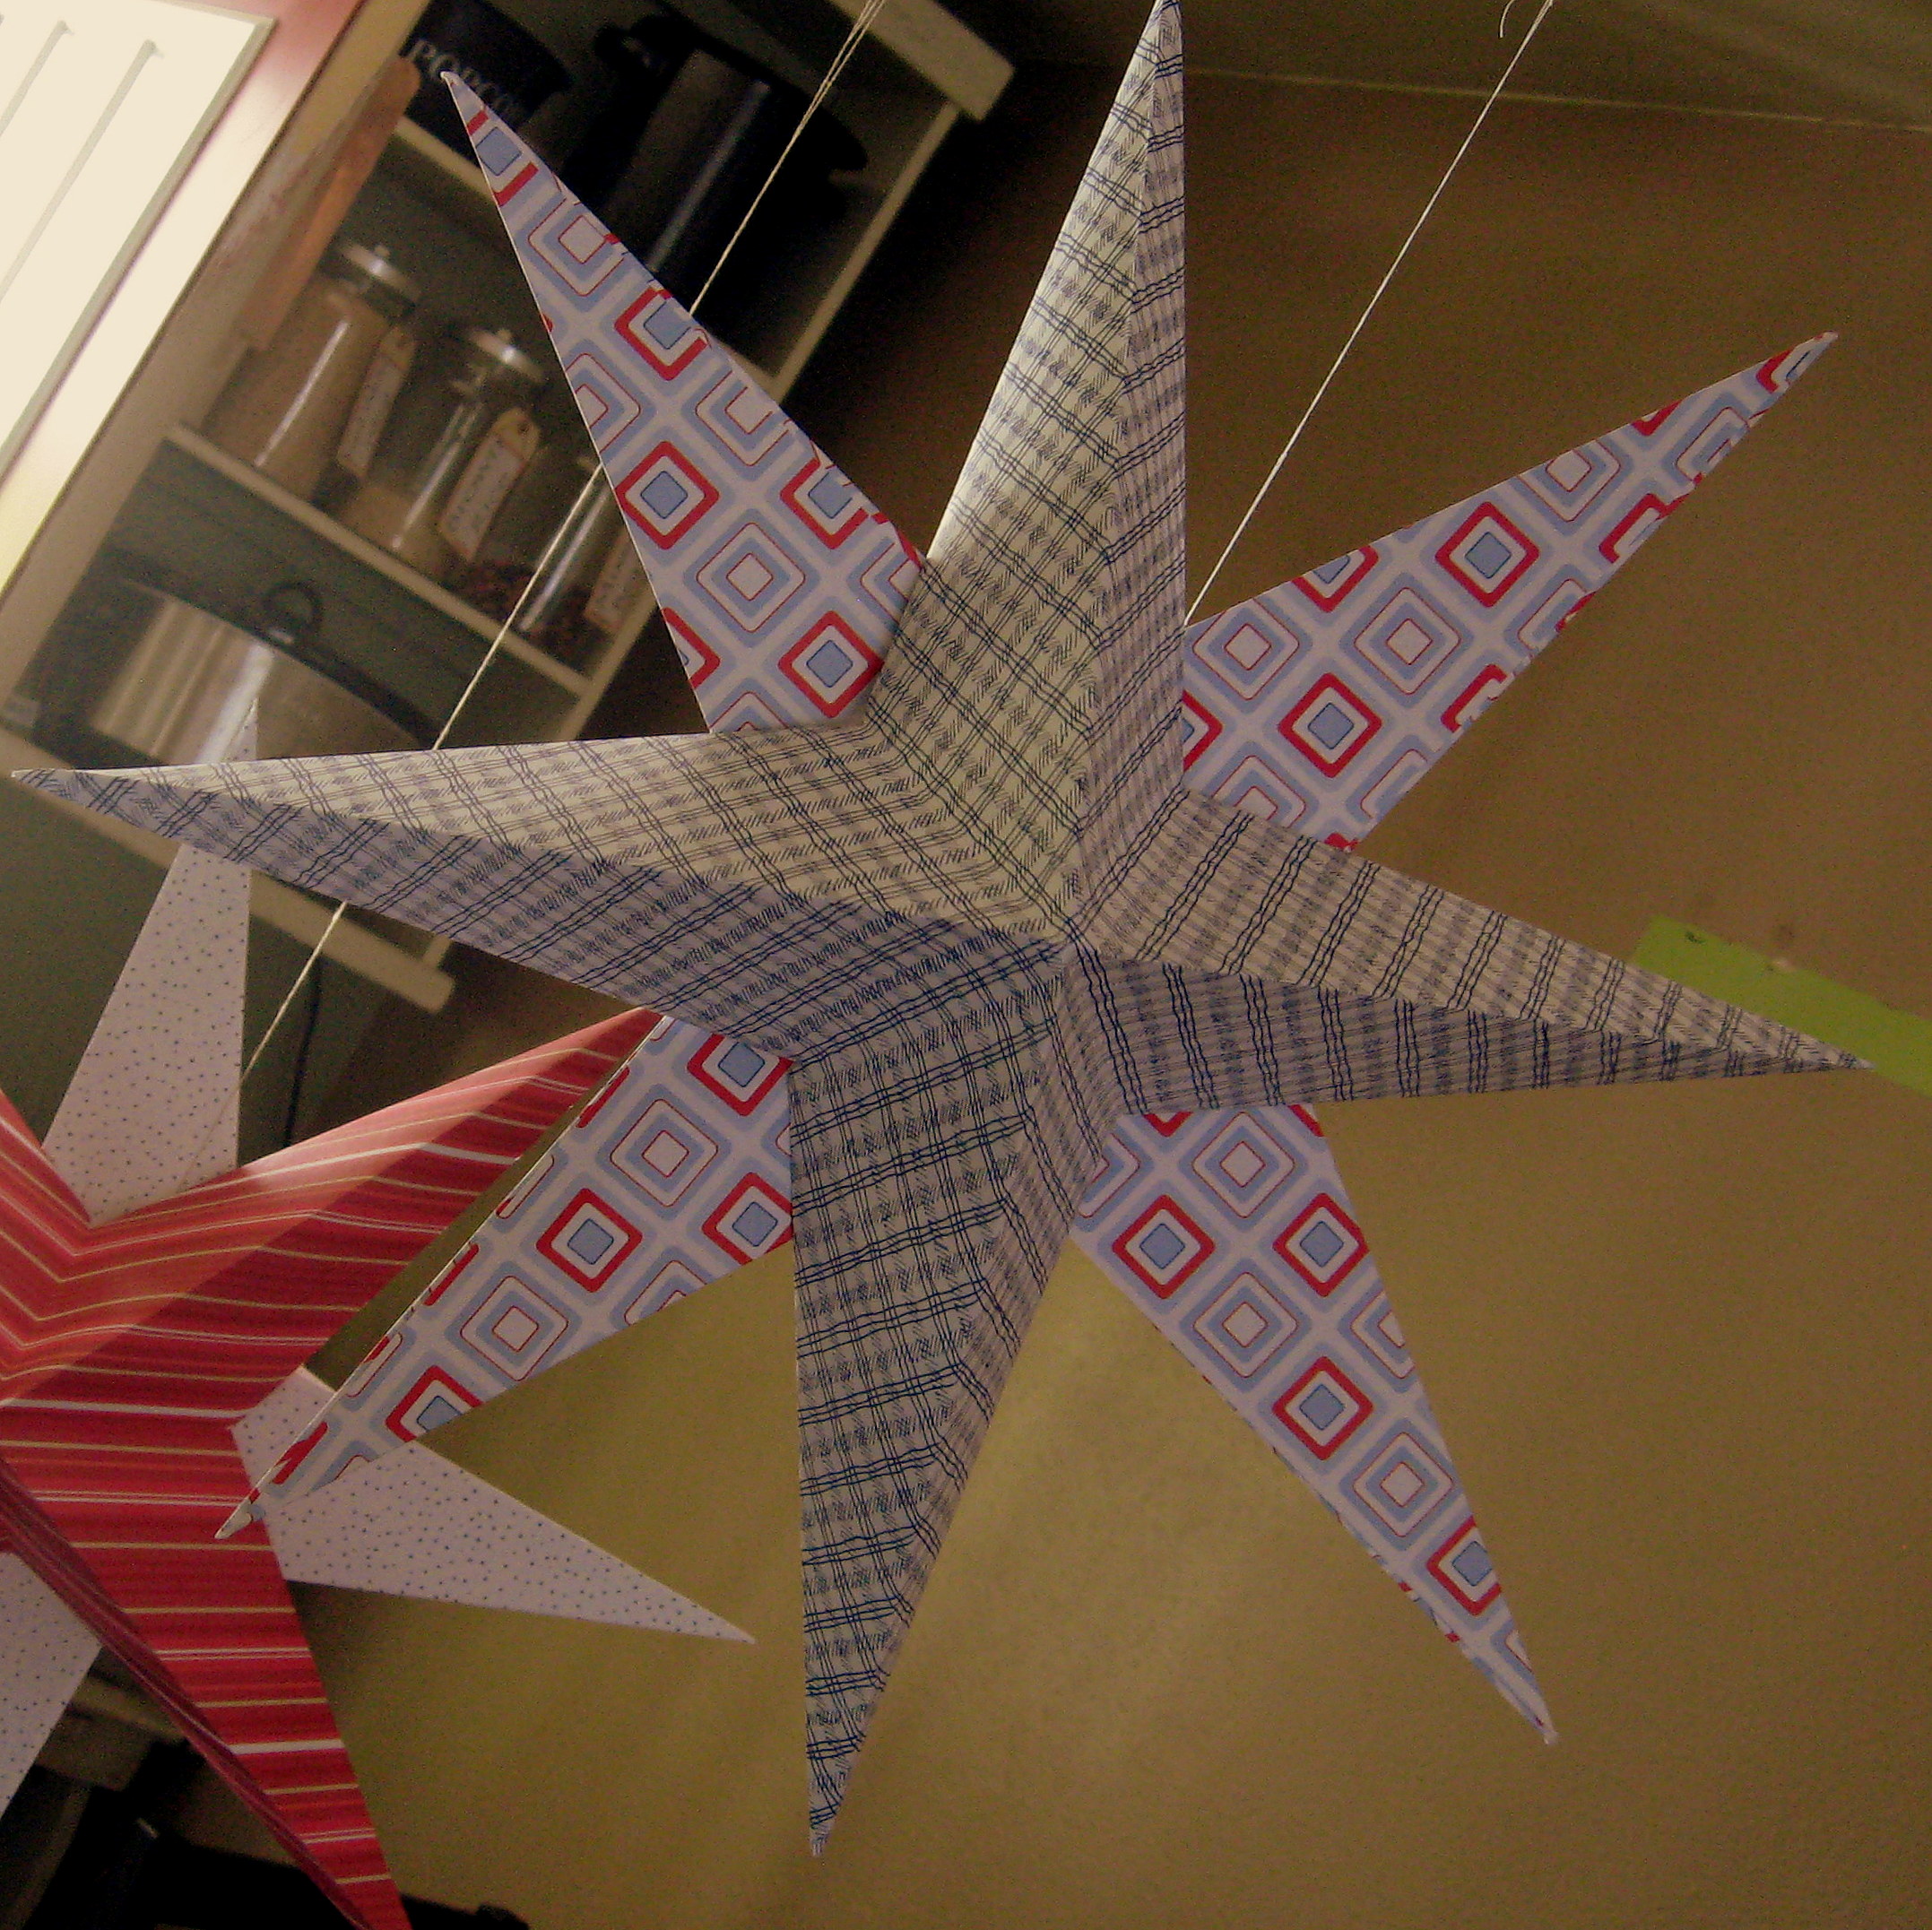
Now make a second one, exactly the same way, and attach them together back to back – double stick tape or sticky dots work great for this. Use a needle to thread a piece of string through for hanging.
We hung them from the light above our dining table; don’t judge them too harshly based on this bad picture quality – I either had to open the door to get natural light, which made them swing and spin from the wind, or try the pictures with the door closed and glaring overhead light! In person they are super cute!
PickYourPlum! Chalkboard Frames! Two Color Band Silicone Watch! Casserole Carriers!


Vintage Is As Vintage Does – Chalkboard Frames
Nothing says old school like a chalkboard.
Starting at $10.99 (56% off) Retail: $24.99
Get with the Times – Two Color Band Silicone Watch
Even your watch relaxes in the Summertime.
Starting at $6.99 (65% off) Retail: $19.99
Reheat Not Necessary – Casserole Carriers Summer Blowout
Grab it while it’s hot.
Starting at $5.00 (79% off) Retail: $24.99
Plus lots more CUTE deals!
LOTS of cute deals! Inexpensive shipping!
New at Zulily! KEEN Men, Women, Kids – up to 65% off – totes, mules & more!

KEEN Men, Women, Kids – up to 65% off – totes, mules & more!
HybridLife: It’s KEEN’s mantra and part of everything they do, from shoe designs to commitments to nonprofits. HybridLife means innovation—like giving sandals the signature bumper toe for extra protection. HybridLife means creative solutions—like becoming a part of organizations that can inspire change. And, perhaps most of all, it means making play a key part of every day.
A PYP Best Blog! Making Shabby Wooden Fireworks!
Just in case you missed this article on making shabby wooden fireworks the first time we shared it a couple of years ago, we are republishing it. After Sharon wrote this blog originally, we got an awesome response. This is one of the PYP Best Blogs!
I was reading someone’s blog today and she said that for her, the hardest thing about blogging was coming up with the first sentence of a post…I didn’t realize how much I agreed until she said it…
SO! Let’s make some fireworks!
I started with this piece of wood that I found in my garage. It is about 1 1/2 inches square, but you could use square, round, bigger, smaller… whatever strikes your fancy! 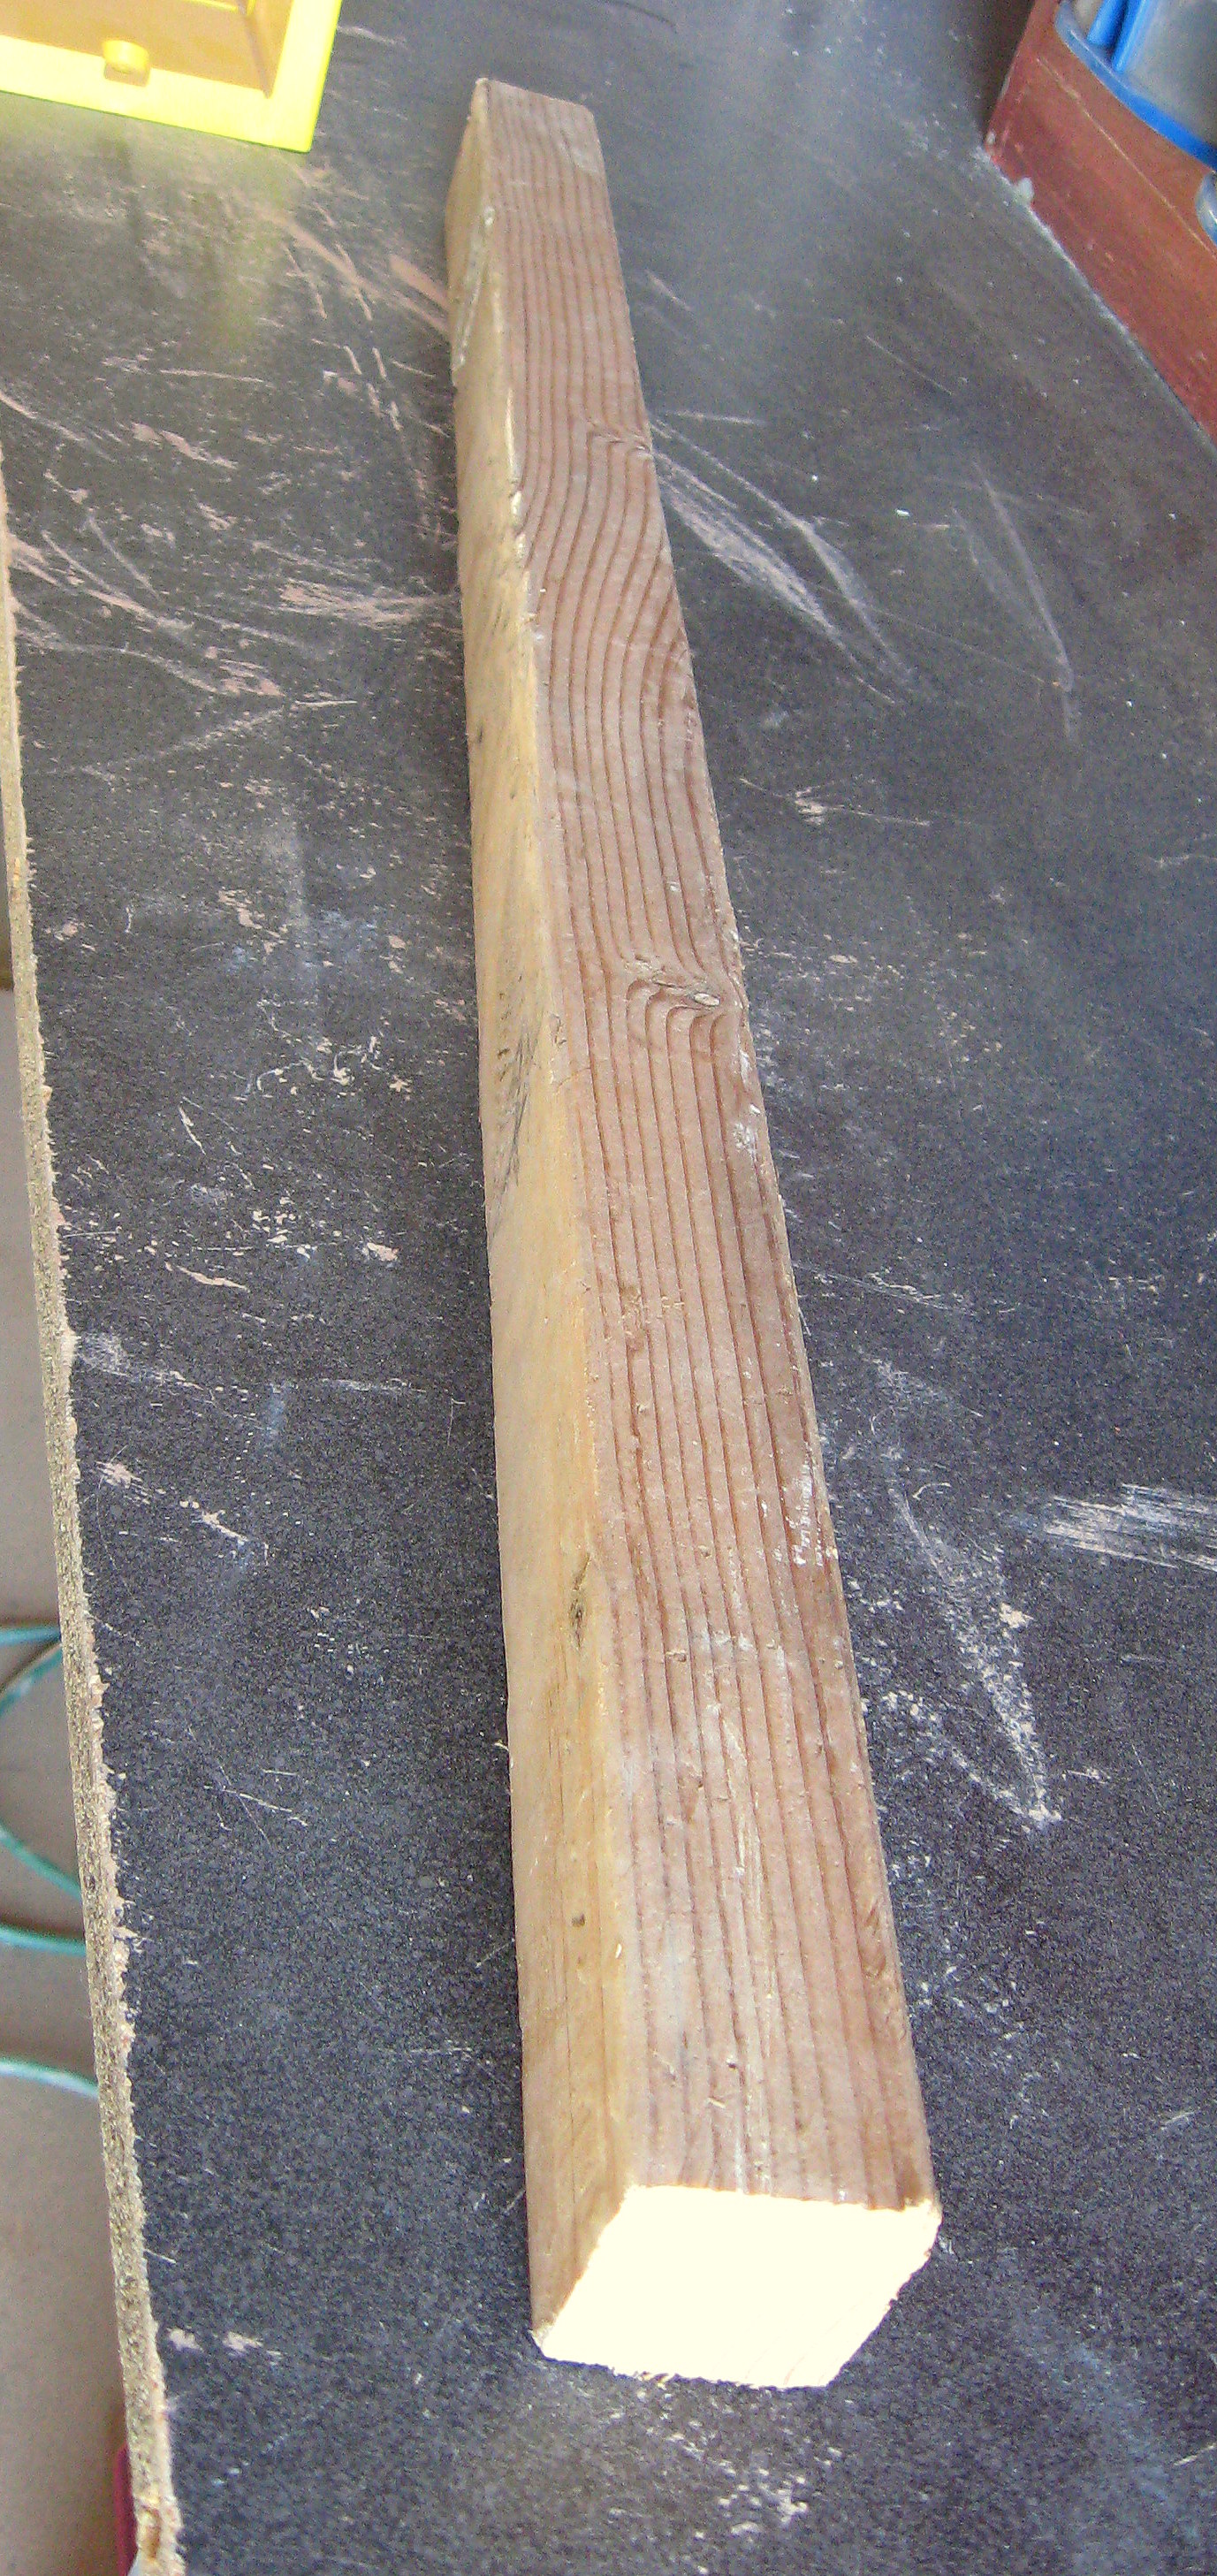
Cut into three pieces…I just eyeballed what I thought looked good – mine are about 10, 8 1/2 and 7 inches – and then give them a good sanding.
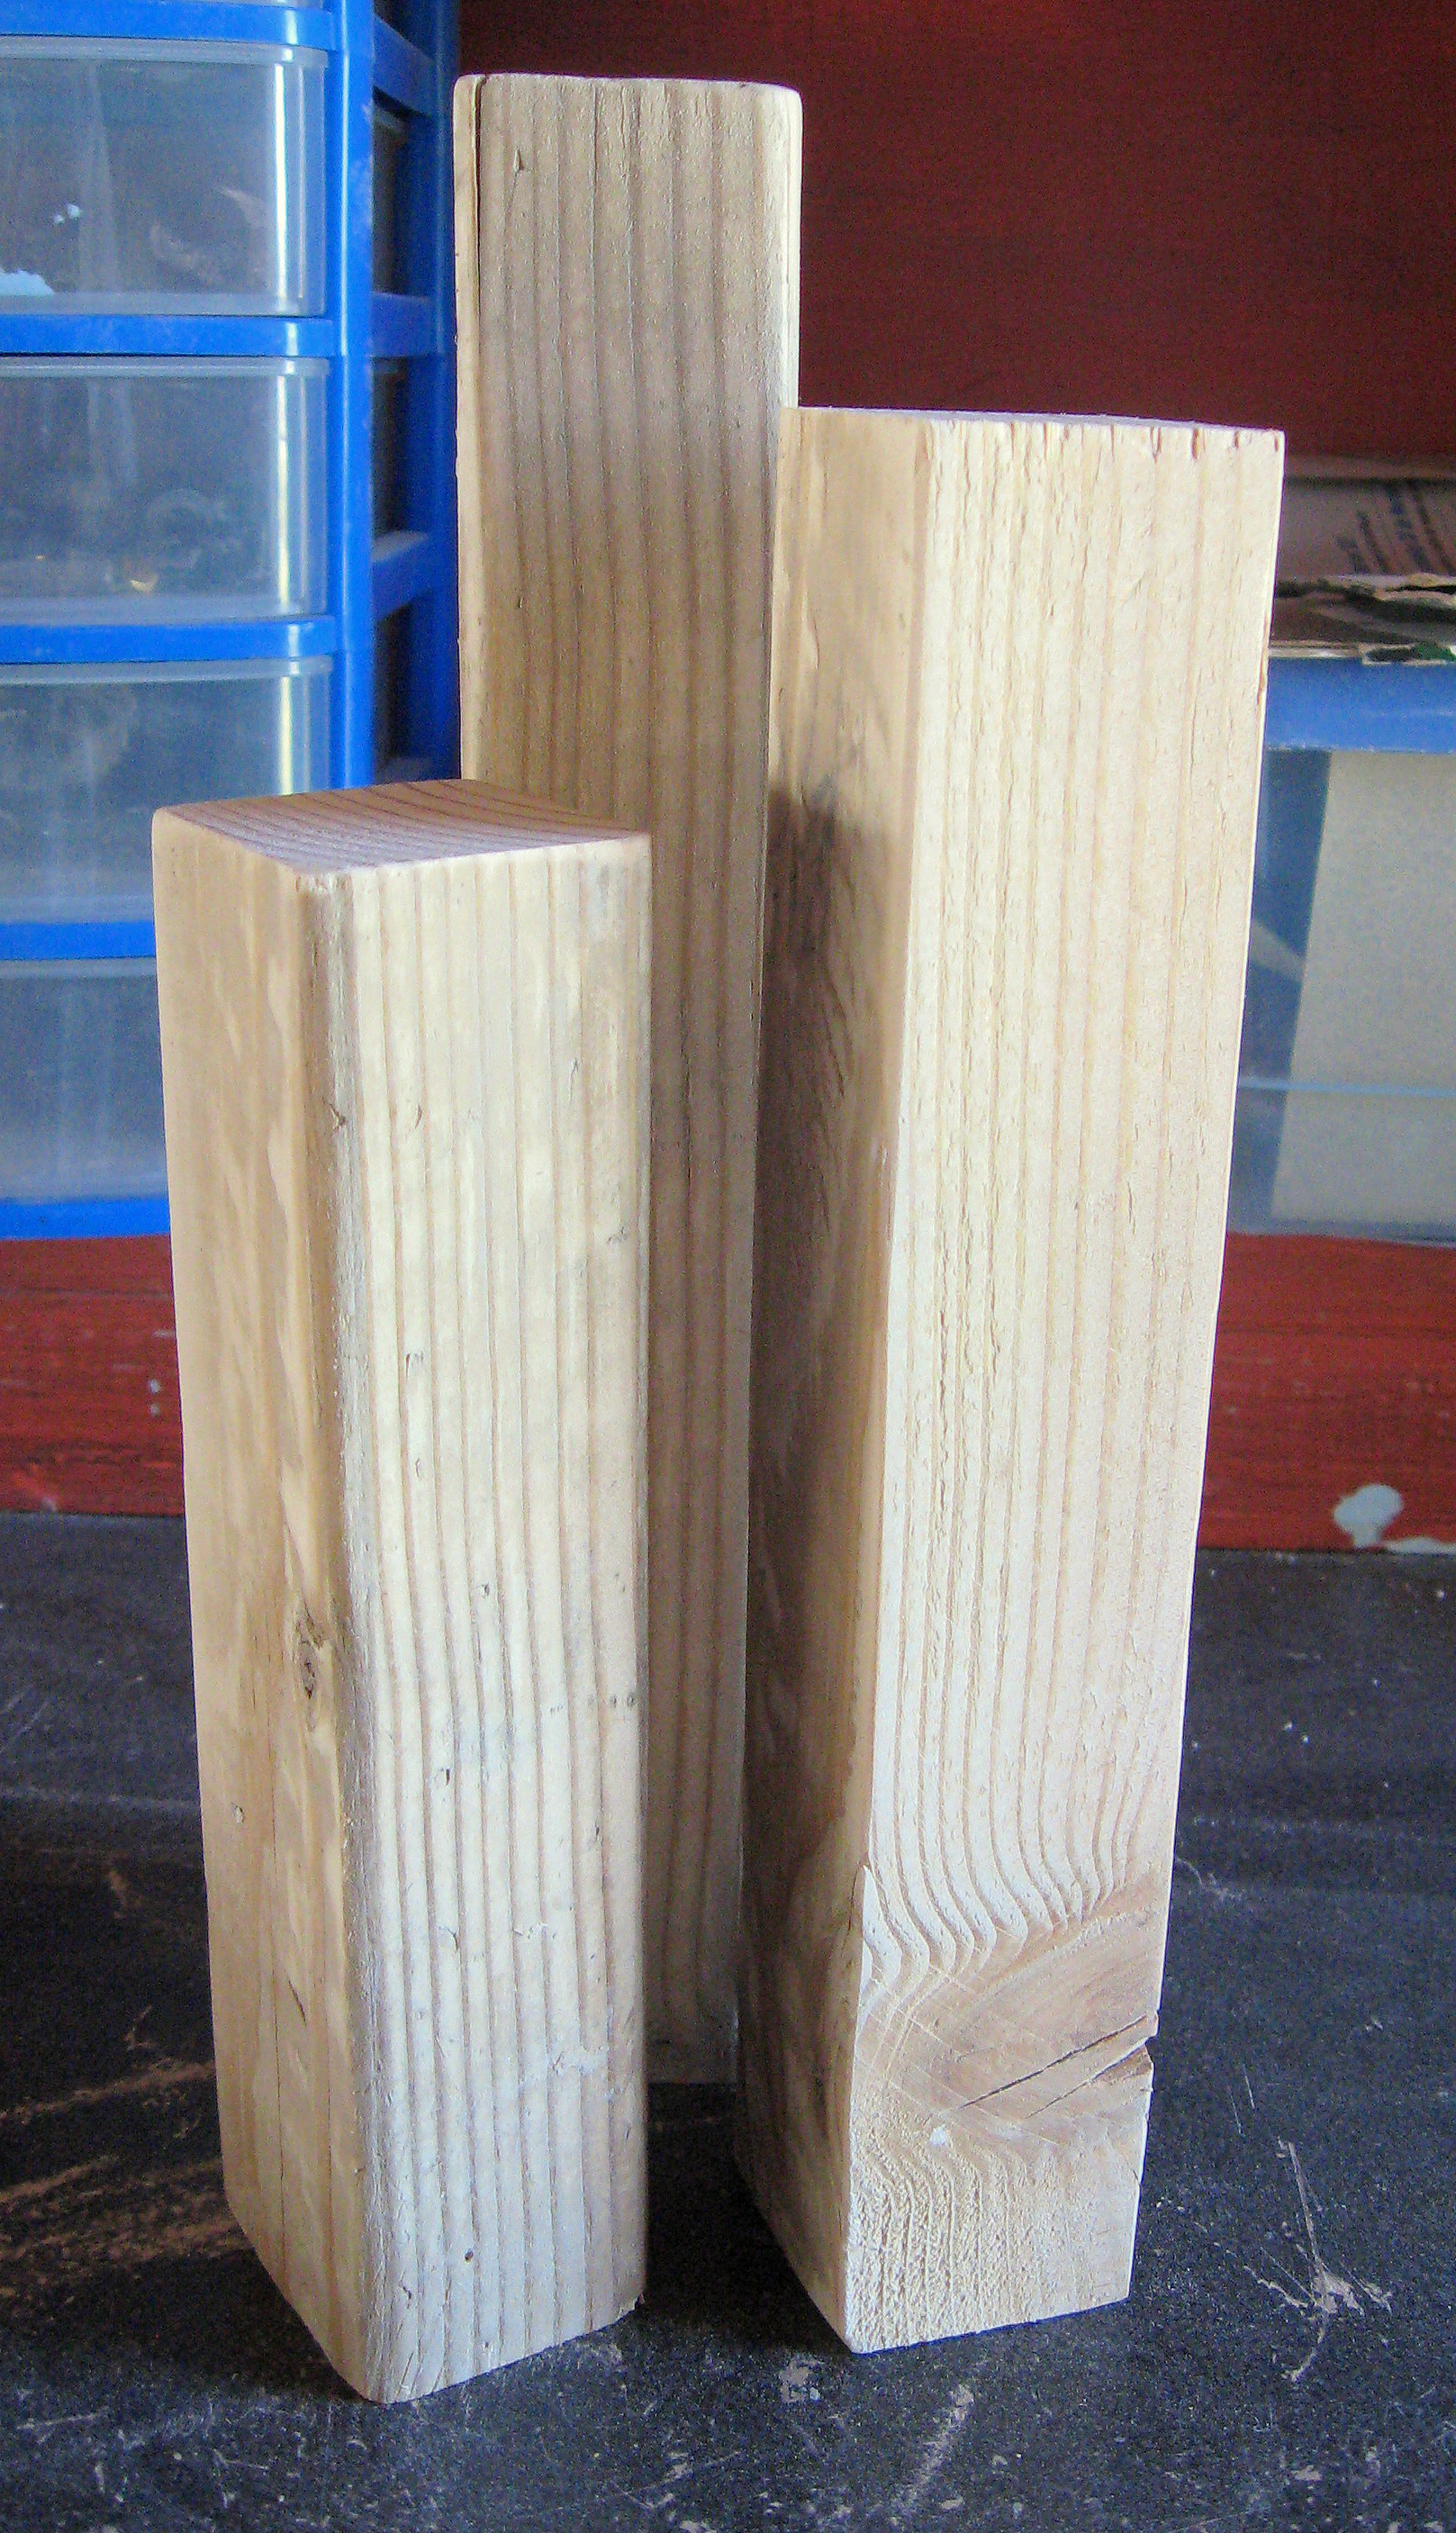
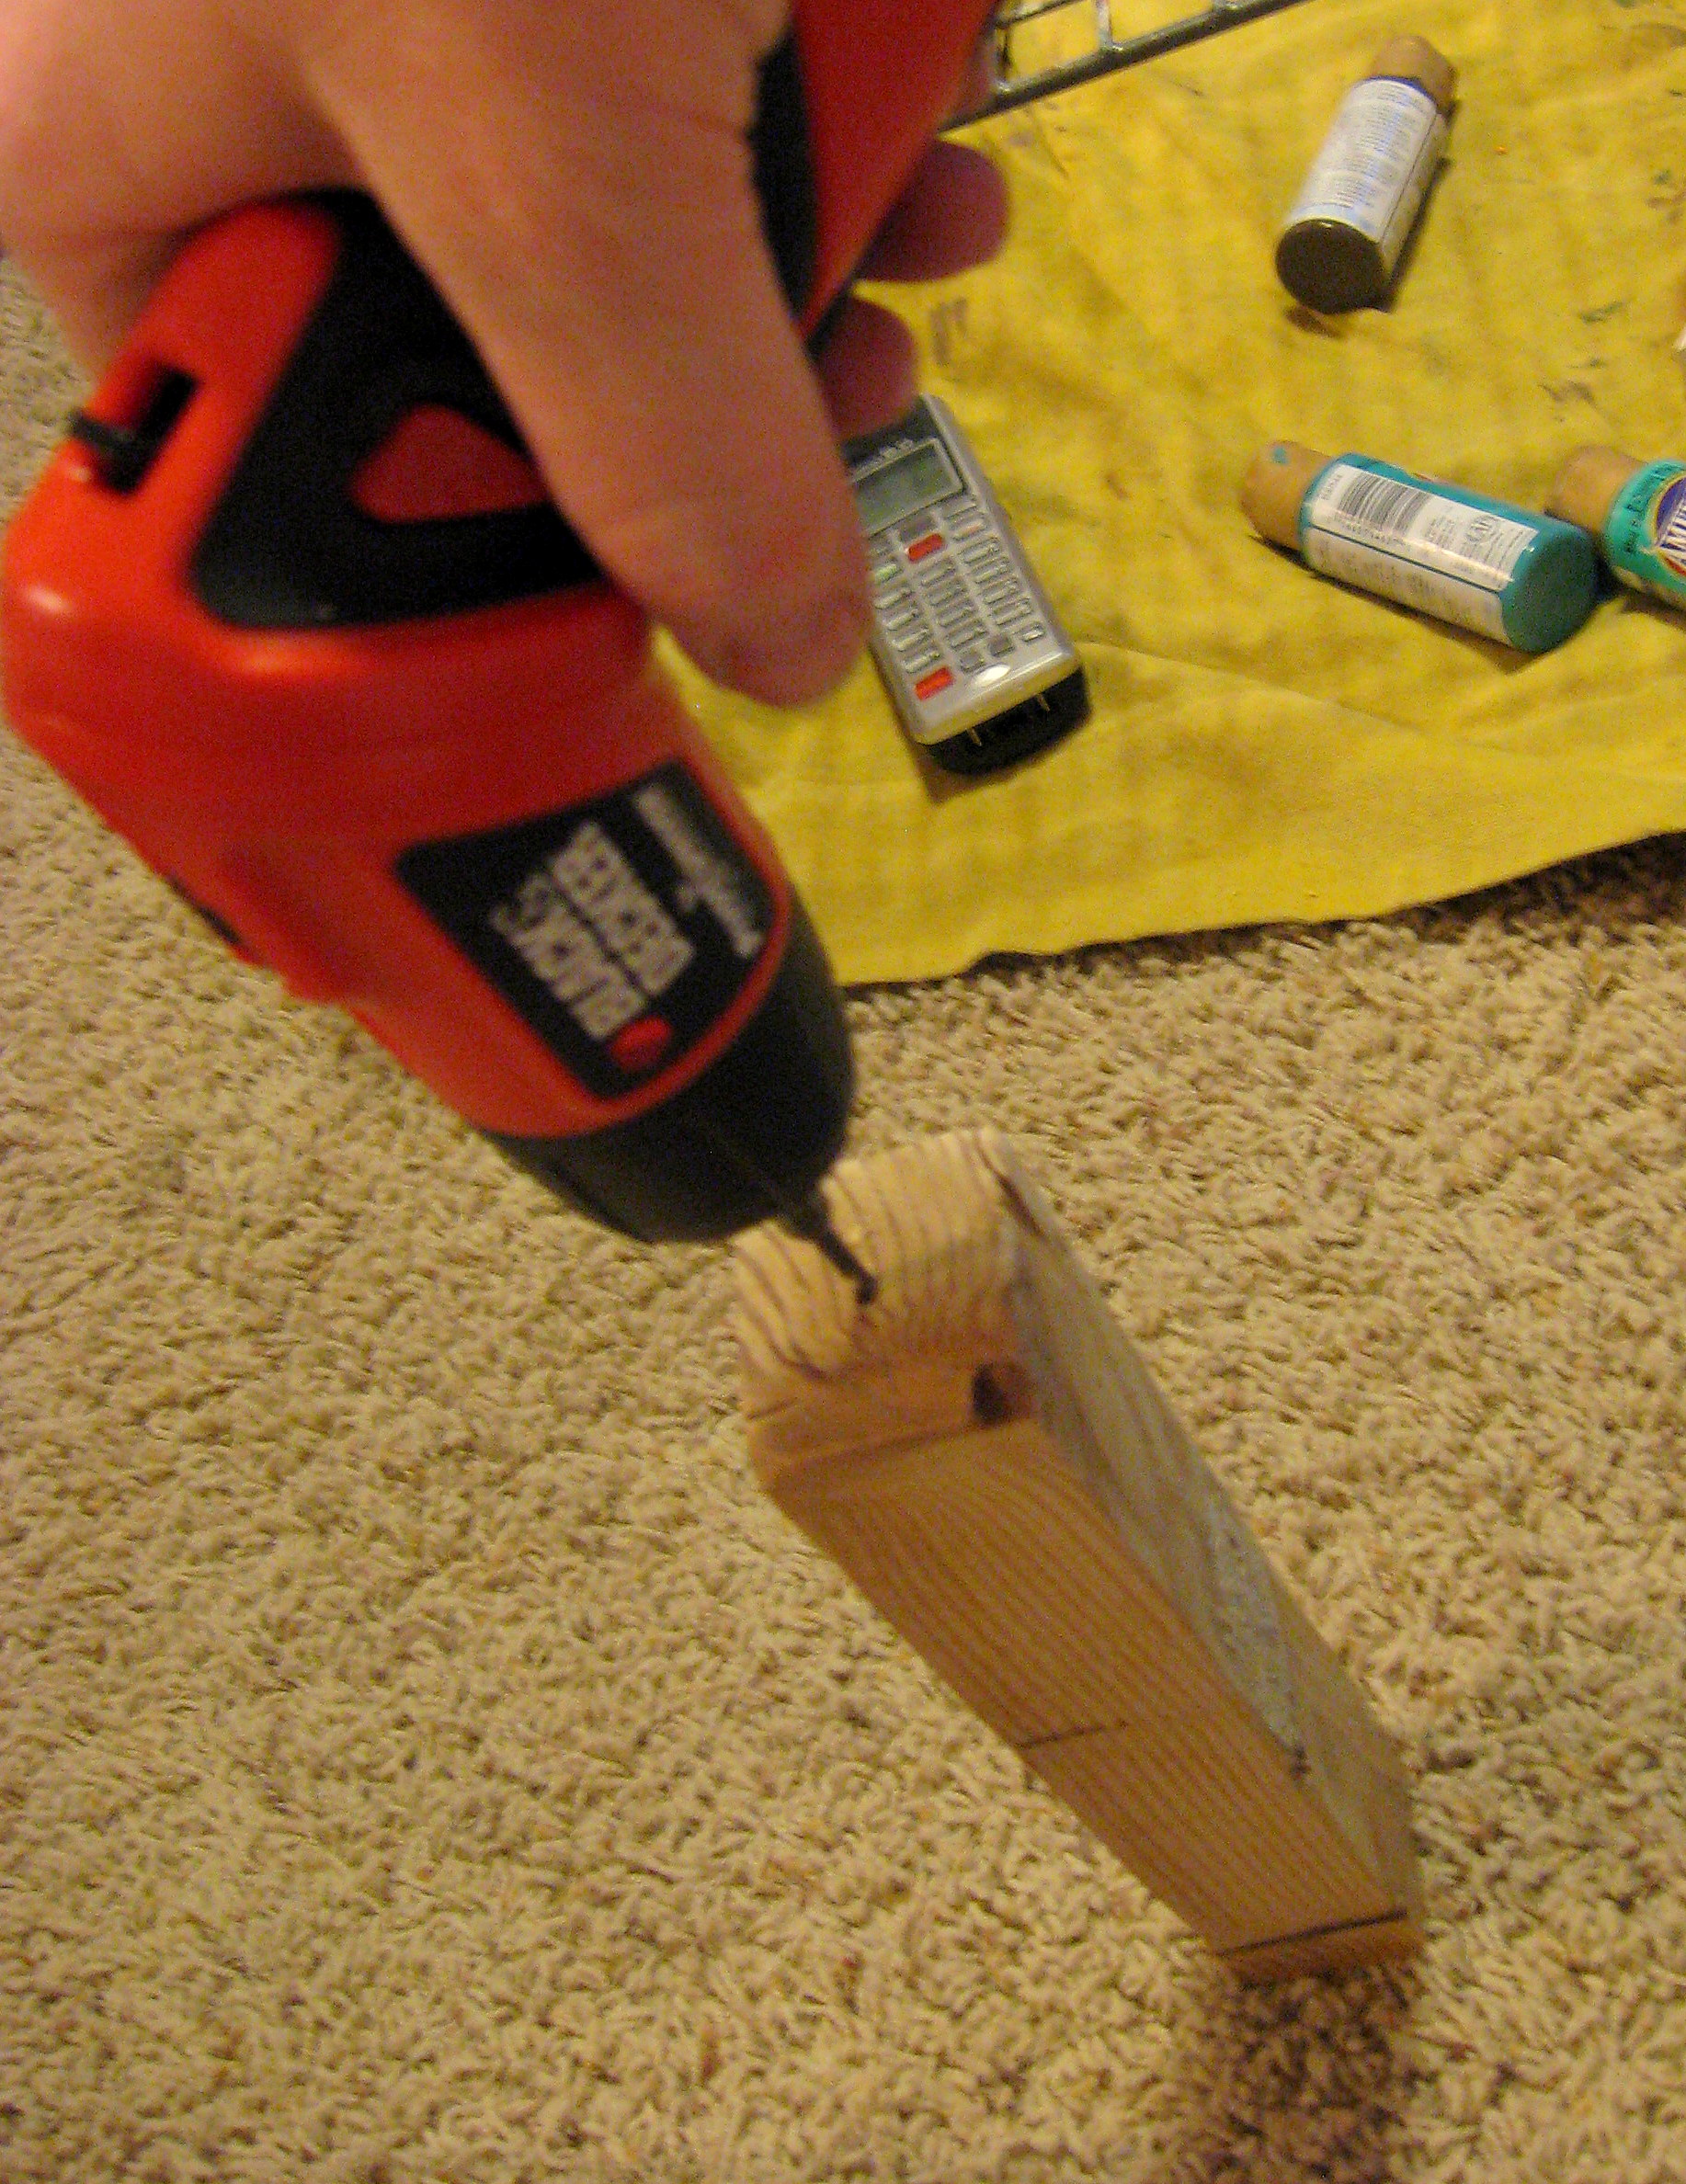
Drill a hole in the middle of the top of each stick – you will use this later for the “fuse” on the fireworks.
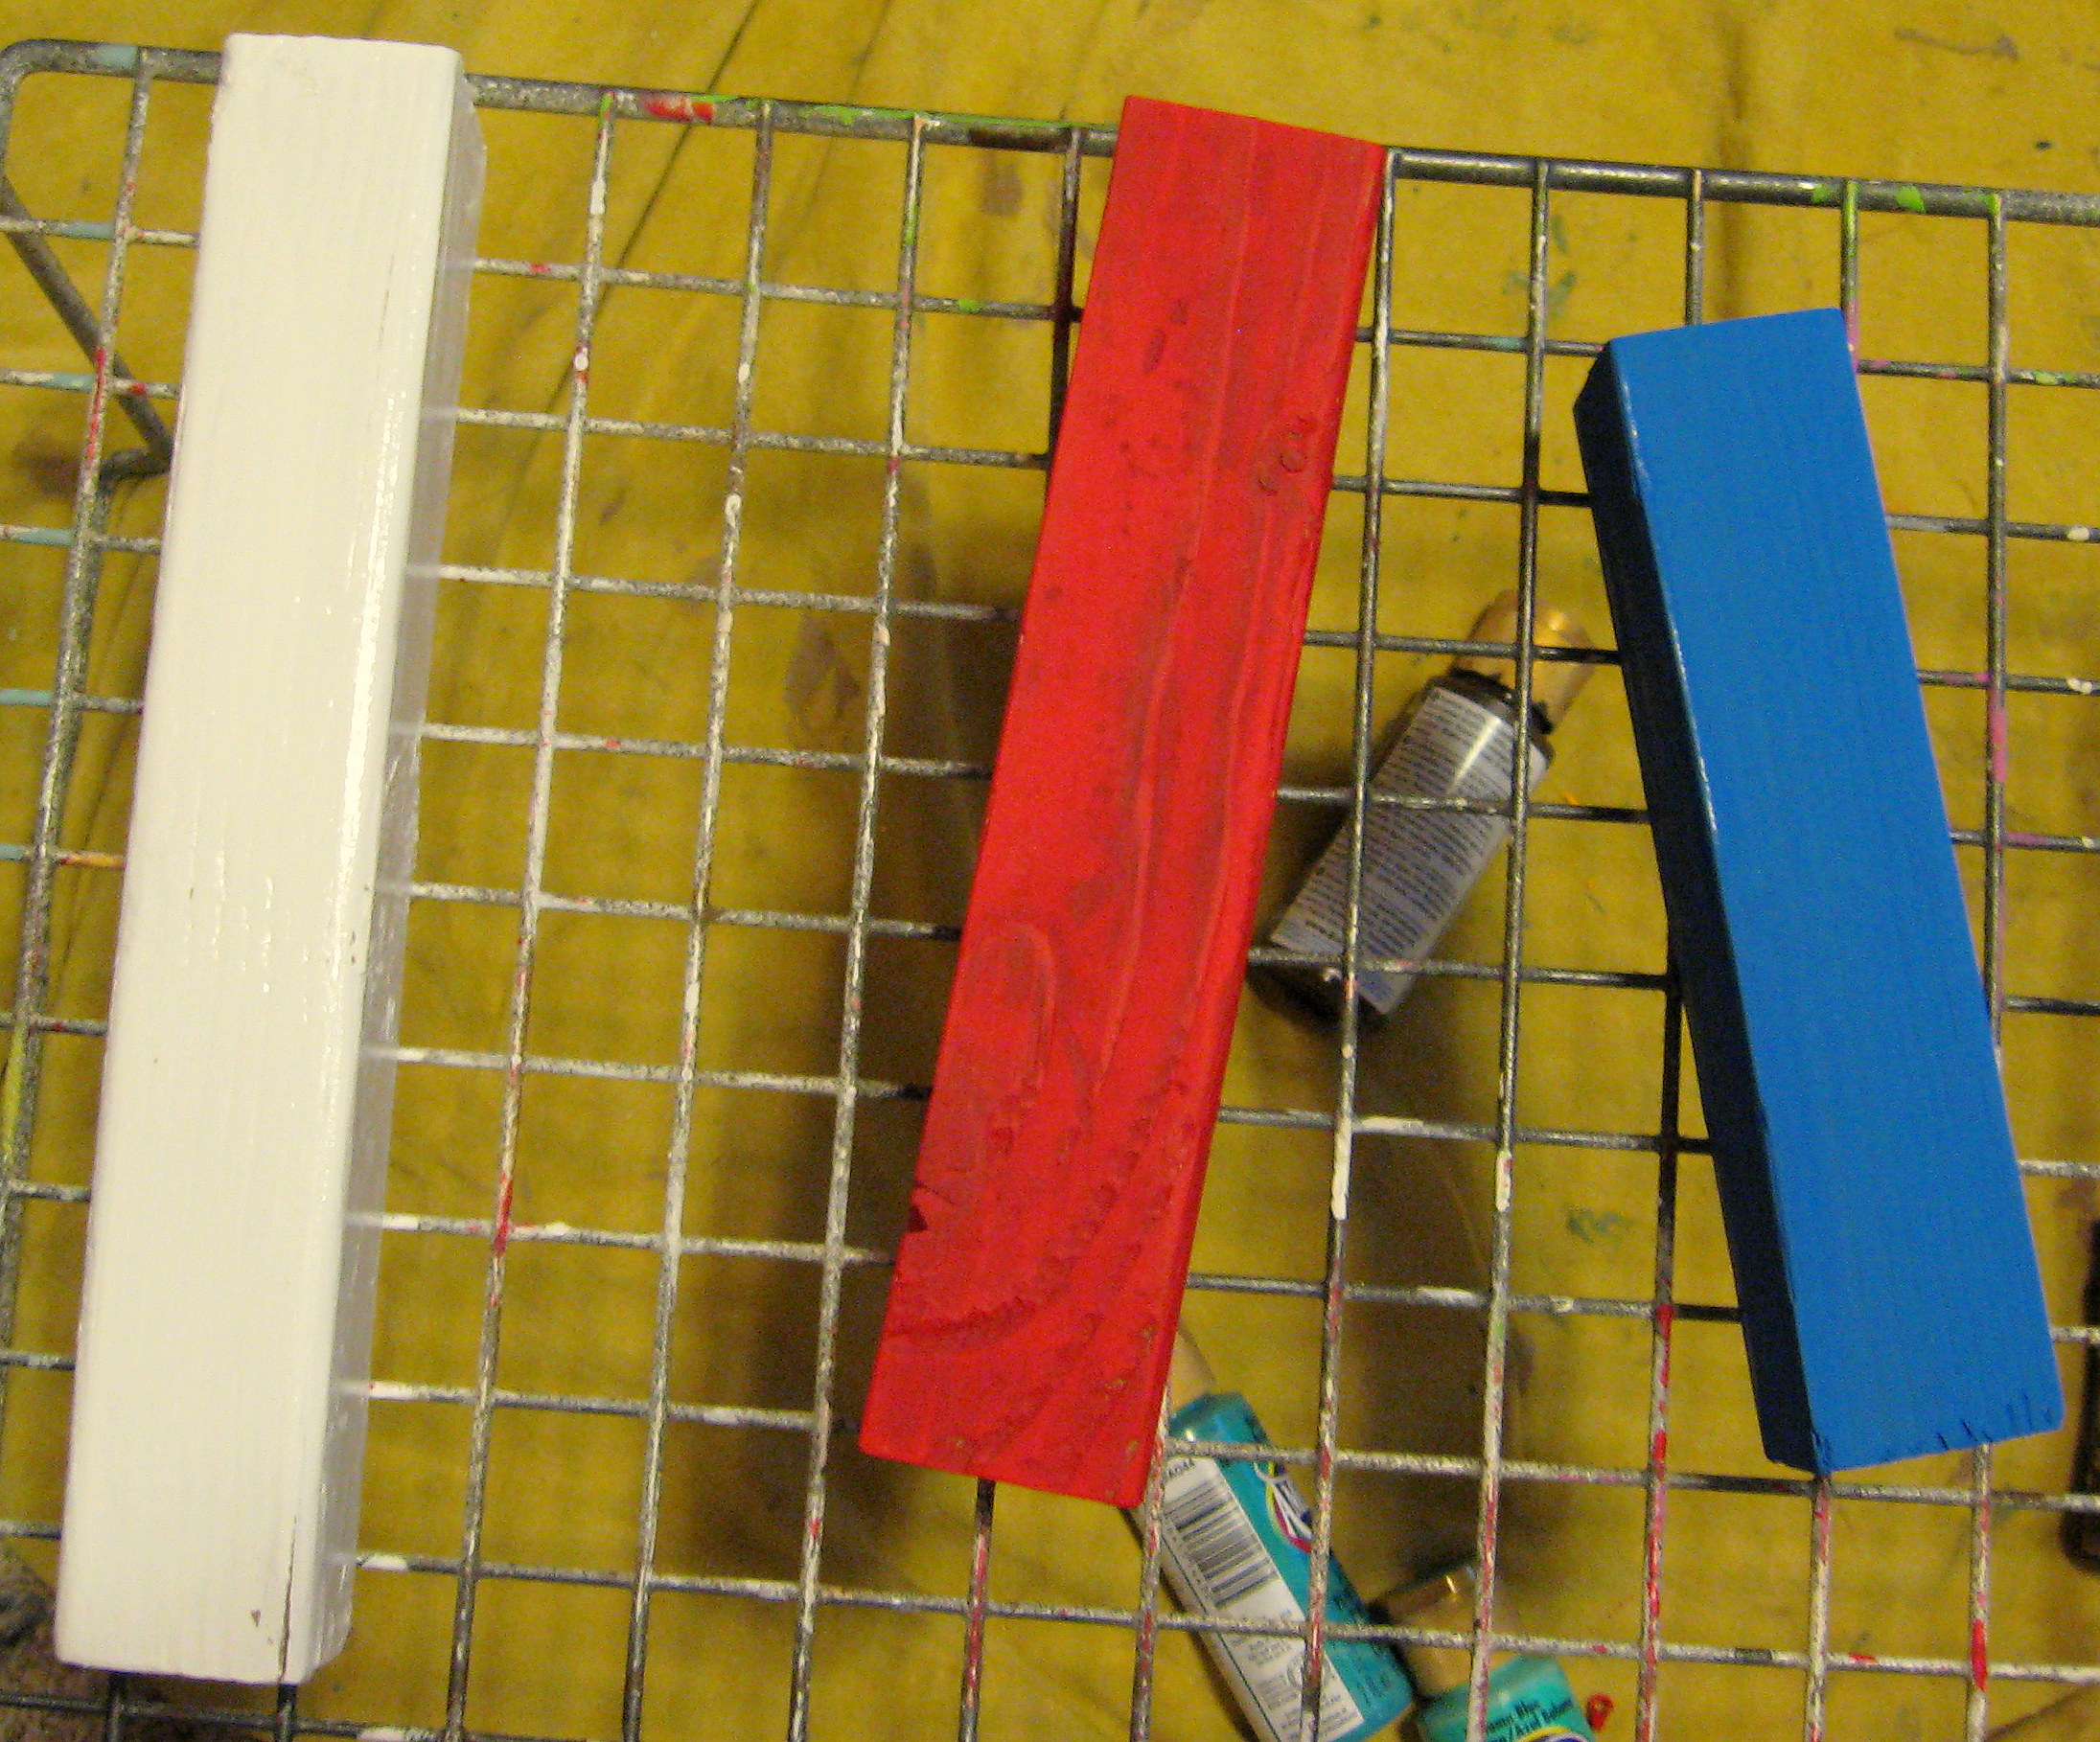
Now paint them and let them dry, then give the edges a light sanding to distress the fireworks a bit.
Next, cover each of the fireworks sticks with scrapbook paper. Cut a strip that is long enough to go all the way around and overlap just a little on the back.
Wrap it around the stick, using the edges to crease the paper, then take the paper off and make the creases sharp.
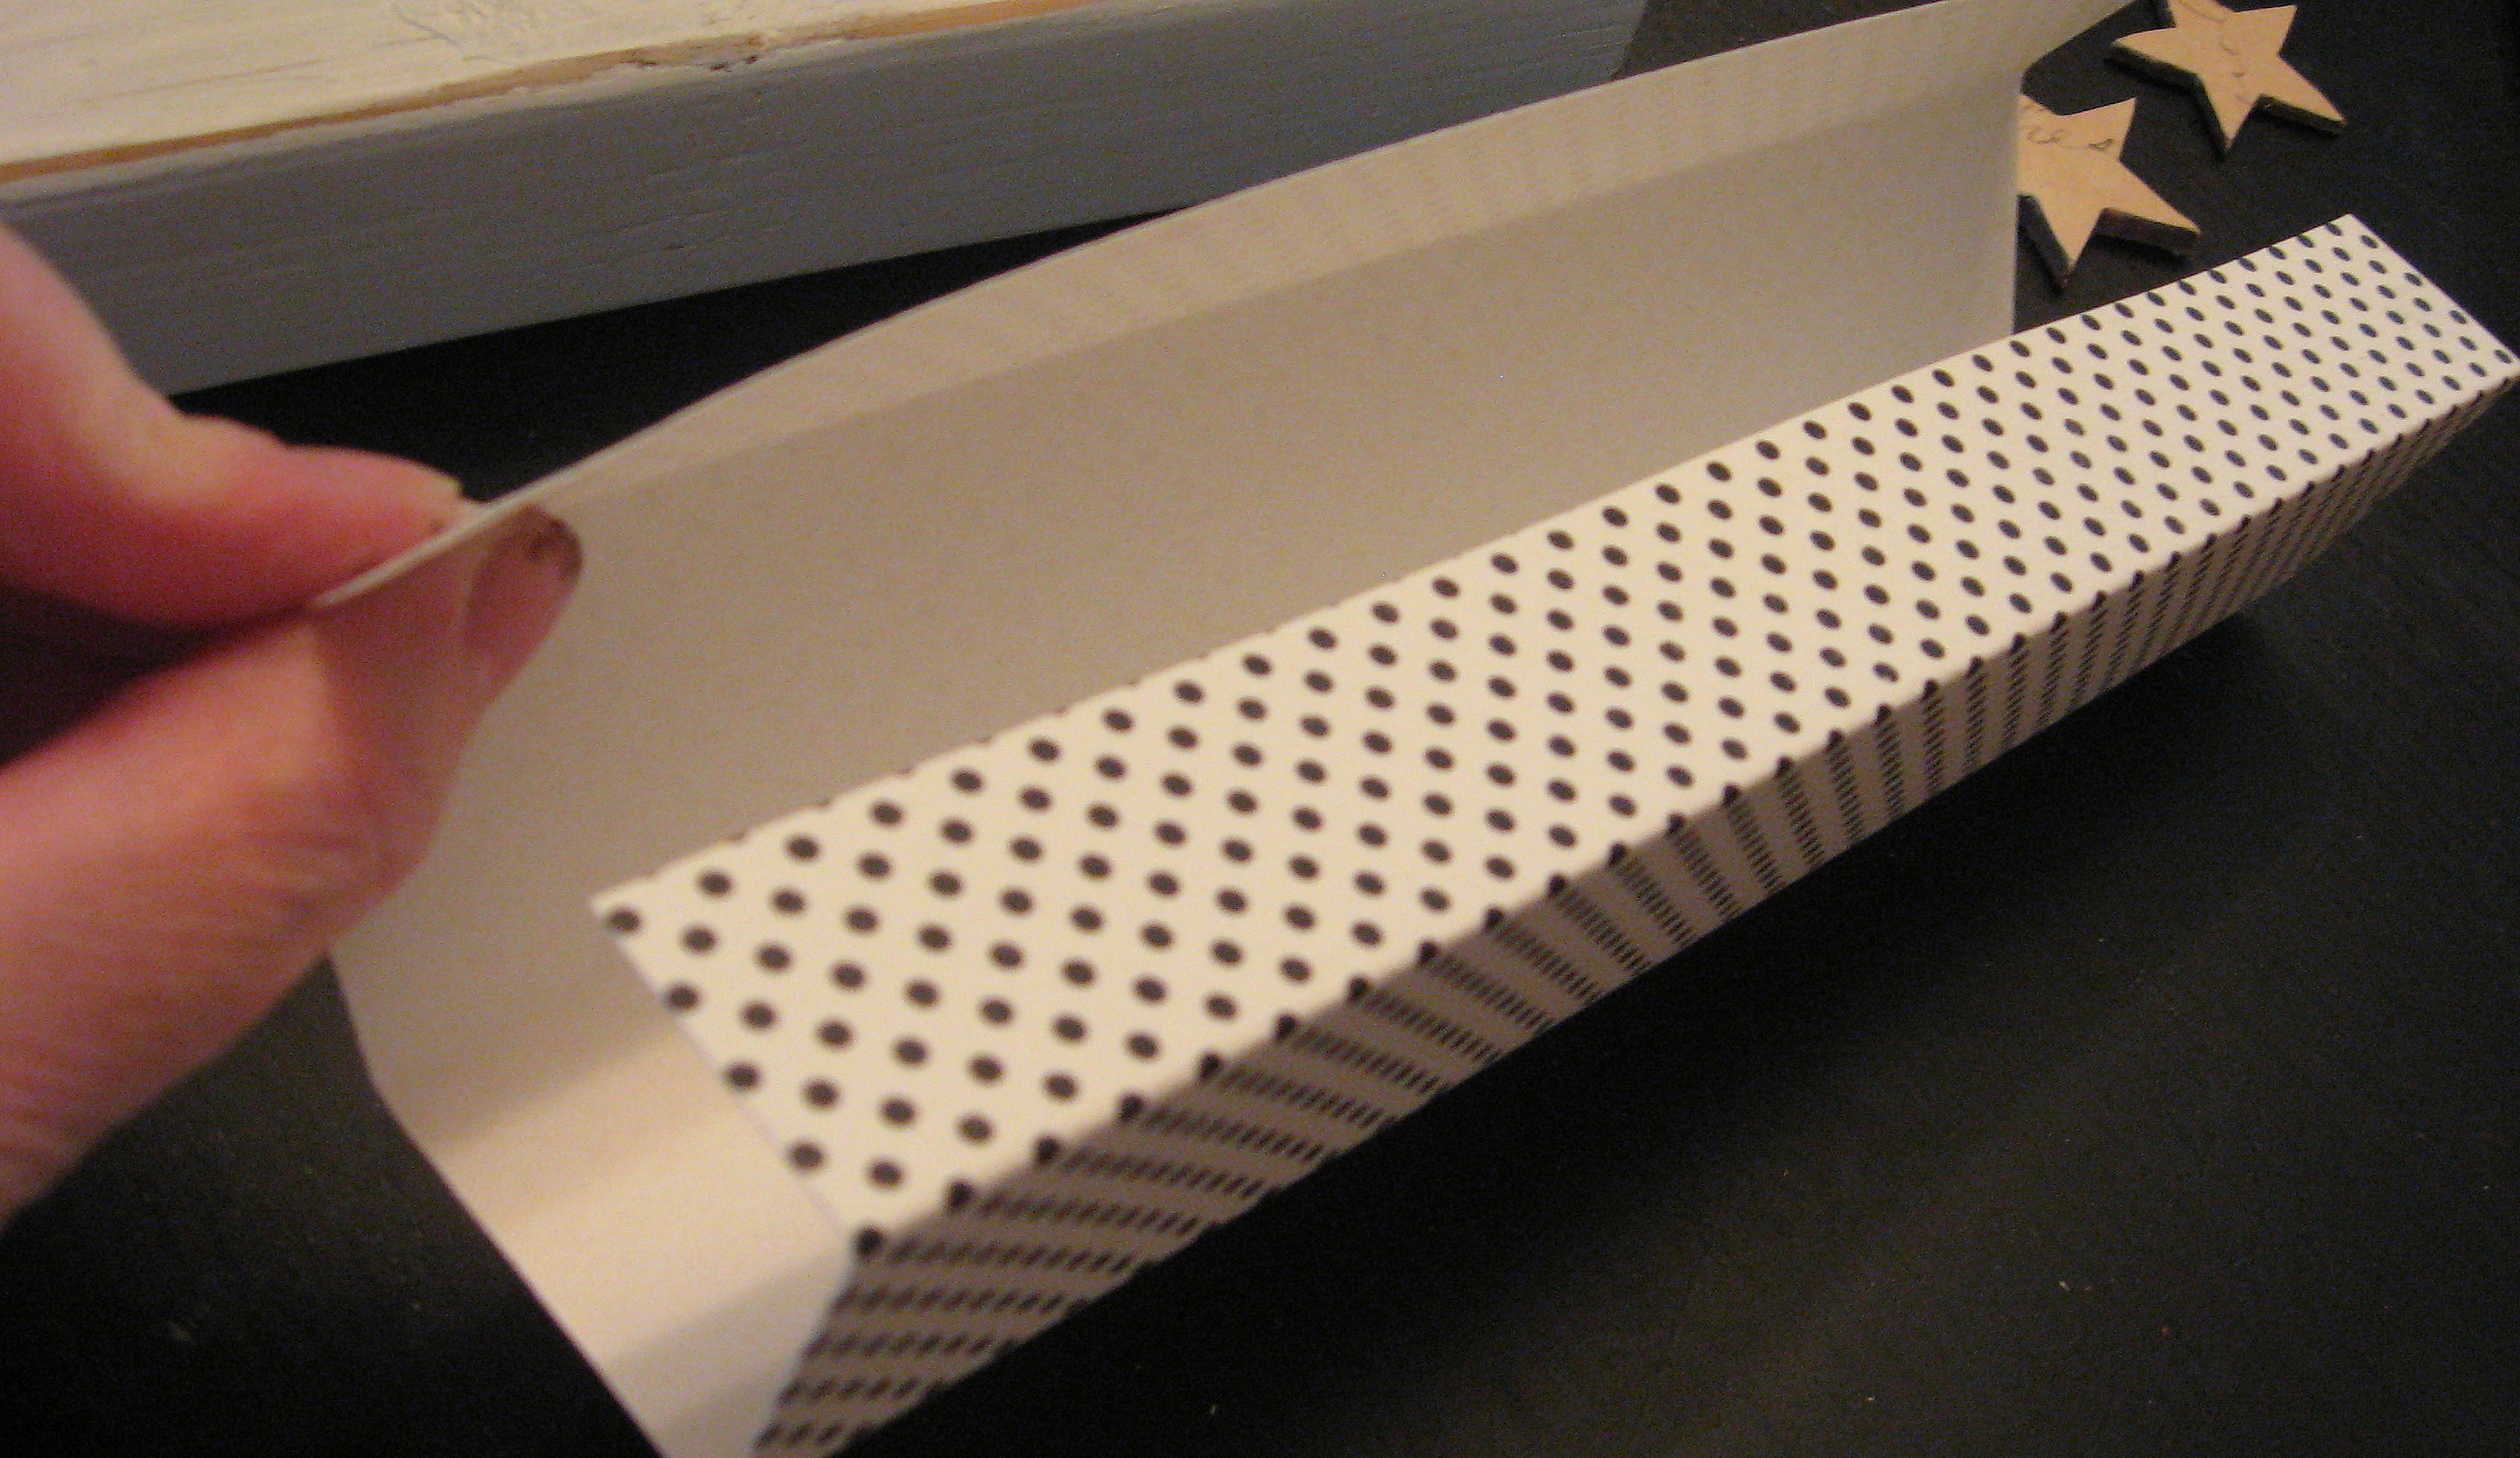
Mod Podge the paper onto the sticks and let dry. Once it’s dry, take sandpaper to the edges and corners to rough up the paper a little and give it that shabby, worn look. Just be sure to use a light touch – the paper will tear easily.
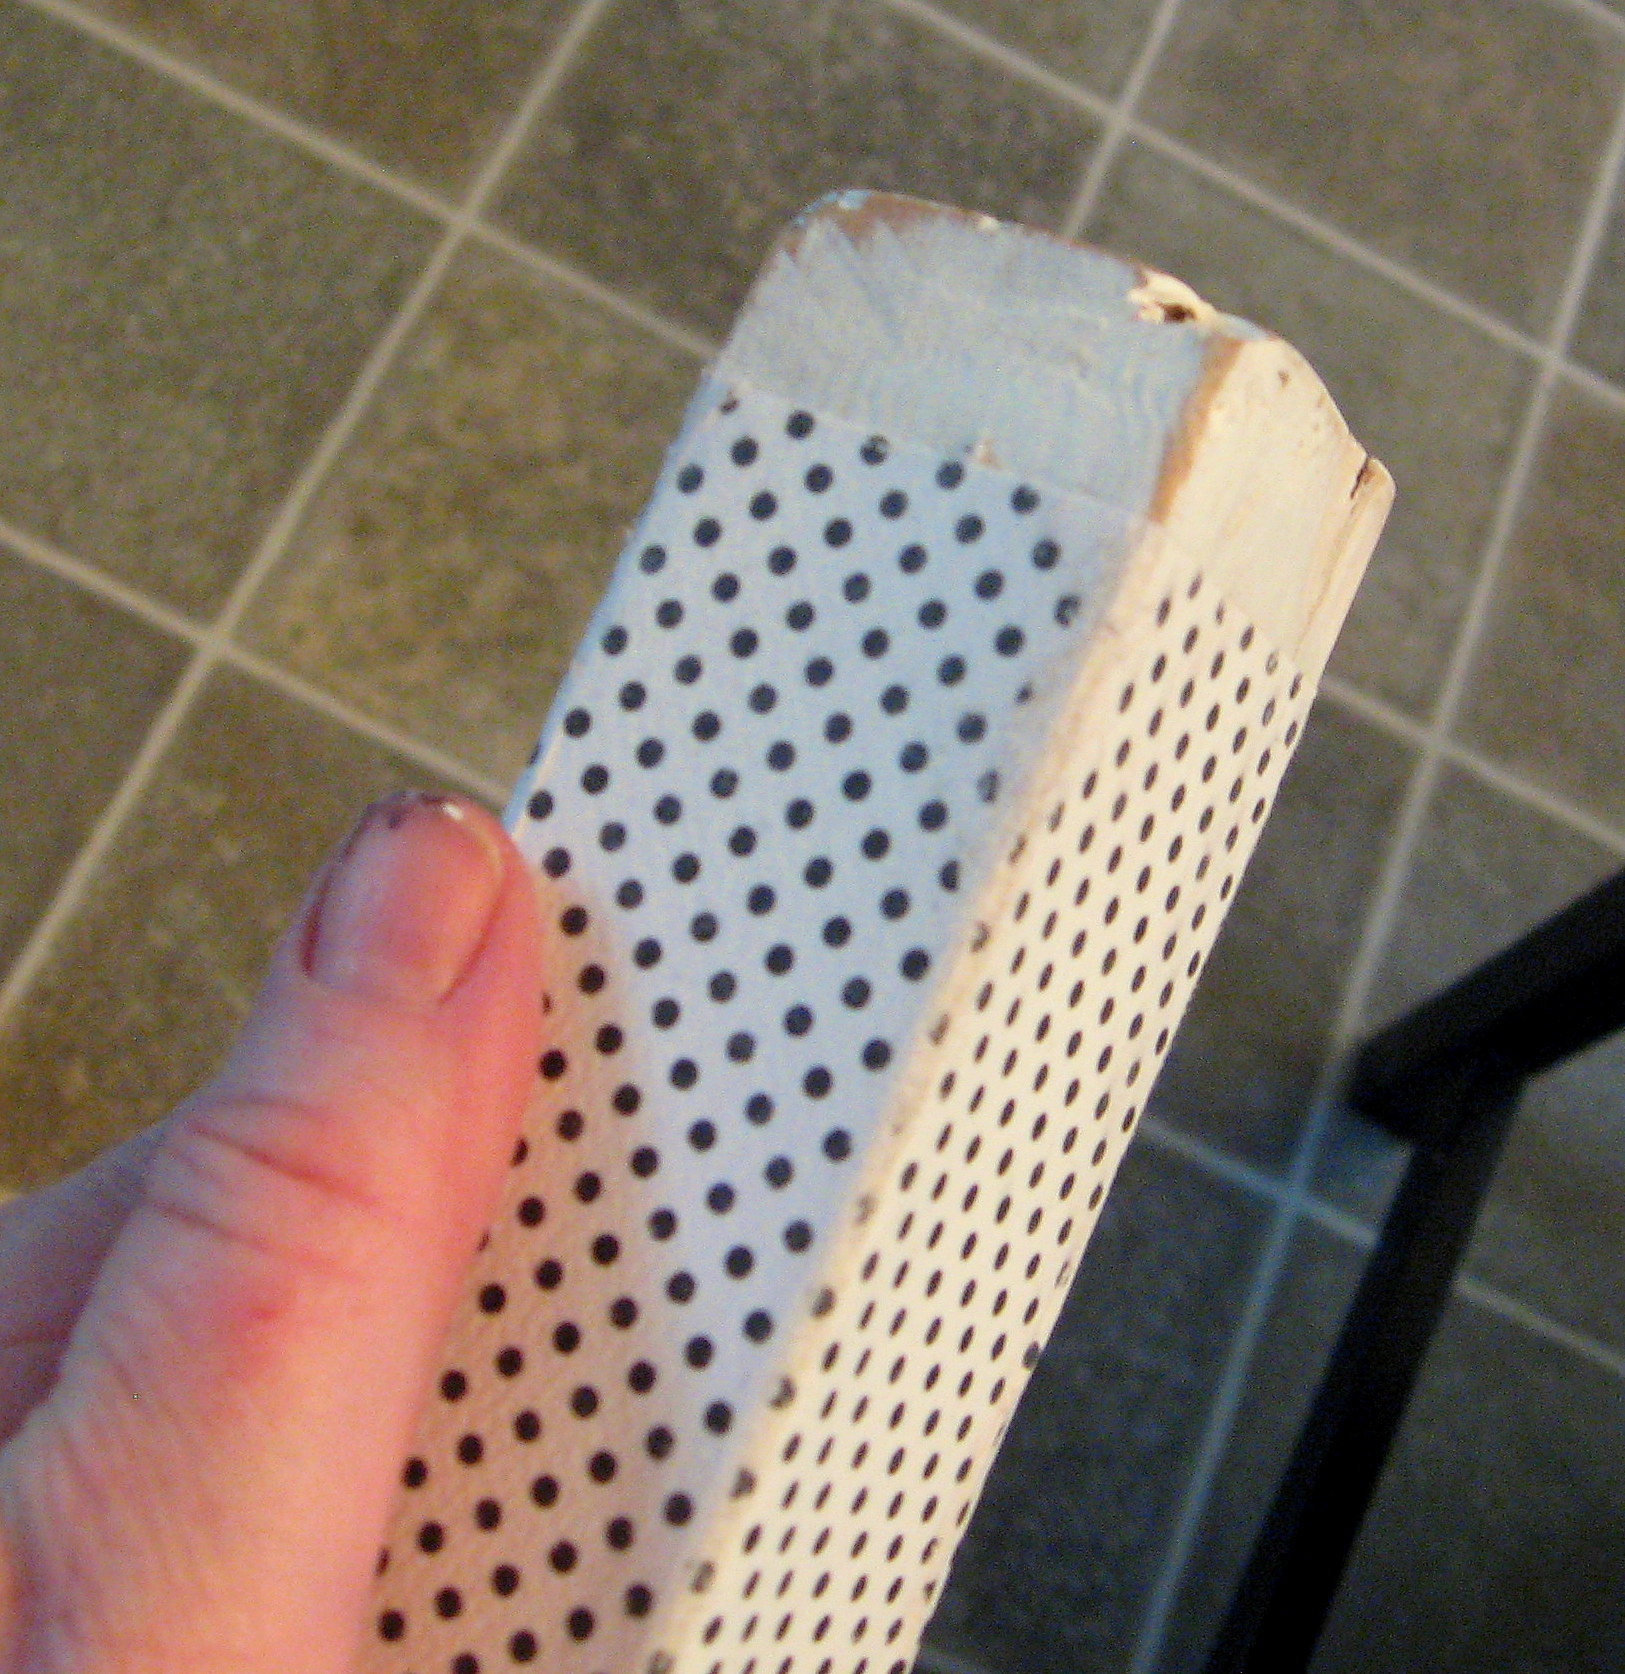
When the fireworks look just the way you want them, seal them with a coat of Mod Podge on top of the paper.
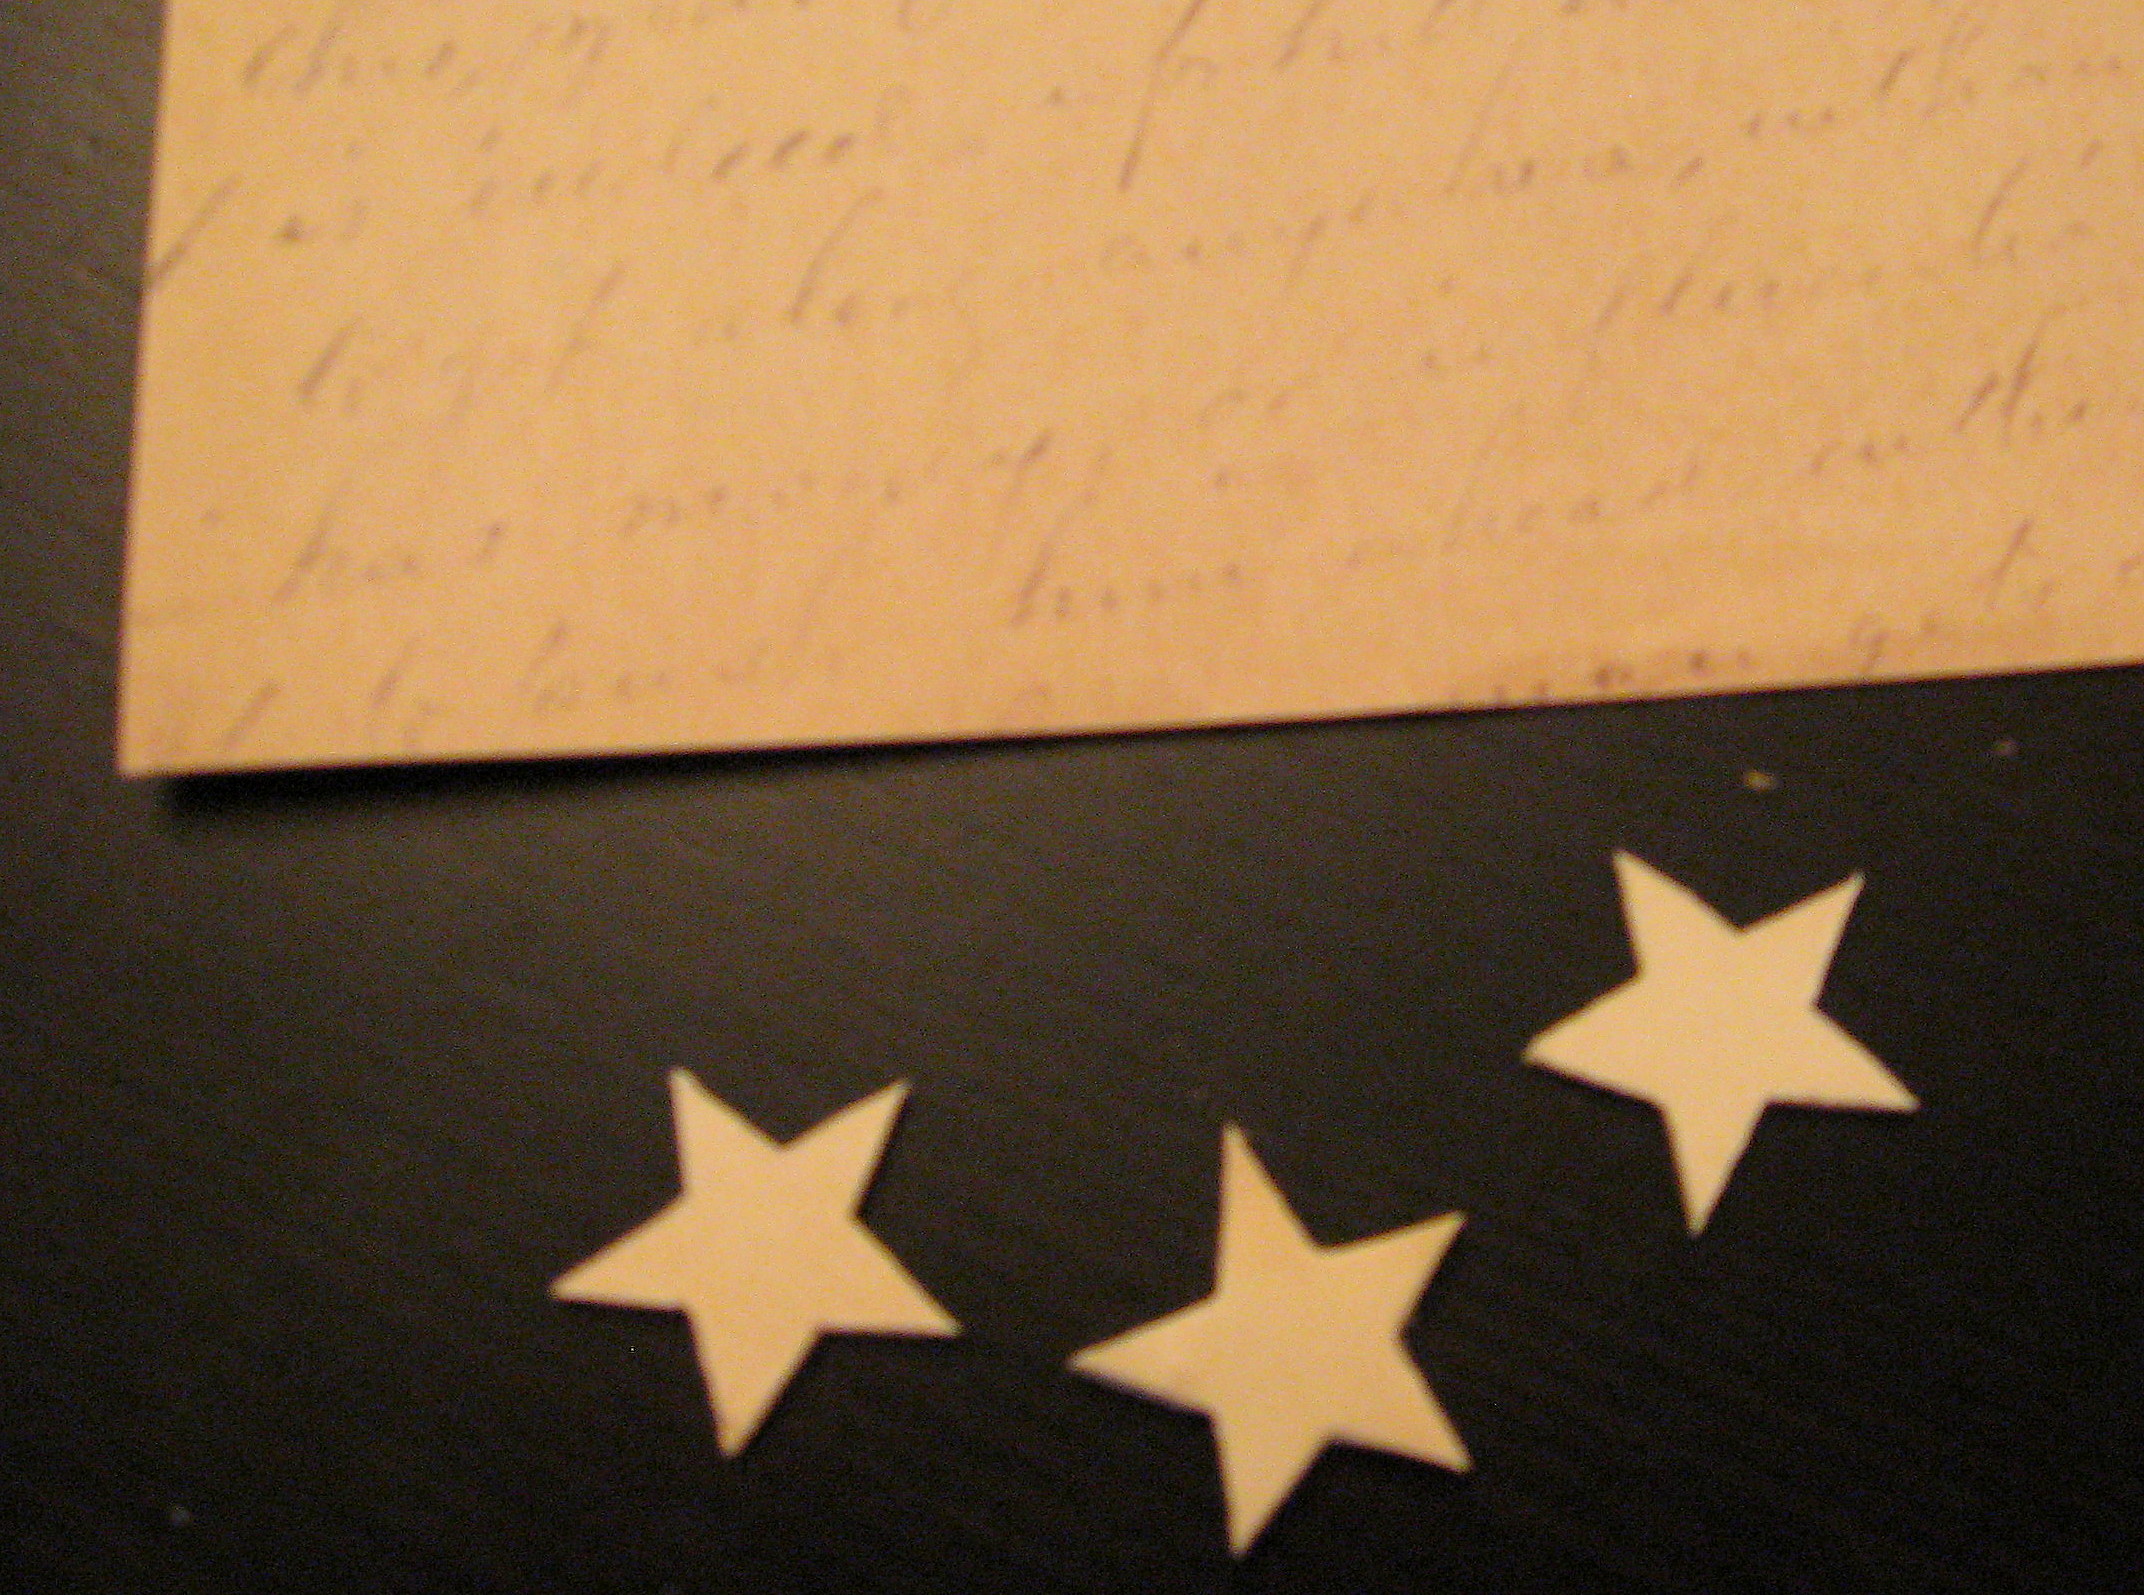
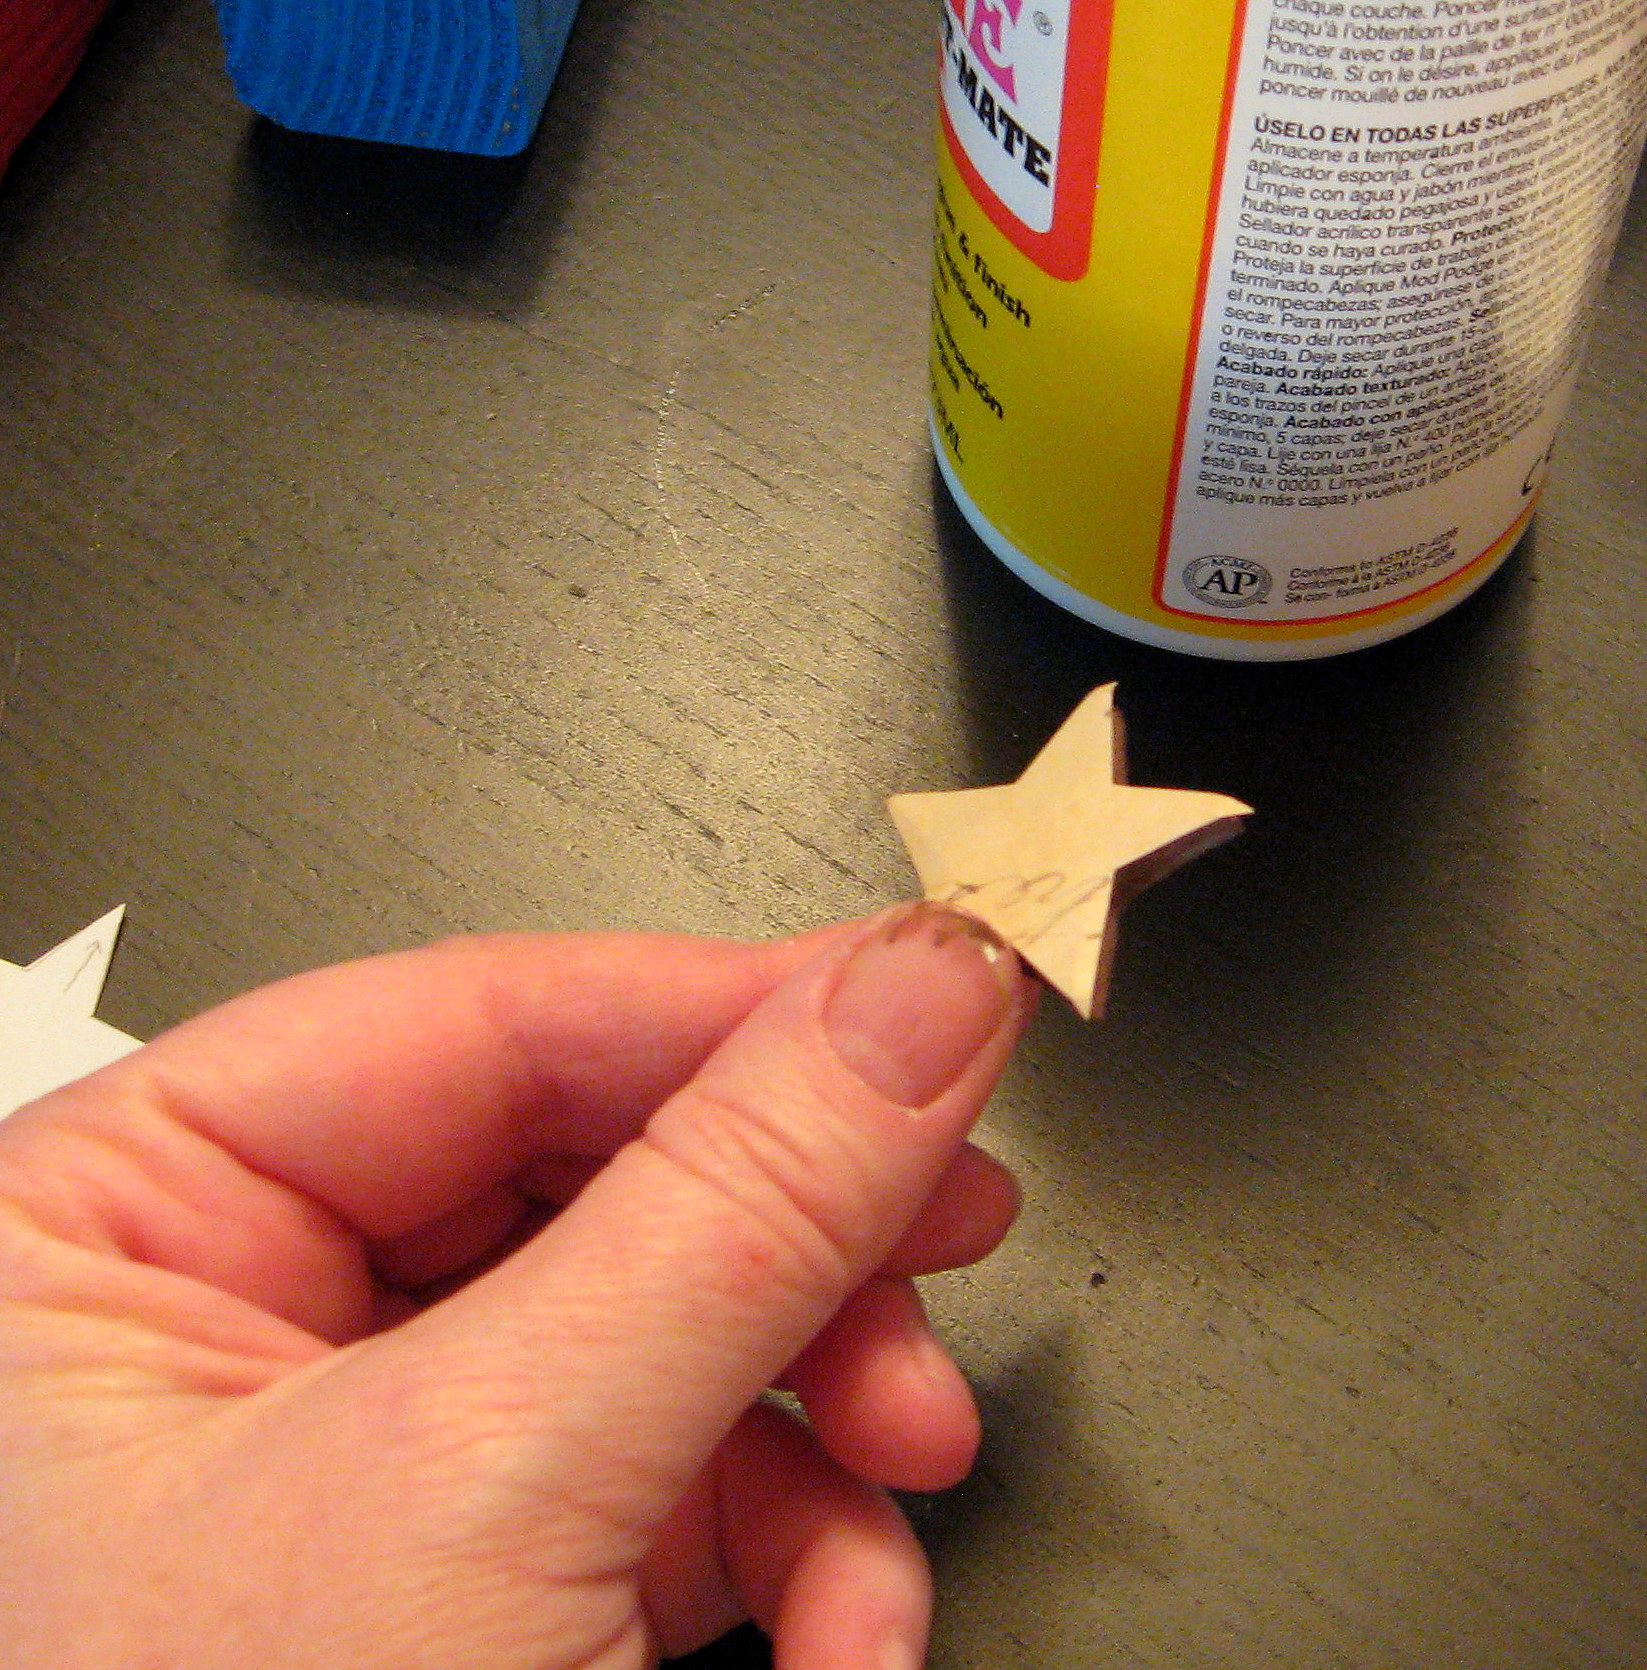
Next we will make the “fuse”. I started with three wood stars that I bought at a craft store. trace them onto a piece of scrapbook paper – mine is a creamy white with old-fashioned script writing on it – and cut them out. Cut them a little bit on the big side rather than trying to line them up exactly…you will see why in the pictures below.
Paint the edges and the backs of the stars with a coordinating paint color – I used brown –
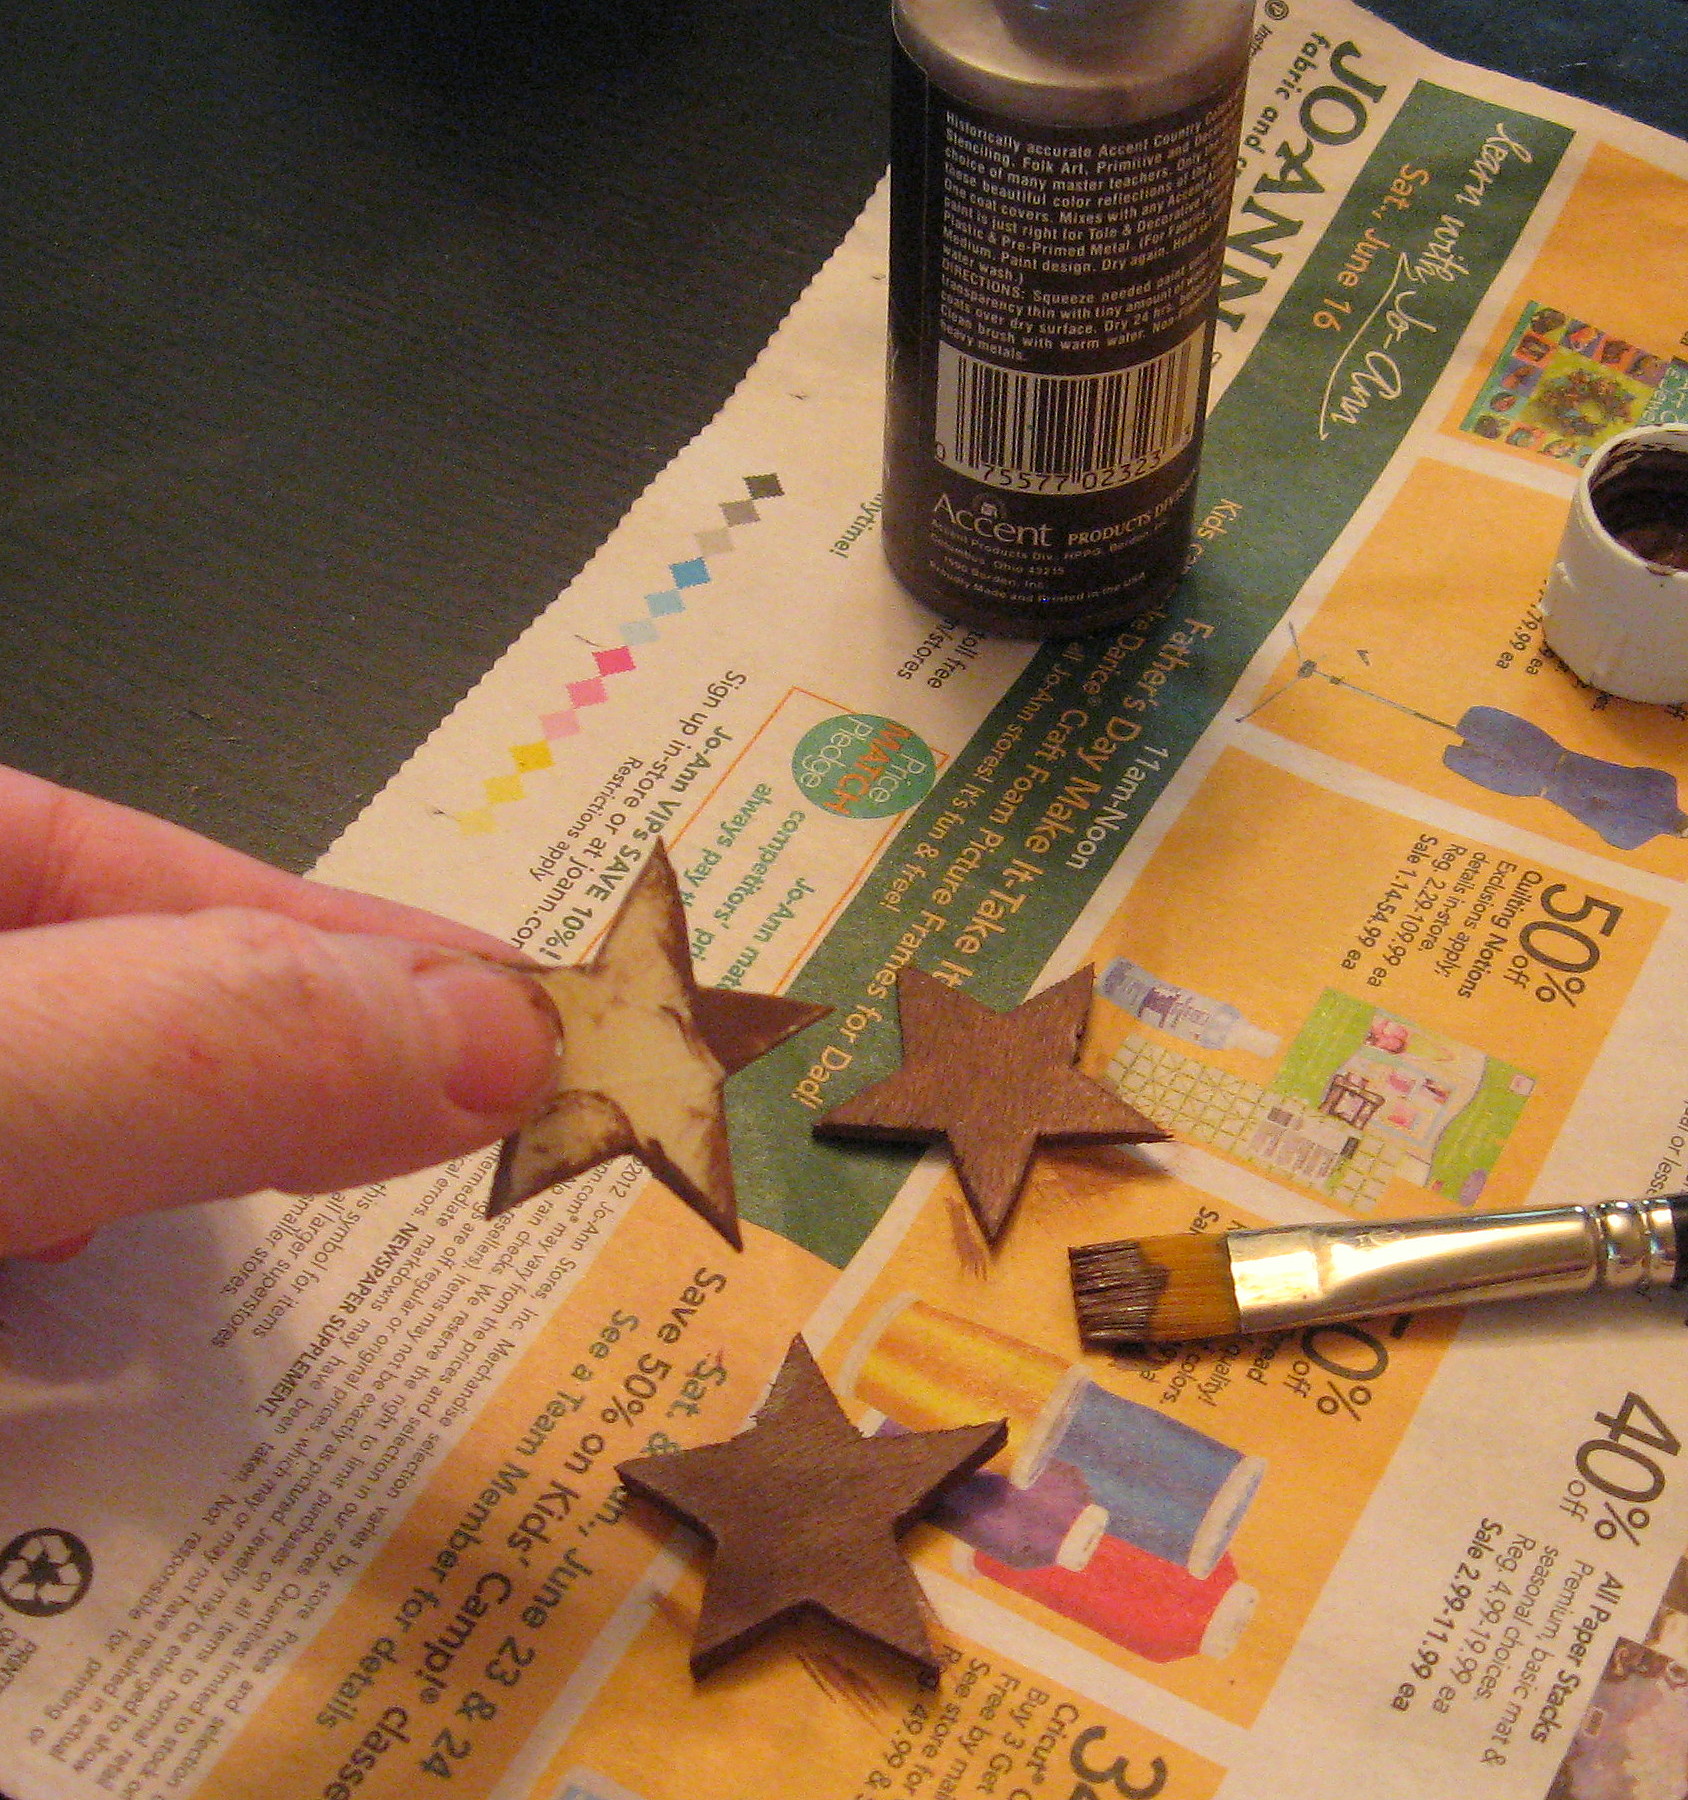
and once that is dry, Mod Podge the paper stars onto the unpainted side of the wood stars. Notice in the picture below how the paper is bigger than the wood?
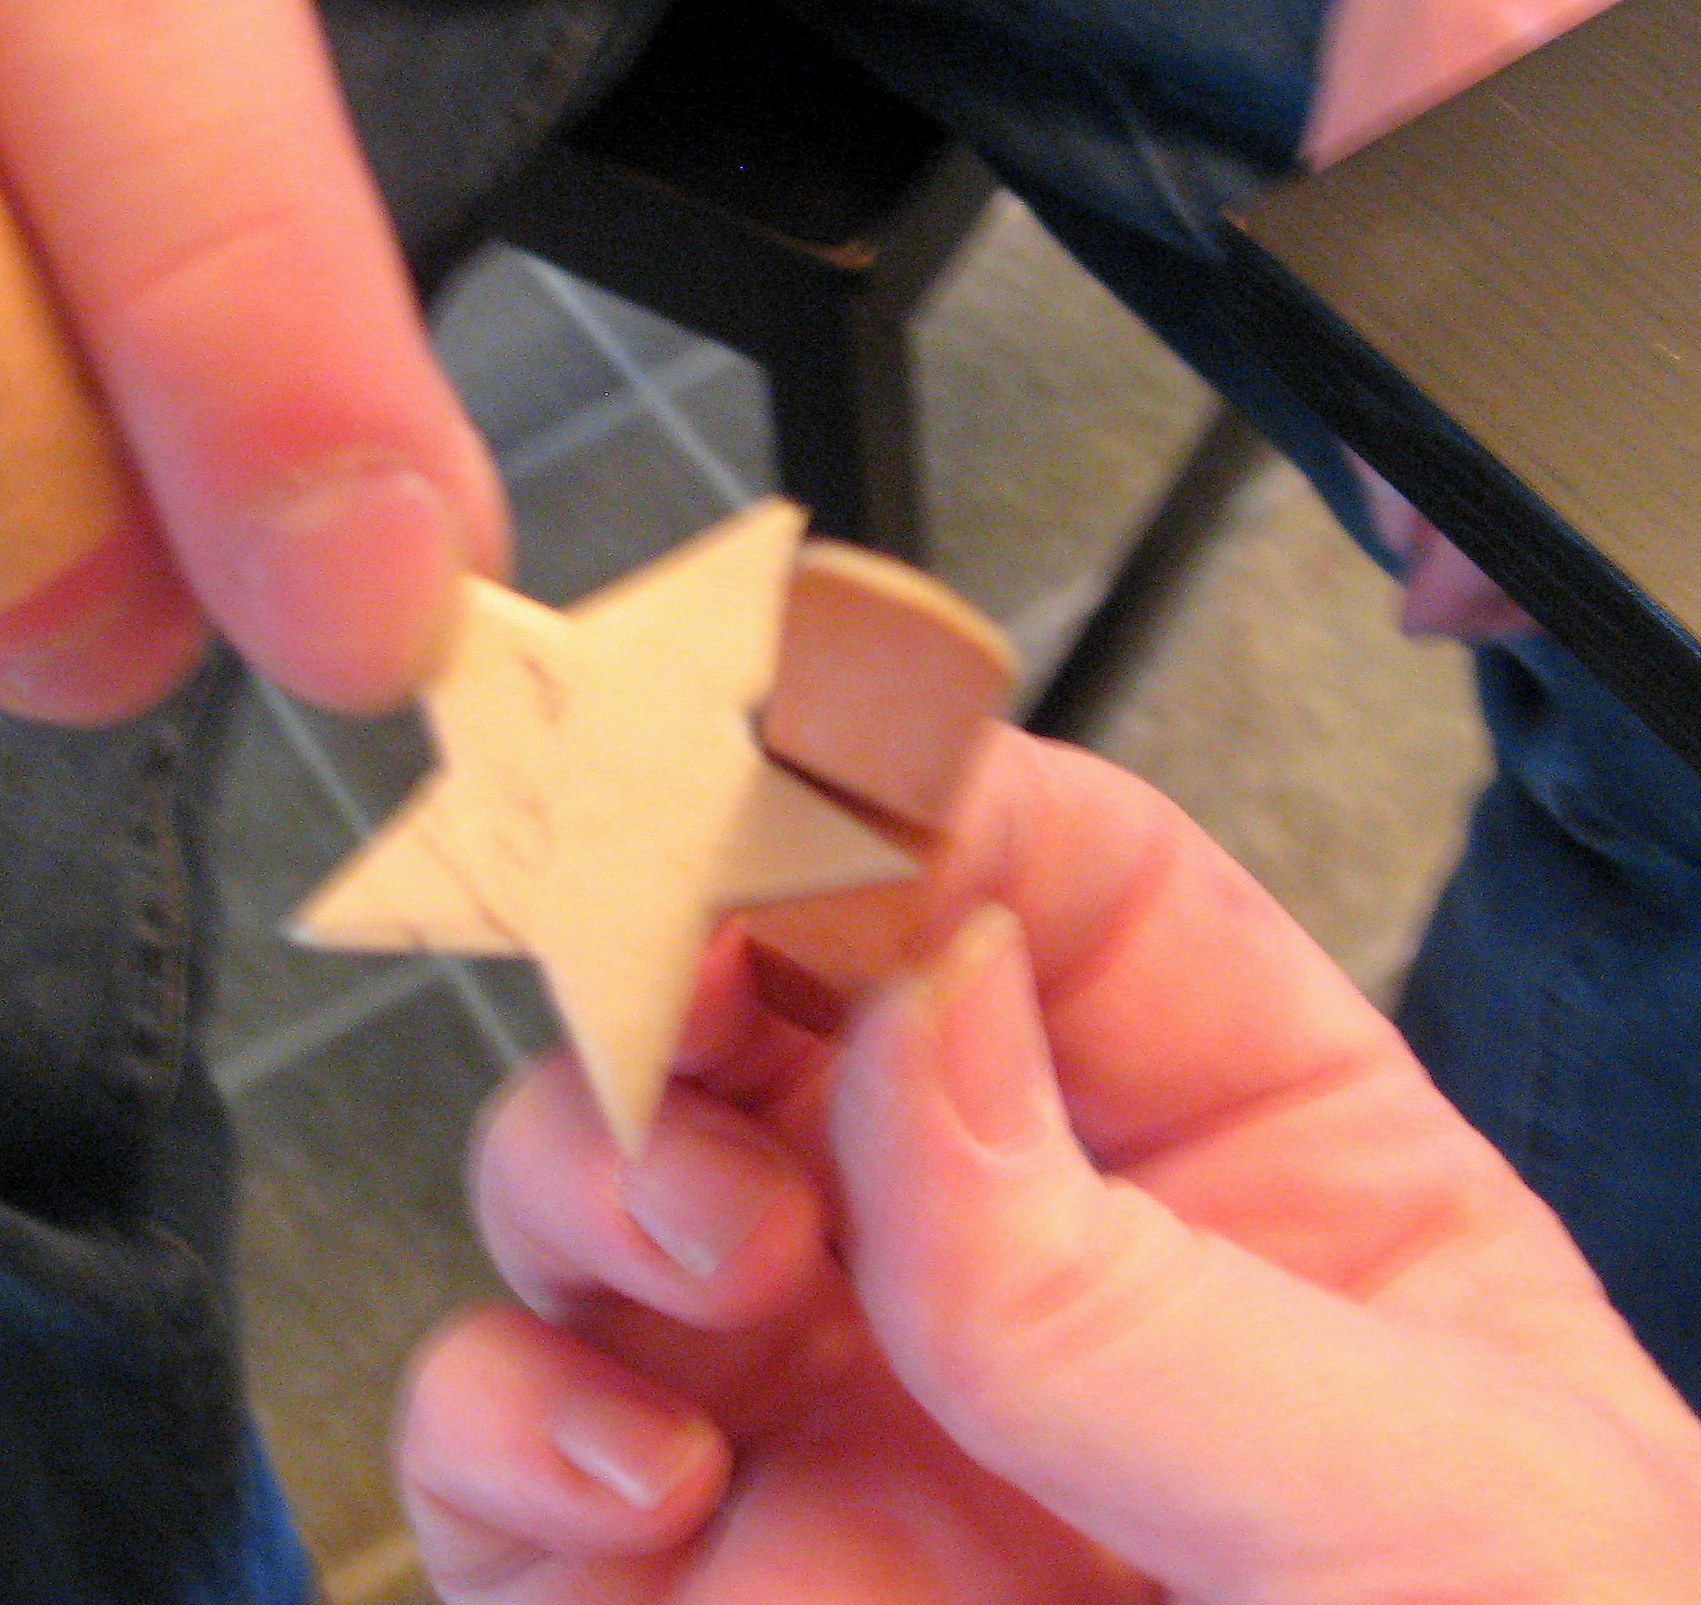
Using an emery board (I buy packs of them at the dollar store just for crafting!) or a piece of sandpaper, sand the overlapping edges of the paper off by holding the emery board perpendicular to the star and sanding in downward strokes.
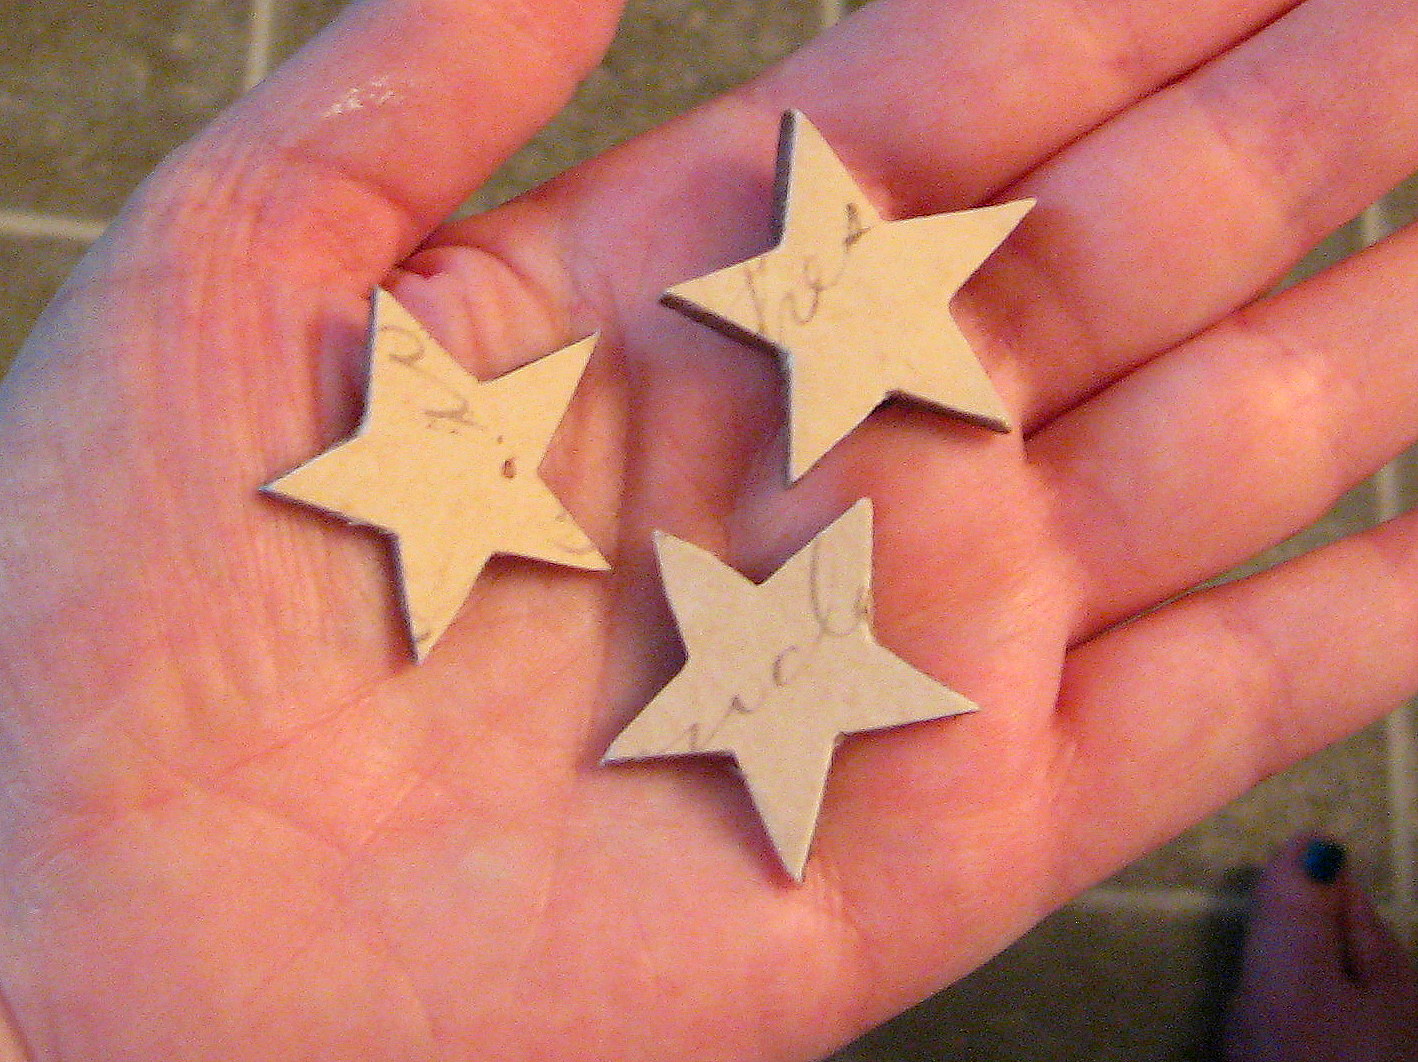
The paper will be cut off and you will end up with perfectly covered stars with perfectly crisp and even edges.
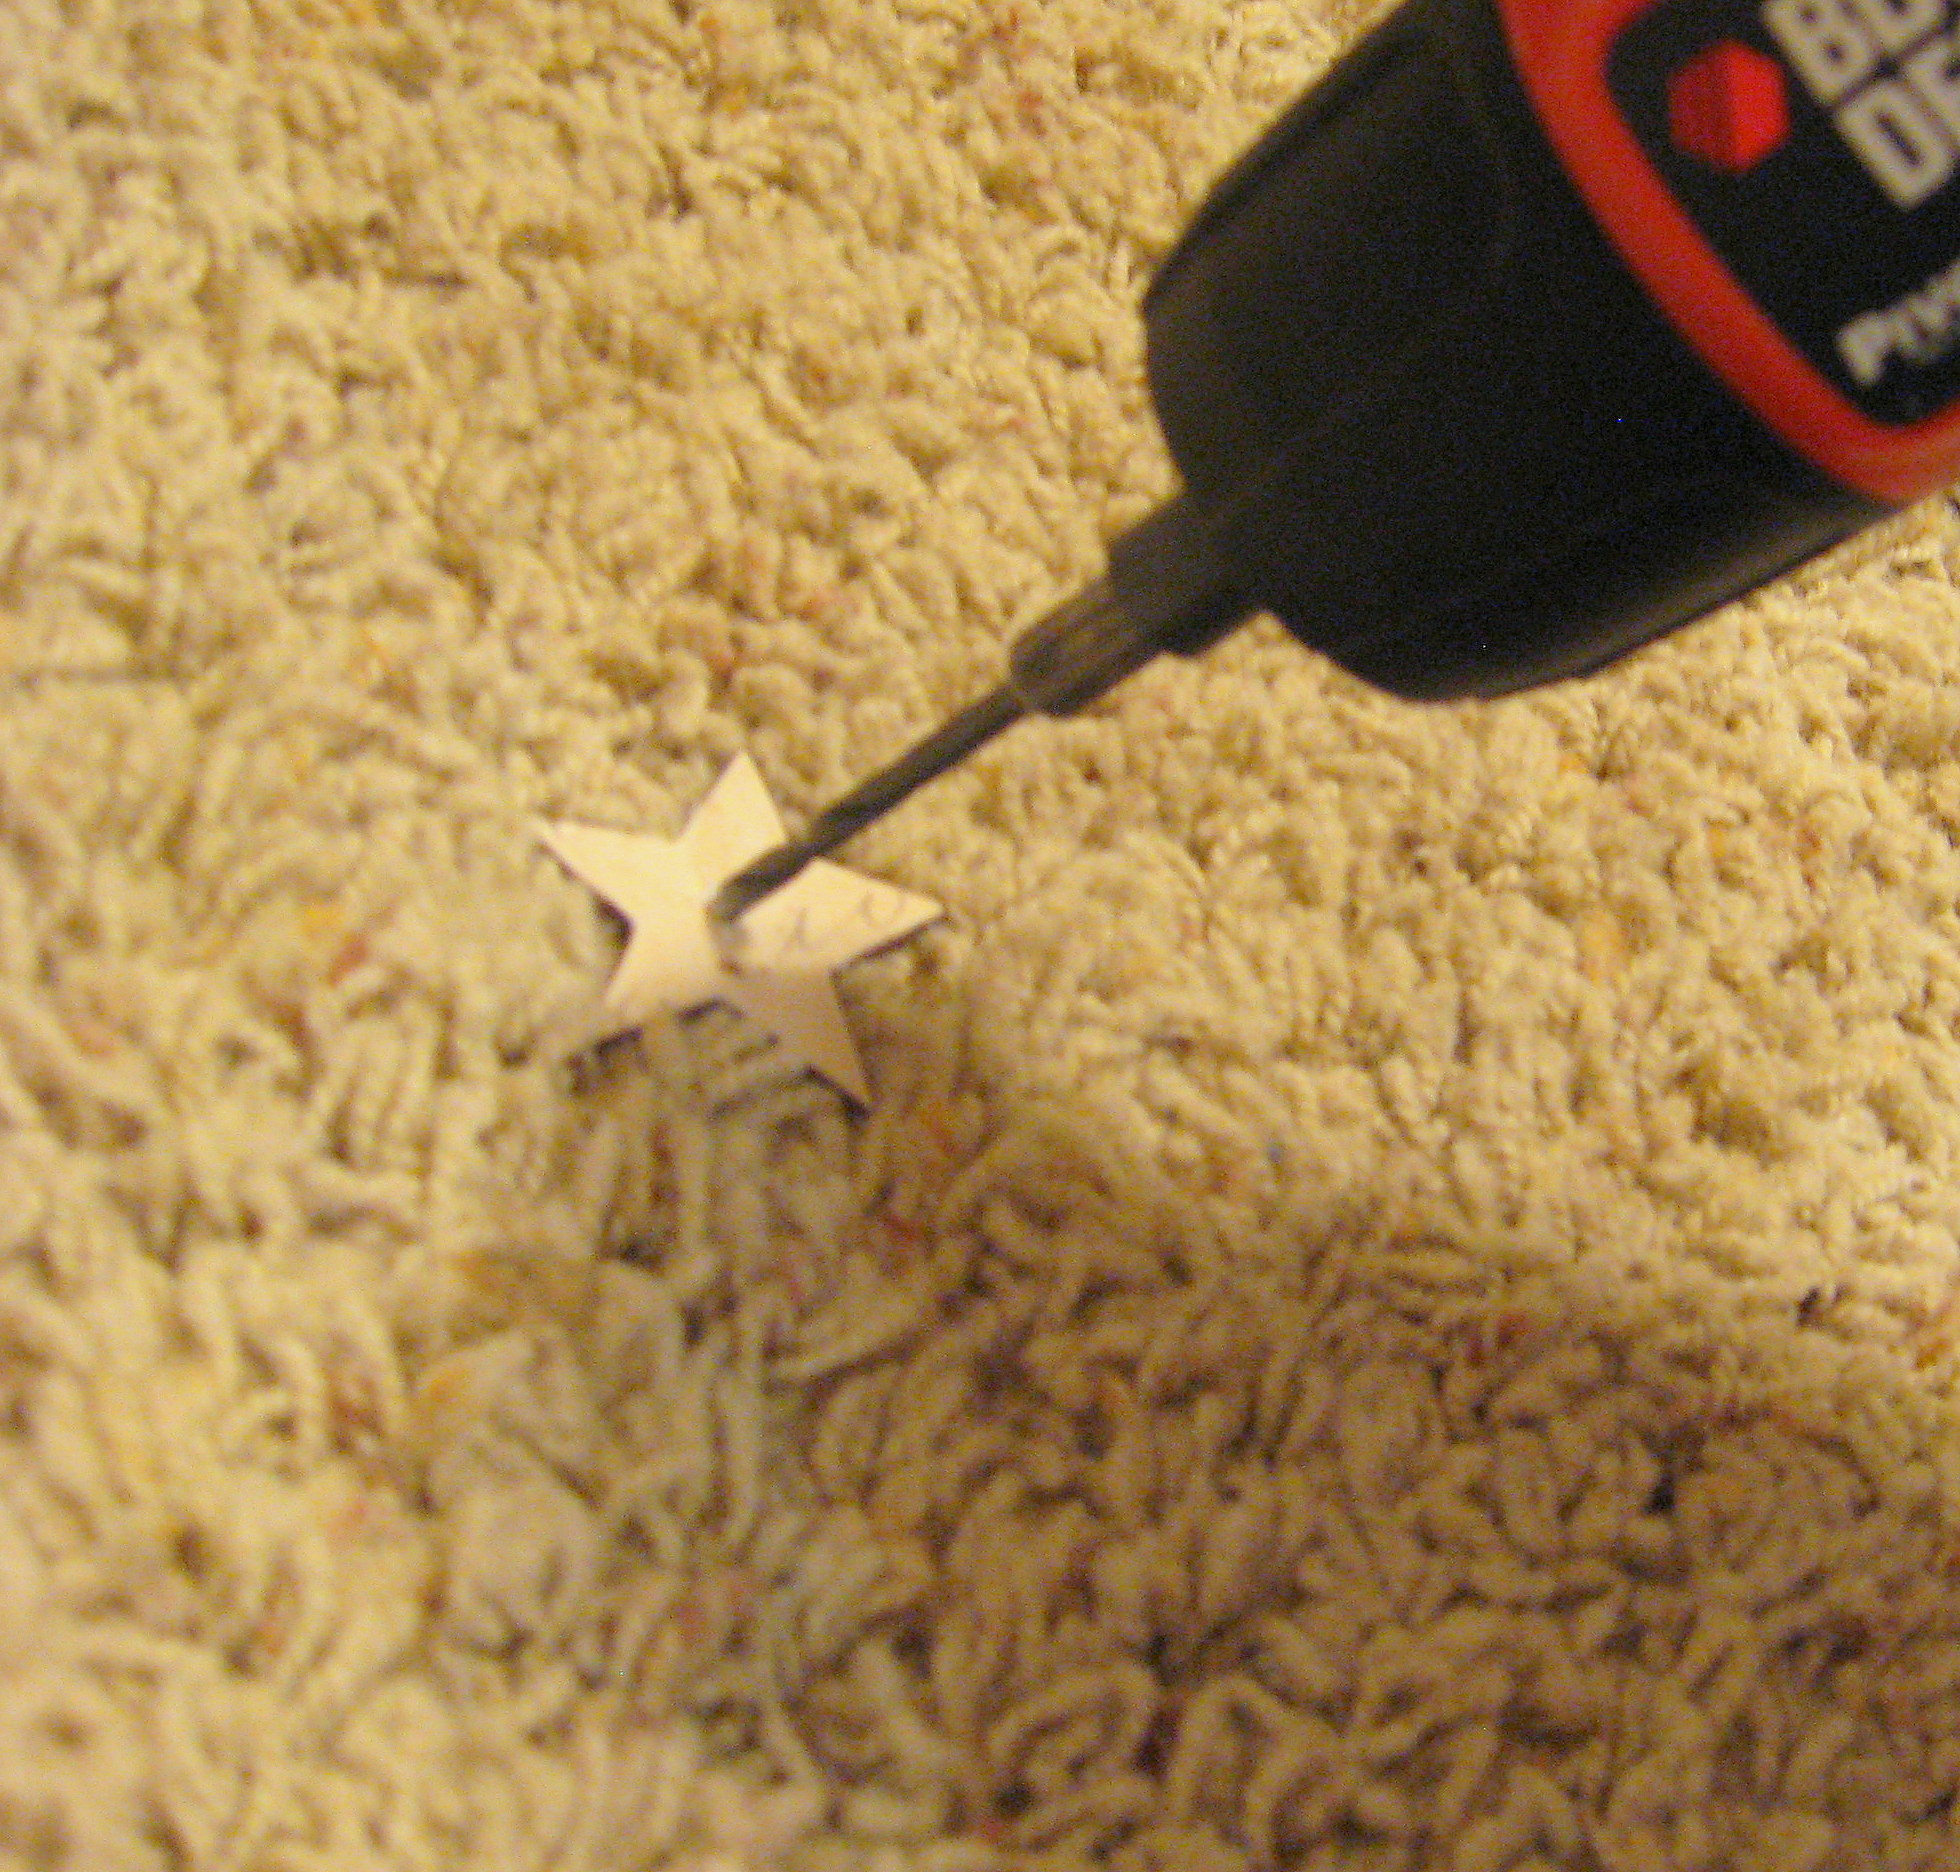
Seal the paper with Mod Podge and let them dry. Once they are dry, drill a hole through the middle of each star. BE CAREFUL! This wood will split easily, so go slow and don’t push too hard or you could break the whole star in half. Mine splintered off a little bit of wood on the back, so I just touched up the paint and it looks just fine.
Cut off a few inches of a heavy wire for each star. Using a pair of needle nose pliers, curl the end, then bend the curled part over about 90*
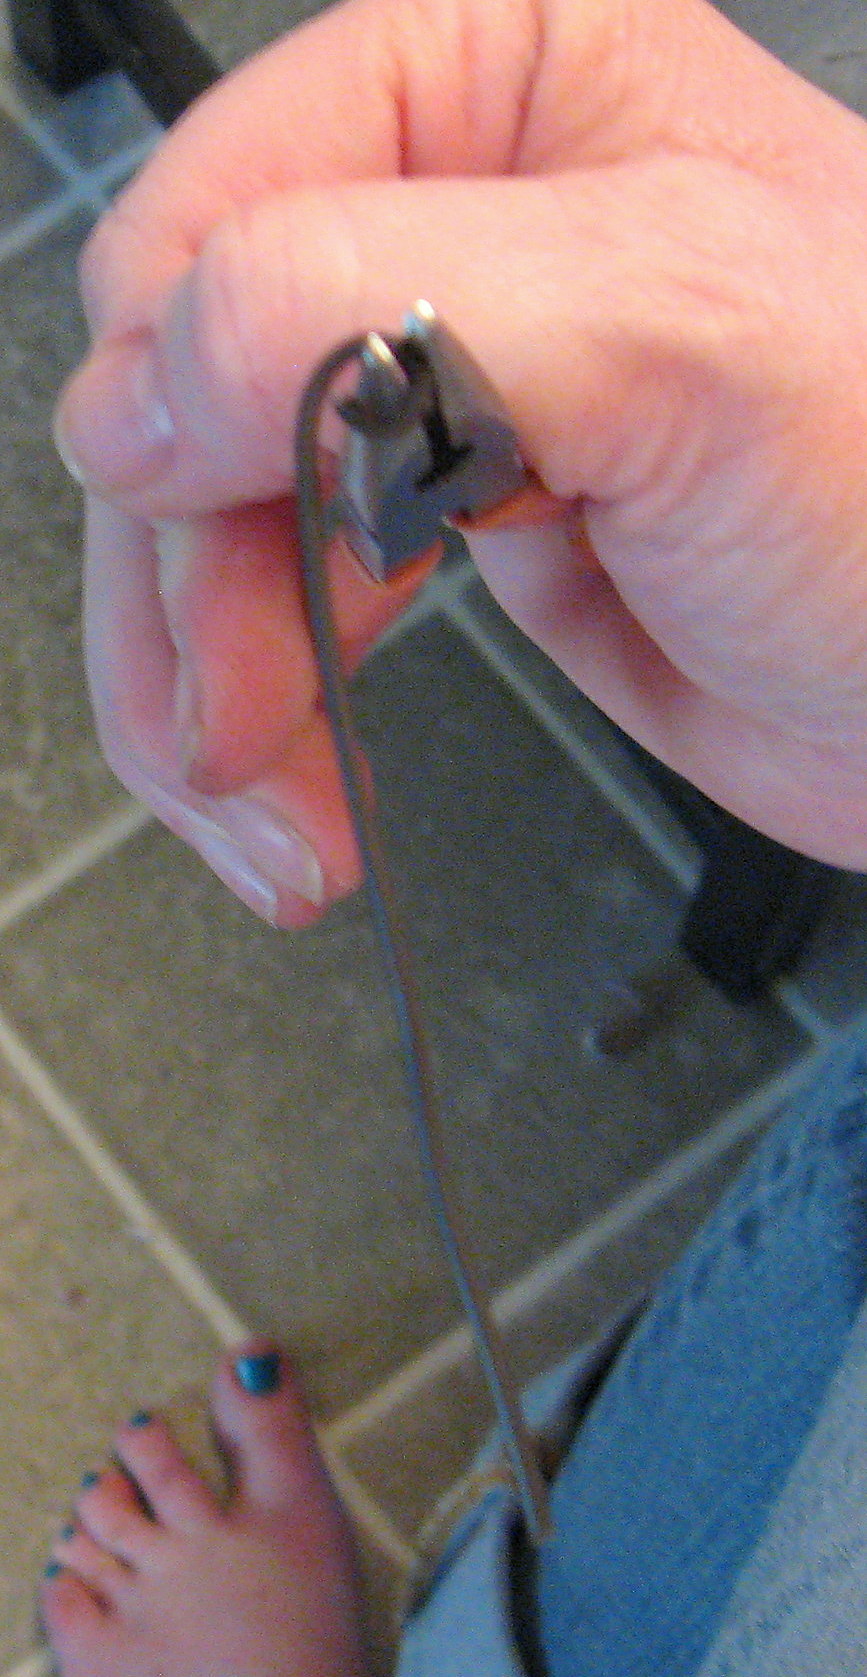
insert the other end through the hole in the star, position it how you want it, and – using the pliers – squeeze the wire together on either side of the star to hold it in place.
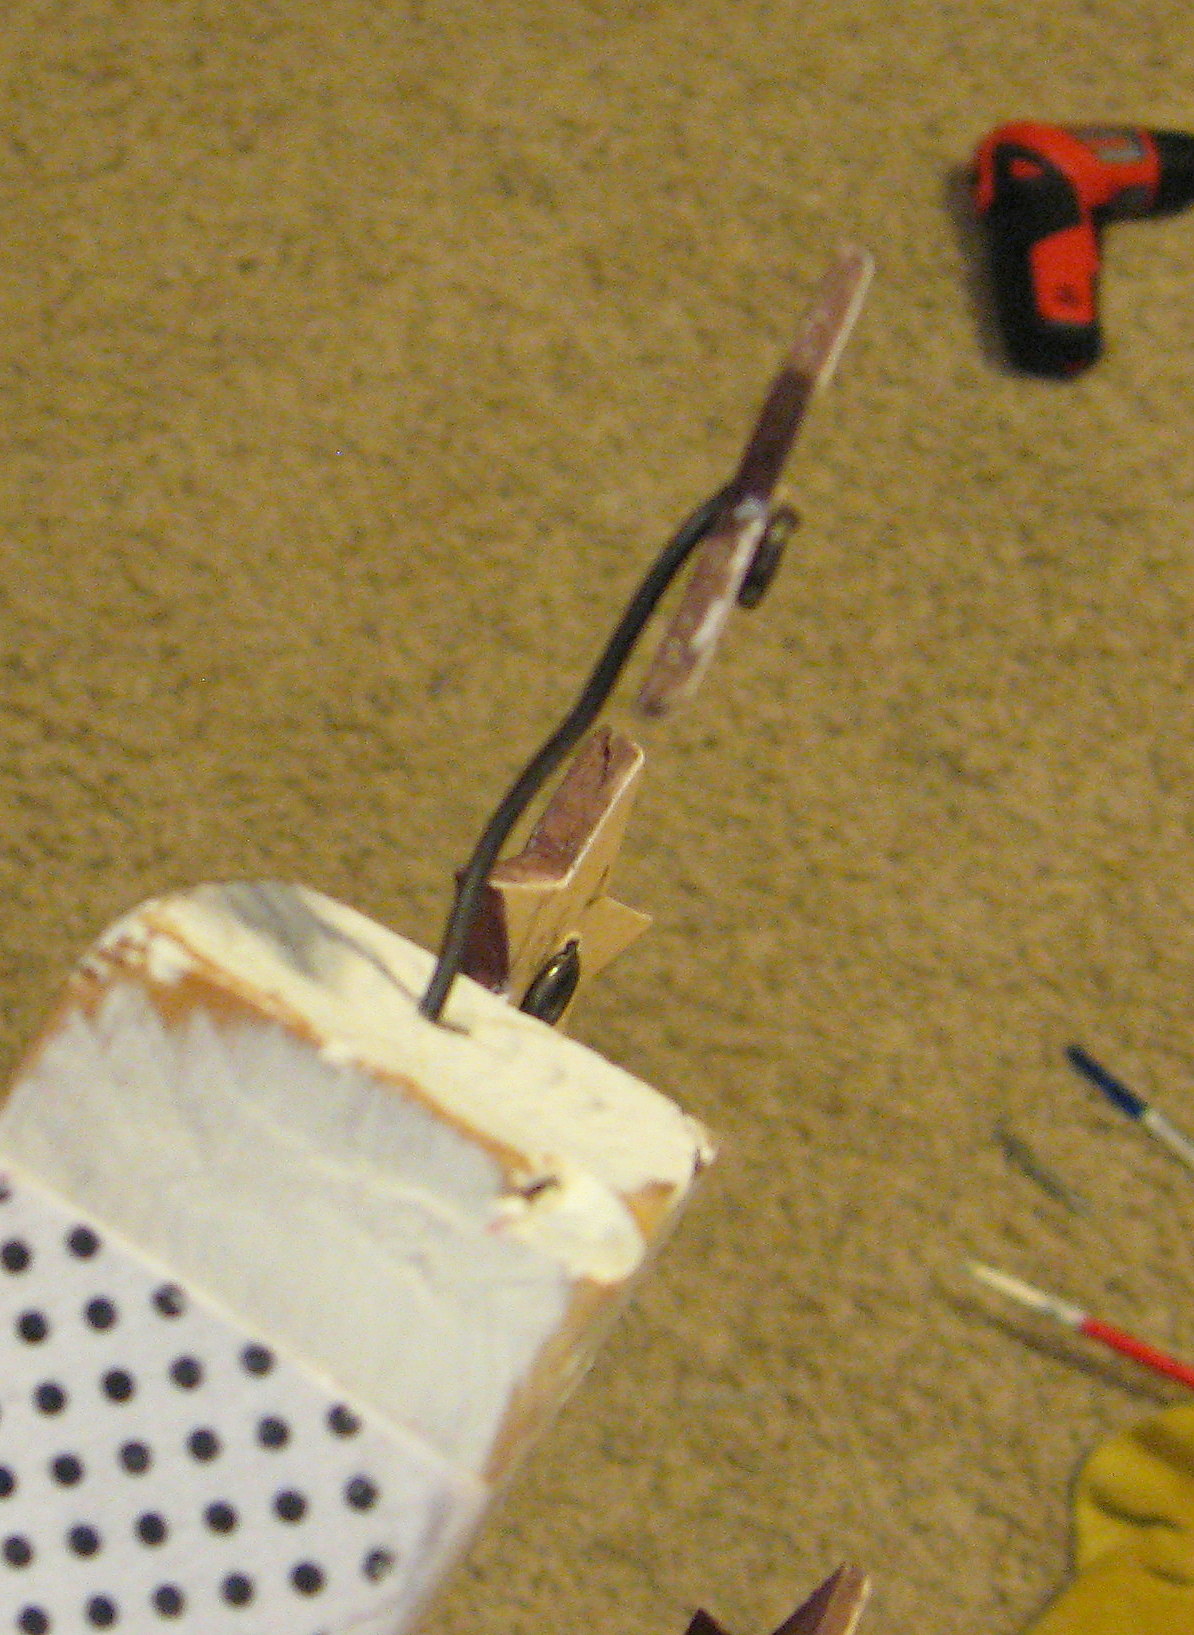
Cut the wire to the desired length, squirt a little glue into the hole you drilled in the stick and insert the finished fuse.
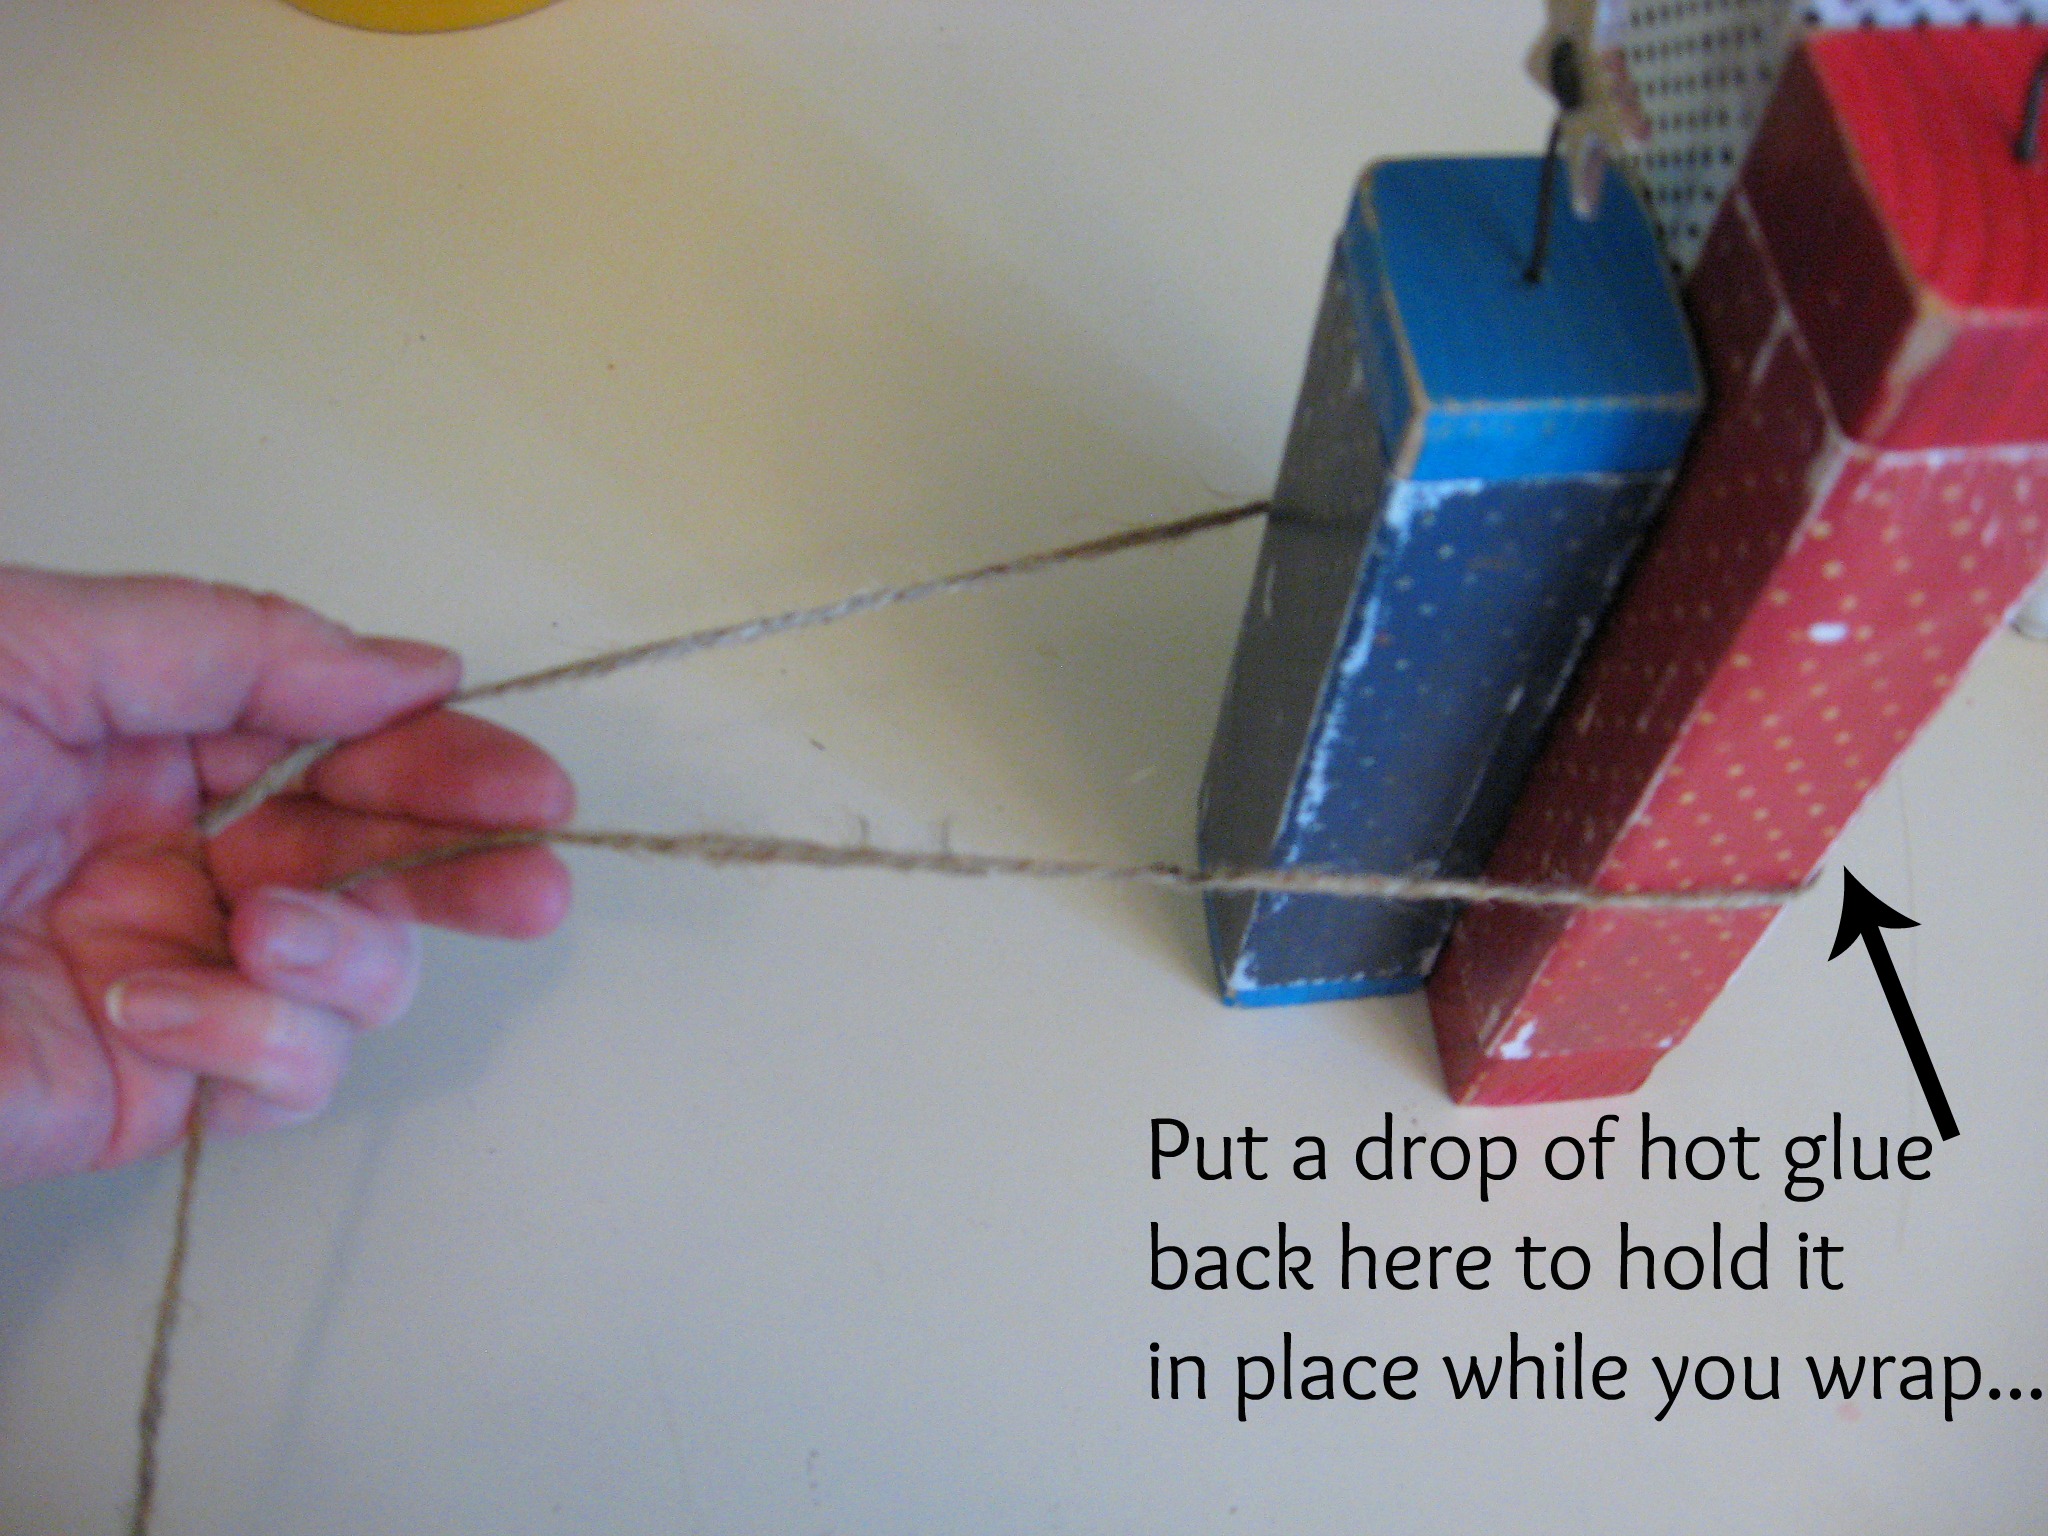
I stacked the three fireworks together and used a little dab of hot glue to hold them together so they wouldn’t shift around during this next step.
Wrap twine around them, leaving a tail, and using a dot of hot glue on the back to hold it in place.
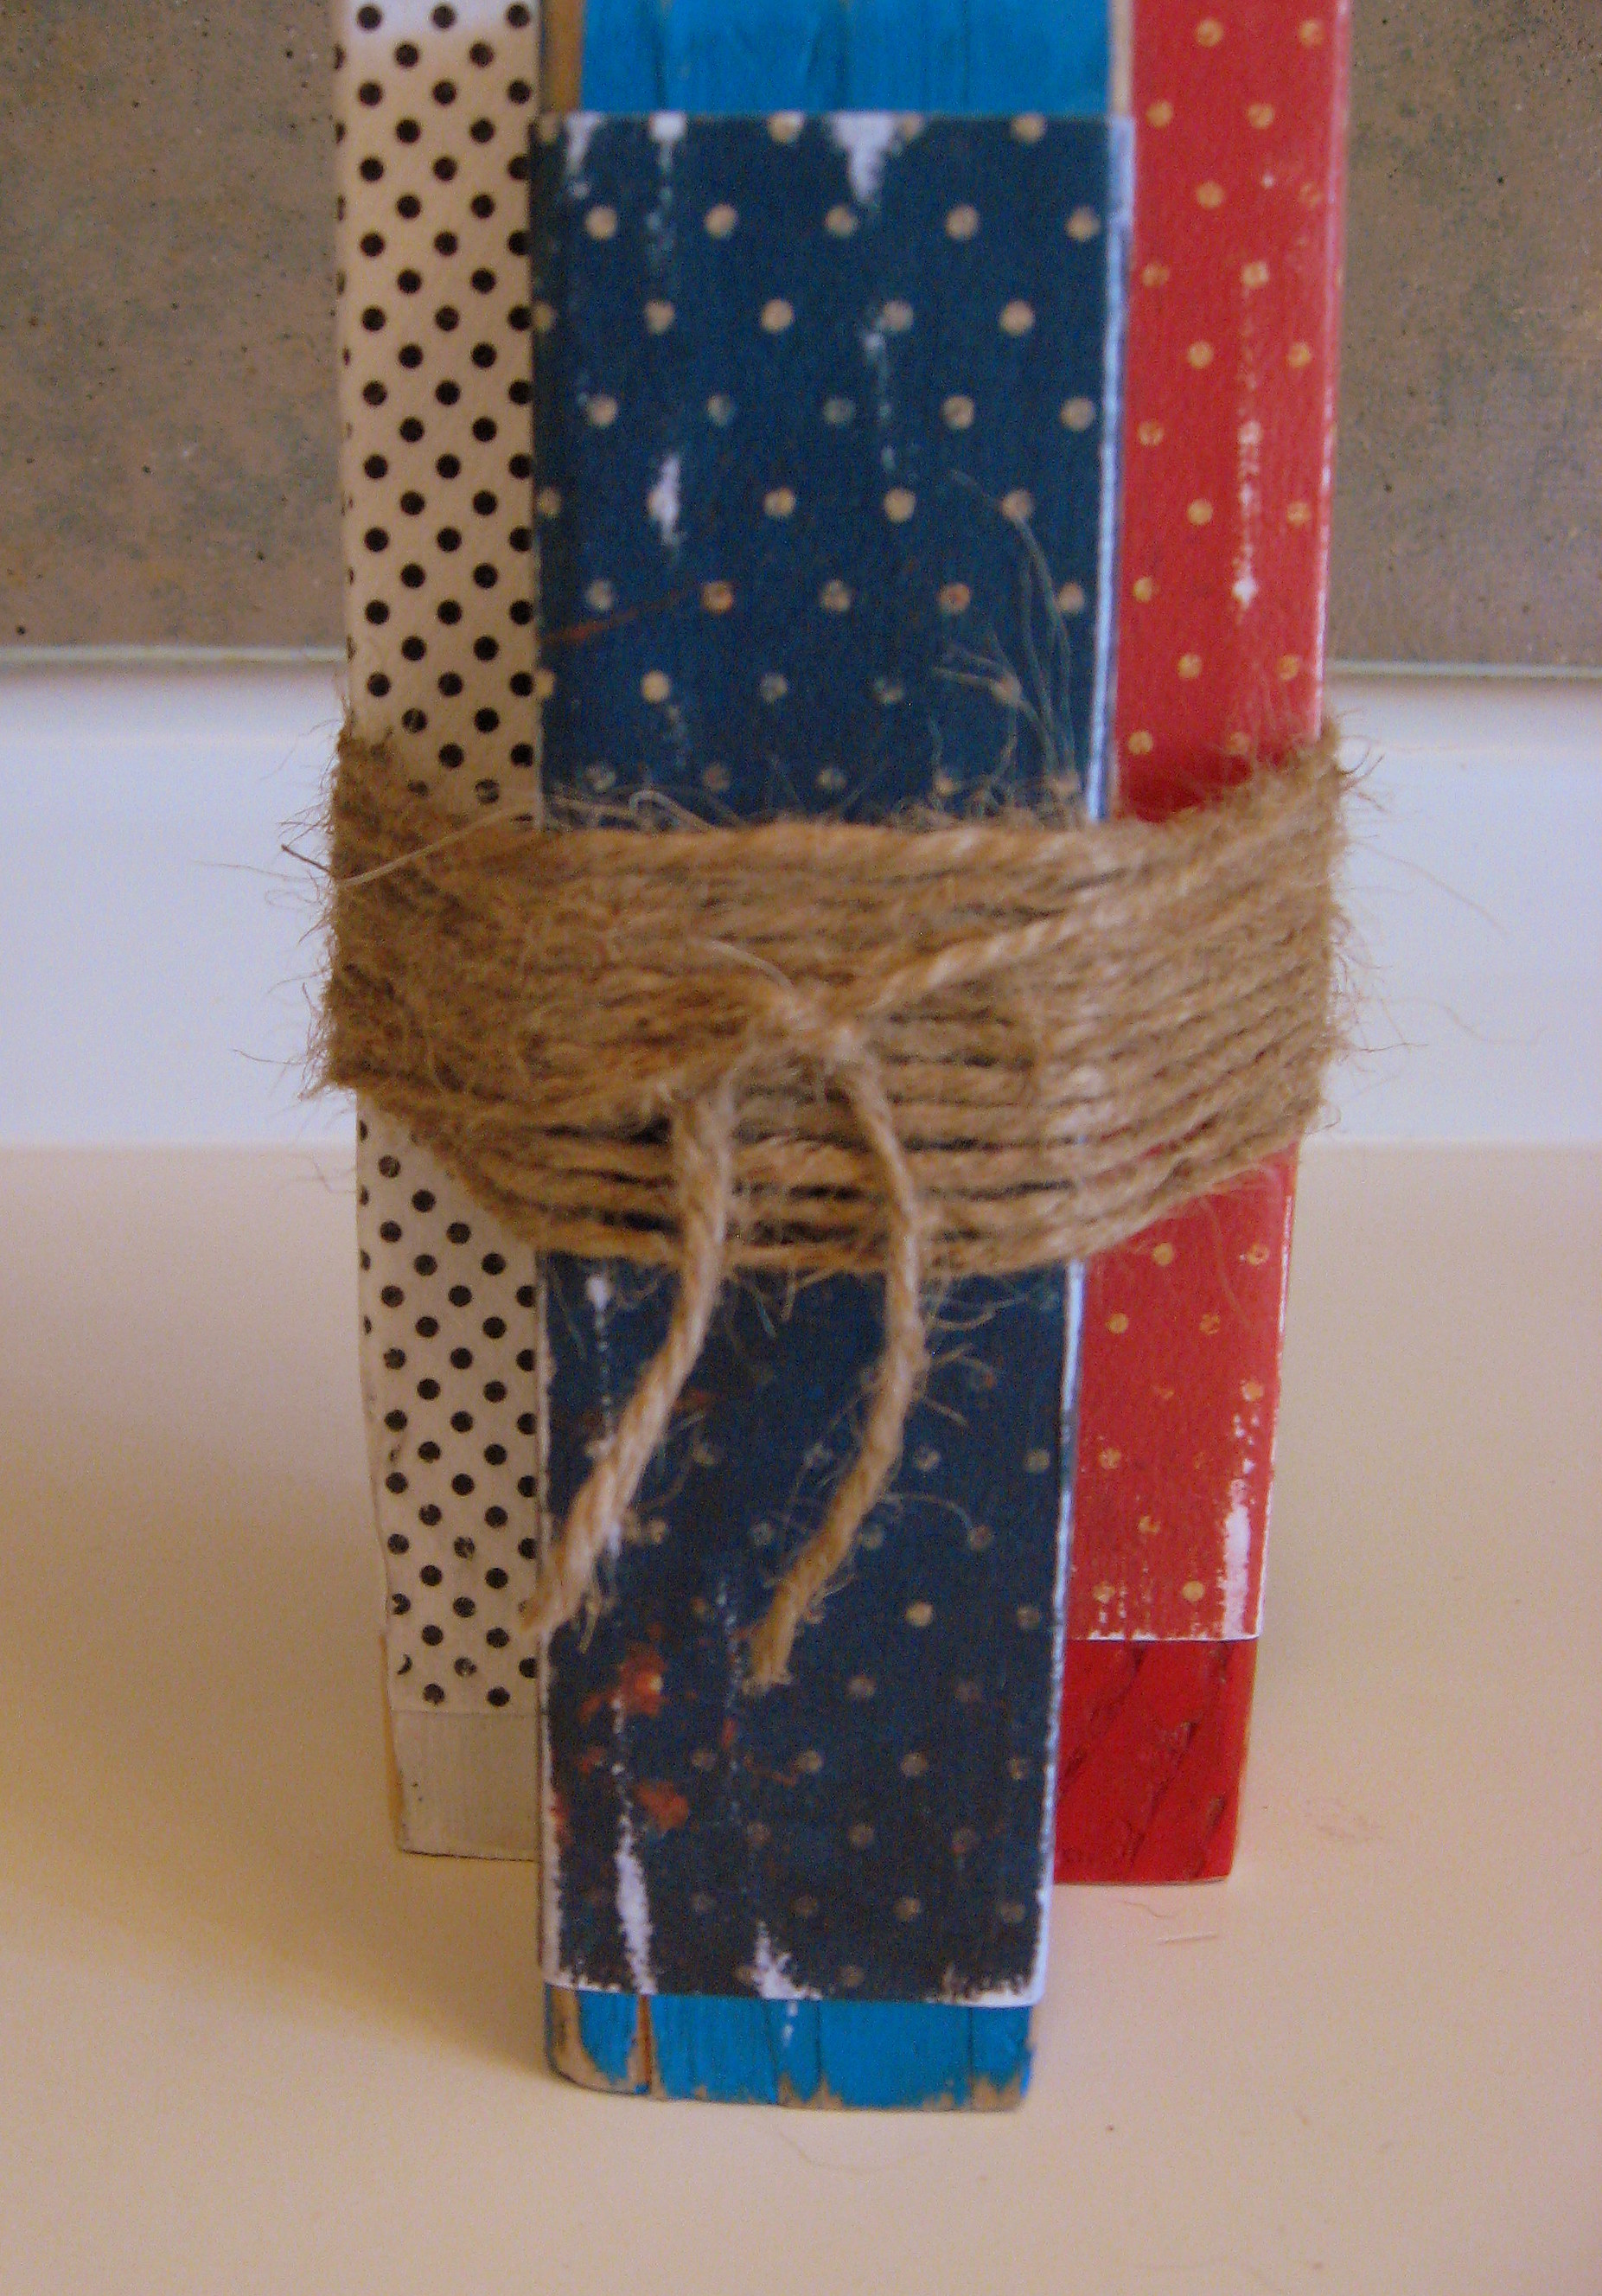
Wrap the other end of the twine around the whole bundle until it looks good, then cut the twine and tie the two ends together like this:
The last sentence is just as hard as the first….ummmm….
TA DA! Finished fireworks!

Burlap Stockings, BACK TO SCHOOL TEES, Essential Oils, Midi Skirts & More!
Such cute stuff today!
 $12.99 | Christmas in July! LOWEST Price ever!!! Personalized Burlap Stockings!!!!
|
 $4.99 | BLOWOUT on BAKERS TWINE
|


More cute stuff available today! Low shipping prices!
PickYourPlum! Candy Tubes! Chevron Clutch! Adult Flip Flops! Kids Name Flip Flops!


Confection Perfection – Candy Tubes
Clever packaging for a sweet gift.
Starting at $7.99 (52% off) Retail: $16.99
Clutching at Clutches – Chevron Clutch
Don’t let it go.
Starting at $6.99 (65% off) Retail: $19.99
Get Ready to Flip Out – Adult Flip Flops
Flippity Floppity. Flip Flops won’t stoppity.
Starting at $14.99 (70% off) Retail: $49.99
These Flips Won’t Flop – Kids Flip Flops
So cute you’ll flip out. Children’s Personalized Flip Flops!
Starting at $13.99 (60% off) Retail: $34.99
Plus lots more CUTE deals!
LOTS of cute deals! Inexpensive shipping!
PickYourPlum! Gift Tags! Filigree Earrings! Silicone Baking Mats!


Tag it or Bag it – Gift Tags
Tell them with a tag.
Starting at $3.99 (60% off) Retail: $10.00
Play it by Ear – Filigree Earrings
Sometimes you need to play things by ear.
Starting at $2.99 (76% off) Retail: $12.99
Practice Bakes Perfect – Amazing Silicone Baking Mats
Ready, set, bake!
Starting at $7.99 (60% off) Retail: $19.99
Plus lots more CUTE deals!
LOTS of cute deals! Inexpensive shipping!