
New at Zulily! SPANX Swim by Sara Blakely up to 70% off!

SPANX Swim by Sara Blakely up to 70% off!
Sara Blakely had $5,000 and a genius idea — footless pantyhose. Sara persuaded a factory in North Carolina to make the prototype, wrote her own patent and the rest is history! Today SPANX offers you a complete swimwear line that features the same slimming powers as their classic shapewear collections. Get ready to flaunt your beach-ready figure with sassy confidence.
A PYP Best Blog! DIY Magnet Board!
Just in case you missed this article on making a magnet board the first time we shared it a couple of years ago, we are republishing it. After Sharon wrote this blog originally, we got an awesome response. This is one of the PYP Best Blogs!
Have you seen these?
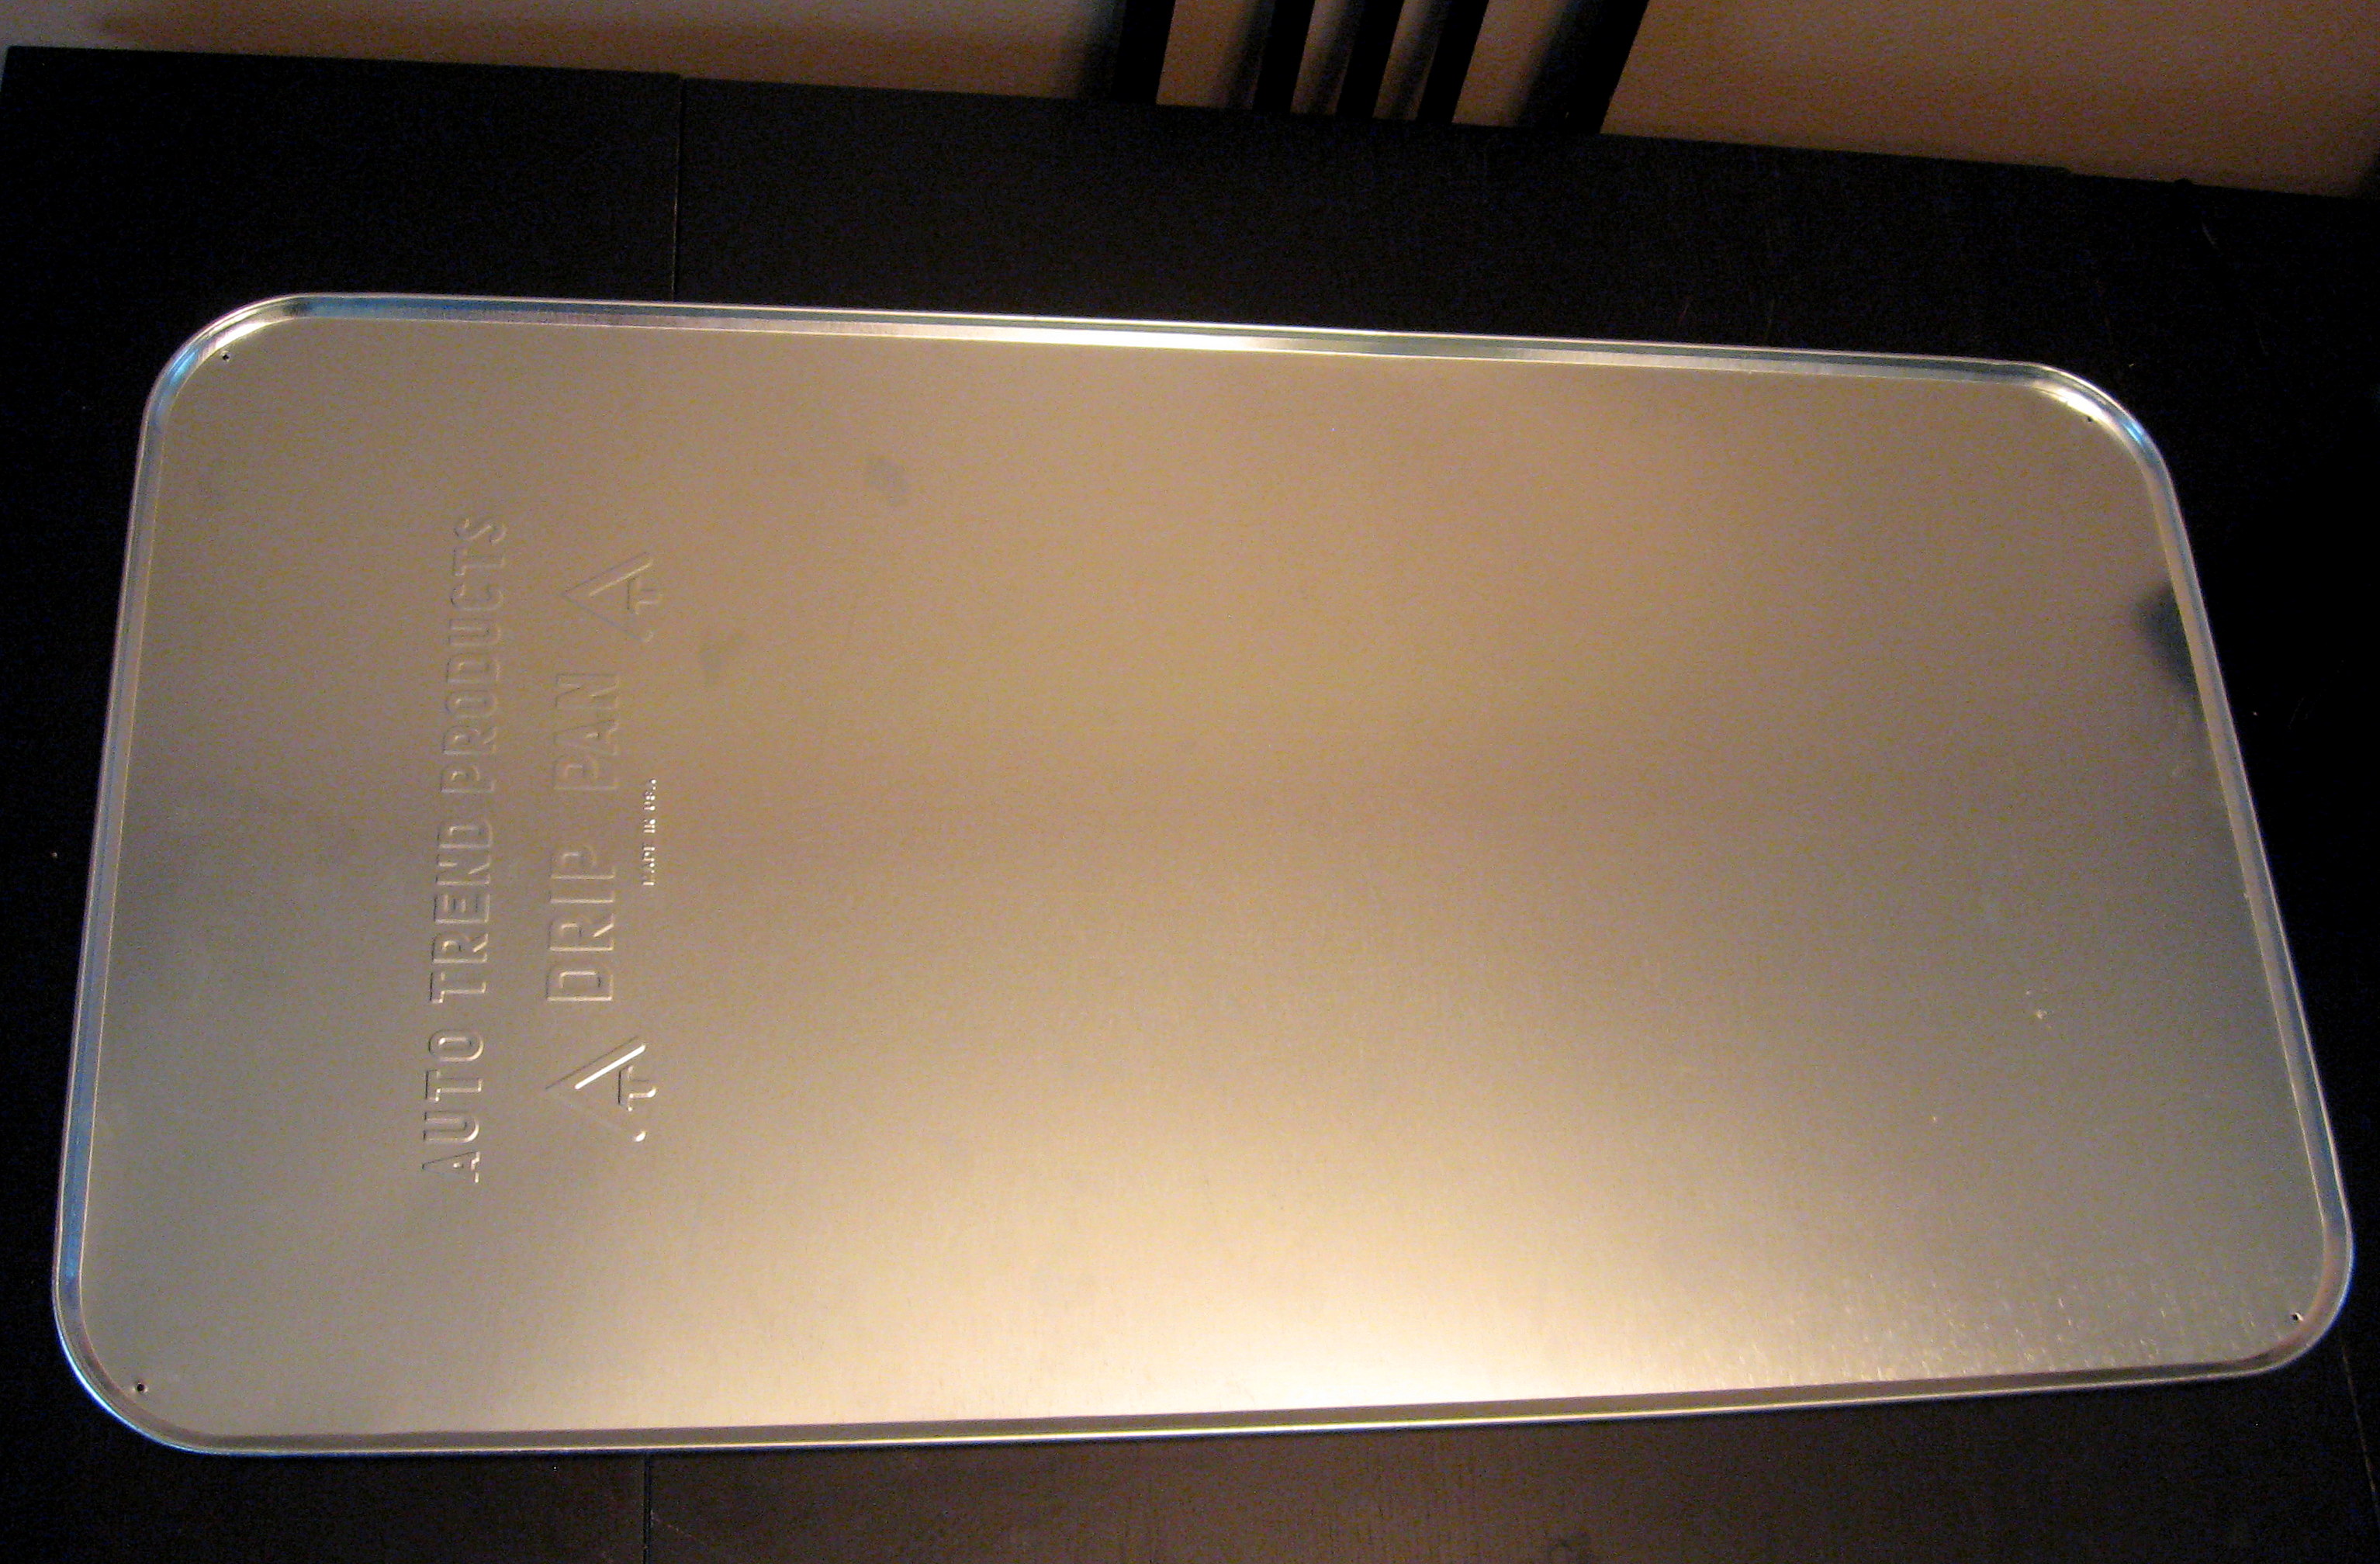
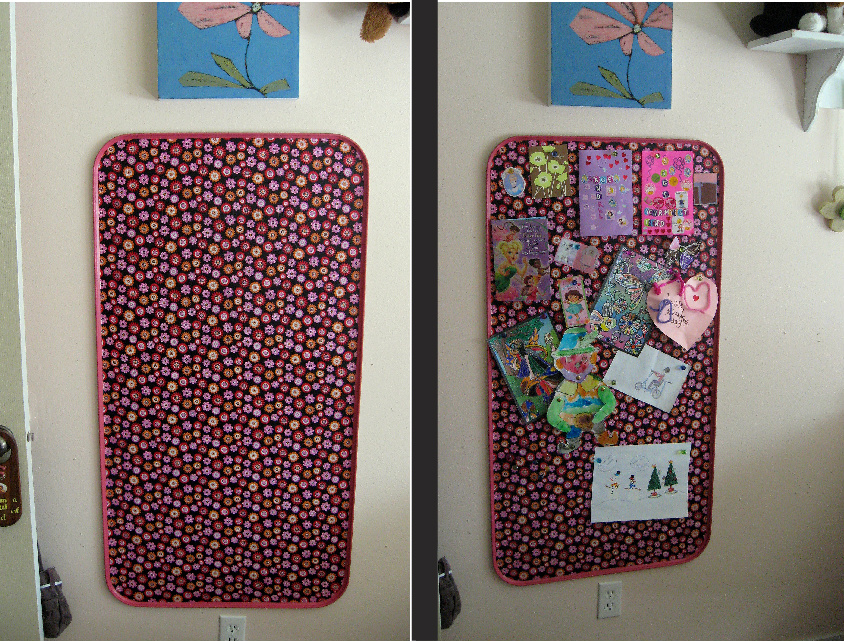
They look like an enormous cookie sheet, but they are drip pans to put under your car. They are big – about 2′ X 4′ – and you can get them at Walmart for about $11. I have had one in my craft area for awhile that I use as a magnet board. I needed one for my daughter’s room, and loved the size of these, but I knew the silver wouldn’t work in her pink room, so I pulled out my trusty Mod Podge and went for it!
You’ll need:
Drip Pan
Spray Paint
Fabric
Mod Podge
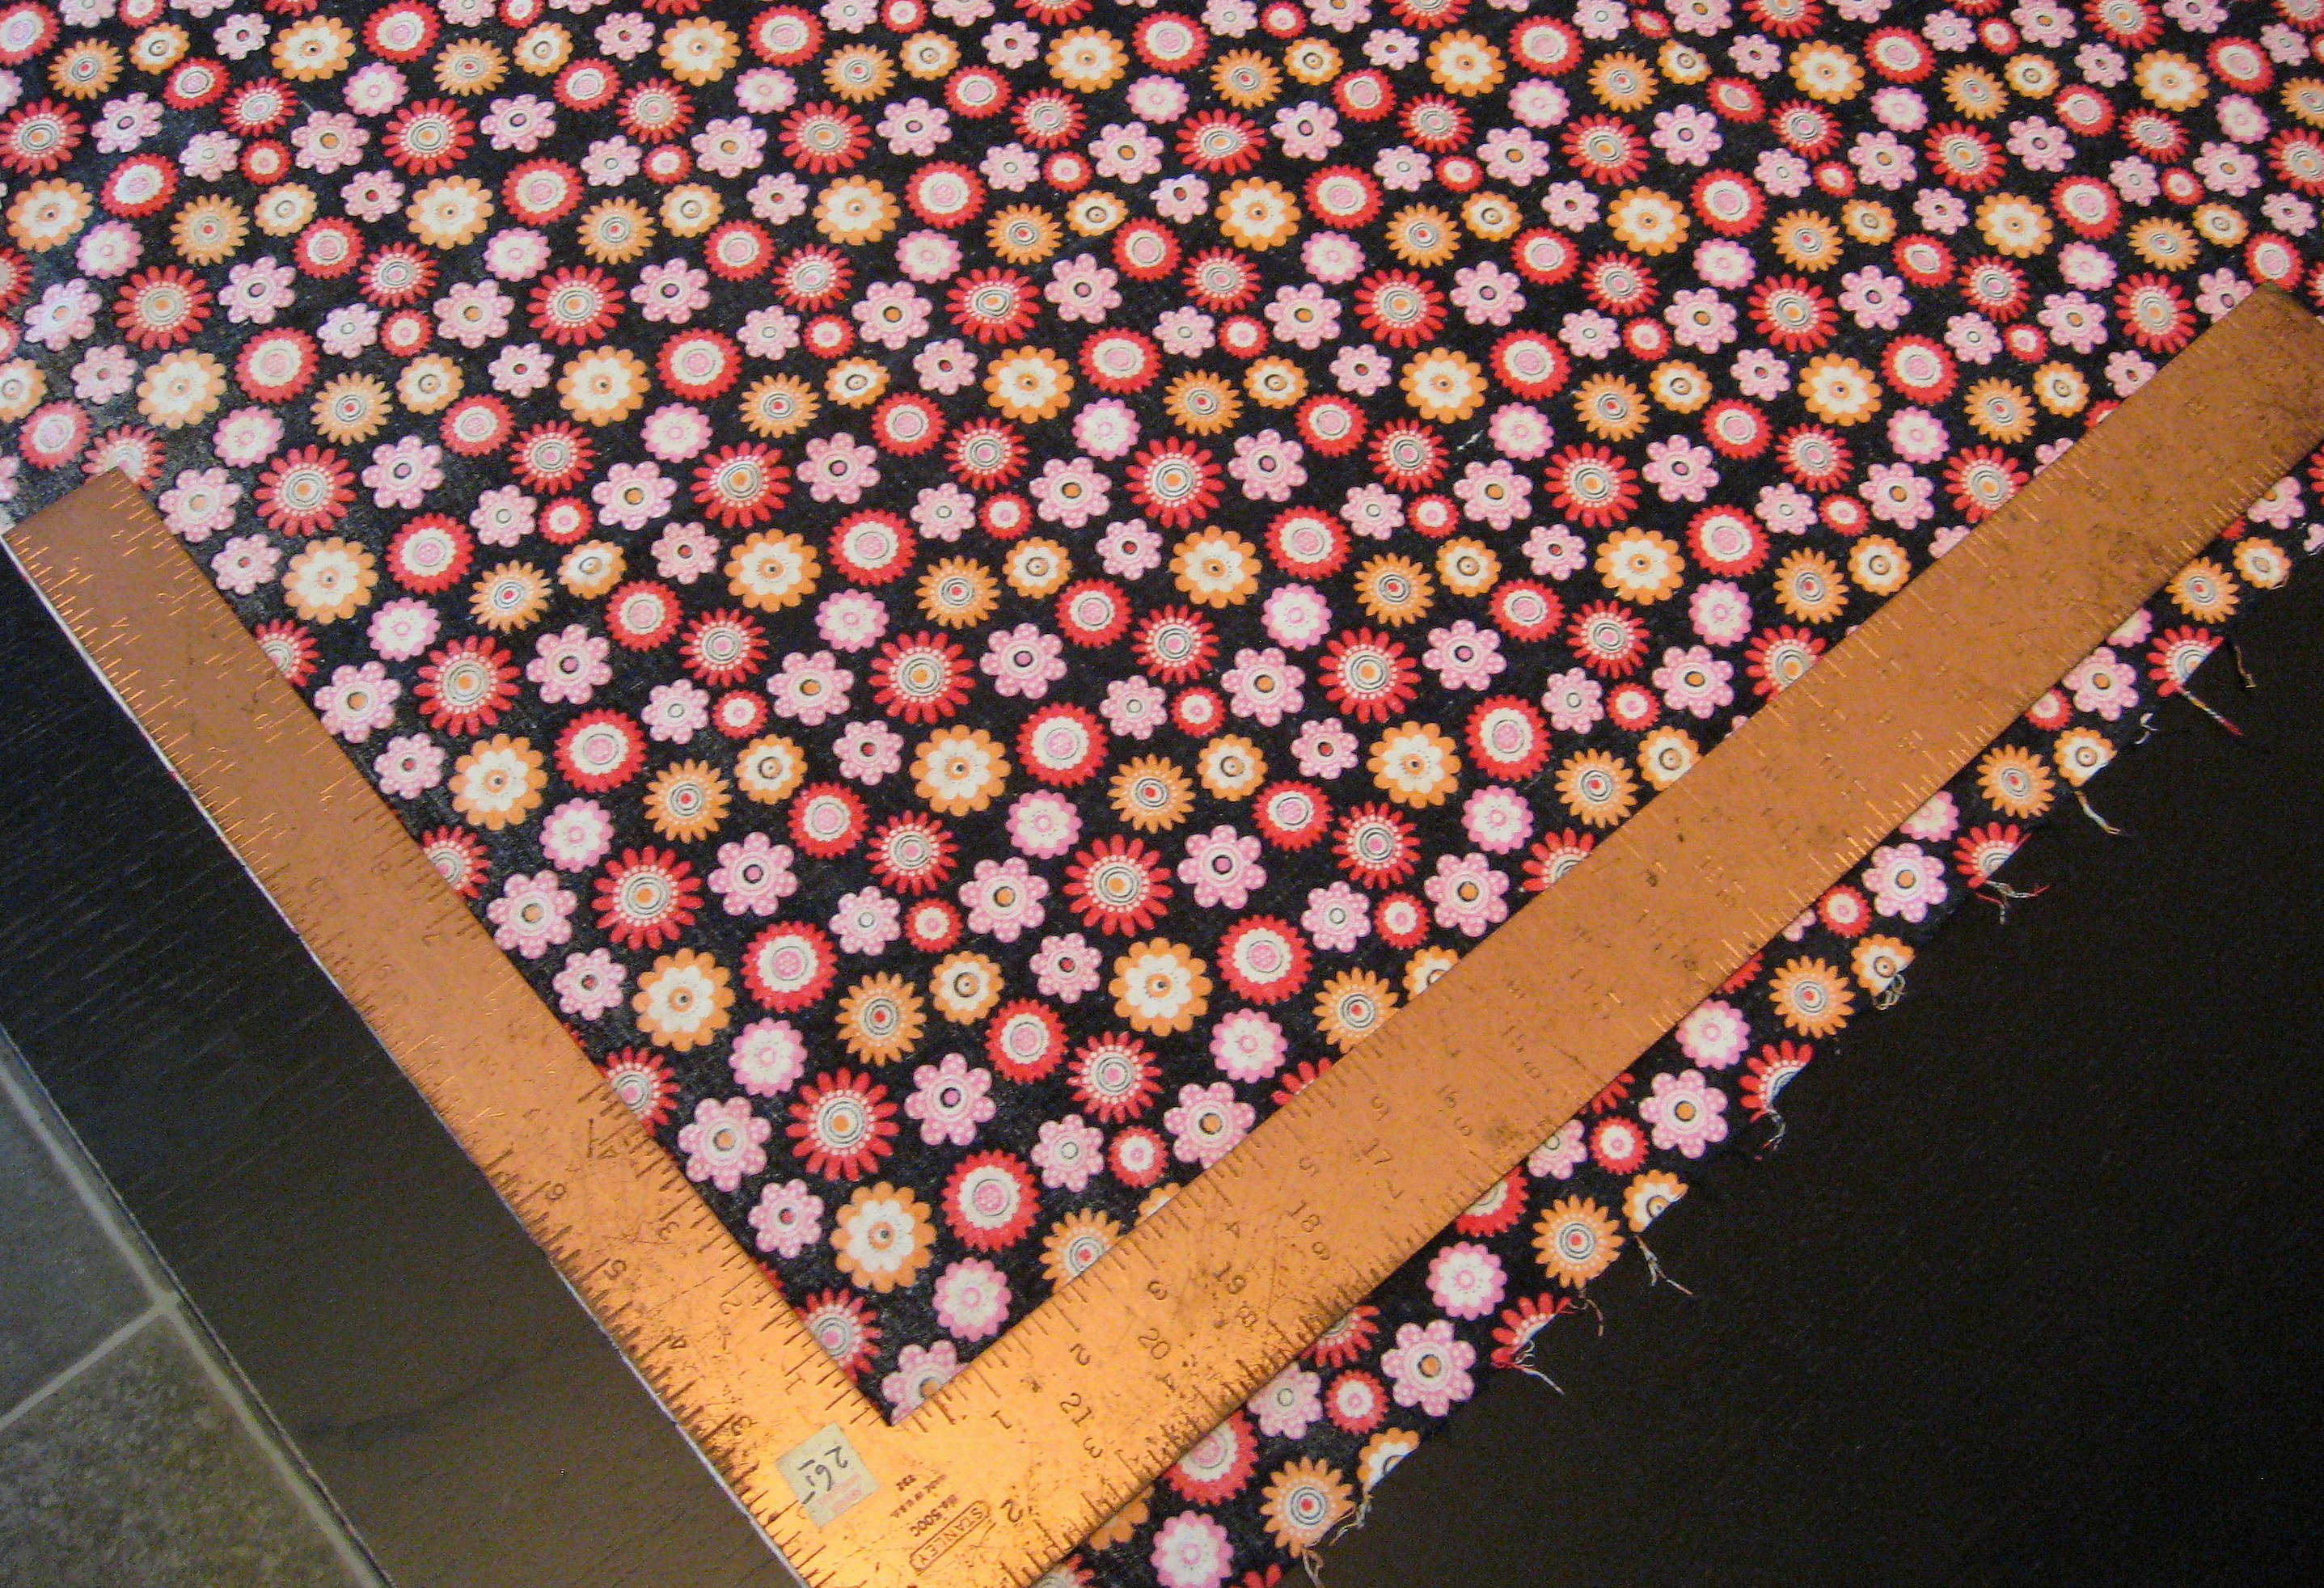
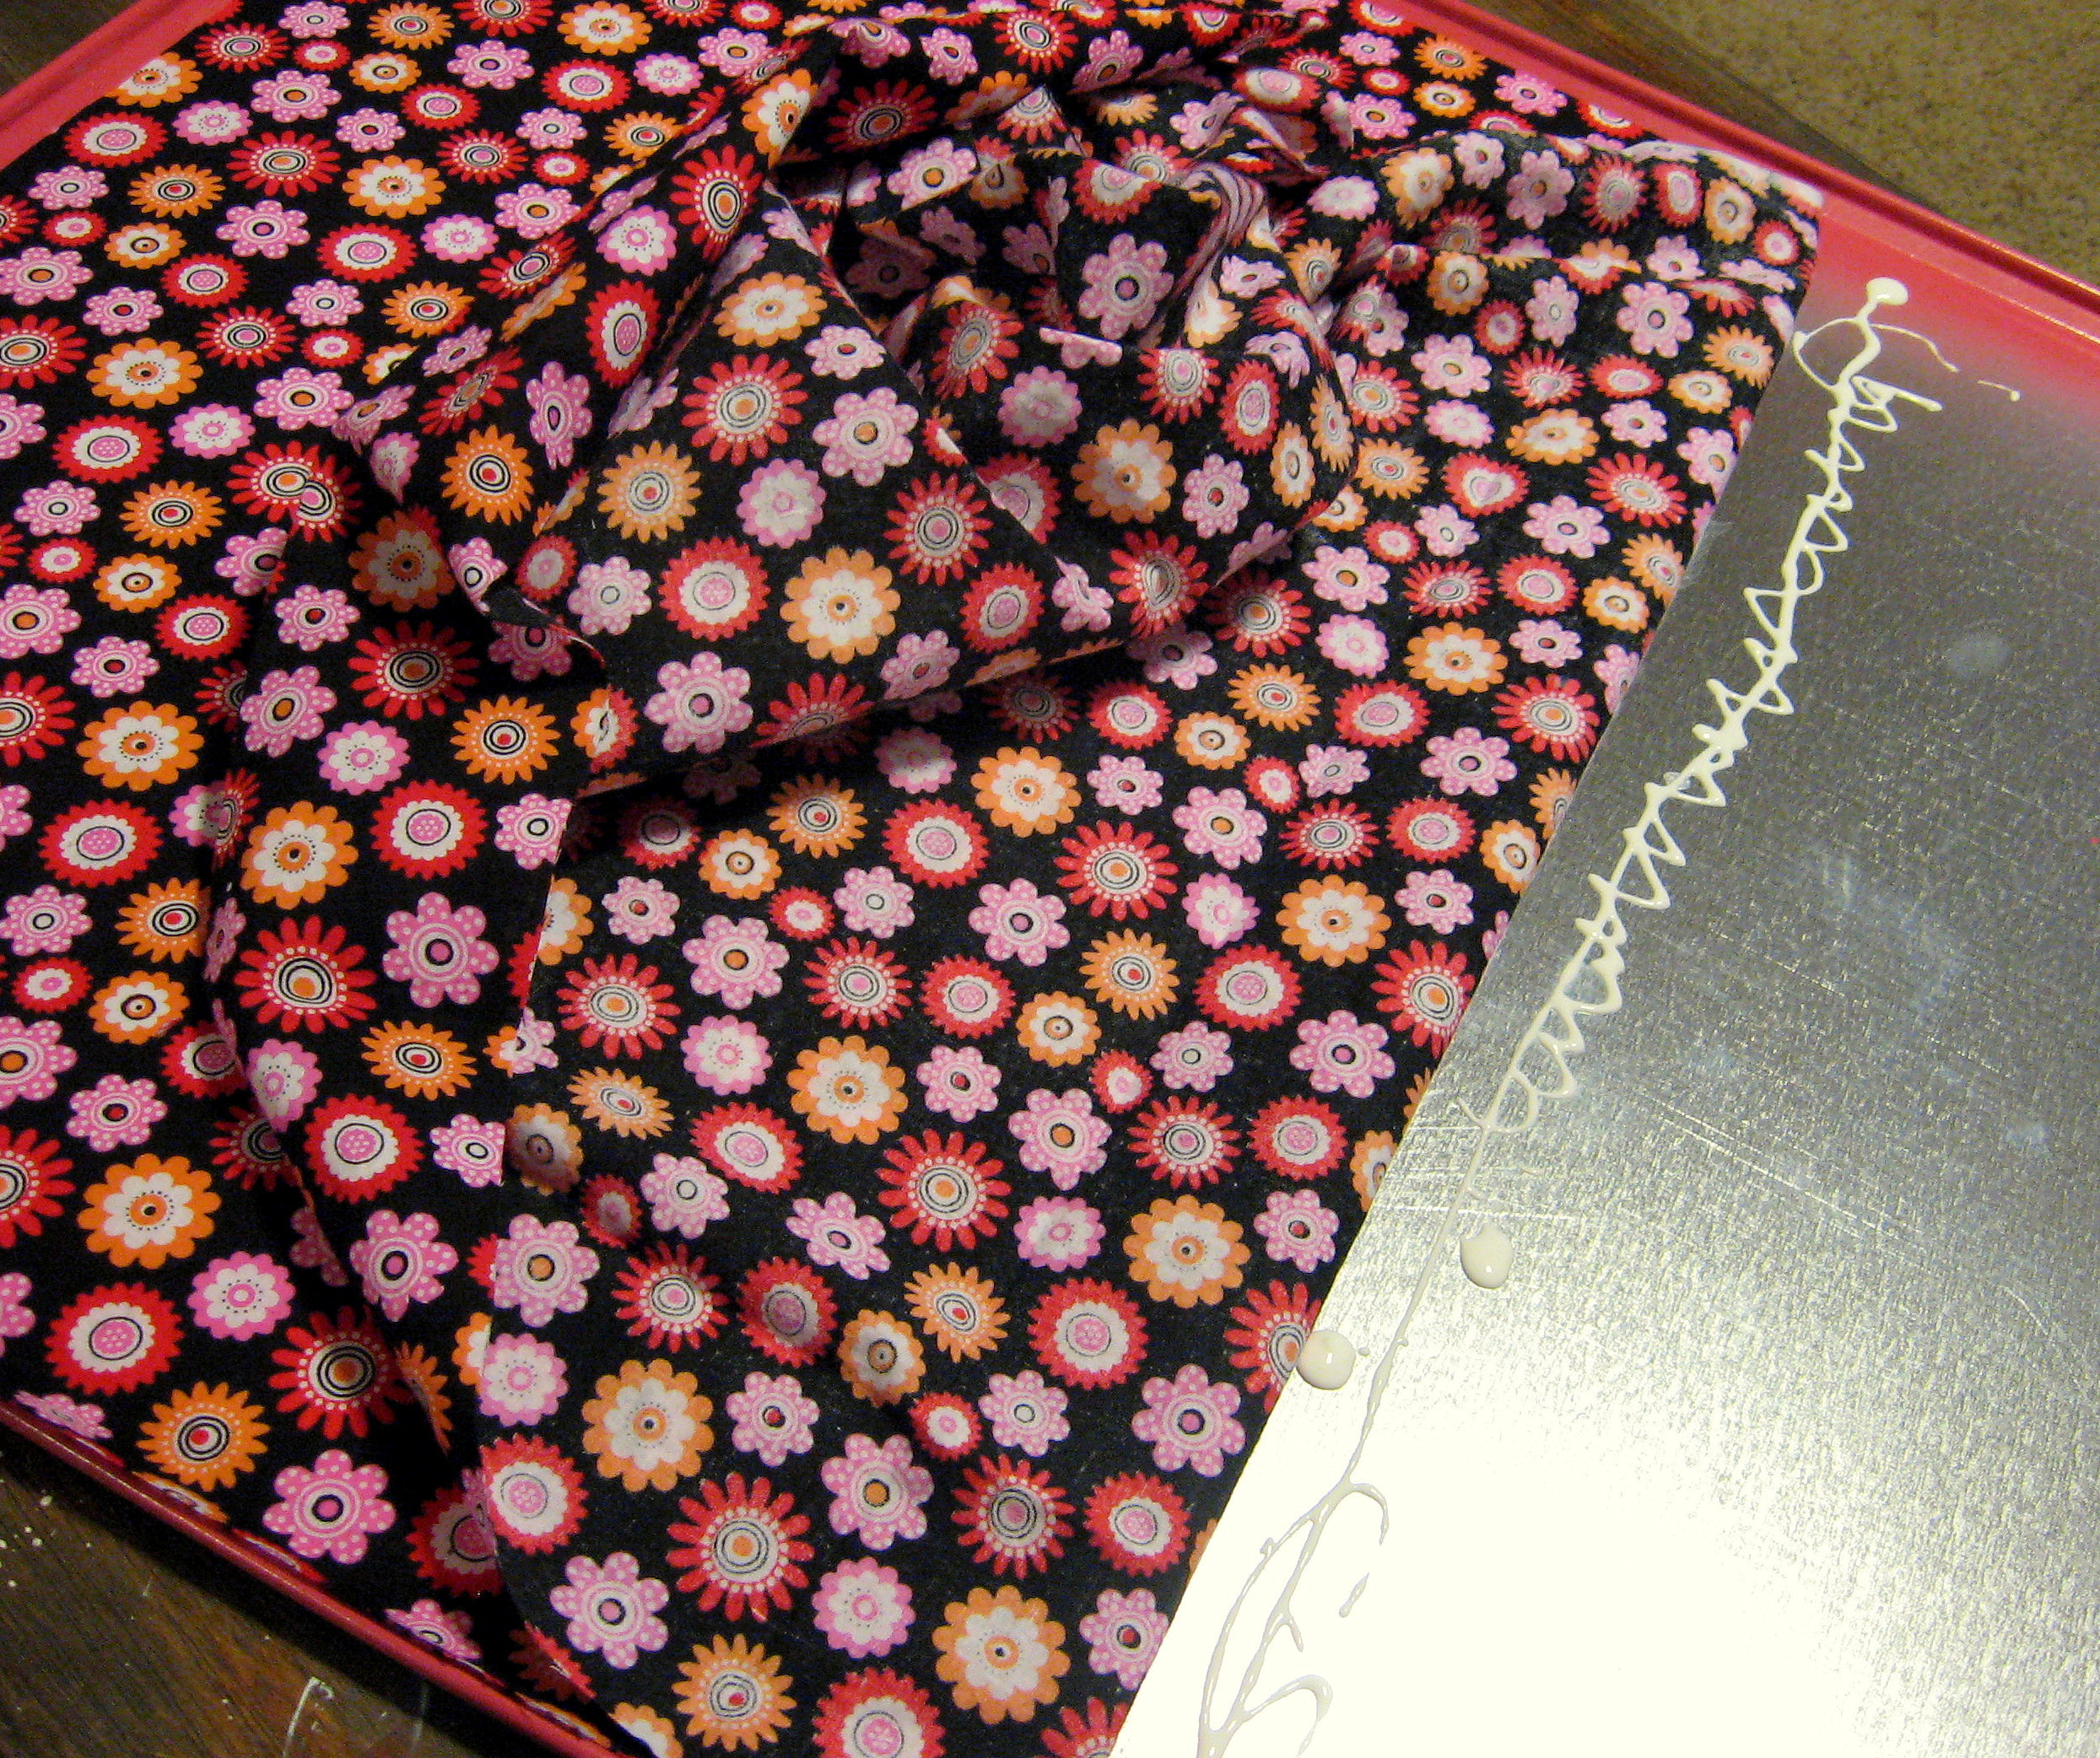
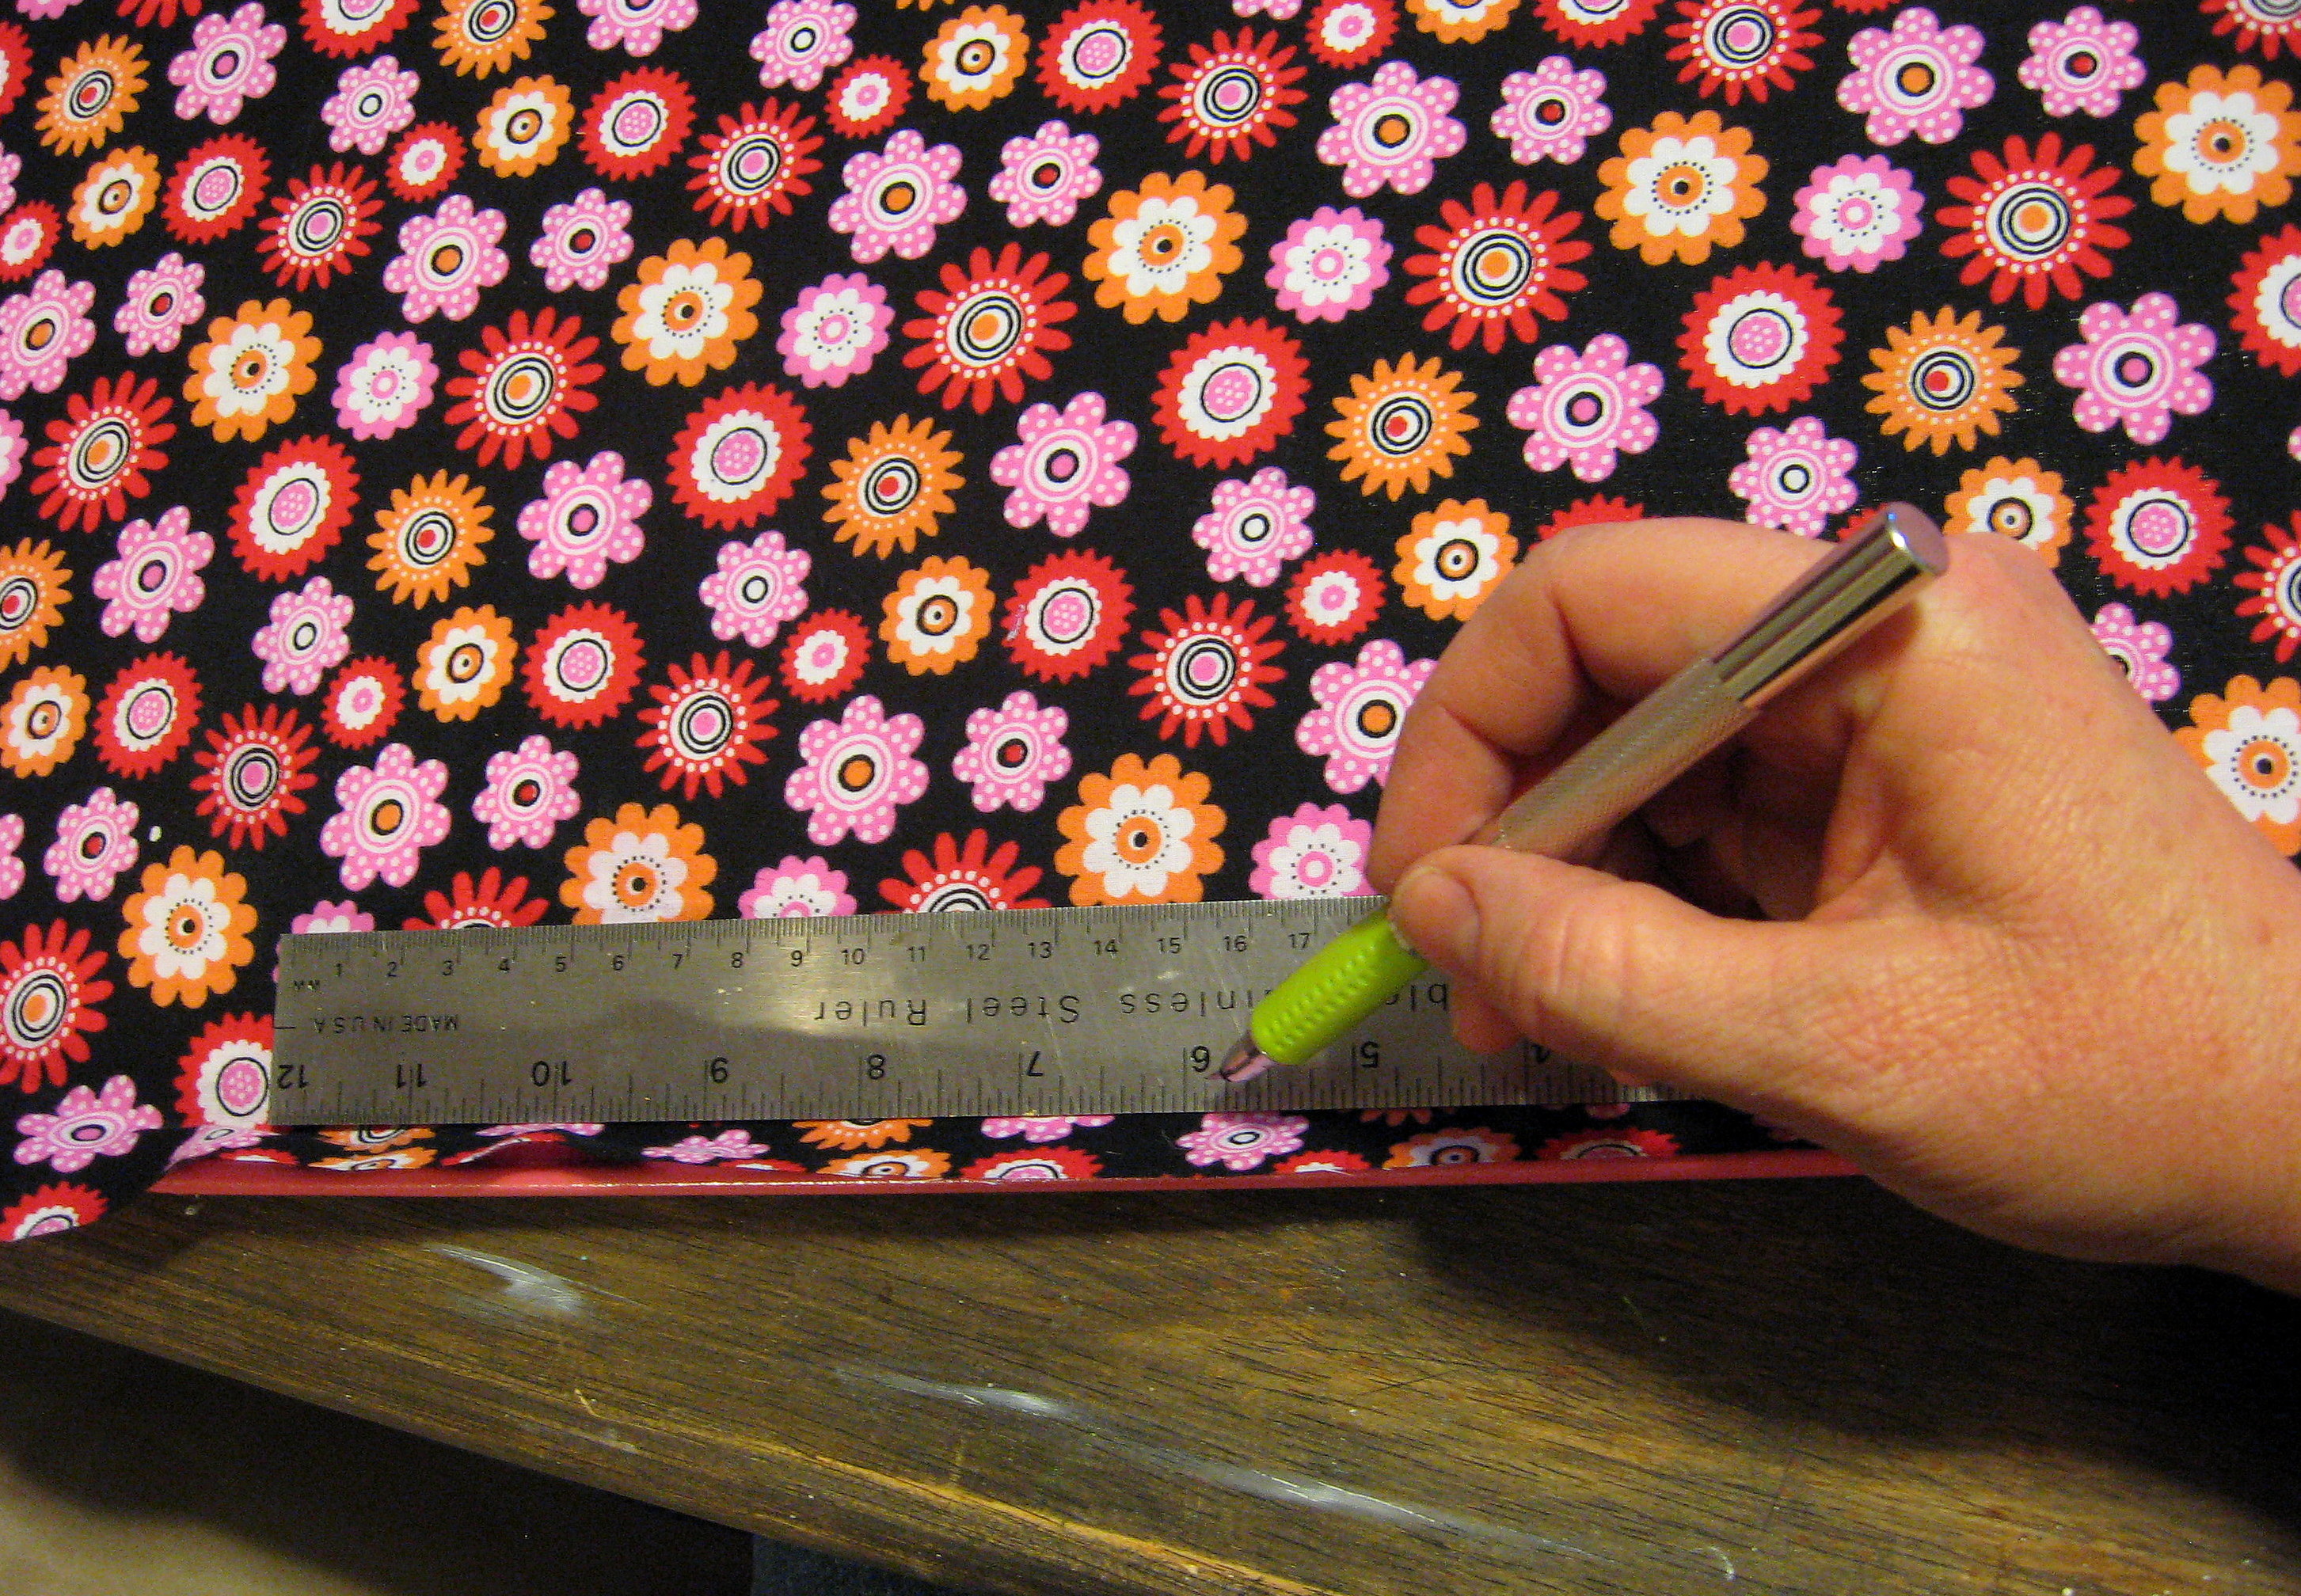
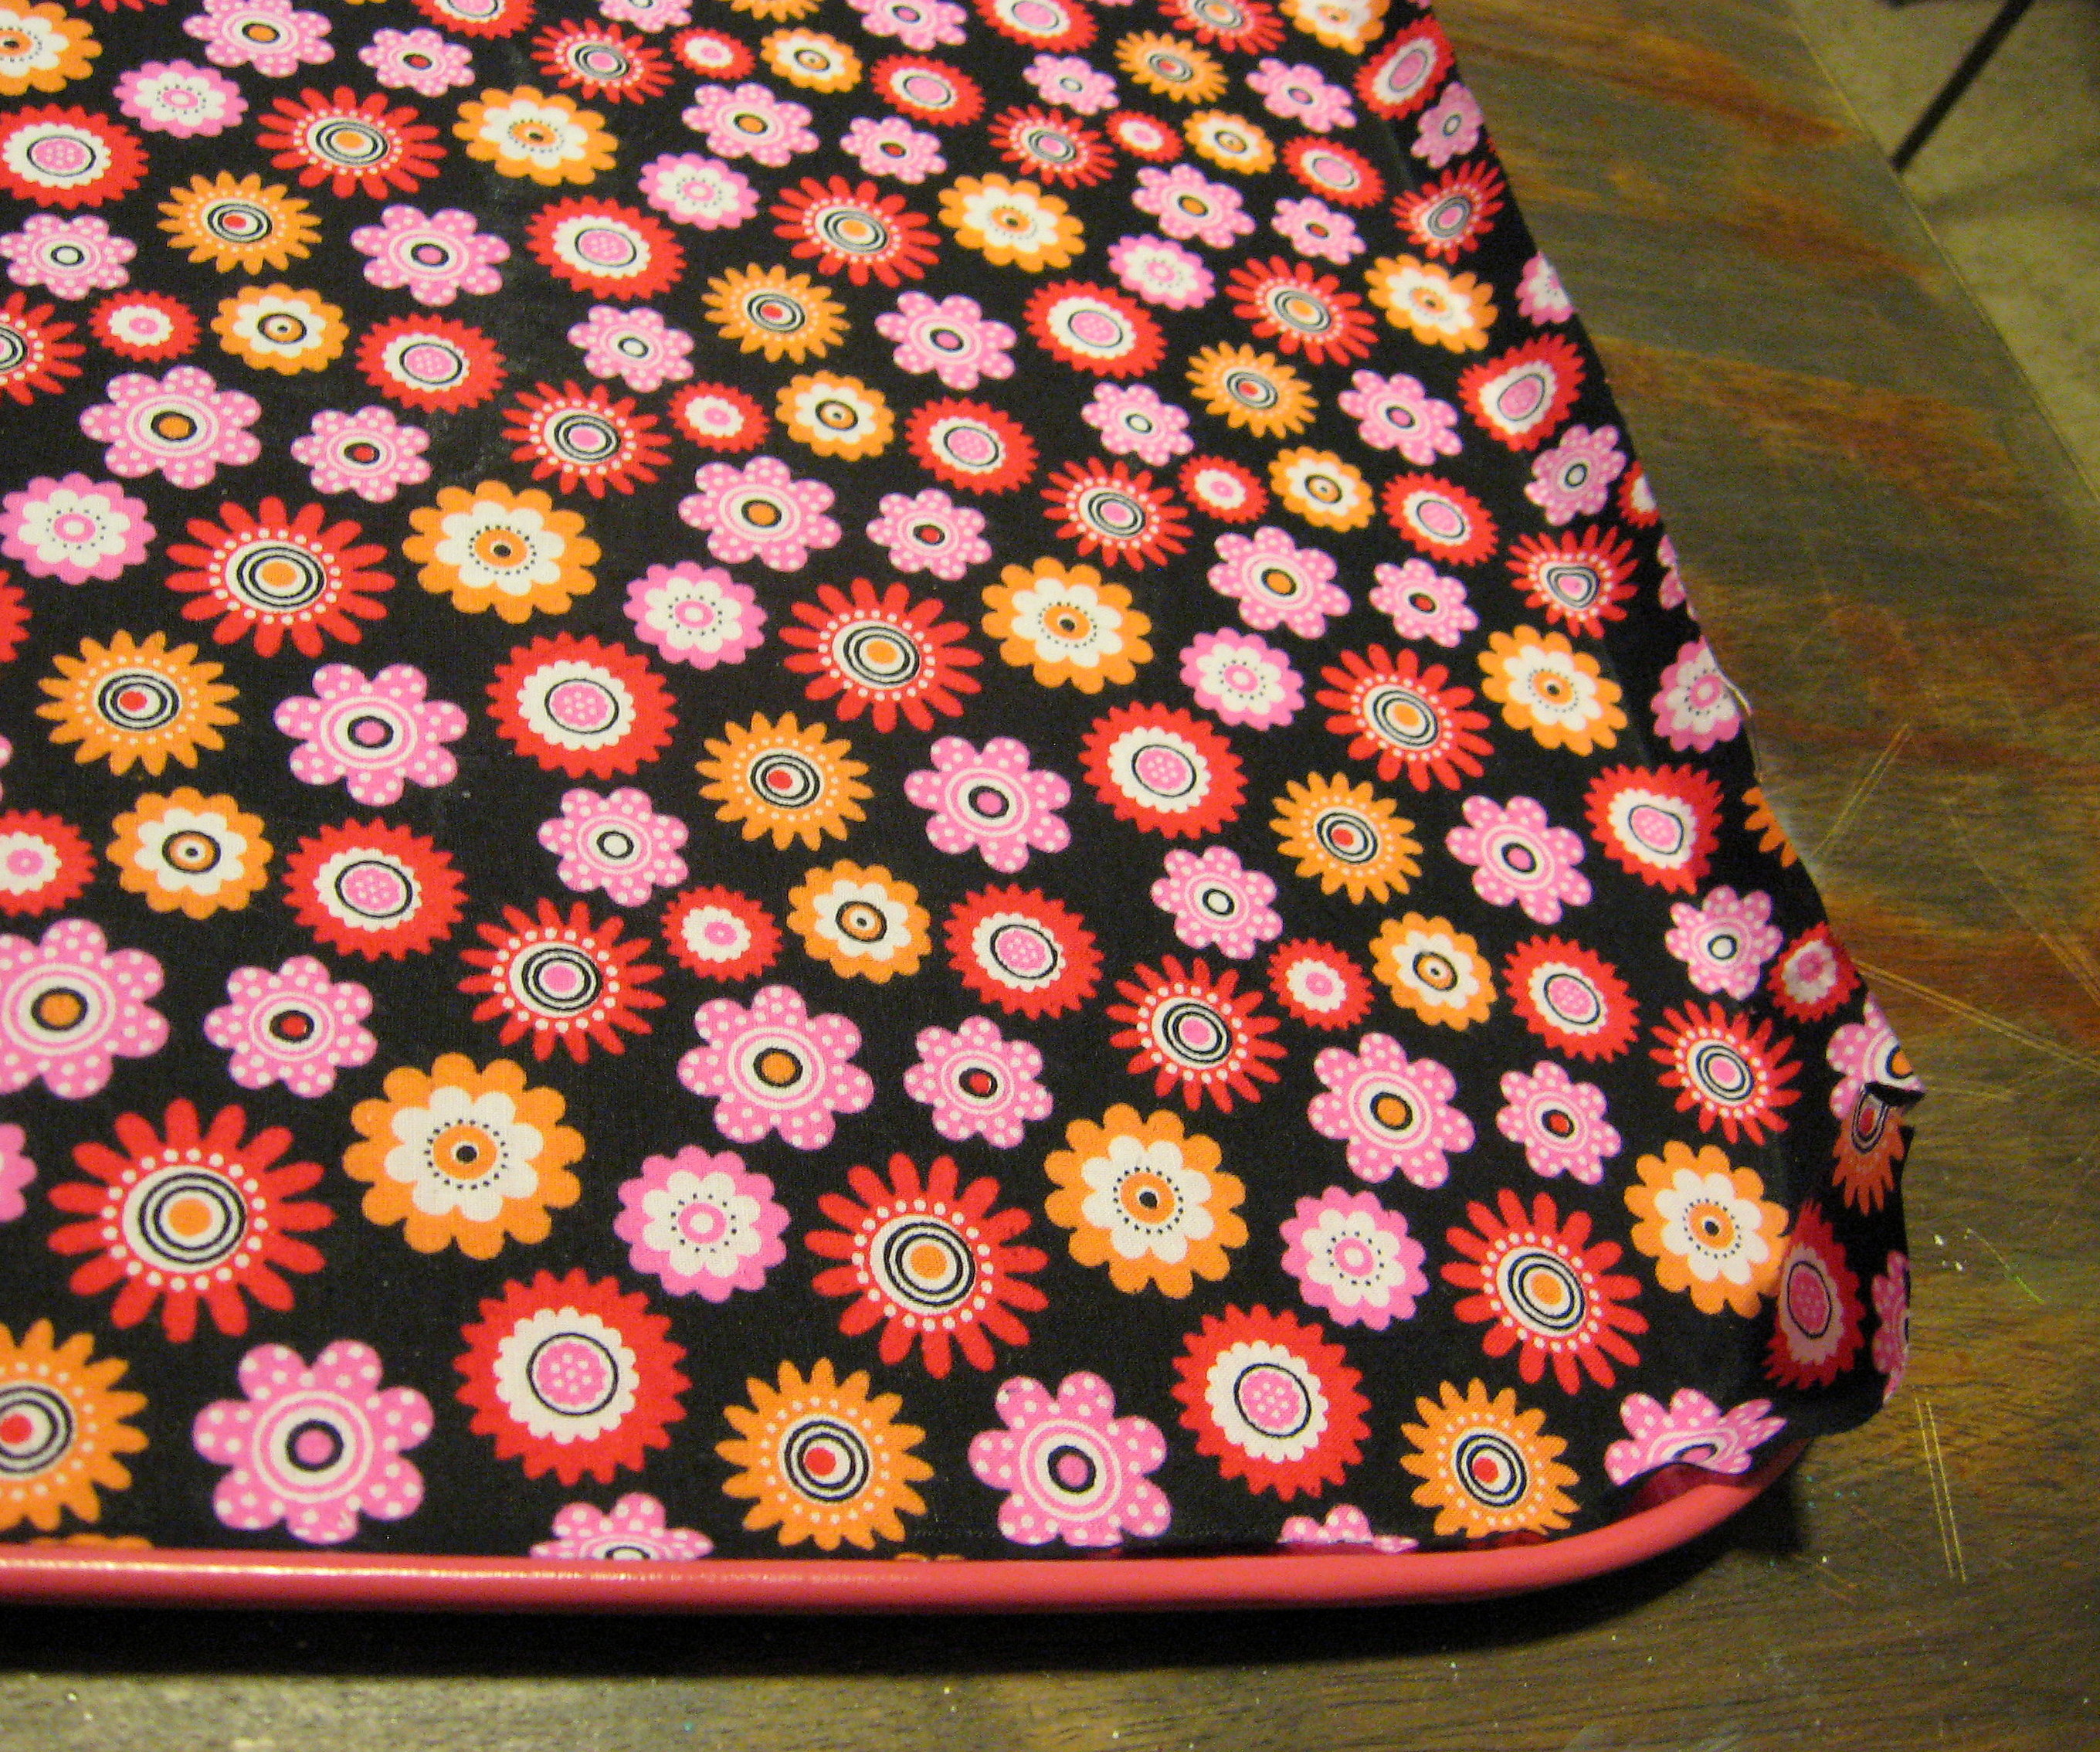
I started by cutting my fabric into a rectangle just a little bit larger than the dimensions of the drip pan – maybe an inch or so. The fabric will stretch a little as you Mod Podge it on, and you will cut off the extra when you’re finished, so you really only need to make sure that two adjacent sides are square and straight. If you have a rotary cutter and mat, you’ll want to use that. I don’t, so I used a carpenter’s square to mark it, then cut with scissors.
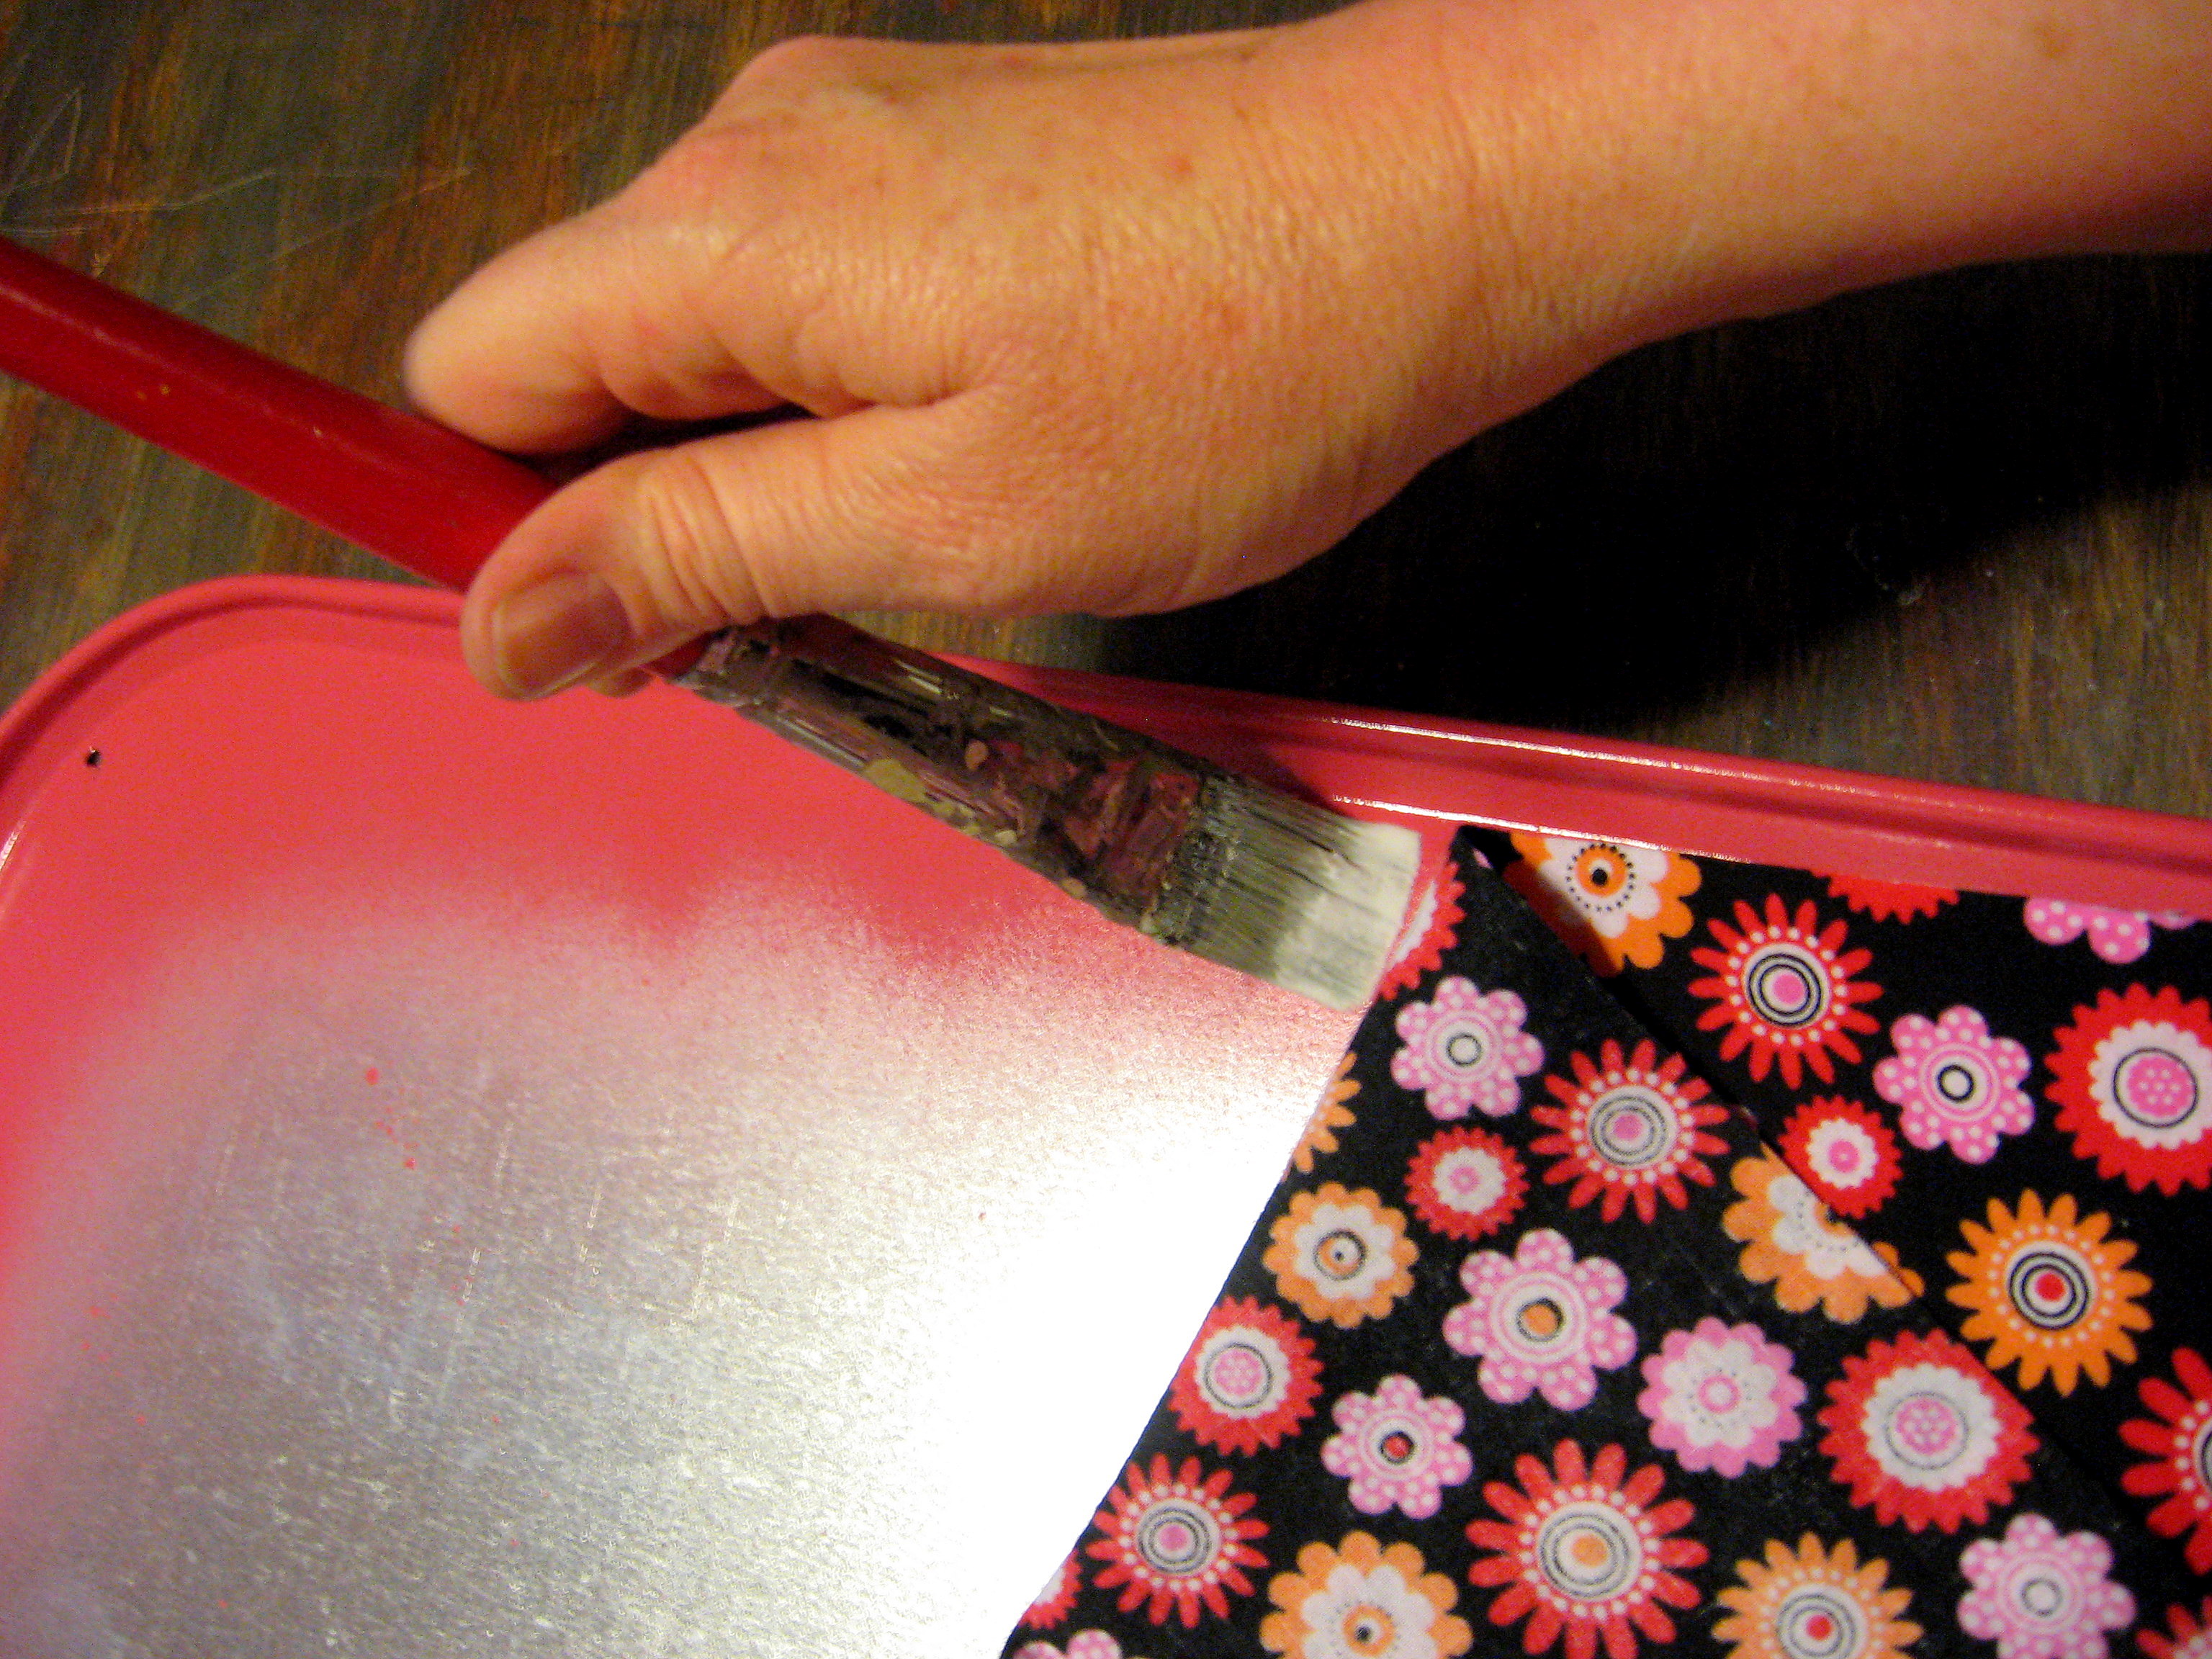
Put the fabric aside and paint the edges of the pan (you could save yourself this step by wrapping the fabric all the way around the edges to the back of the pan if you wanted to.)
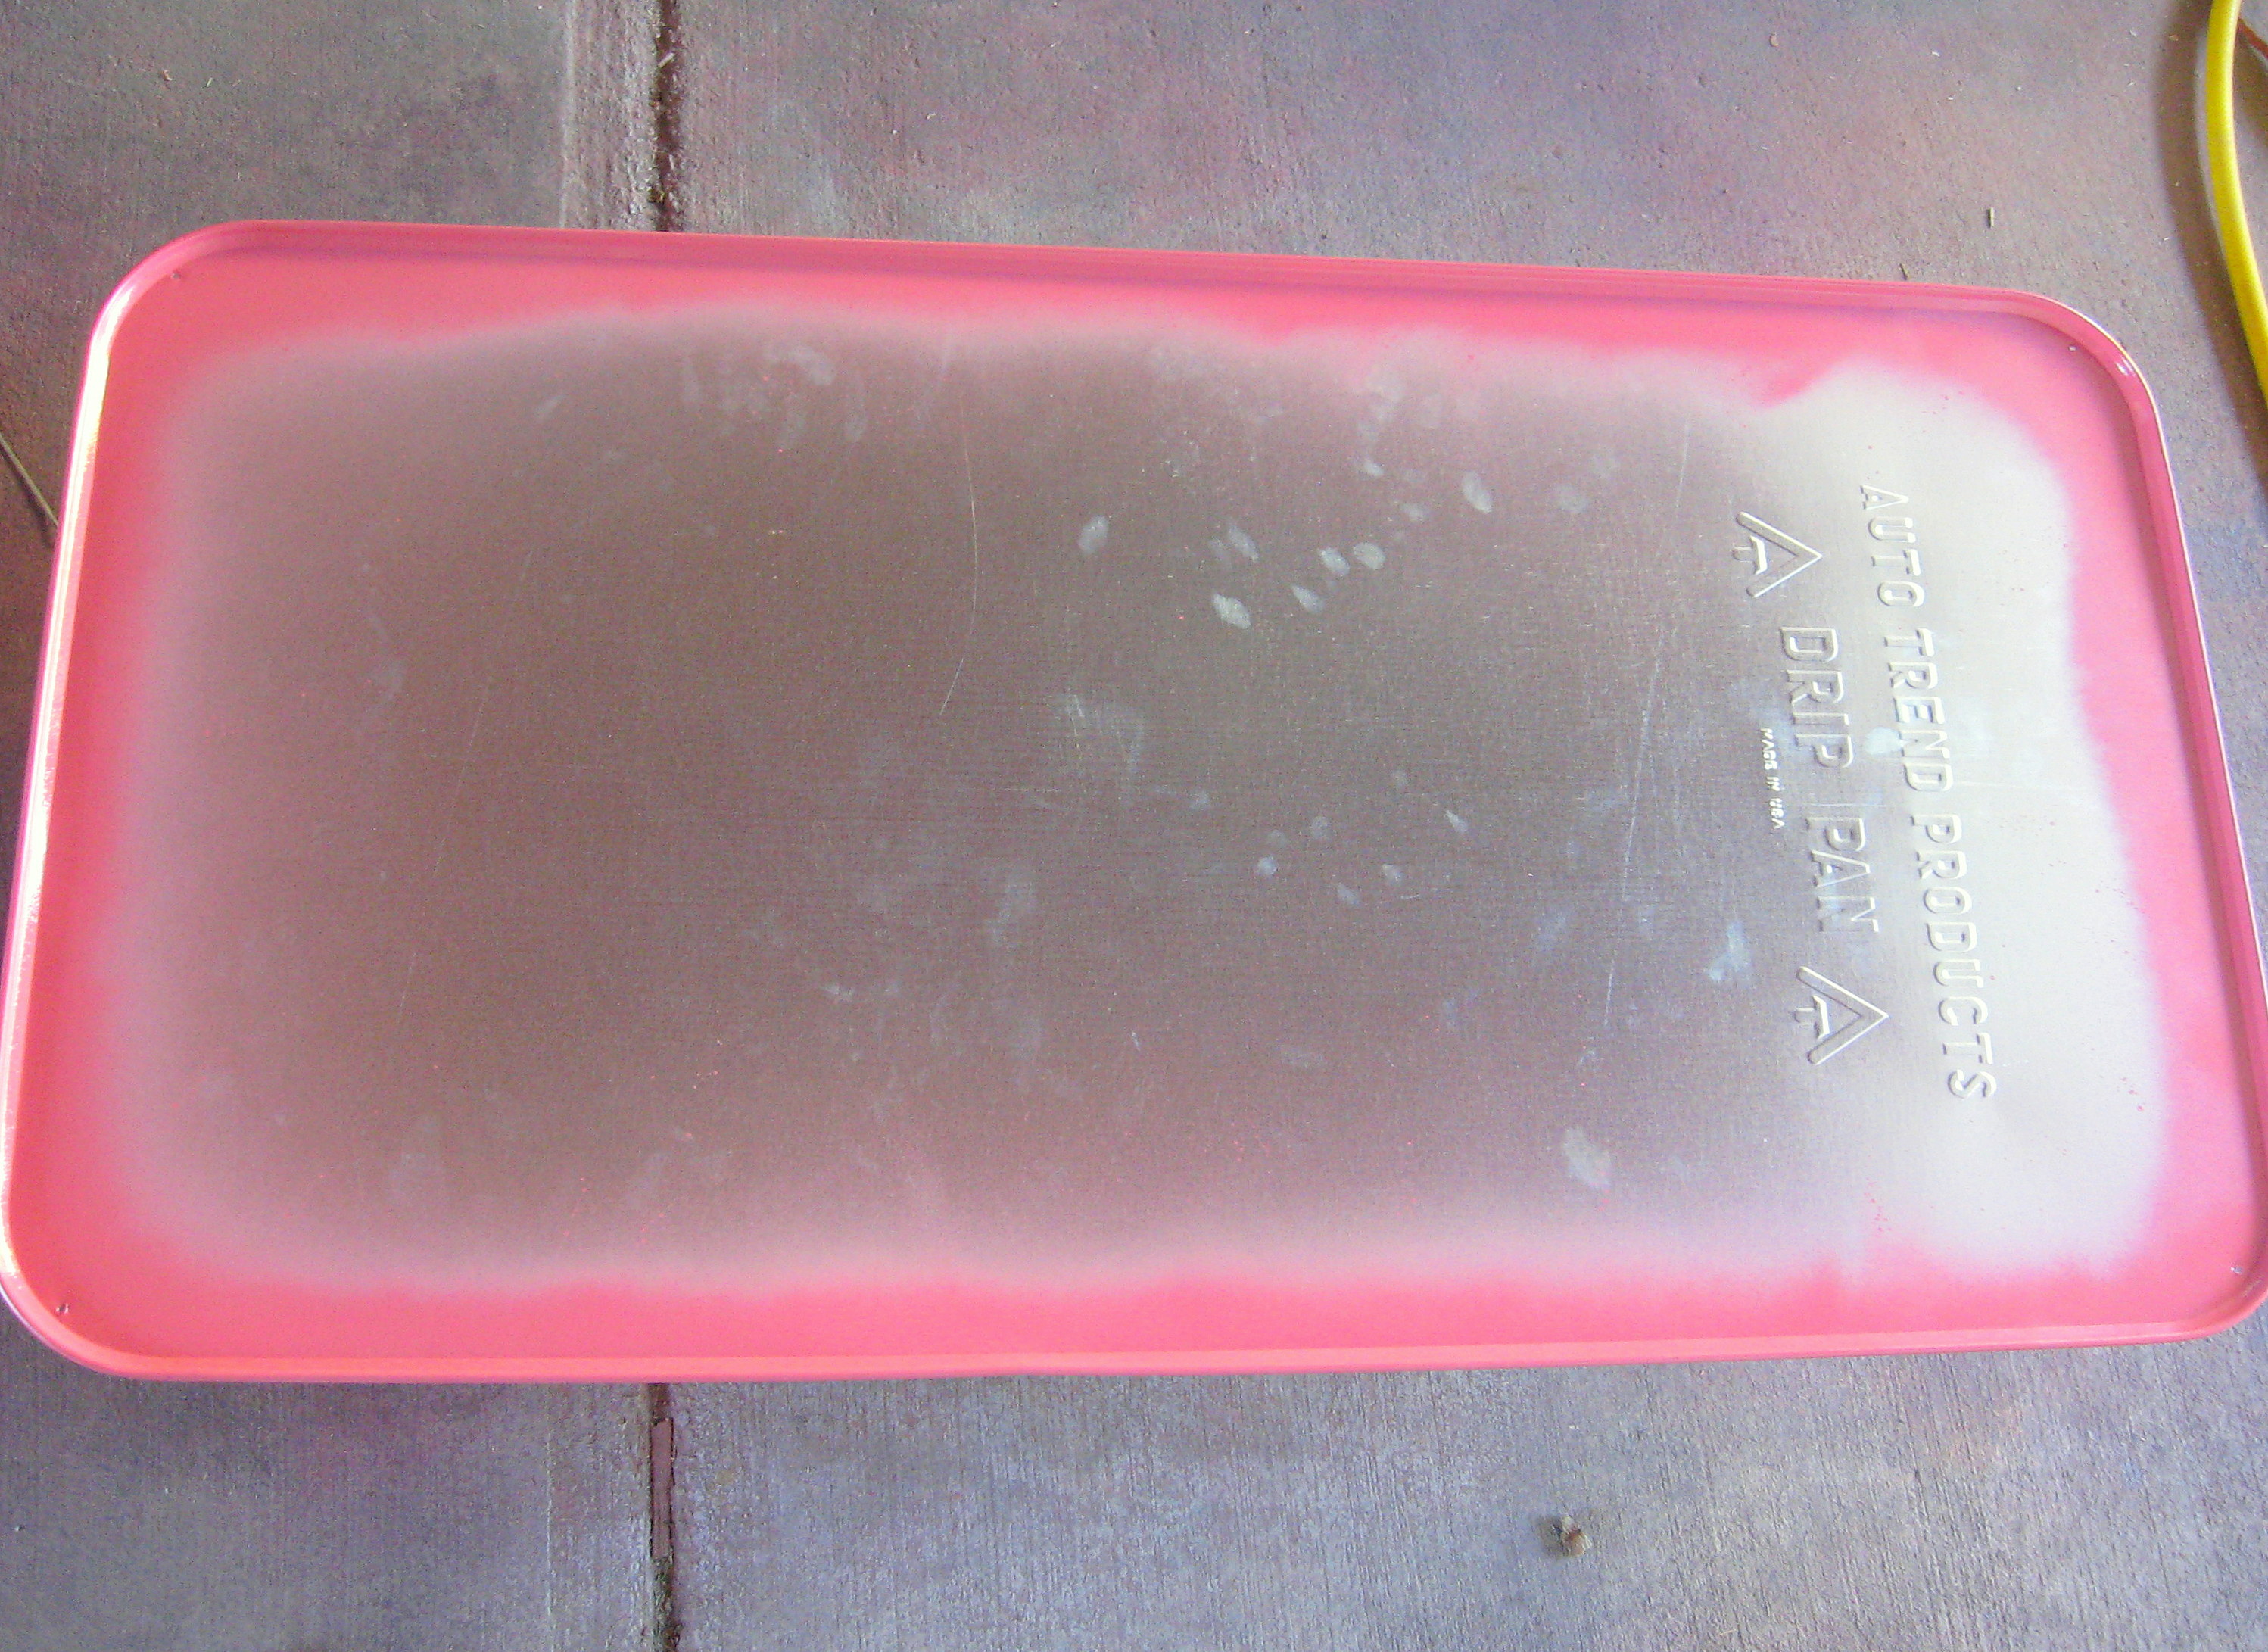
You only need to do the edges, since the middle will be covered with fabric. I recommend using a high quality paint to lessen the chance of it scratching off of the metal. I like Krylon.
Once the paint is dry, find a big work space, make sure your kids are occupied and pop in a movie. Mod Podging fabric is a little trickier than paper and will take a little time and patience to get it all straight.
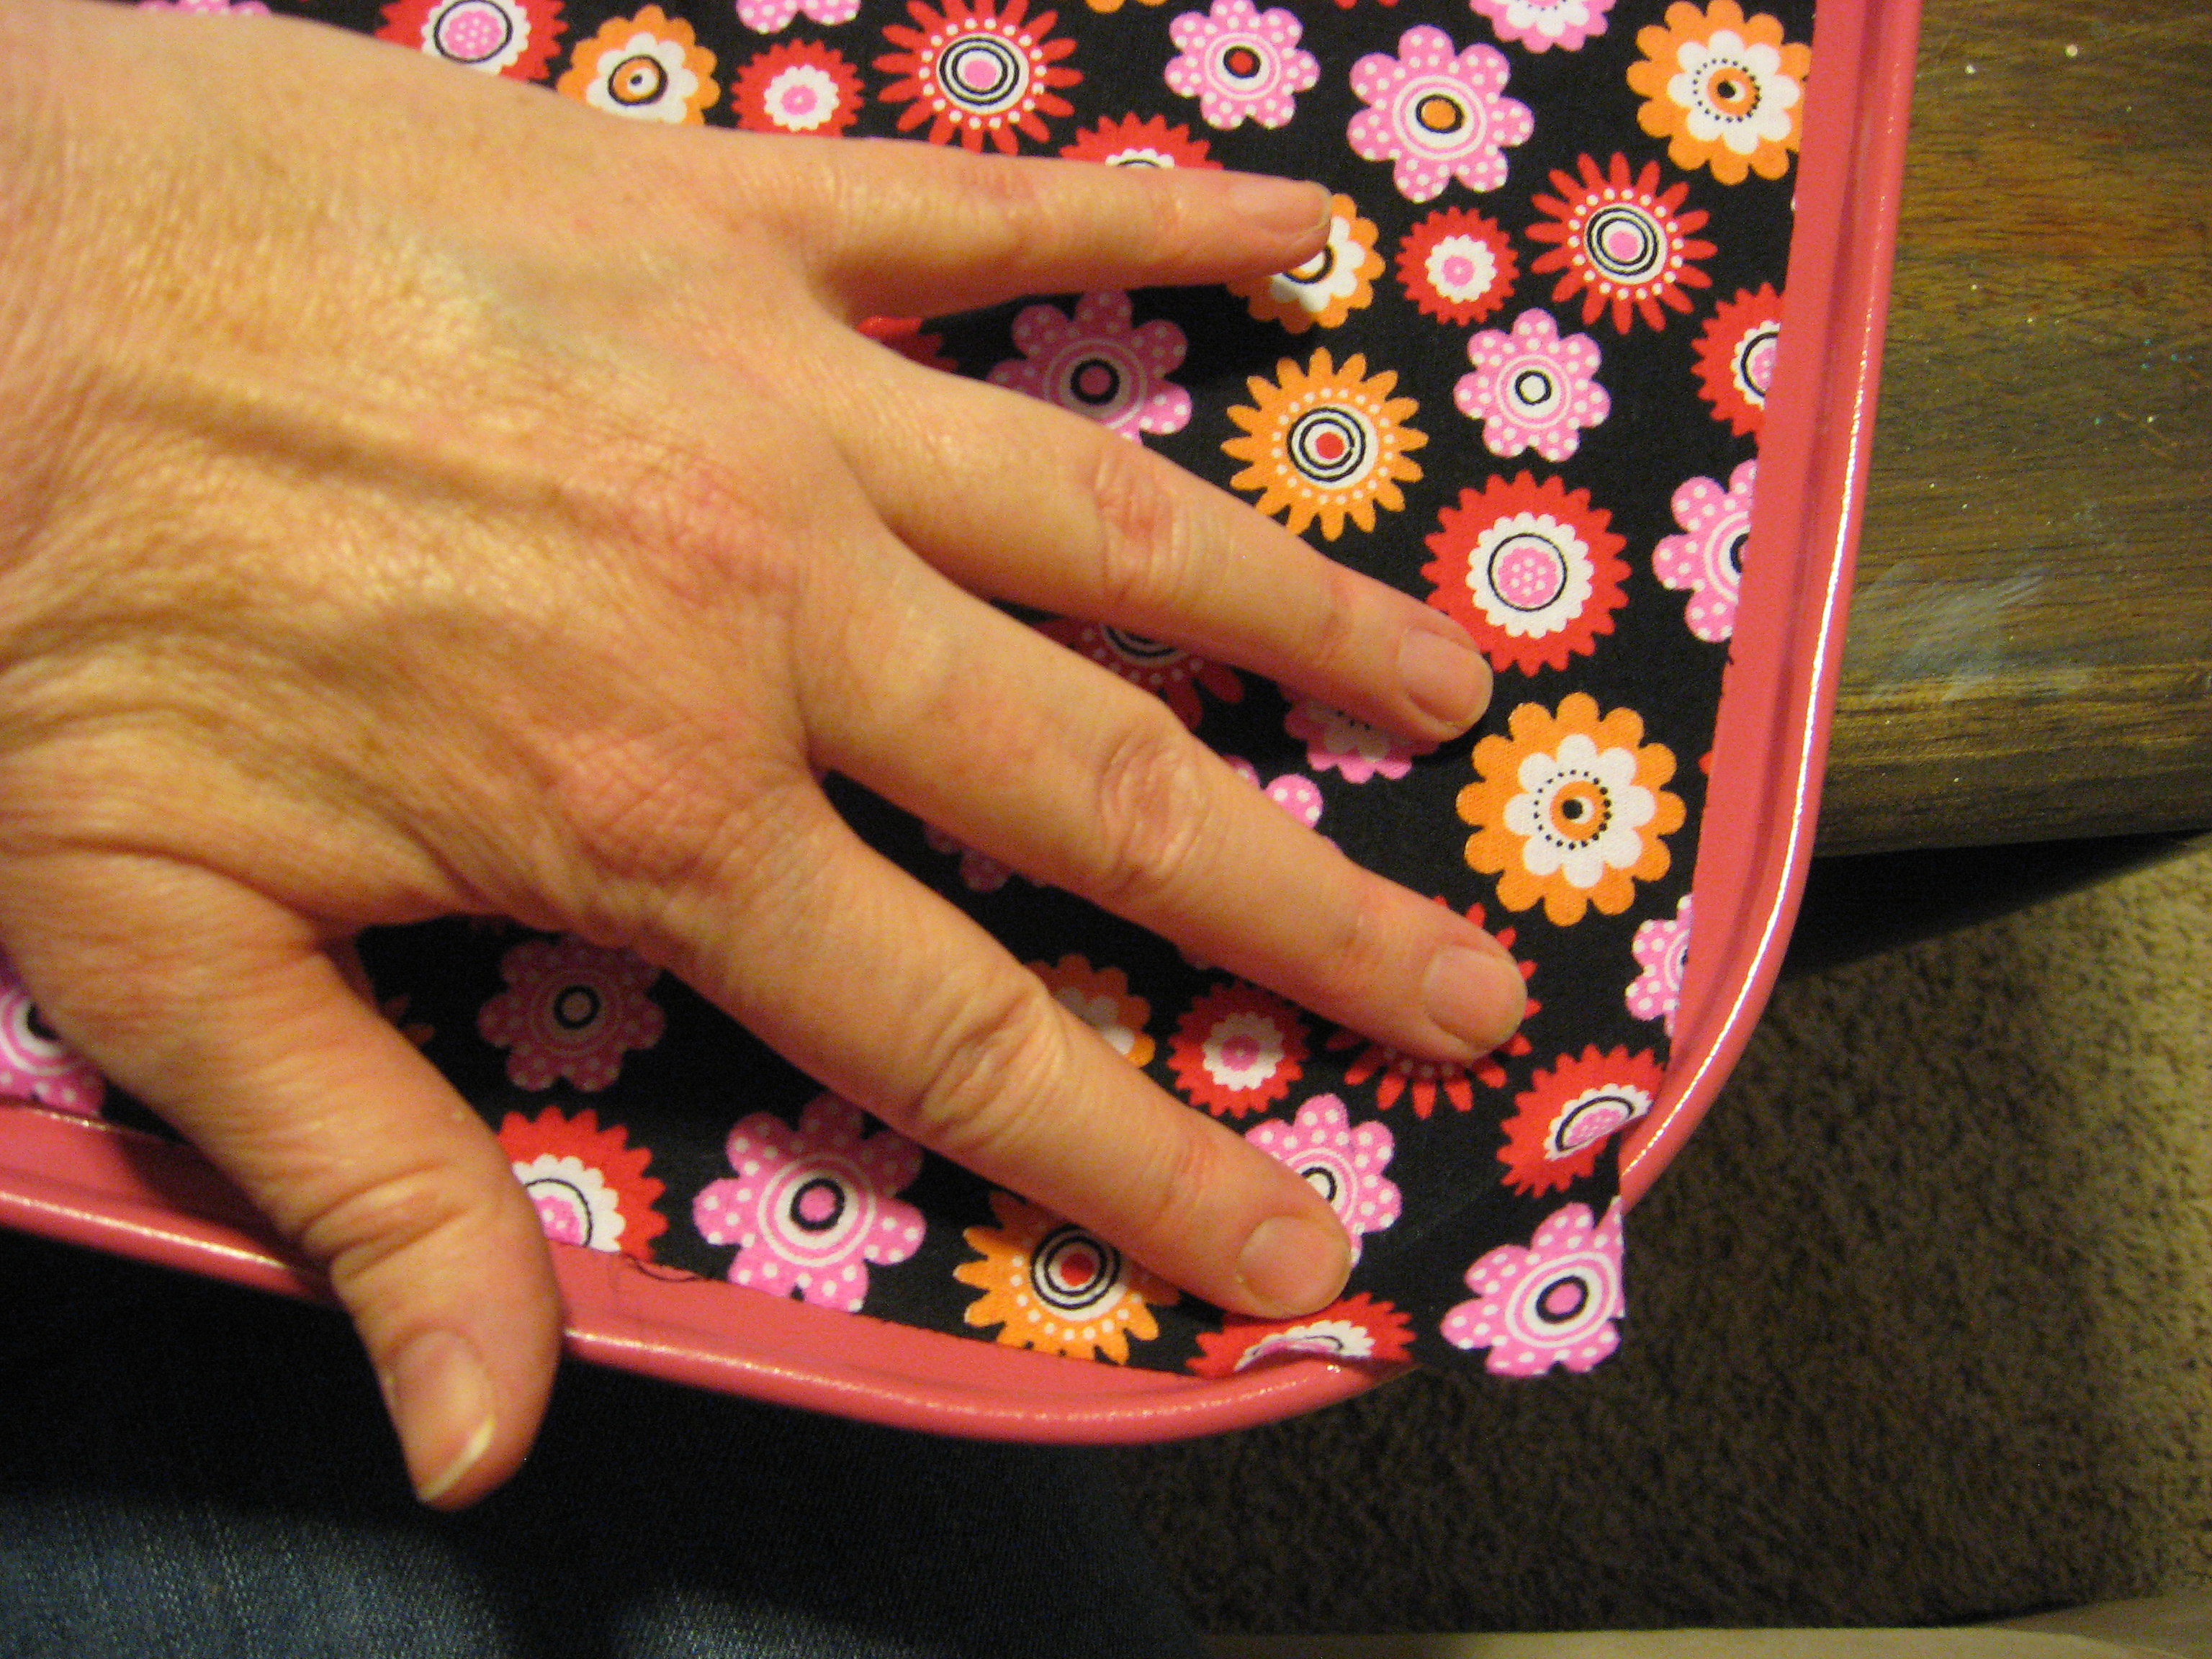
Start by lining up the two edges of your fabric that you cut straight with two adjacent sides of the pan. The corner will extend over; don’t worry about that yet.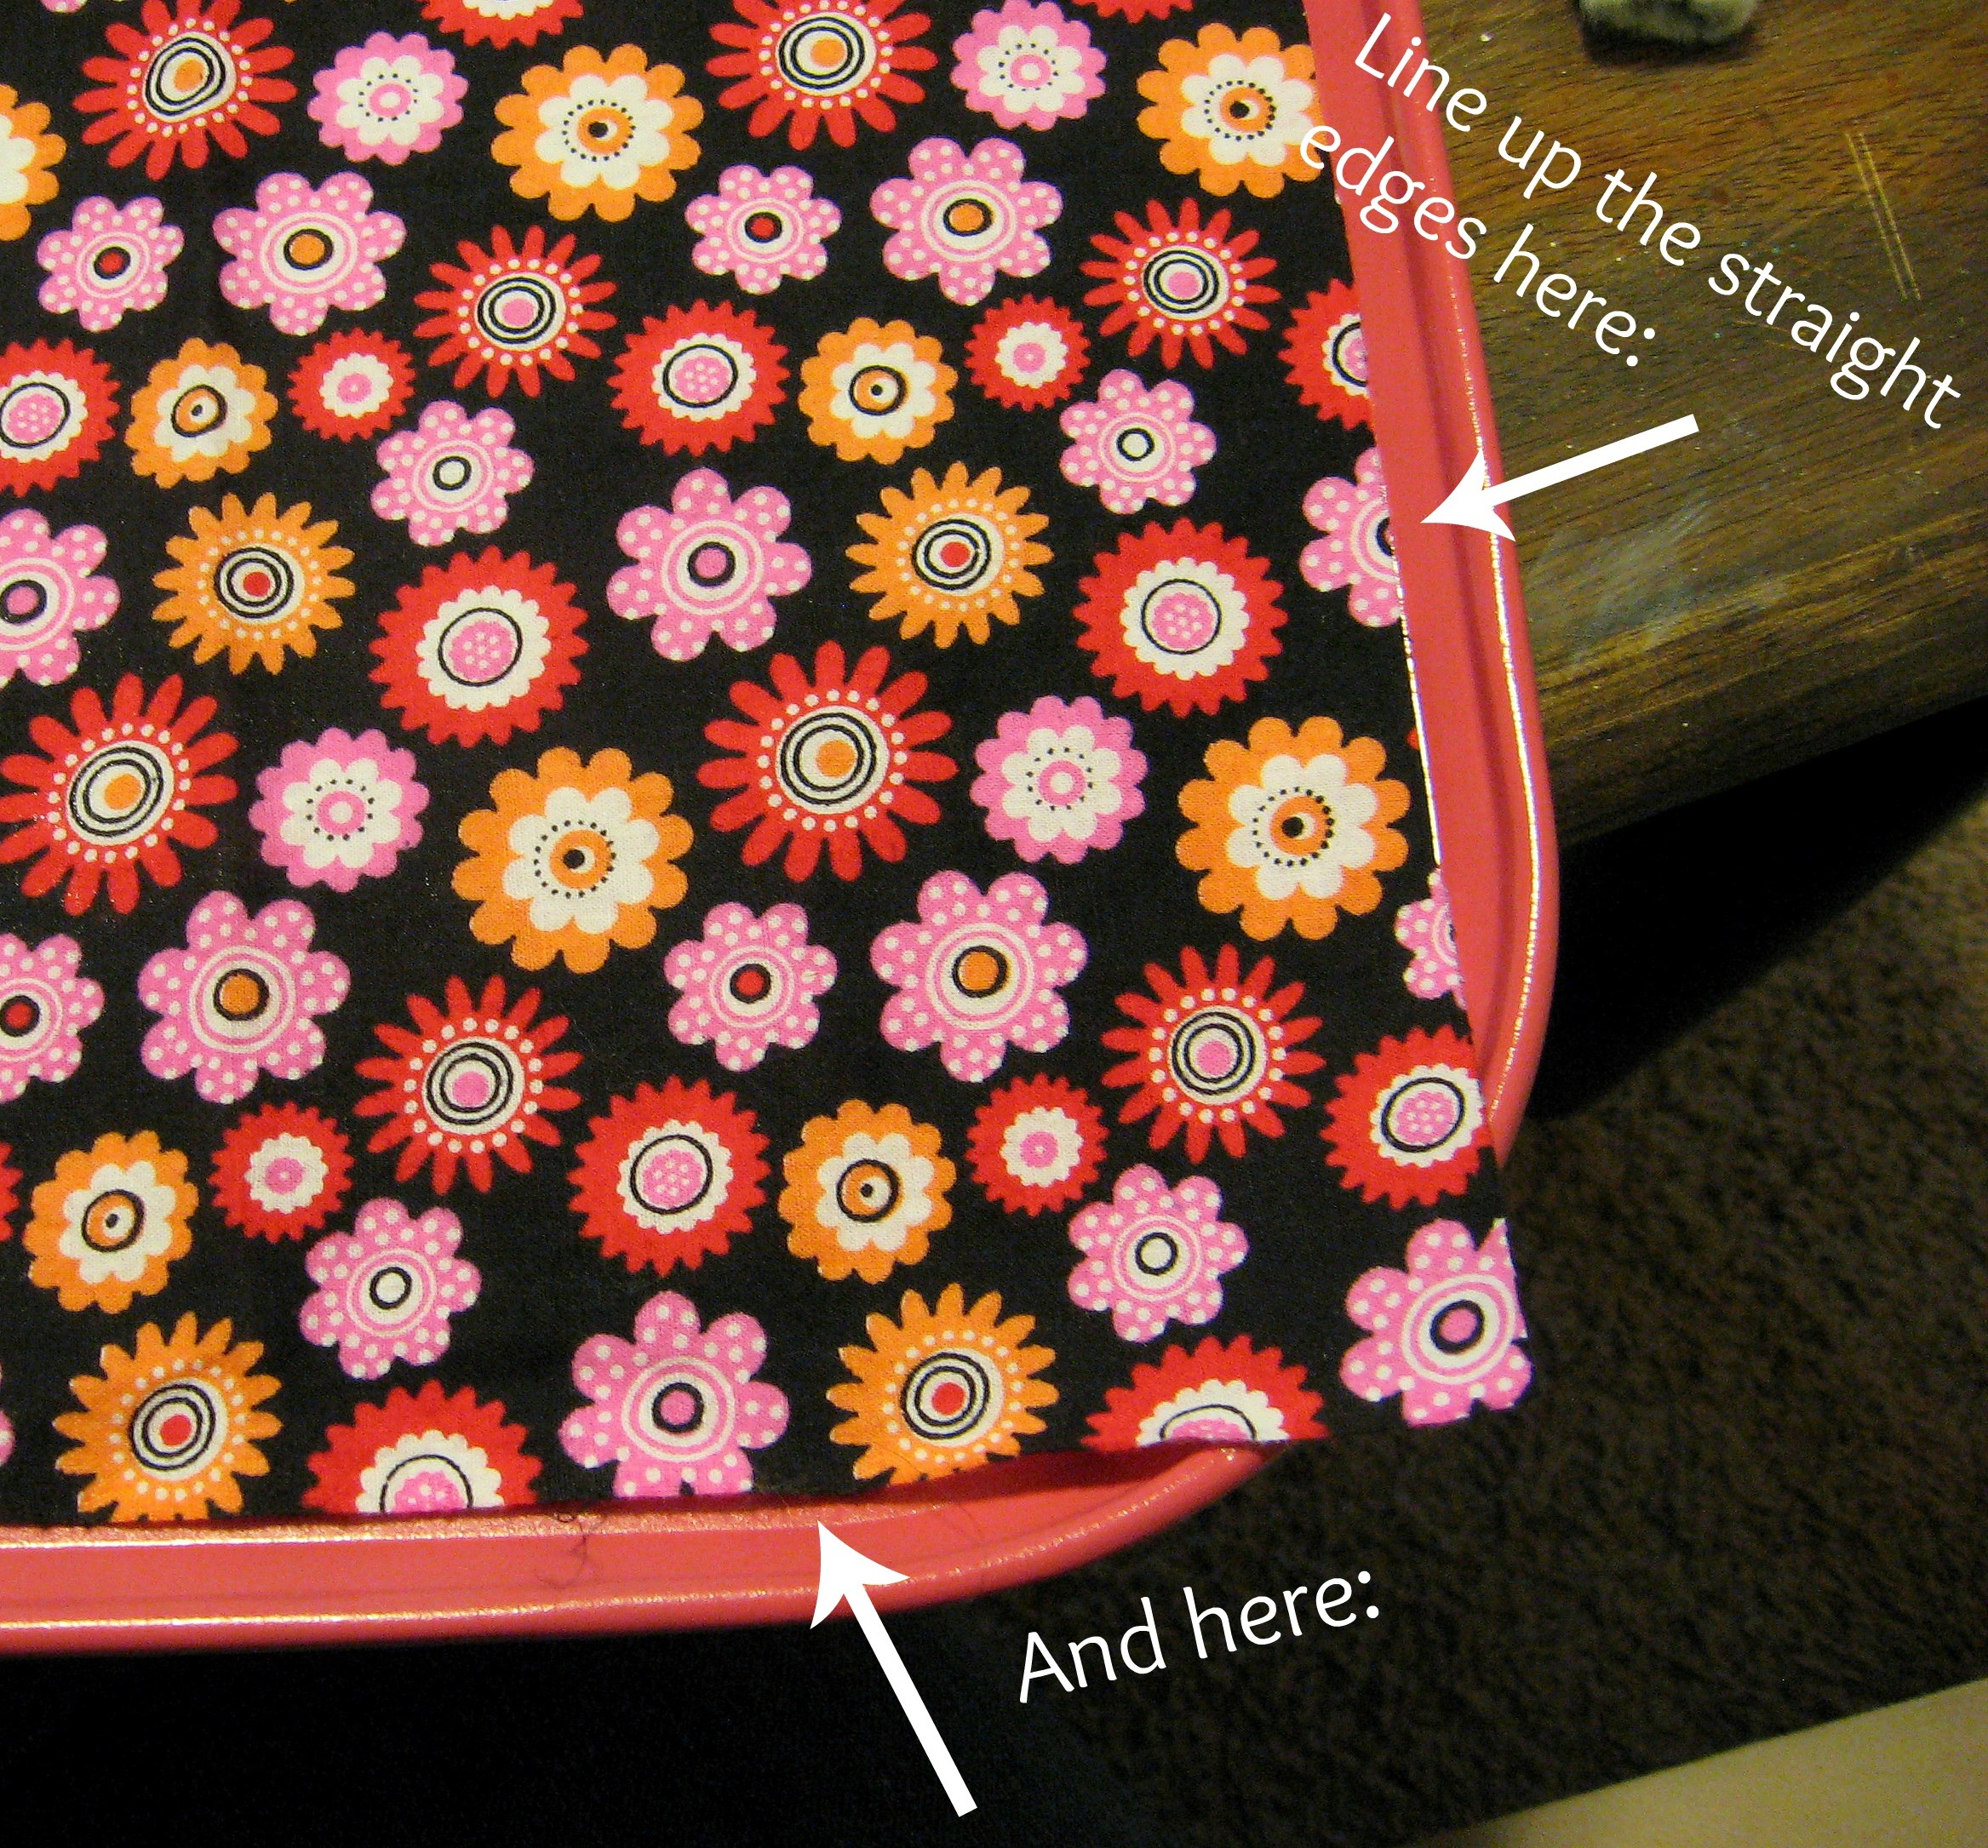
Once the fabric is all laid out and lined up with the edges, gently fold back the end and start applying the Mod Podge to the tray.
Start with the corner that you just lined up, then work your way across the short end of the tray until you get the fabric on that whole end adhered. Apply a few inches of the Mod Podge, then rub it down with your fingers until it is stuck.
Then gently fold back more fabric, apply more Mod Podge, rub and repeat. Make sure you are not leaving any spots under the fabric without Mod Podge. Once you get a strip across the whole short end adhered, leave it for 15 minutes to dry before you continue. If that first strip is lined up and attached well, the rest of it will be easier. Continue rubbing it with your hands (or a brayer) as it dries to make sure it dries flat and smooth.
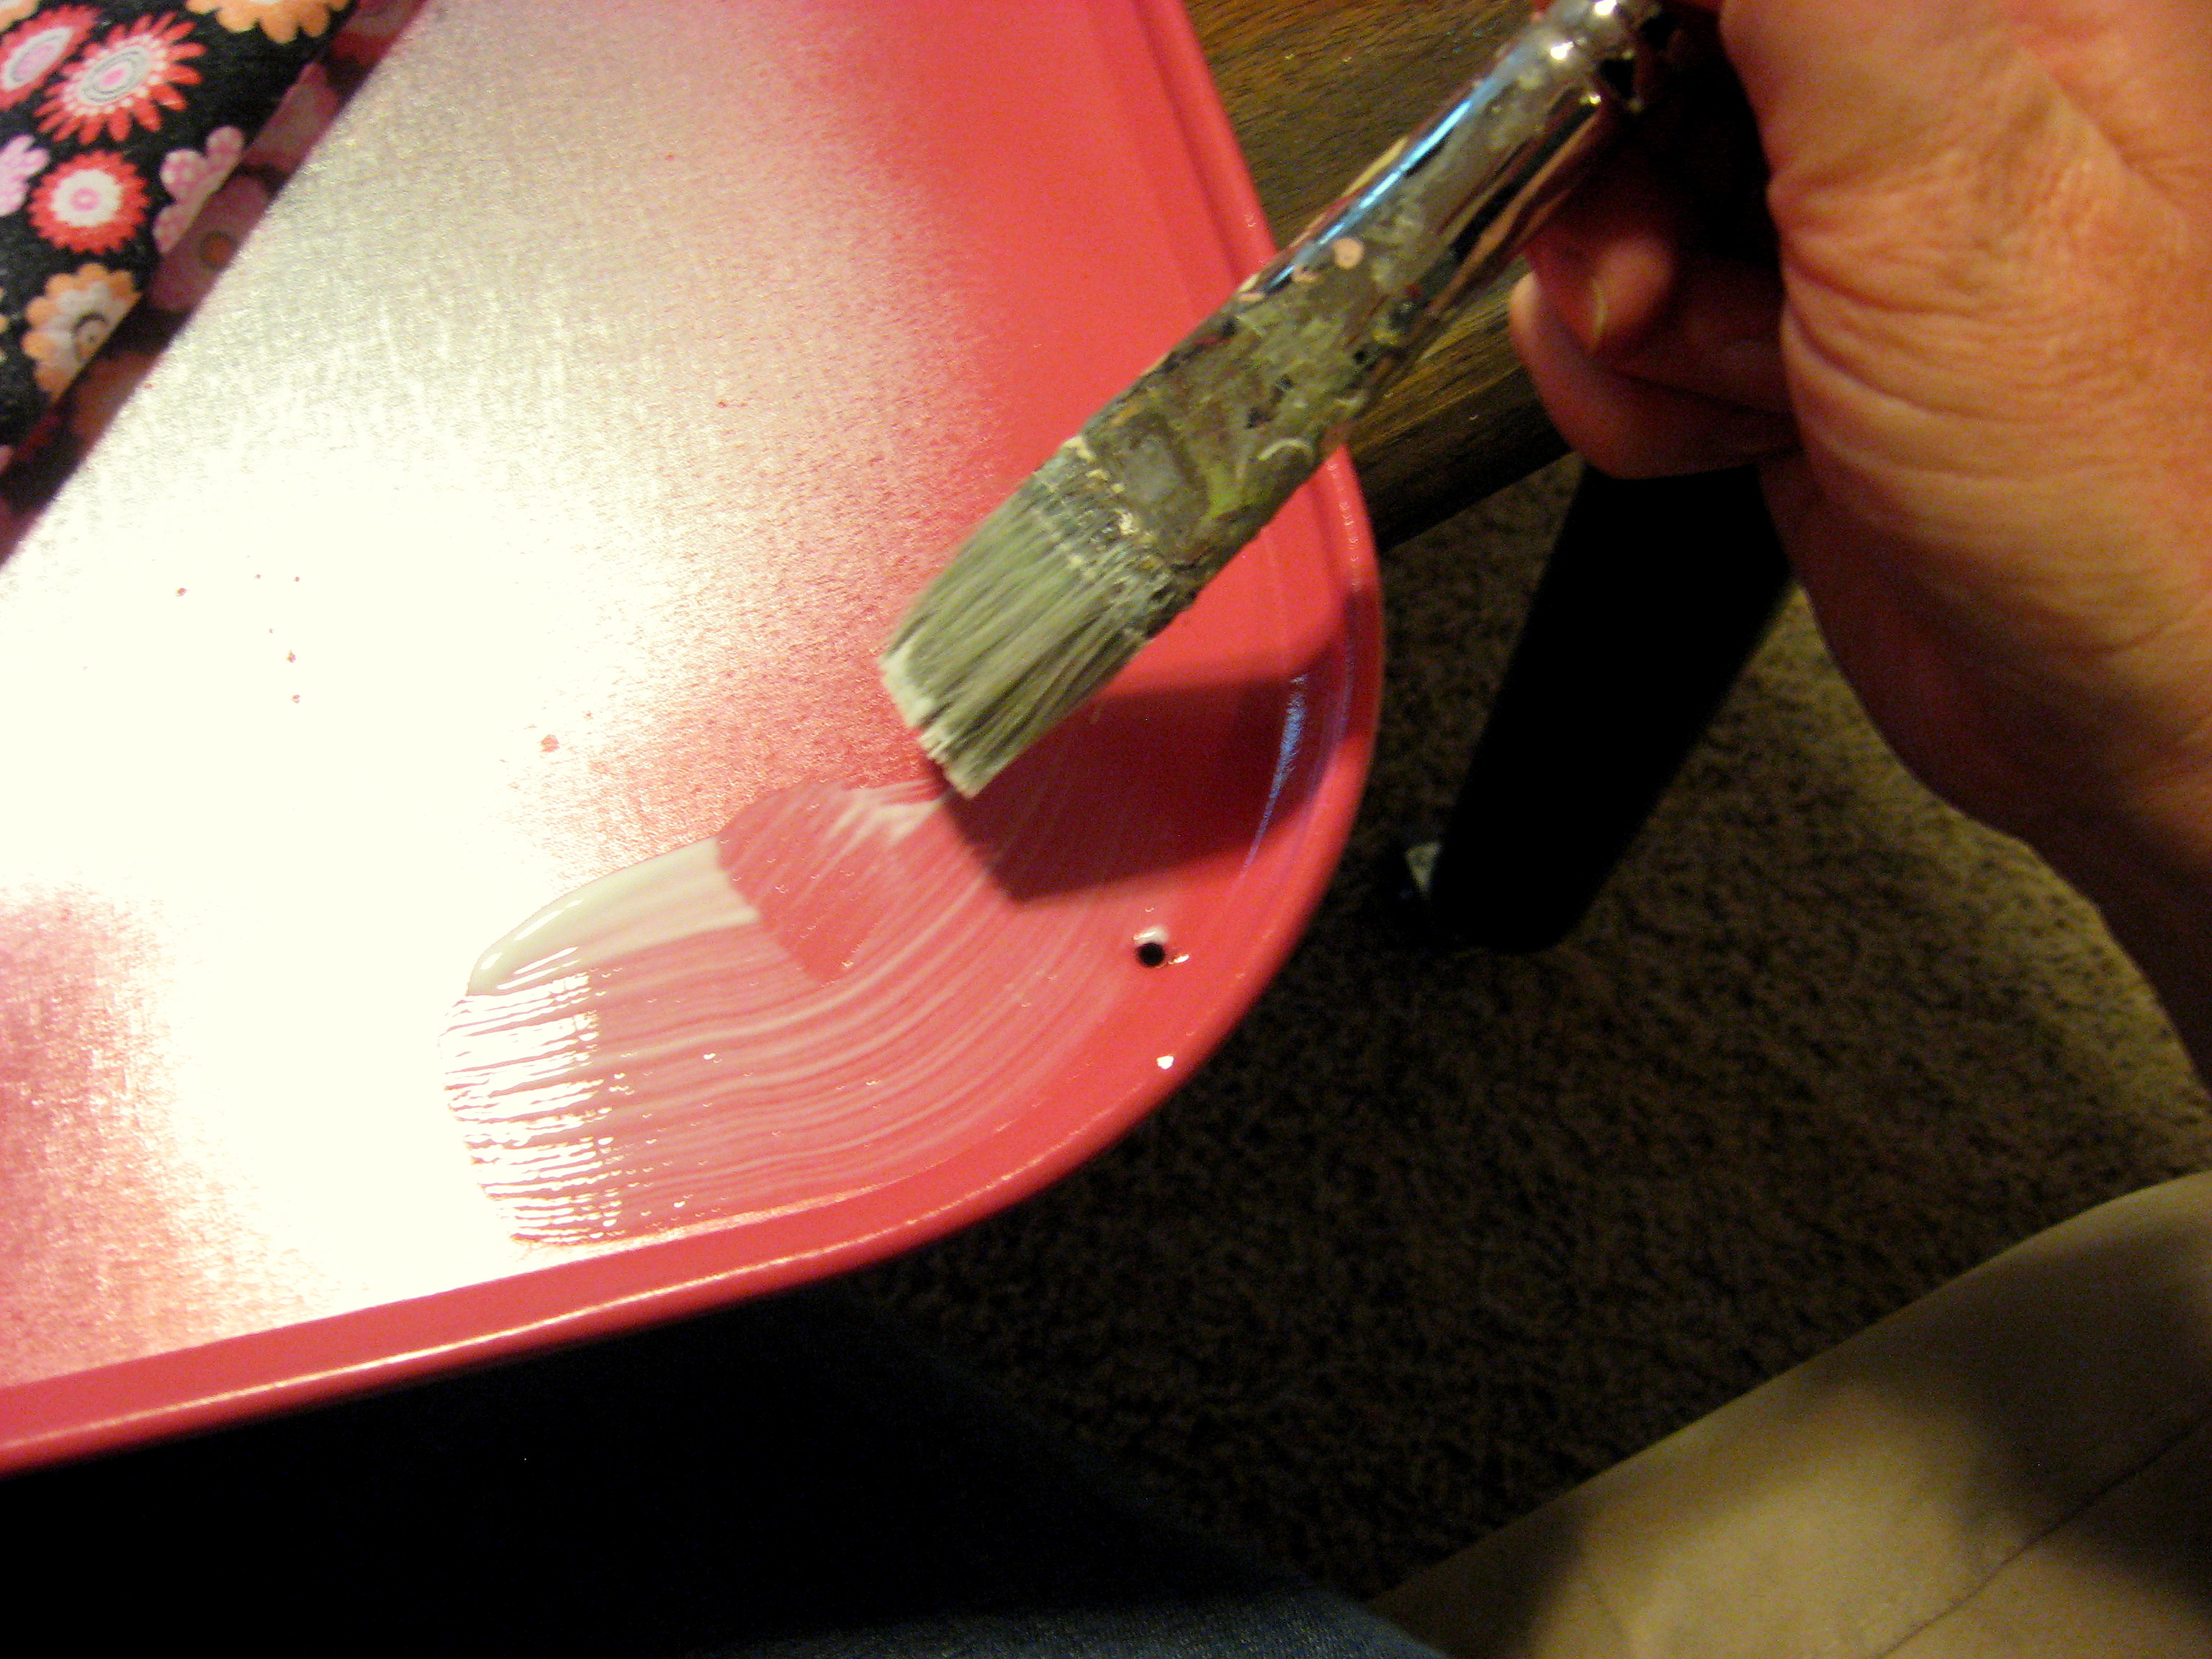
Once that first strip is dry, you can work the rest of the way down the pan in strips. Fold the fabric back, apply enough Mod Podge to cover 4 or 5 inches. I just poured it on
and then spread it with a paint brush.
again, making sure not to miss any spots. Fold the fabric over the Mod Podge – carefully lining up the straight edge (remember the other edge will extend over at this point) and rub until it starts to dry.
Let that dry thoroughly, then you are ready to cut off the excess fabric. I used an exacto knife and a metal straight edge on the straight parts, but I just free handed it around the curved corners.
Once I pulled the excess fabric off, I discovered this:
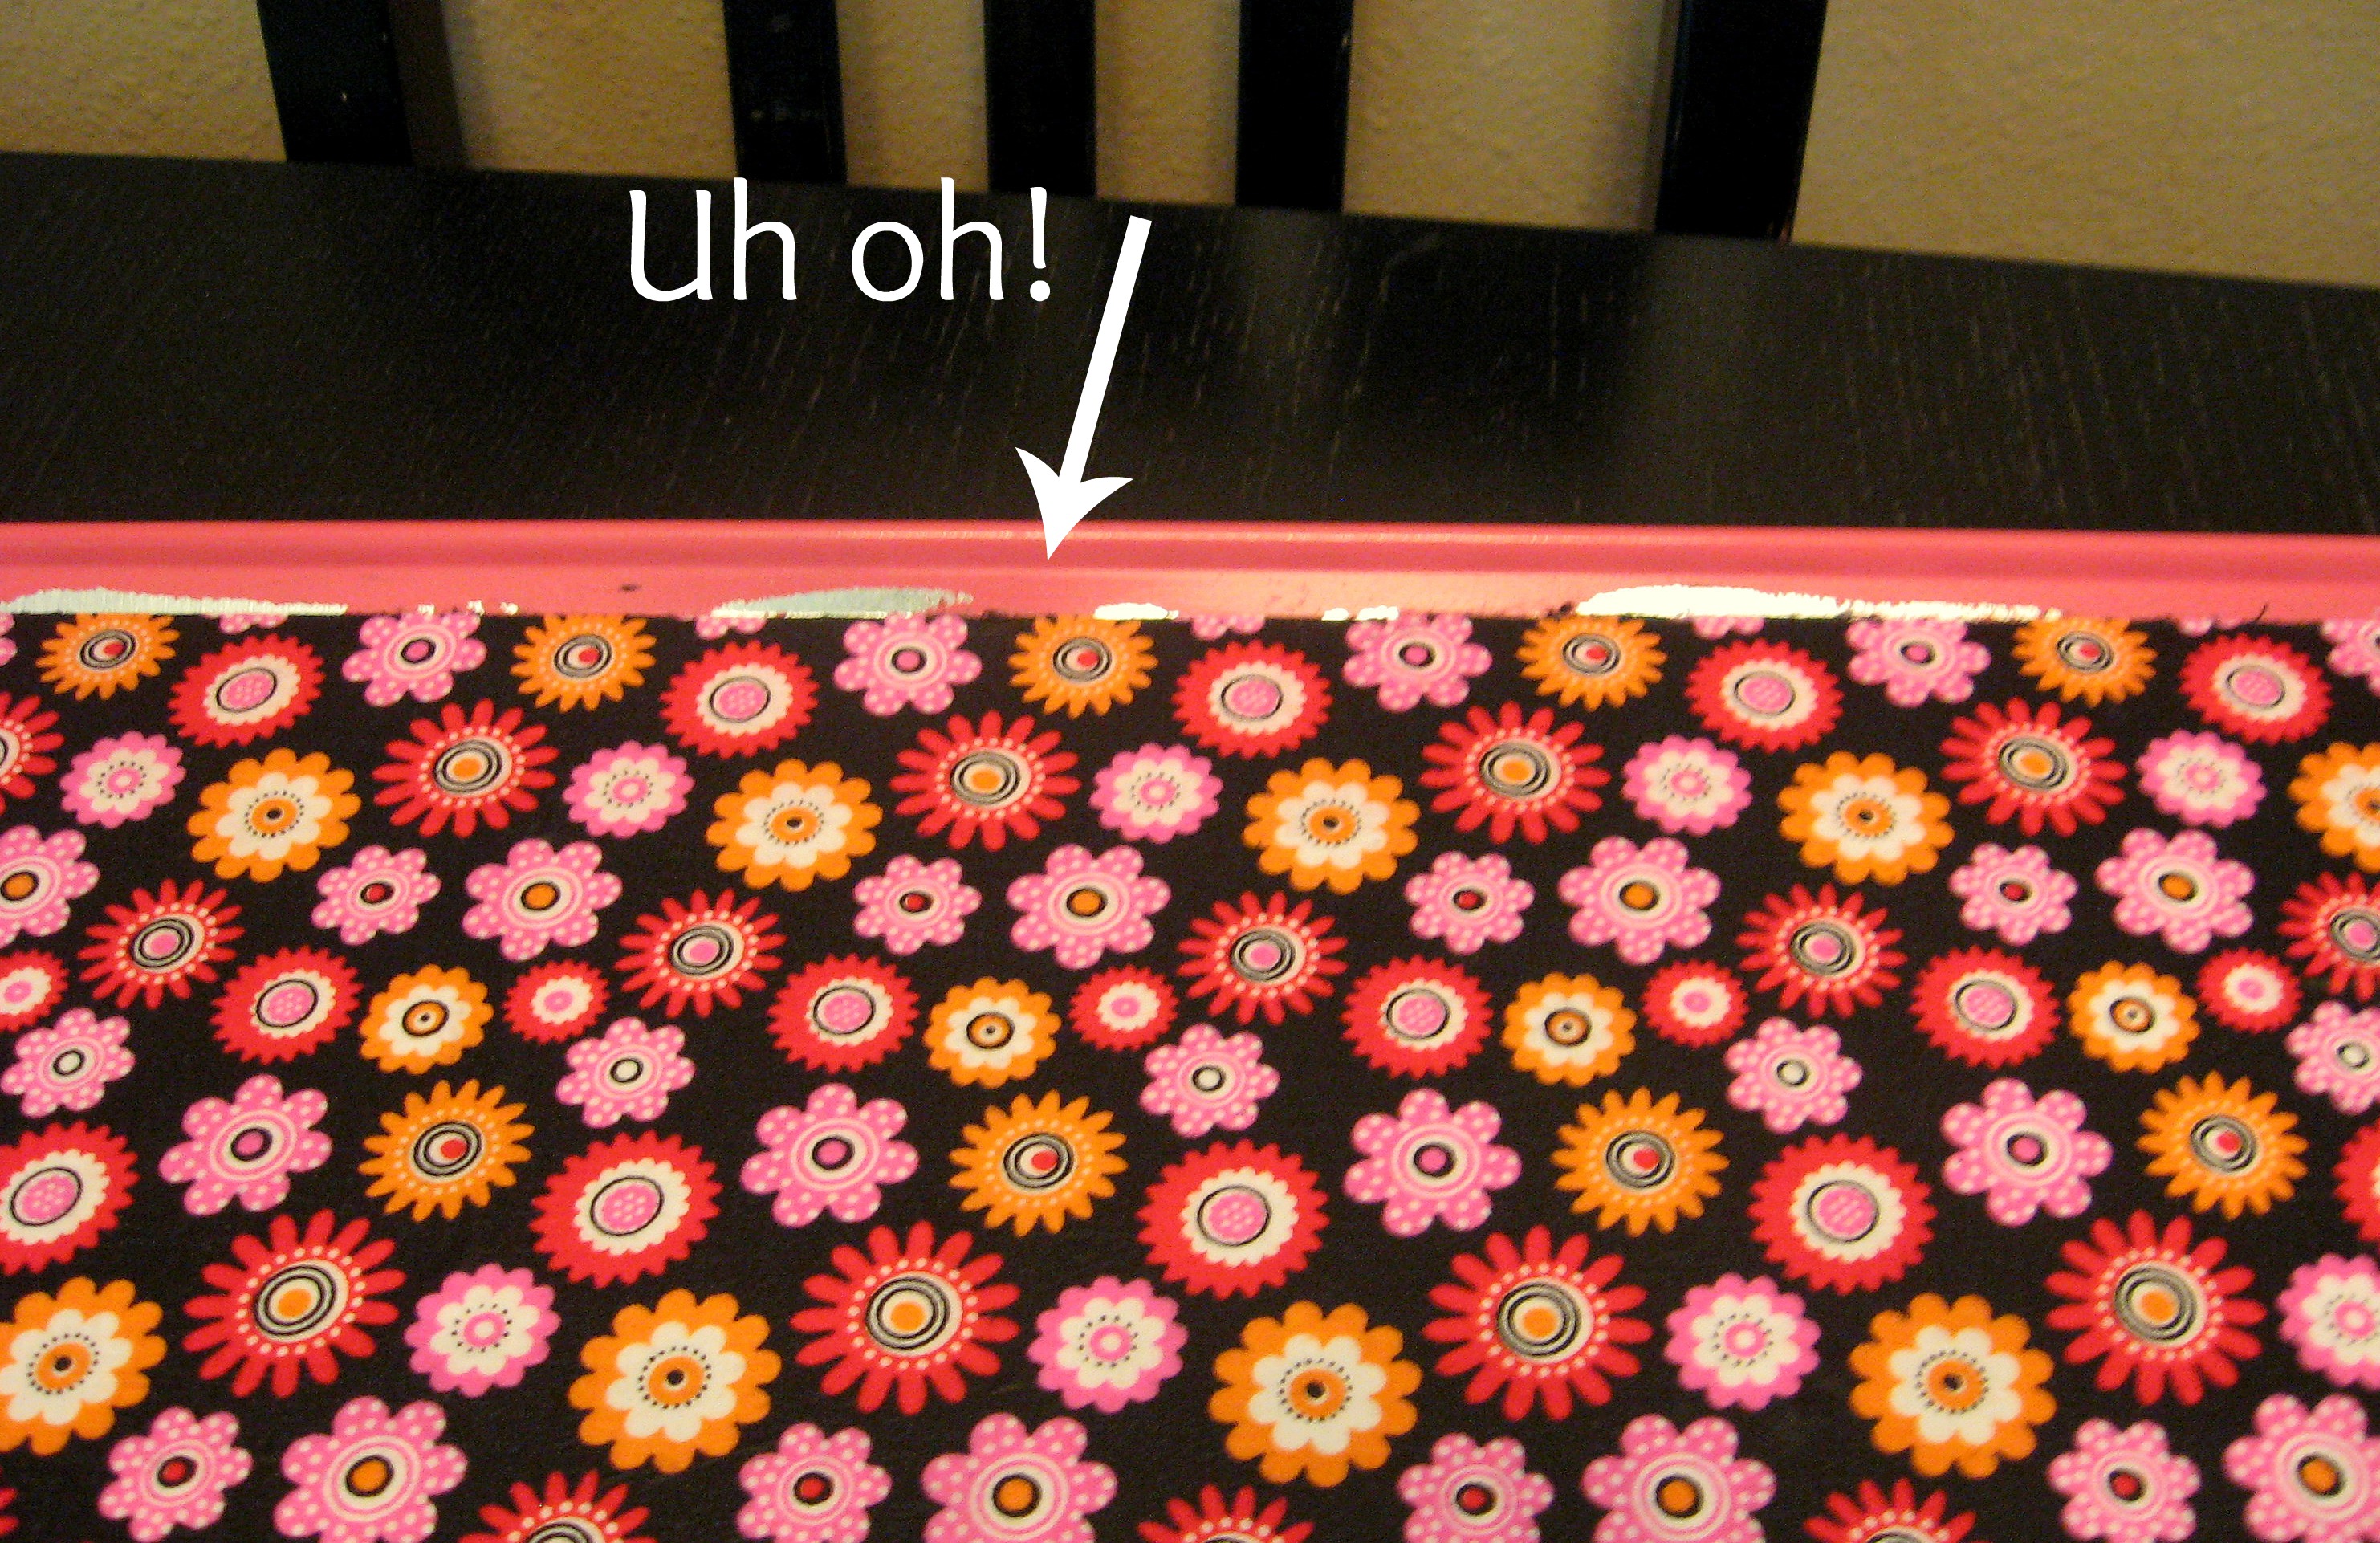
Oops. Fabric pulled the spray paint off with it in some spots.
SO – learn from me when you make yours and either 1) Mod Podge the fabric on first, then tape it off well and spray paint second. or 2) Be very careful as you are brushing the Mod Podge on and don’t let it go up the sides of the pan.
But, in case you find yourself in a similar place and need to fix it, this is what I did. I sprayed some spray paint into the bottom of an empty butter tub- hold it close to the bottom and spray for a minute so that you get a really concentrated stream and end up with some liquid paint. Then I just used it like regular paint with a small paintbrush to paint over the mistakes.
Once that’s dry, give the entire pan a top coat of Mod Podge. Be sure you go up on the sides of the pan too to protect the paint from scratching off.
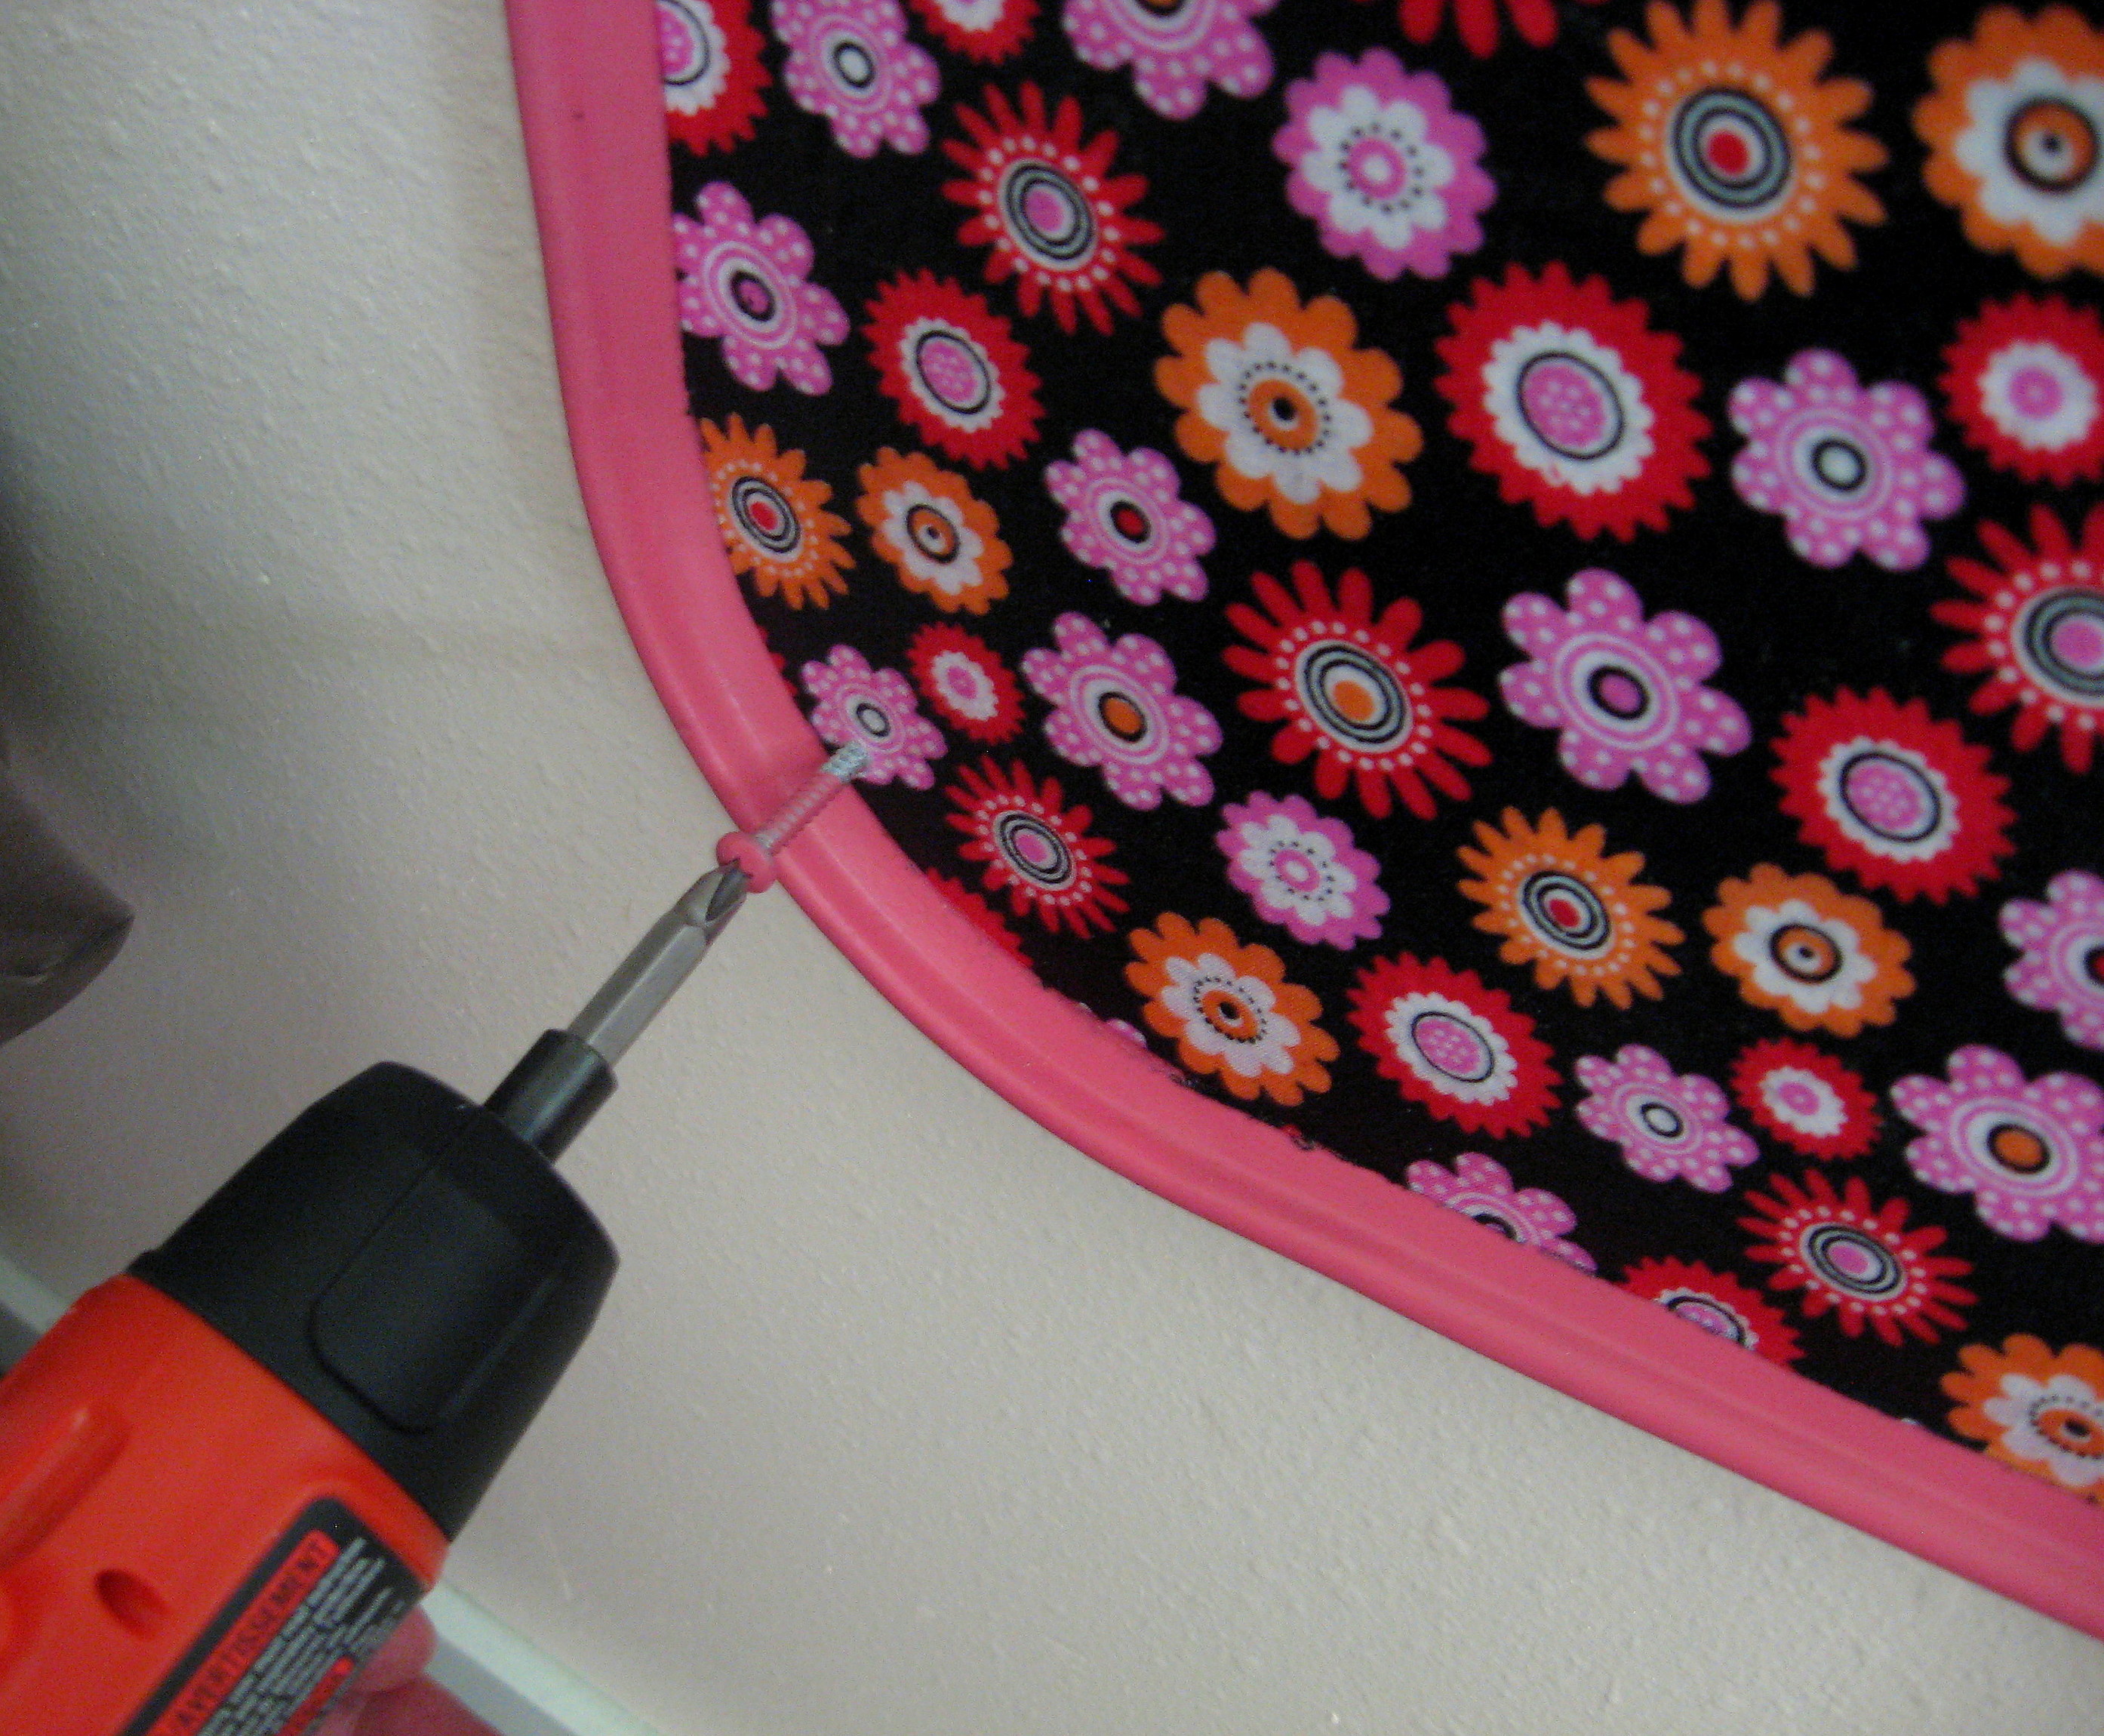
I spray painted the heads of the screws so they would match
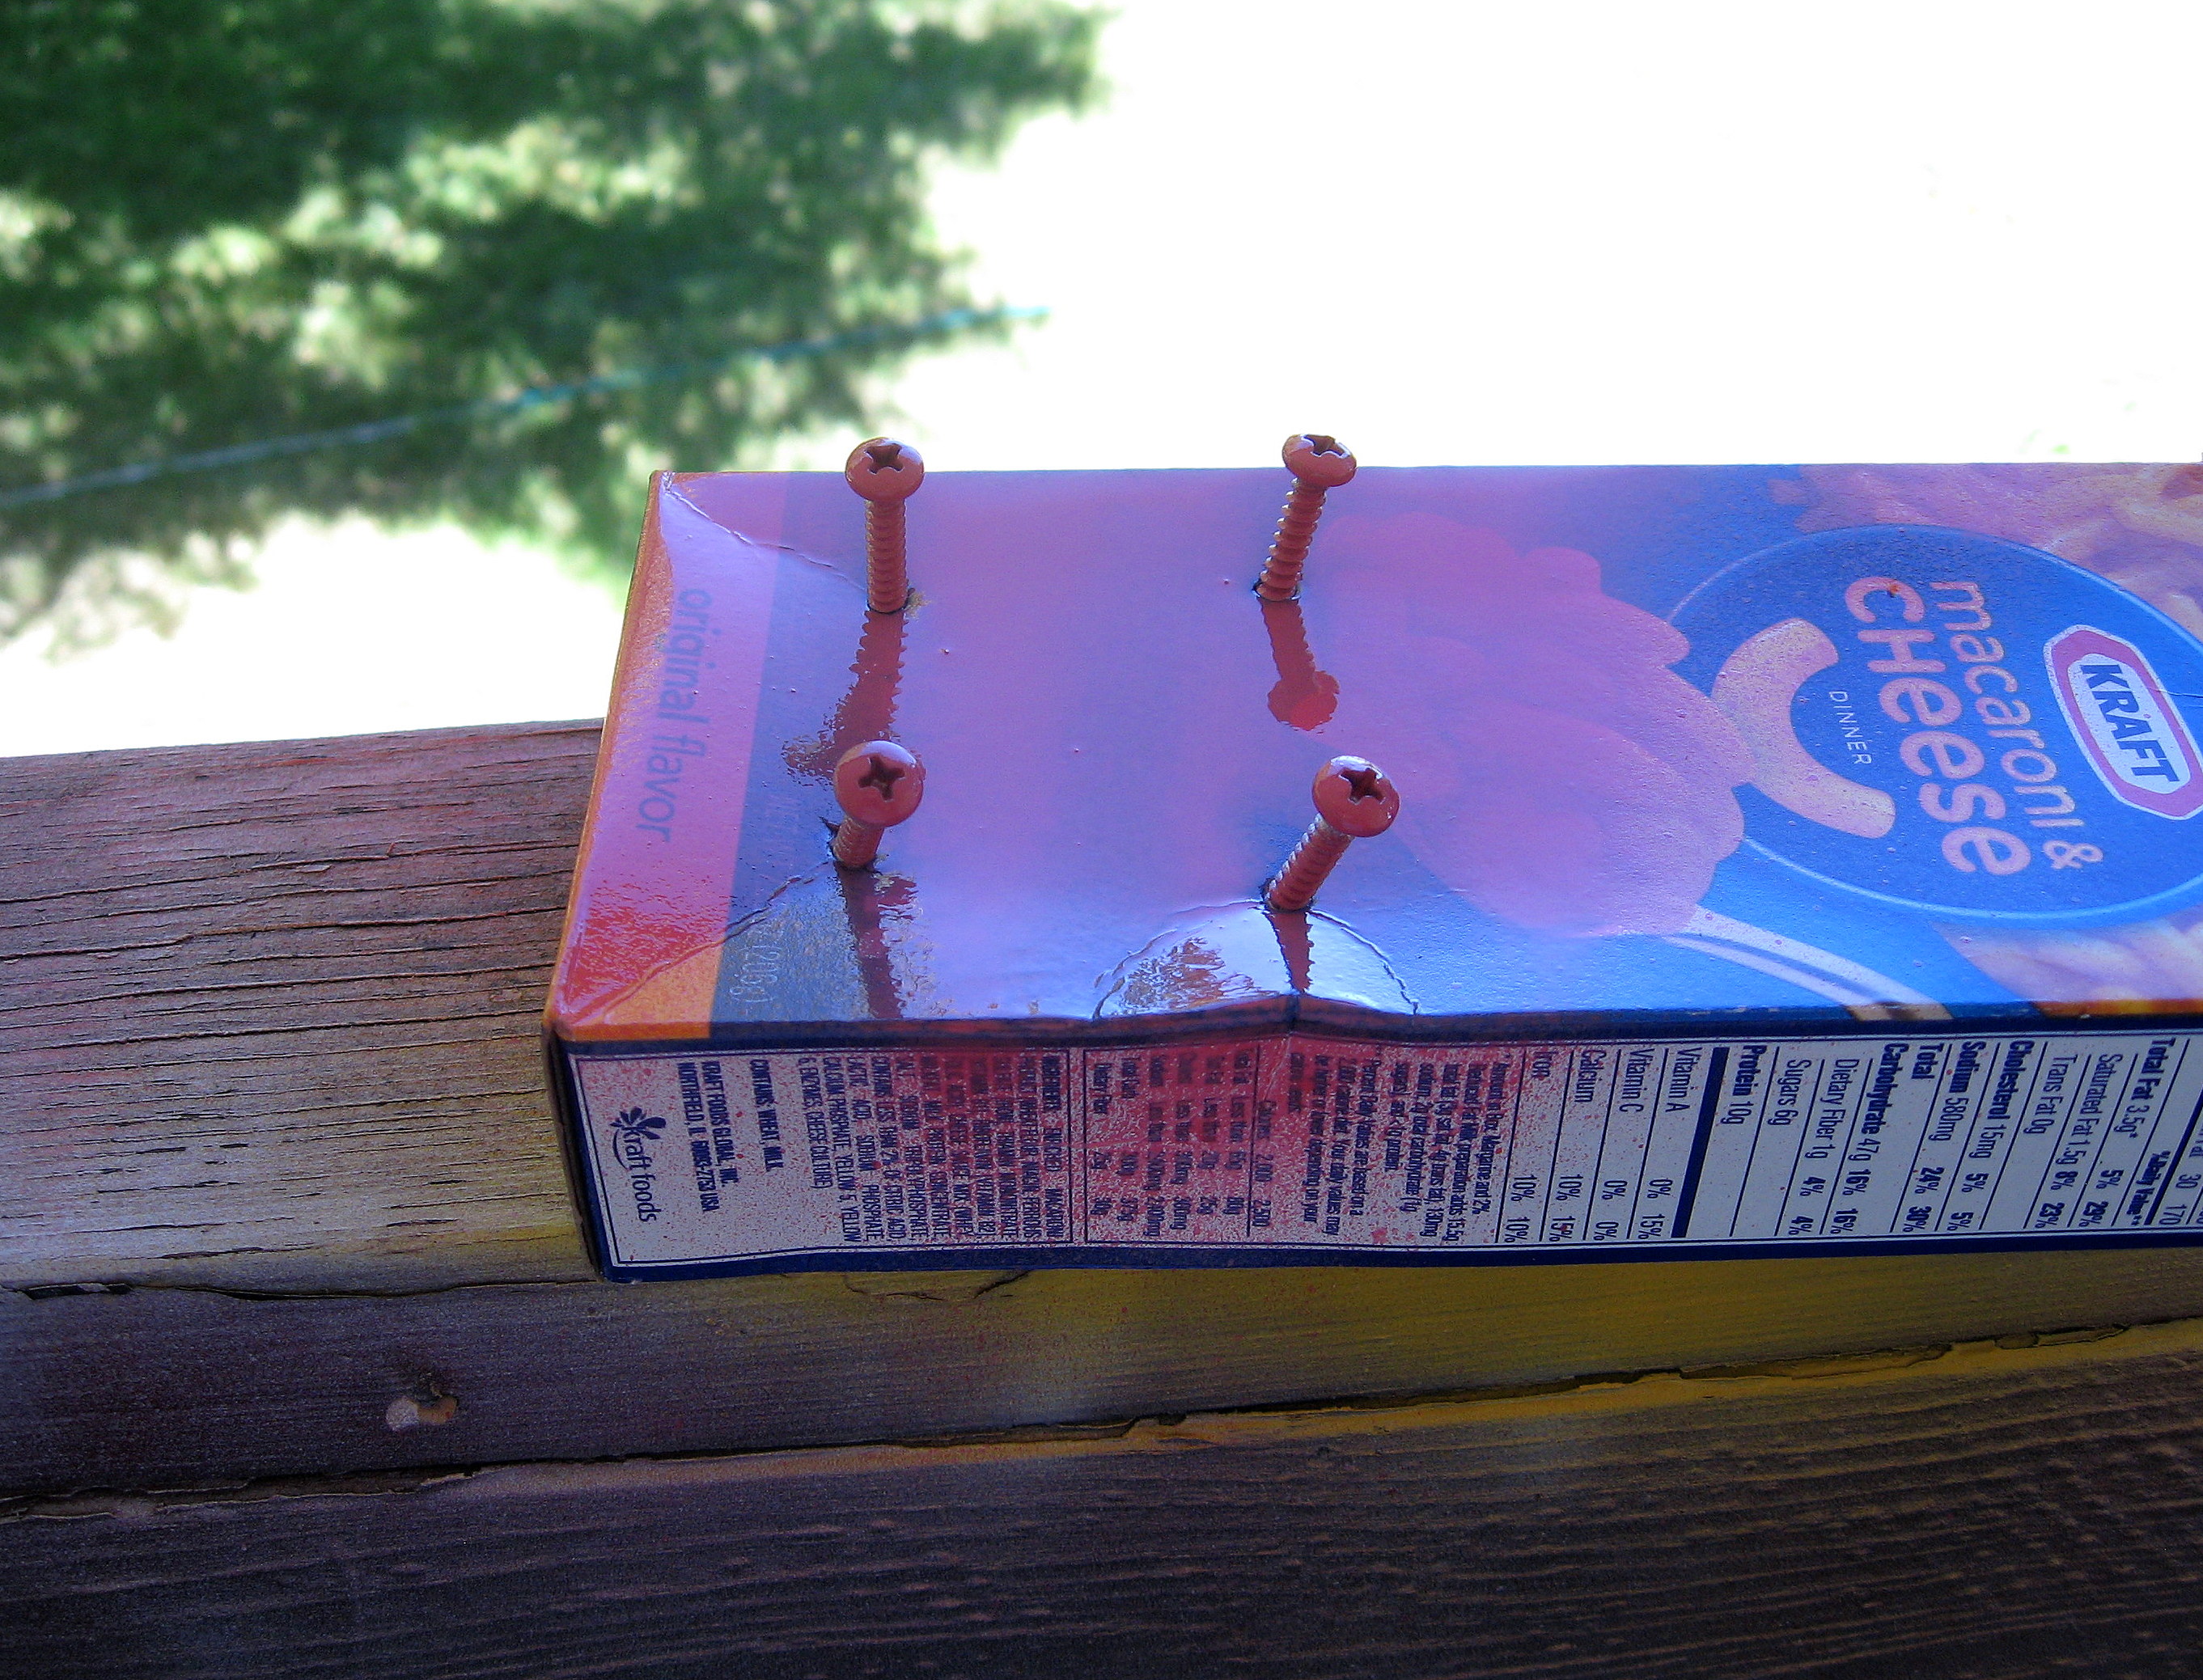
then just screwed it into the wall (a drill bit in an electric drill will go right through the soft metal of the drip pan).
Done! I was worried that the layer of fabric would compromise how strong of a bond I would get with the magnets, but it didn’t; even the heavy birthday card from Grandma that plays that annoying charming and delightful song stayed put.

PickYourPlum! Personalized Metal Sports Ball or Helmet! More!


 Think Outside the Frame – Wood Display Stands for Metal
The right frame of mind.
Starting at $2.99 (76% off) Retail: $12.99
Go, Fight, Win – Personalized Metal Sports Ball or Helmet
Because rooting for your home team is a home run.
Starting at $23.99 (40% off) Retail: $39.99
Which Side Are You On? – Metal Yard Stake
When it comes to supporting your team, you don’t play around.
Starting at $4.99 (66% off) Retail: $14.99
Plus lots more CUTE deals!
LOTS of cute deals! Inexpensive shipping!
New at Zulily! Under Armour – priced to move – performance gear!

Under Armour – priced to move – performance gear!
When special teams captain Kevin Plank created the first Under Armour T-shirt in 1996, his goal was simple: To Empower Athletes Everywhere. The spirit of this vision still continues, through a groundbreaking brand that’s committed to making all athletes better through passion, design, and the relentless pursuit of innovation.
PickYourPlum! Scoop Neck Tee! Cork Boards! Ombre Tutu Skirts!


Here’s the Scoop – Scoop Neck Tee
Basics make things better.
$4.99 (80% off) Retail: $24.99
Pop the Cork – Cork Boards
Put a cork in it.
Starting at $5.99 (70% off) Retail: $19.99
Tiny Dancer – Ombre Tutu Skirts
Who doesn’t love tiny dancers?
Starting at $9.99 (50% off) Retail: $19.99
Plus lots more CUTE deals!
LOTS of cute deals! Inexpensive shipping!
New at Zulily! Ride the Rails: Trains — up to 55% off!

Ride the Rails: Trains — up to 55% off!
From passenger cars and construction cranes to viaducts and turntables, we’ve compiled everything you need to start or grow your locomotive empire. Little engineers will love constructing winding tracks that guide their trains through mountains and volcanoes. The imaginative play will build creativity during playtime.
PickYourPlum! Finger Puppets! Kraft Treat Bags! Statement Necklaces!


Lift a Finger – Finger Puppets
You only need to lift a finger.
Starting at $6.99 (56% off) Retail: $15.99
Something to Serve it With – Kraft Treat Bags
Something sweet for your treats.
Starting at $3.99 (60% off) Retail: $9.99
Light and Airy – Statement Necklace
Make a statement.
Starting at $3.99 (73% off) Retail: $14.99
Plus lots more CUTE deals!
LOTS of cute deals! Inexpensive shipping!
PickYourPlum! Pencil Skirts, Magnetic Card Holders, Clutches!


Pencil You In – Pencil Skirts
We don’t mind being pencil-pushers.
$13.99 (44% off) Retail: $24.99
Stuck On You – Magnetic Card Holders
Stick to it.
Starting at $3.99 (69% off) Retail: $12.99
Let There Be Bags – Clutches
There’s no such thing as too many bags.
Starting at $6.99 (69% off) Retail: $22.99
Plus lots more CUTE deals!
LOTS of cute deals! Inexpensive shipping!
Zulily Huge Blow Out Sale! In all departments!


Huge Blow Out Sale! In all departments!
Ready to find something special? Our Blow-Out event is the perfect place to look, with quality offerings everyone can enjoy. It’s packed full of cool apparel, accessories and footwear for kids and adults, as well as engaging toys, gadgets and books—not to mention a wealth of excellent accents and goods to decorate the home. Let the discovering begin!
PickYourPlum! Permanent Textile Stamps! Tribal Maxi Skirts! Magnetic Iron Mat!


Quick and Easy – Permanent Textile Stamps
Quick and easy is the way to go!
Starting at $14.99 (58% off) Retail: $35.99
Is it Hot in Here or is it Just You? Tribal Maxi Skirts
This one’s a knockout.
$12.99 (67% off) Retail: $39.99
Heat it Up – Magnetic Iron Mat
Just add a flat surface.
Starting at $8.99 (55% off) Retail: $19.99
Plus lots more CUTE deals!
LOTS of cute deals! Inexpensive shipping!
PickYourPlum! Sandwich Cutters! Cute Child Storage Boxes! Cute Foldable Storage Seat!


All It’s Cut Out to Be – Sandwich Cutters
The sandwich of your dreams just became reality.
Starting at $2.99 (80% off) Retail: $14.99
Clean House – Child Storage Boxes
Time to clean house.
Starting at $4.99 (75% off) Retail: $19.99
Make Room – Foldable Storage Seat with Lid
Clean in style.
Starting at $4.99 (68% off) Retail: $15.99
Plus lots more CUTE deals!
LOTS of cute deals! Inexpensive shipping!
A PYP Best Blog! DIY Stuffed Animal Storage!
Just in case you missed this article on creating DIY stuffed animal storage the first time we shared it a couple of years ago, we are republishing it. After Sharon wrote this blog originally, we got an awesome response. This is one of the PYP Best Blogs!
My daughter has an addiction – a stuffed animal addiction! Although I don’t mind enabling her, I don’t like how they end up piled in an ugly heap on the shelf, and I don’t like how she can never find the specific critter she’s looking for – especially the little ones. Here is how we solved the problem.
If you are DIY’ers with a well stocked garage you can do this project very inexpensively. Even if you have to buy everything, it should only cost about $15.
What you’ll need
- Wire hanging planter baskets. I used 5 and I got them at Dollar Tree.
- Board(s); as tall as you would like, and wide enough to accommodate the baskets; I used 3 6-ft. tall cedar fence boards. These are about $1.90 at Home Depot but they regularly go on sale this time of year for less than $1. (I use these for crafts all the time, so I buy a stack whenever they are on sale.)
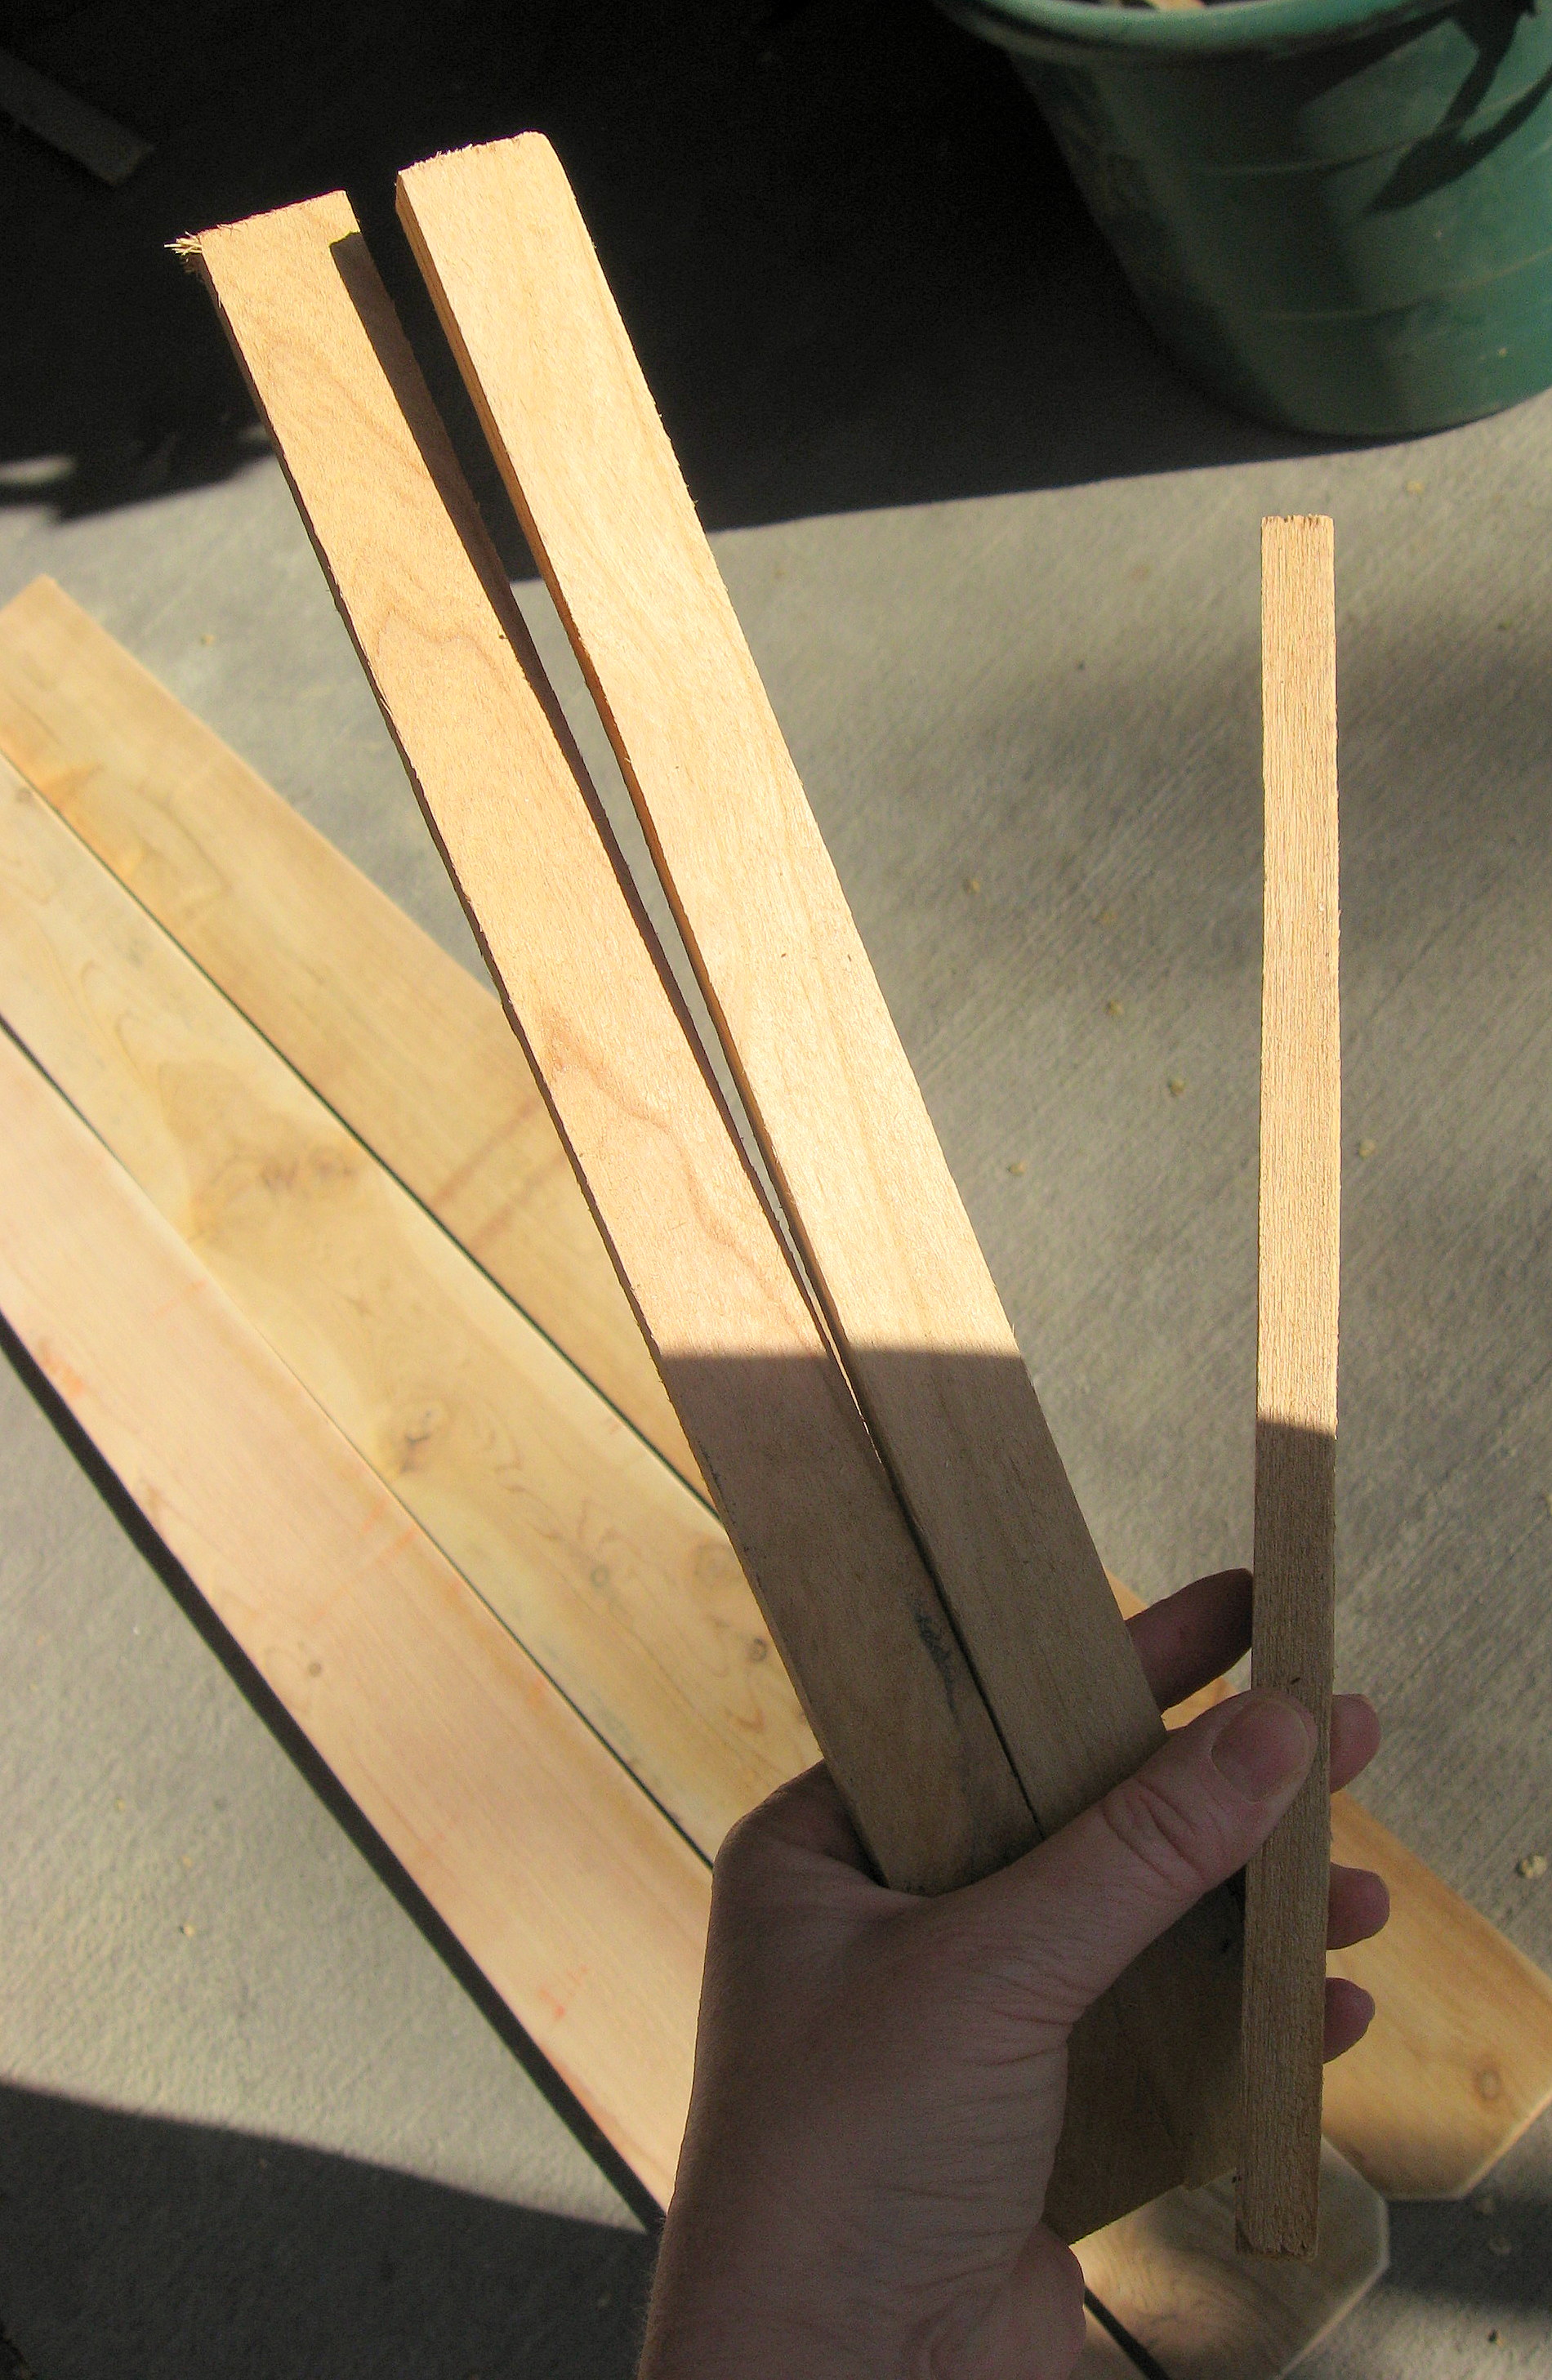
- Thin boards to connect the fence boards together; I used scraps from my garage, but if you have to buy something, ask for lathing strips. You should be able to get one long board for about $1.
- Nuts and bolts a bit longer than the board is wide – look for these hanging in little bags in the same aisle as screws and nails. Should be less than $1 per bag and if you follow my design you will need 10.
- Screws
- Drill
- Saw
- Sander or Sandpaper
- Strong Wire cutters
- Paint
Let’s get started!
Start with the wire baskets; take off the hanging chain and either throw them out or save them for another project; you won’t be using them for this project.
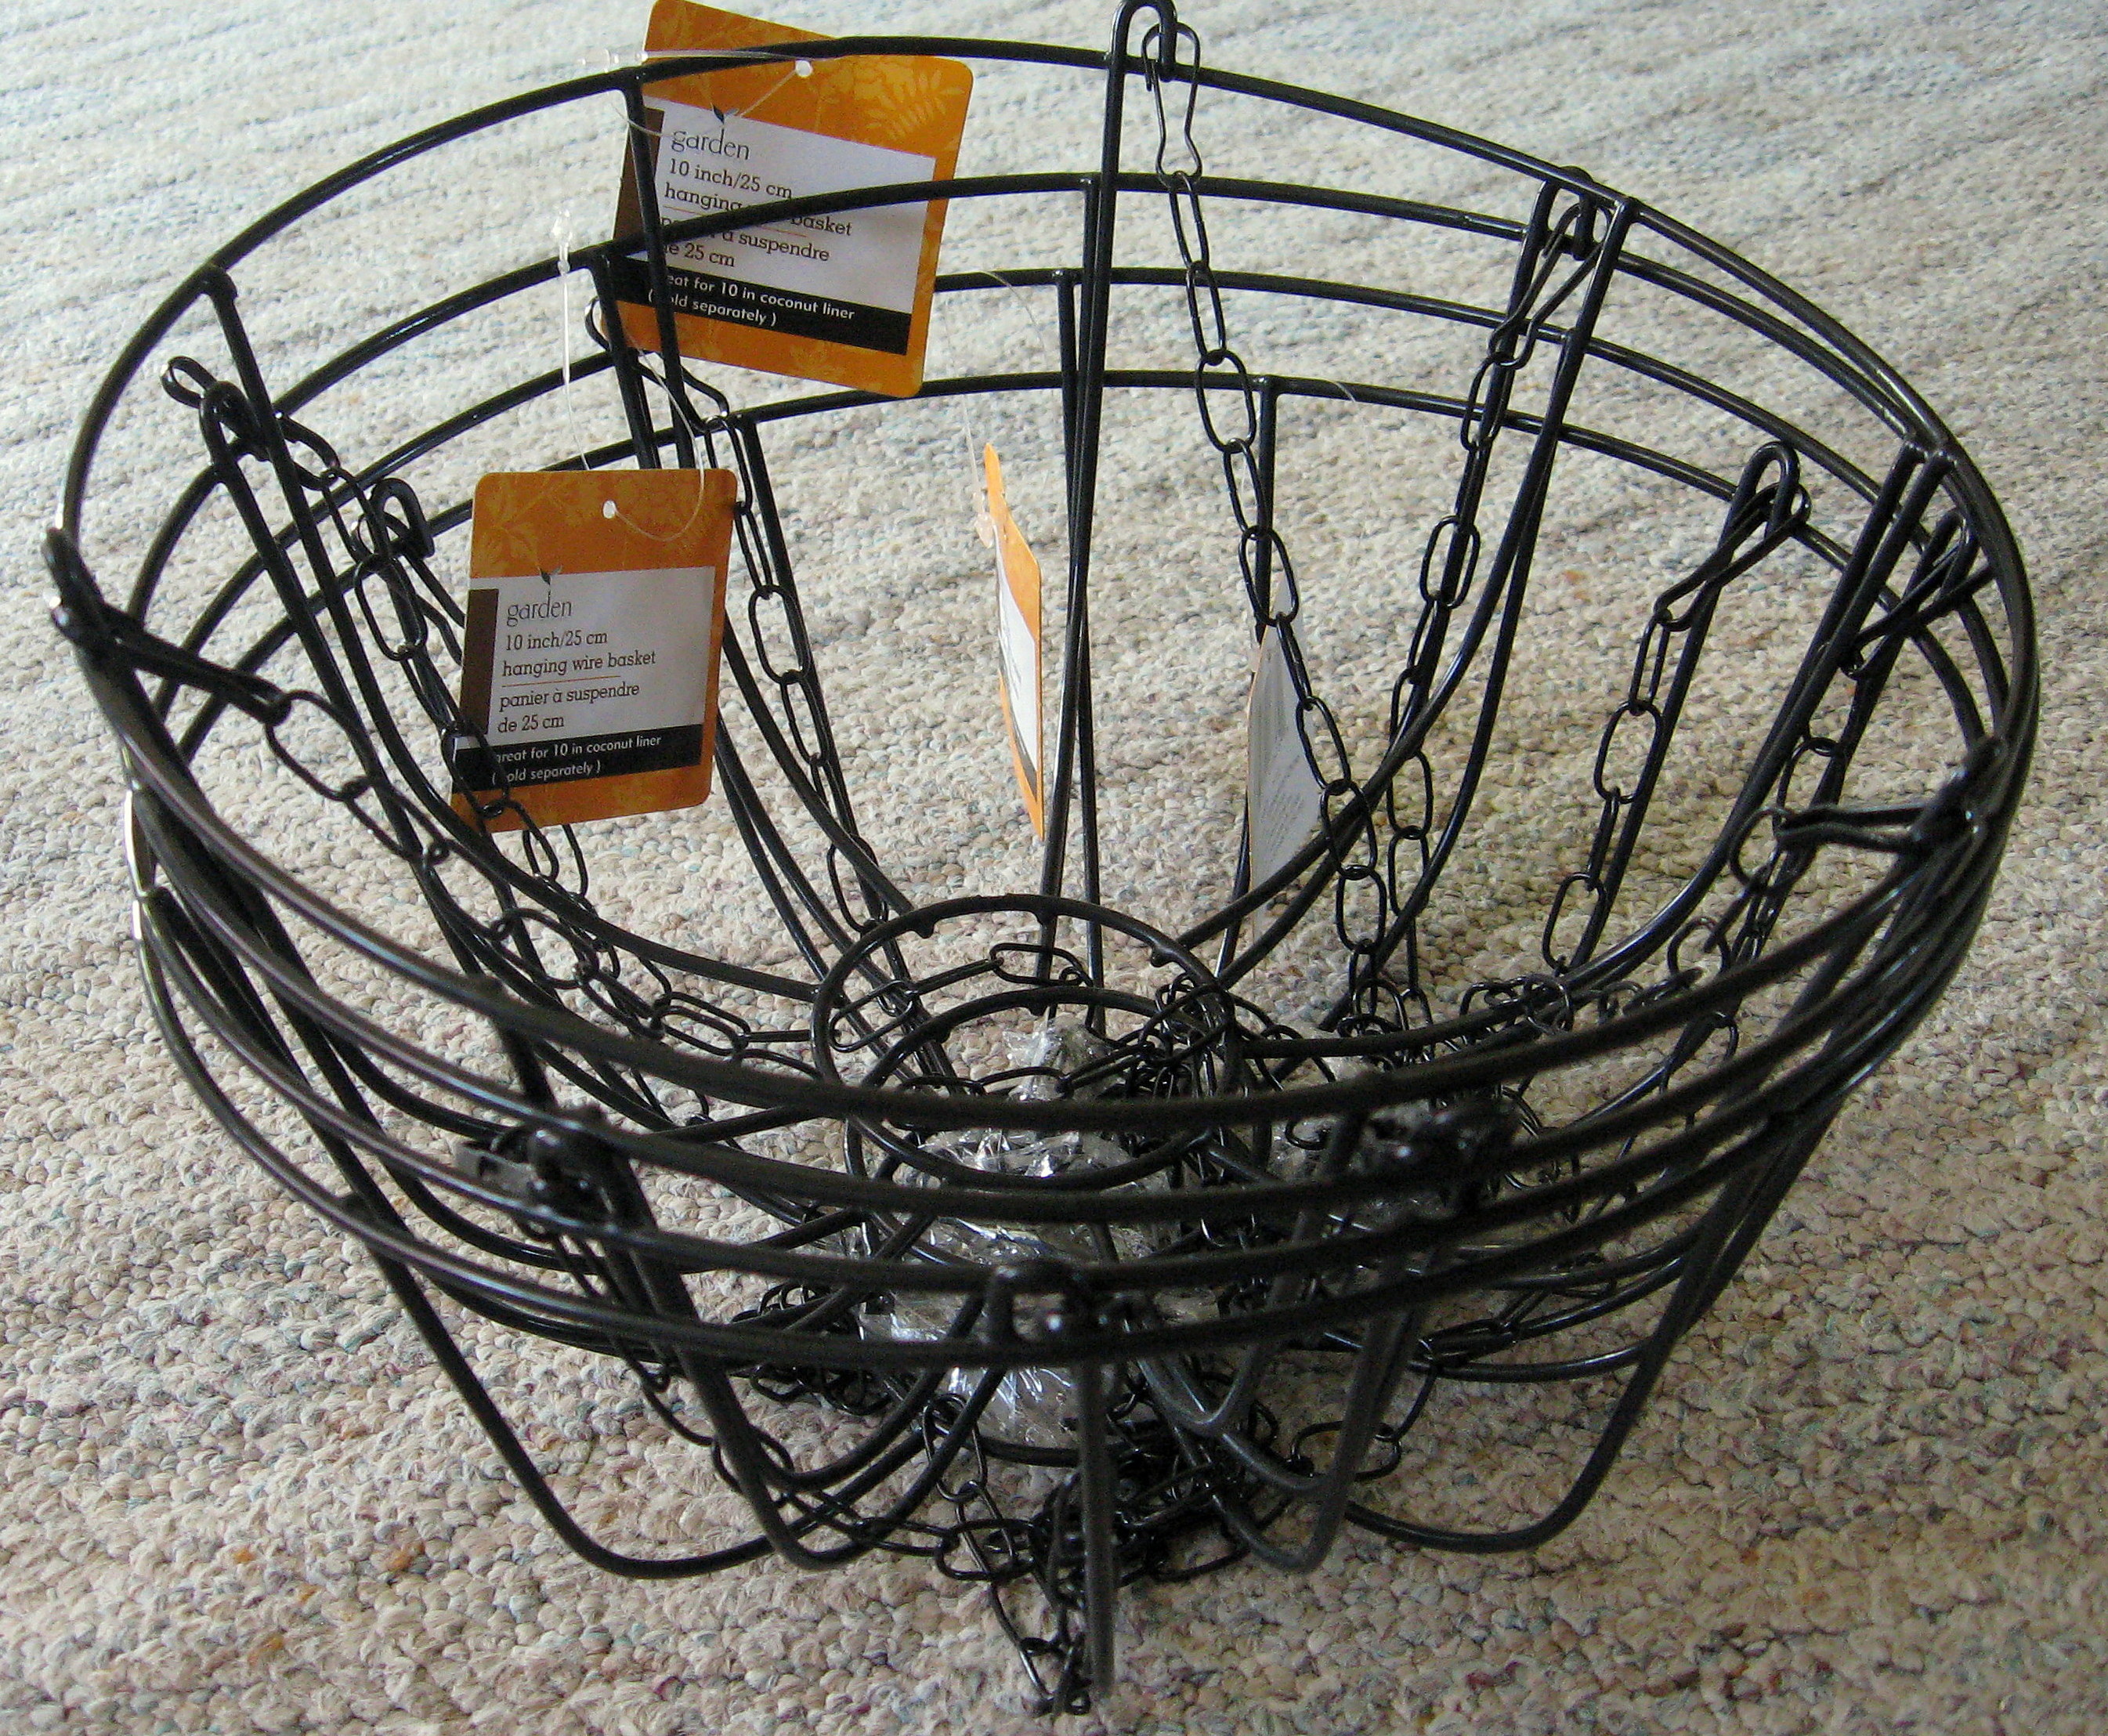
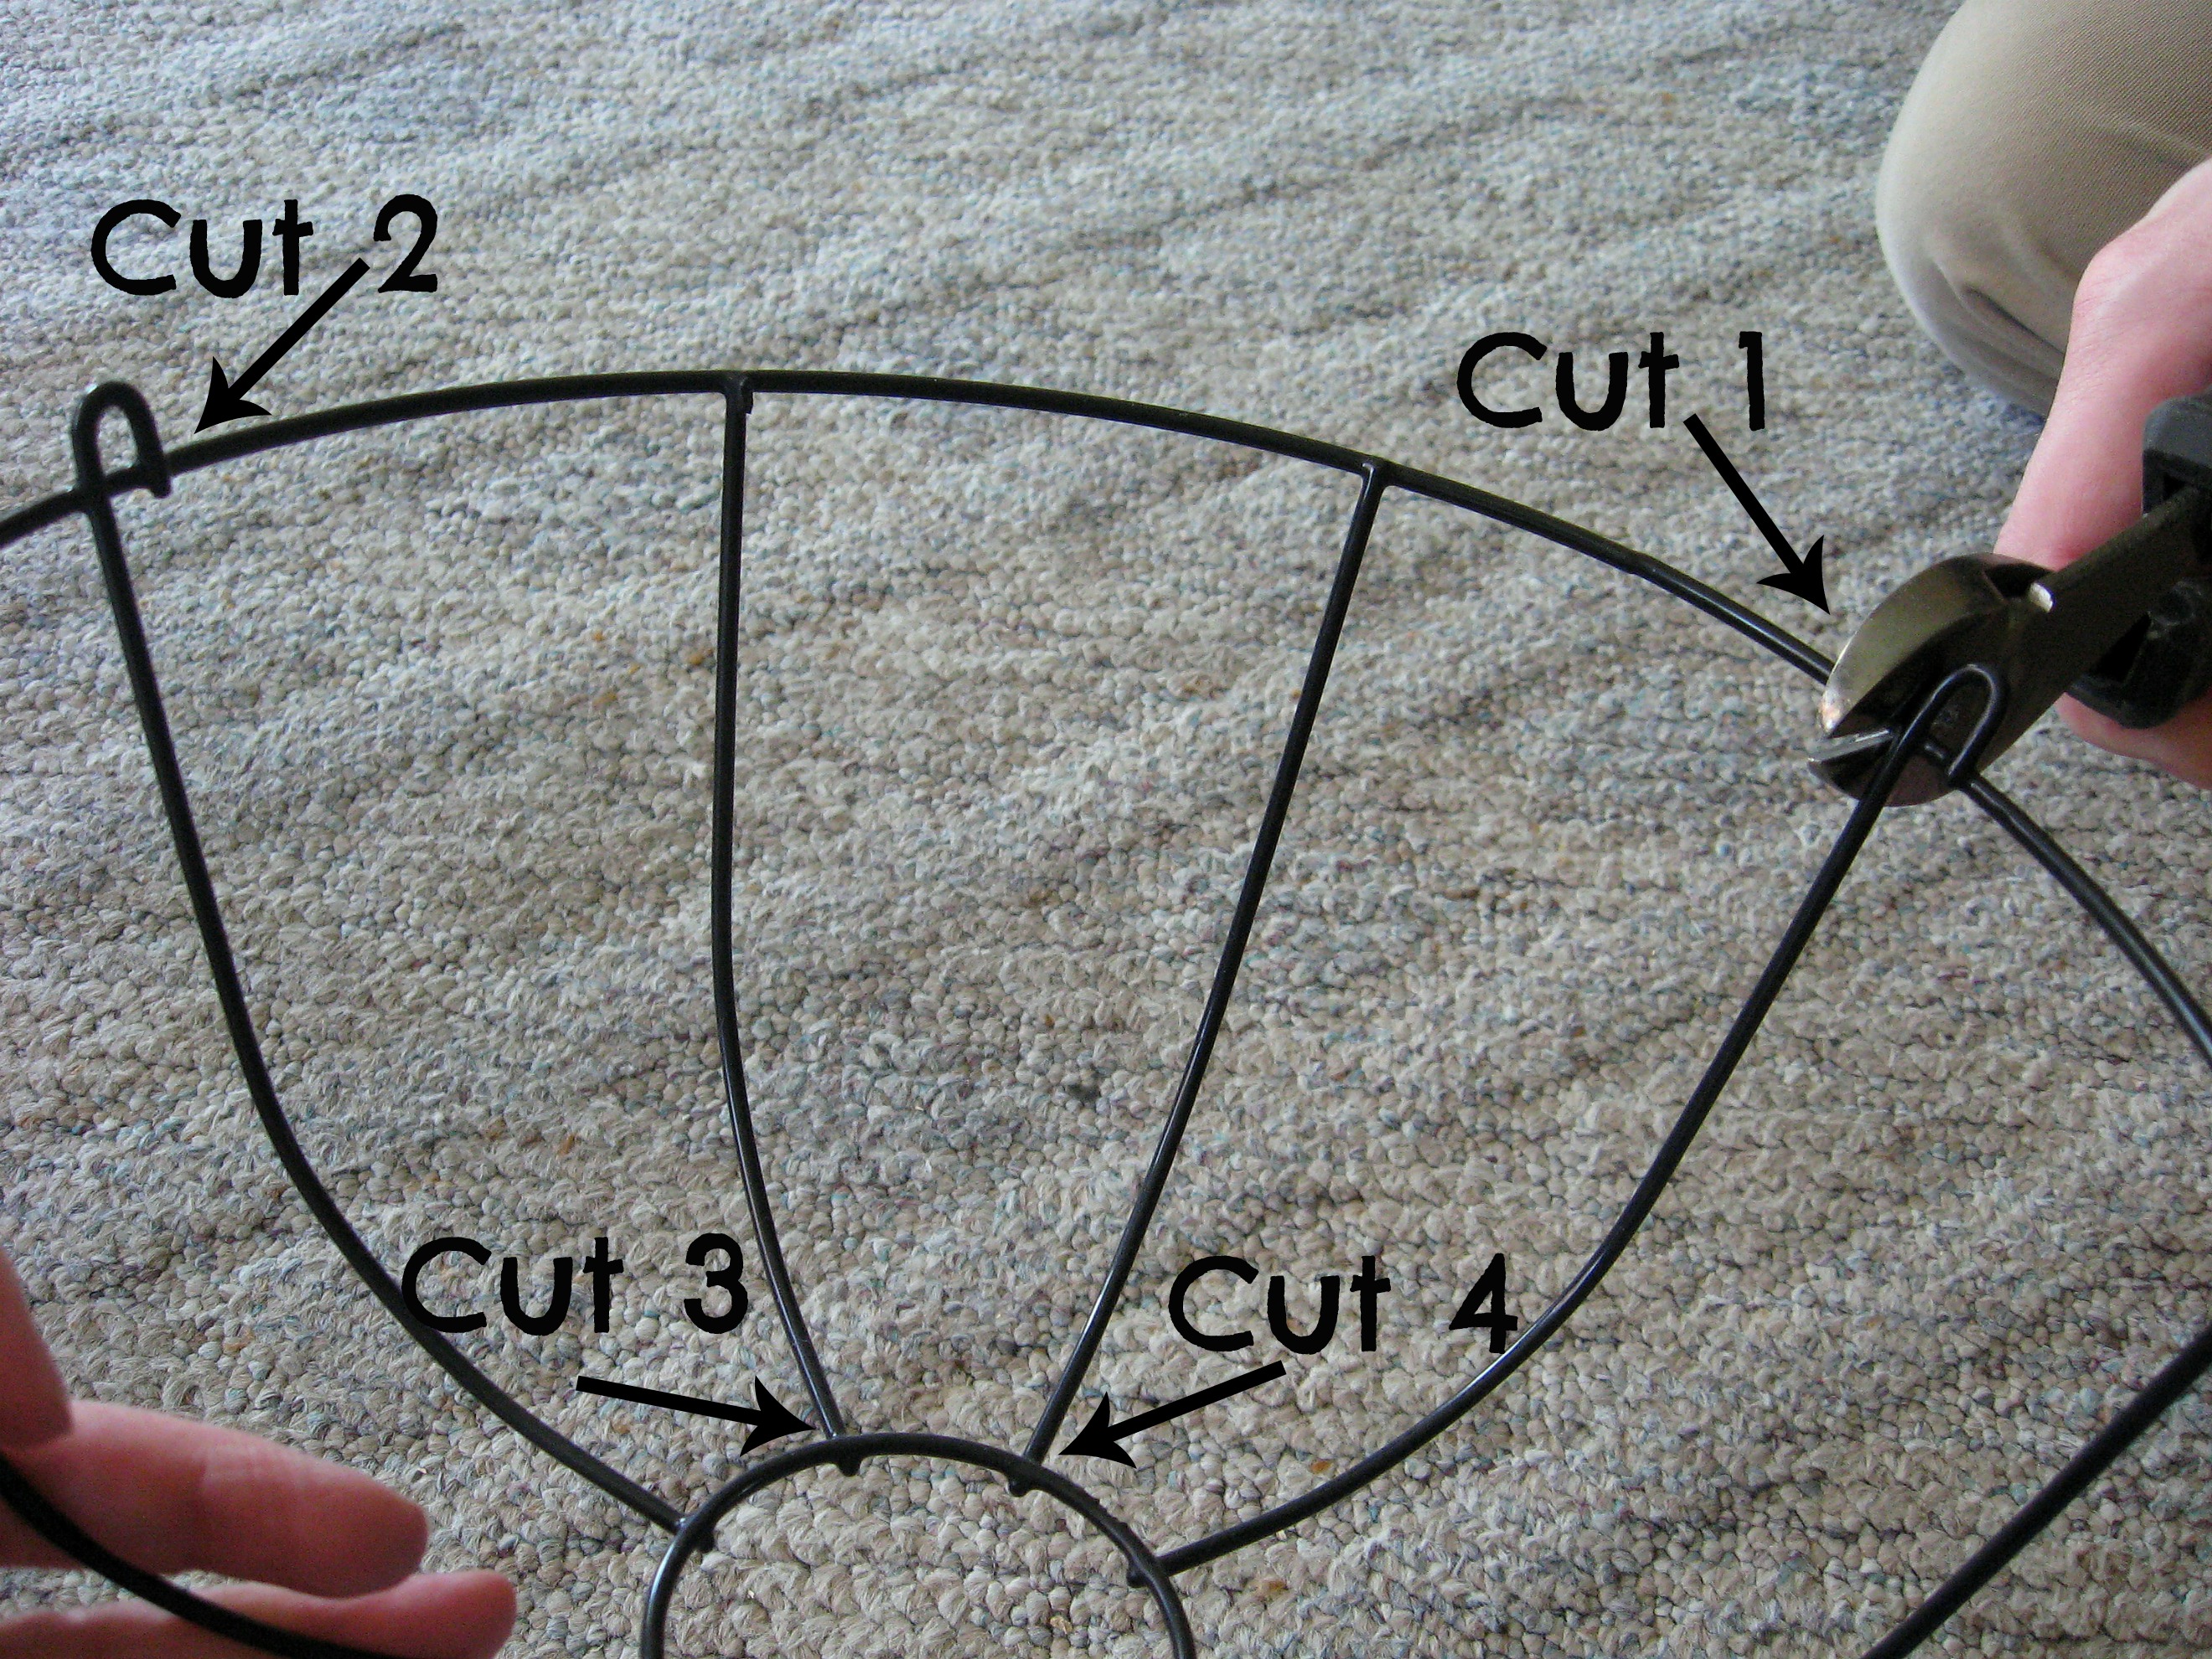
Here is a close up of what my basket looks like. You will cut out a section of the basket so that it sits flat against the board. Make sure you keep the little loops that held the chain; that is where you will screw the basket into the board.
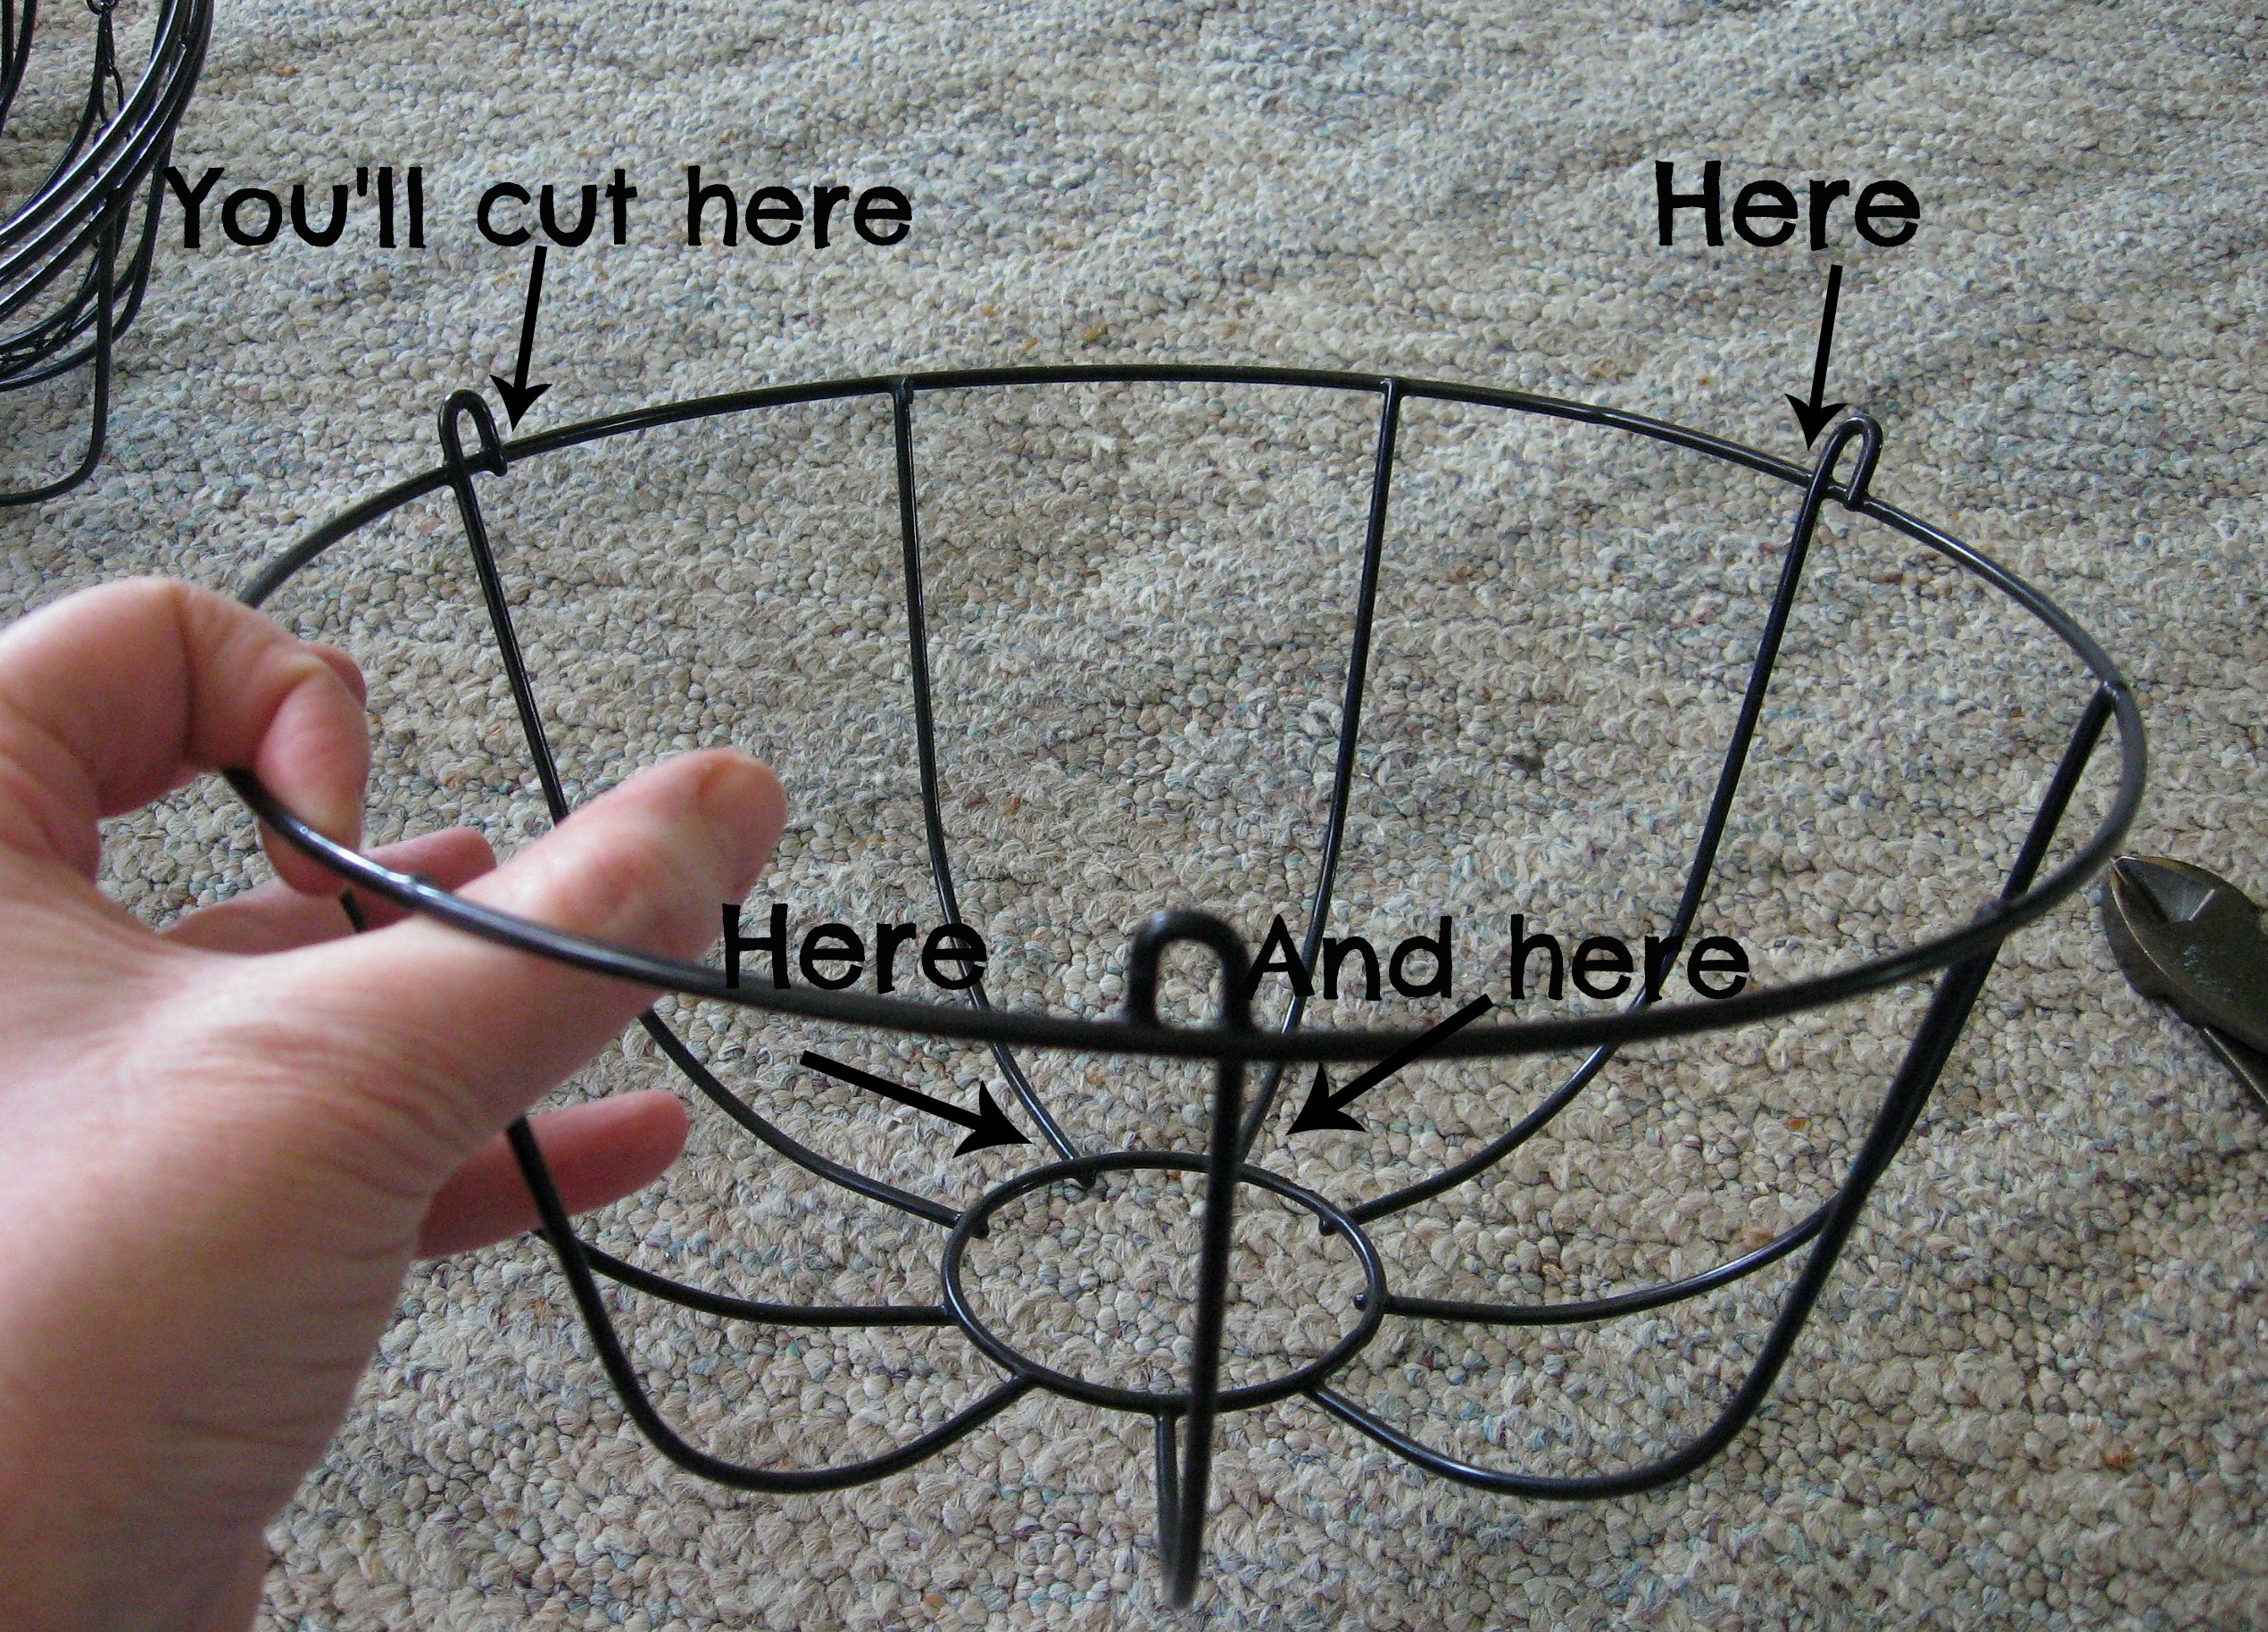
Use heavy duty wire cutters and cut as close to the intersections as you can, so you don’t leave a sharp end.
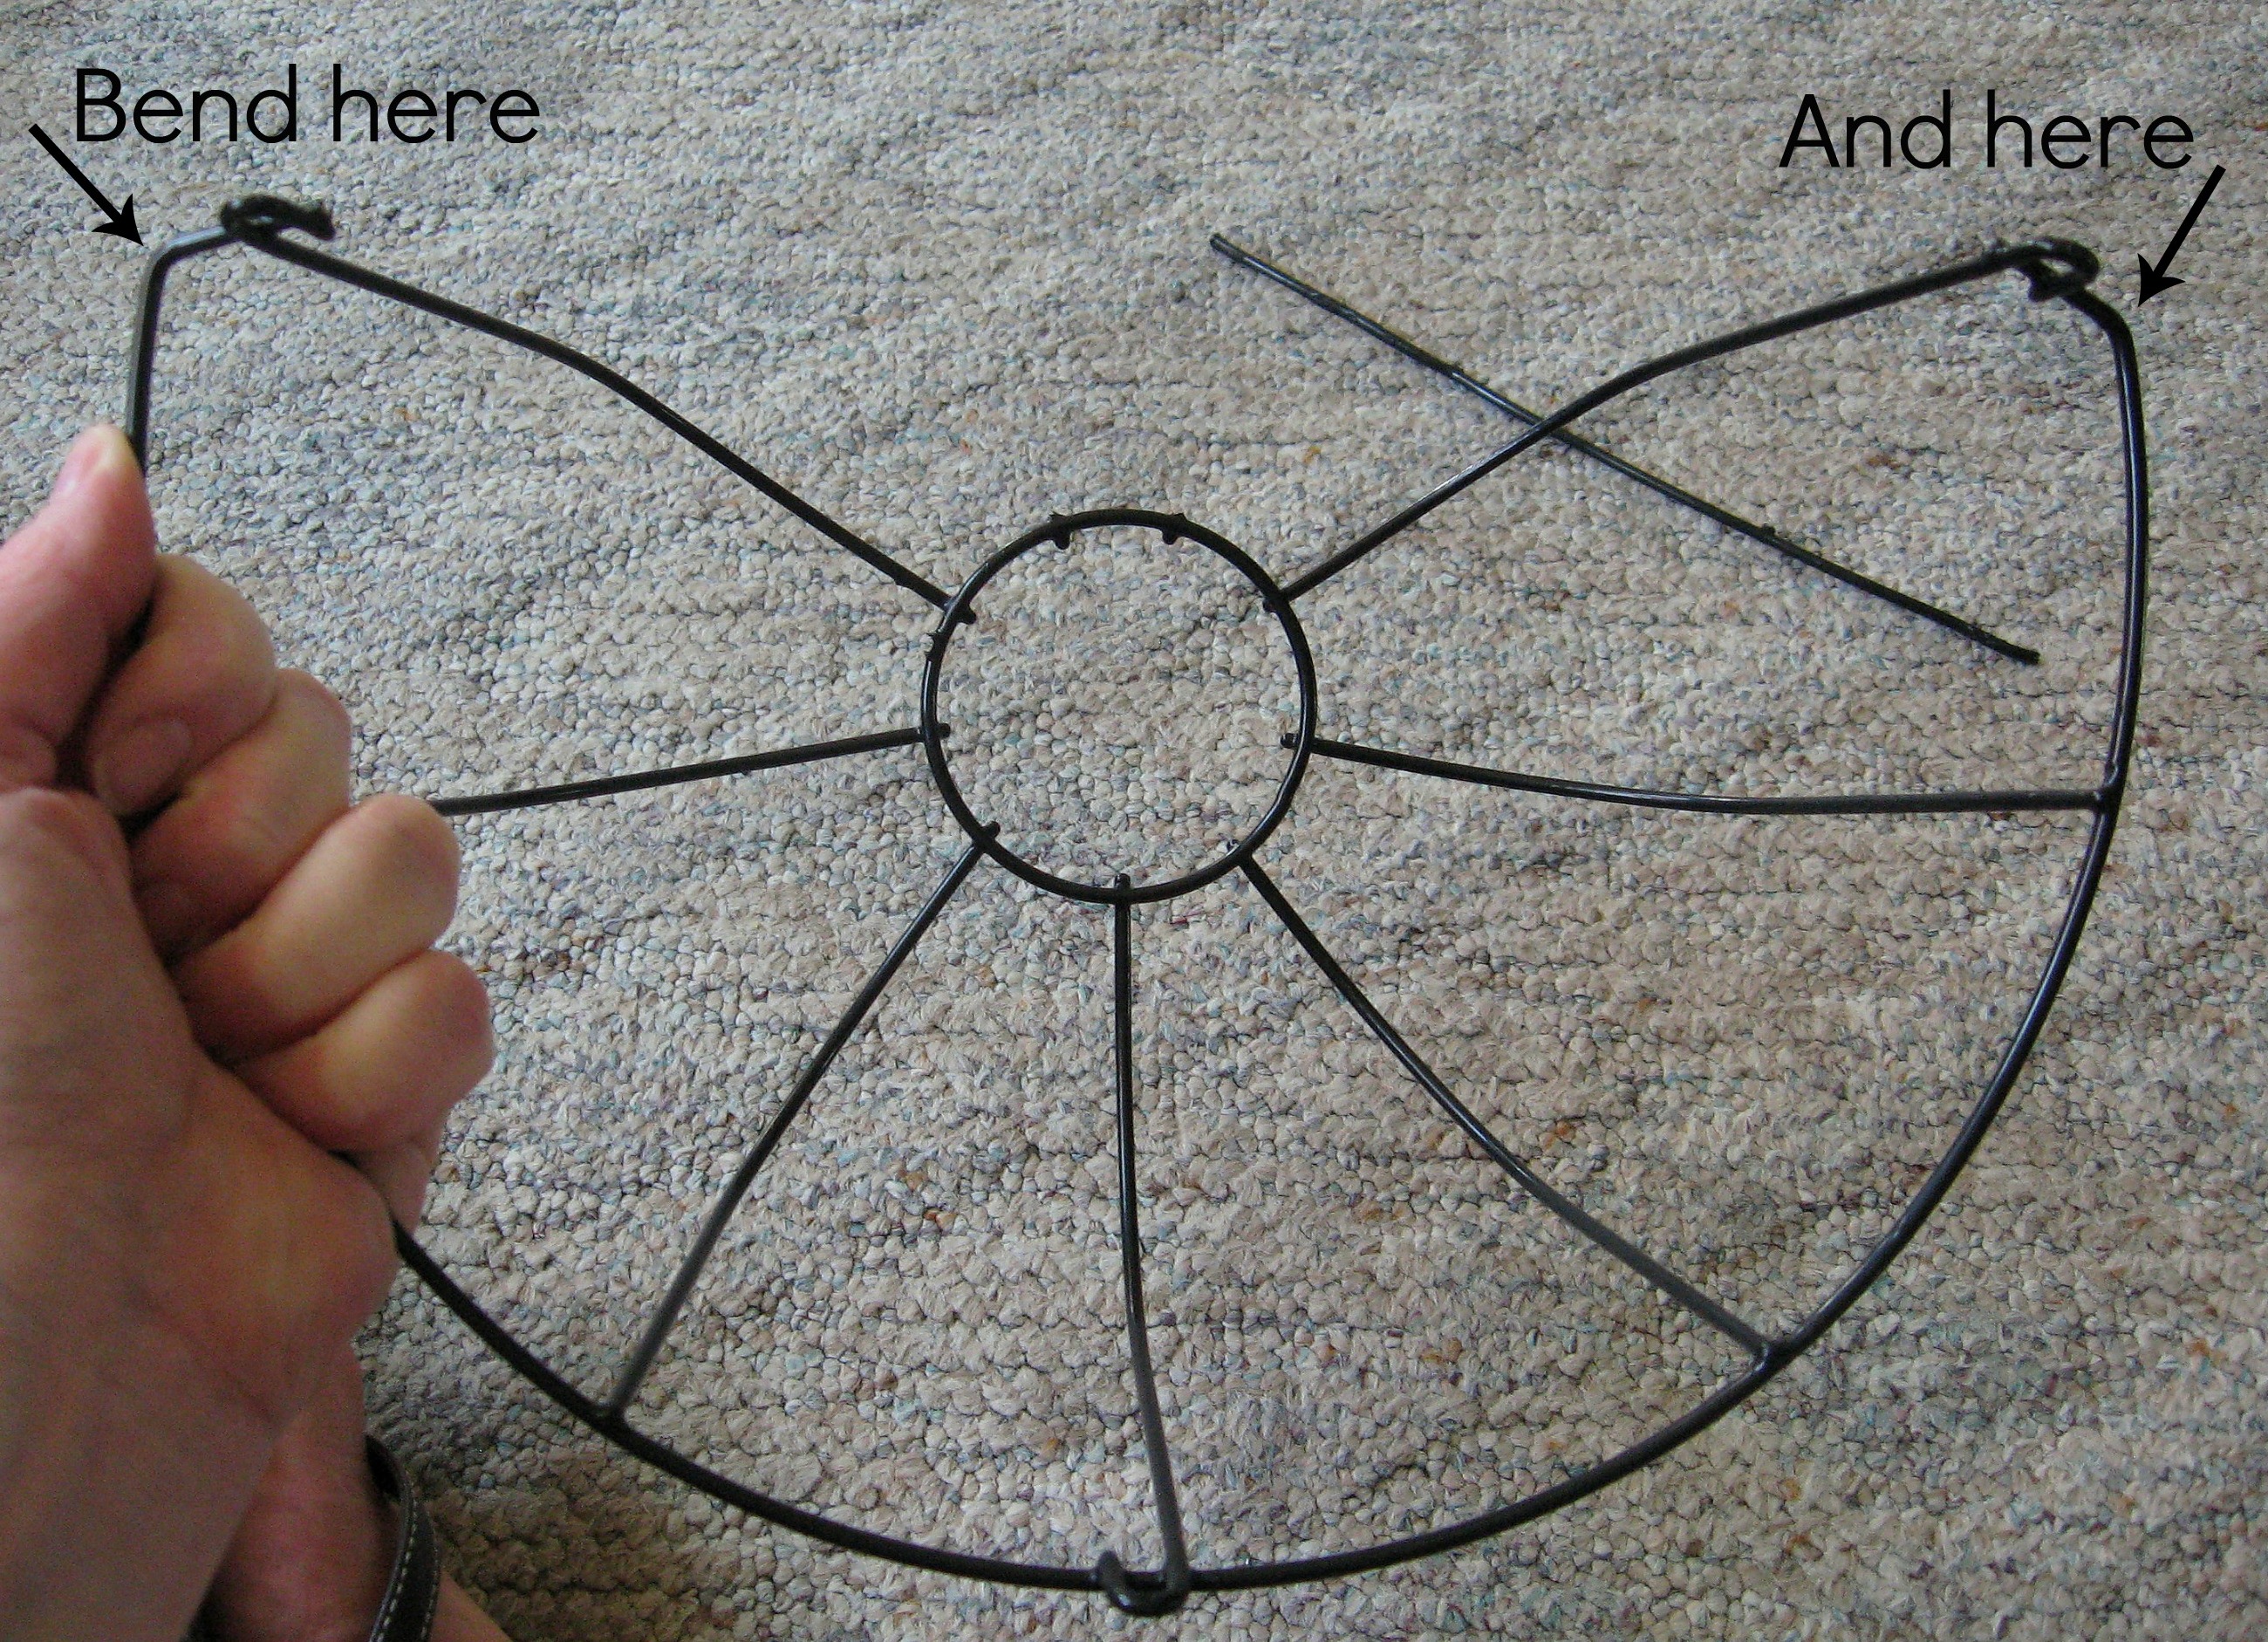
Now you’ll have a basket that has one whole “side” cut away. Next, with pliers, bend the little wire loops in at a 90* angle like this:
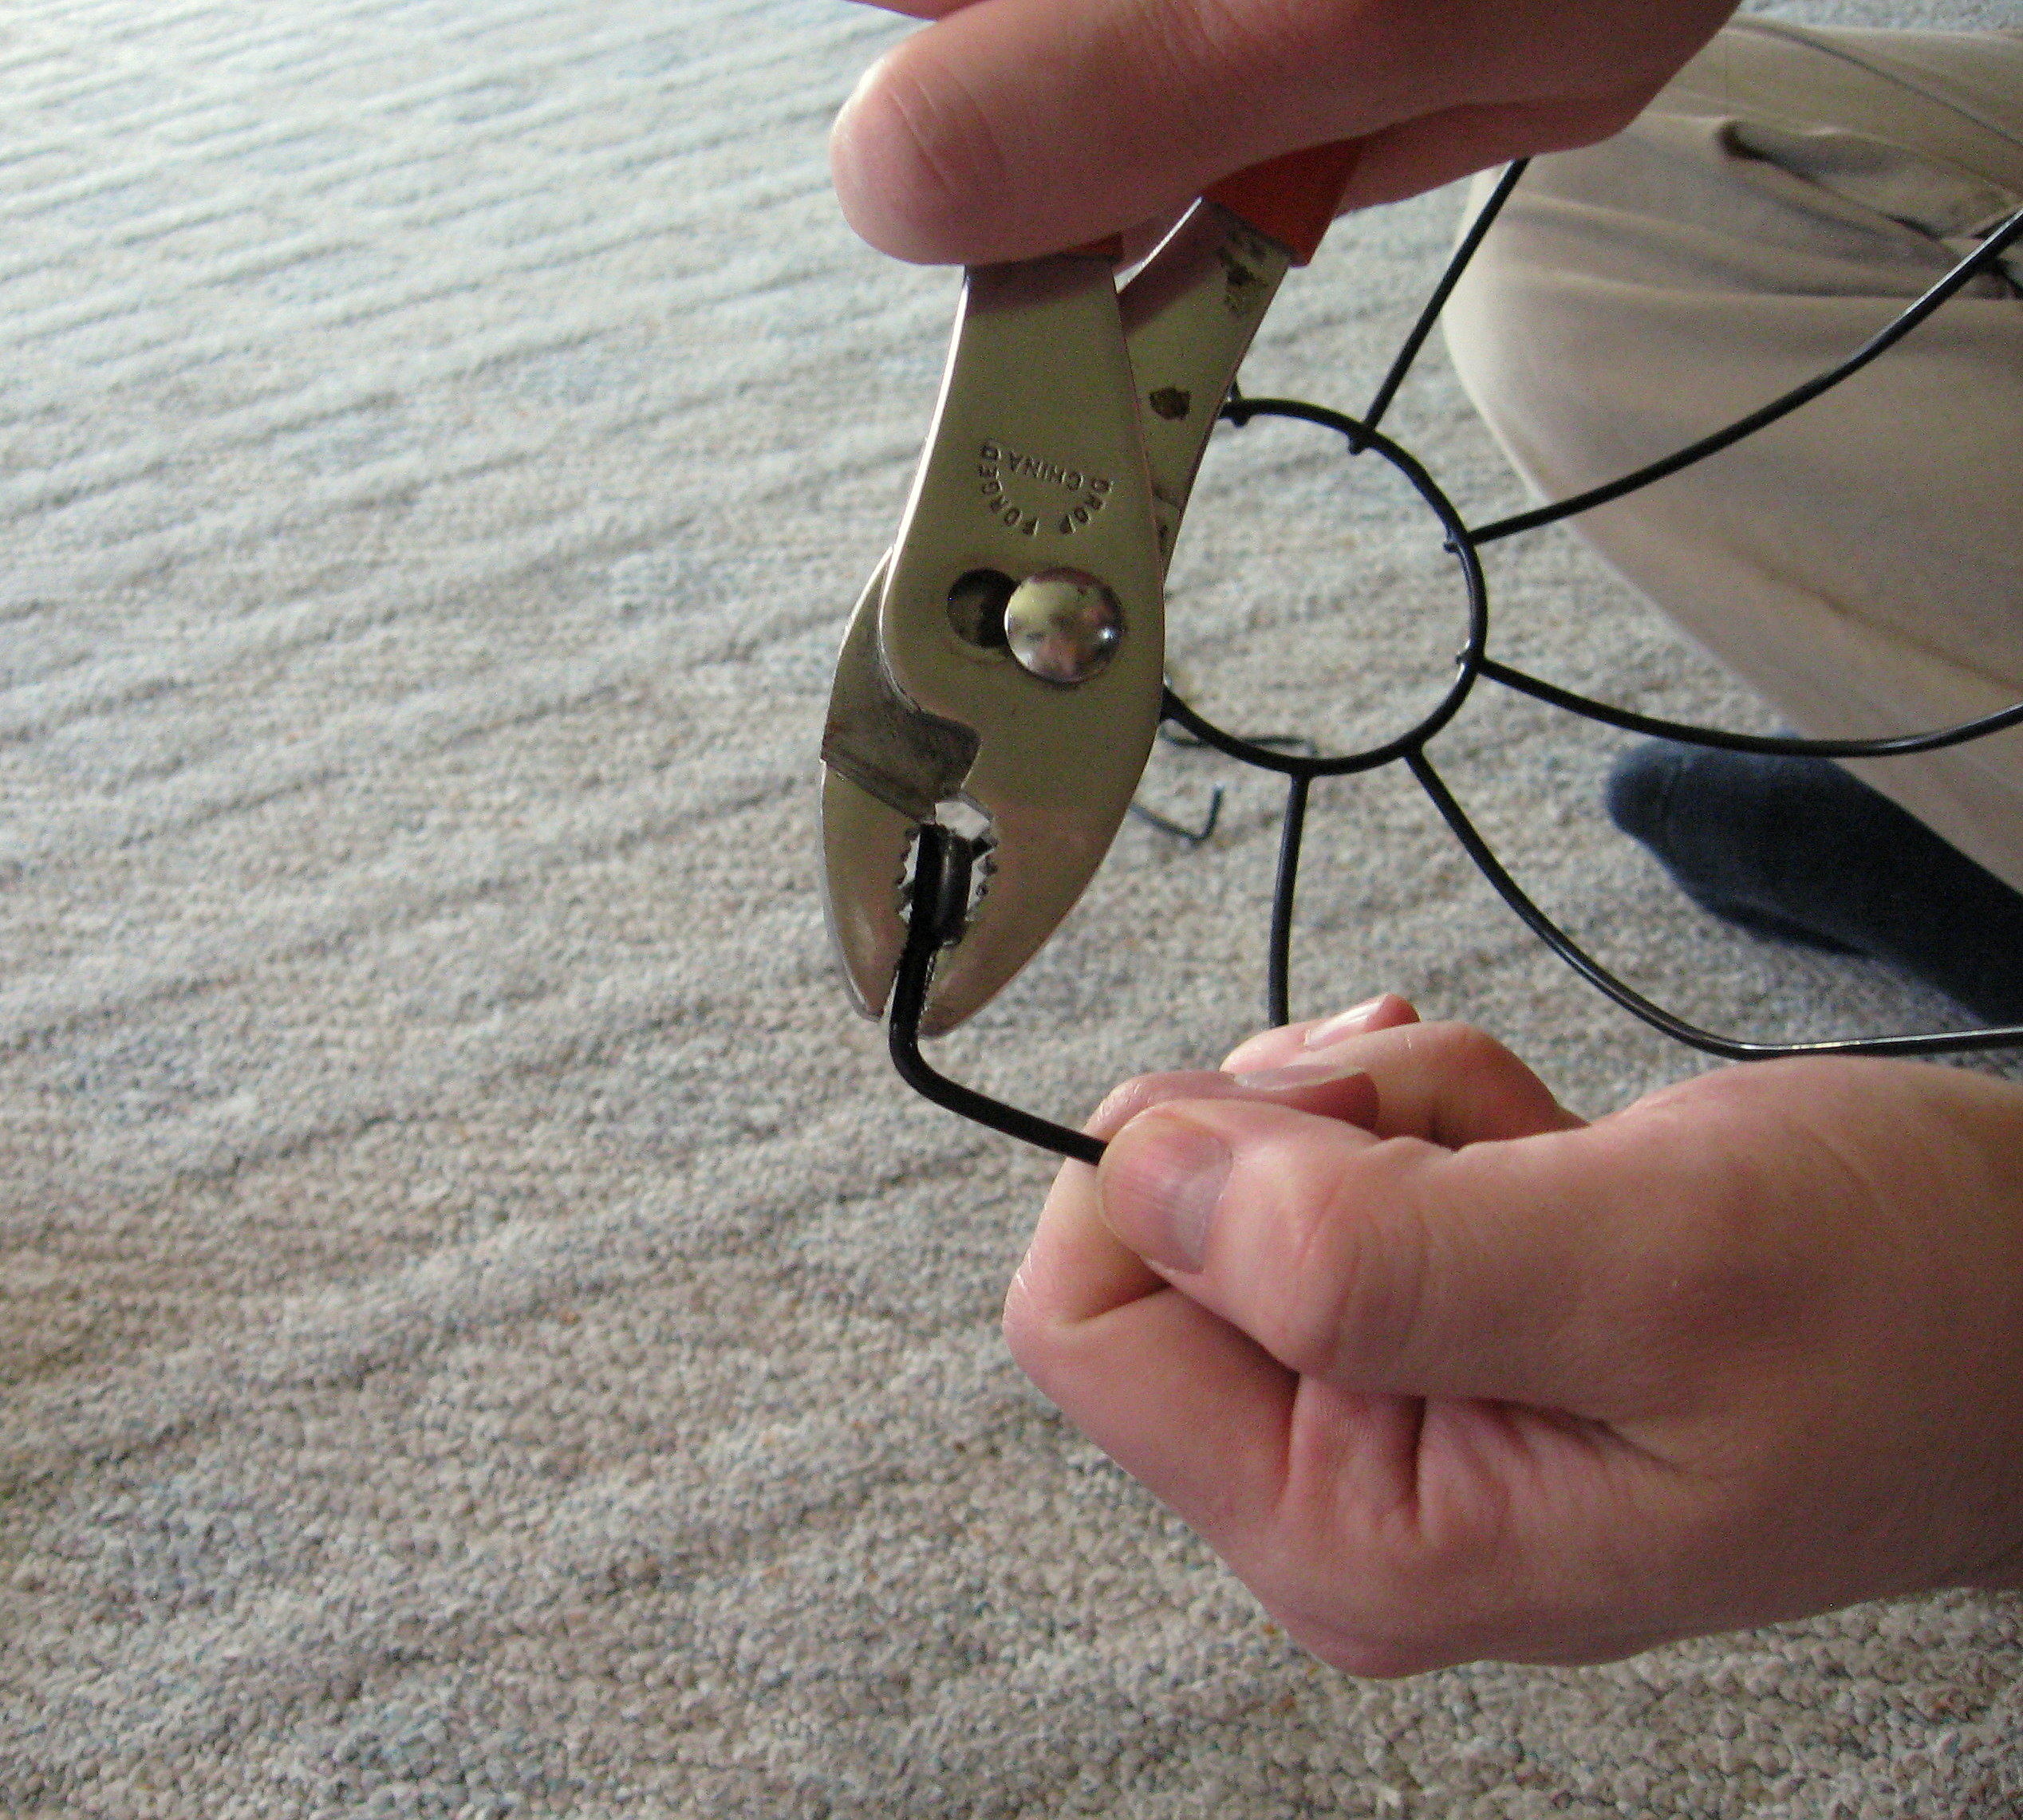
Bend the loops on each side, in towards each other.
Now it should look like this:
Cut and bend all of your baskets. Now take a minute to make sure you don’t have any sharp points, and if you find one, either cut it closer or file it down with a metal file.
Now we will put the boards together. A couple of notes about the boards that I used; I chose the dog eared cedar fence boards because that is what matches the style of my daughters room. You could easily change the style of this project by using one board that is wide enough for the baskets. You could even skip this part and attach the baskets straight to the wall. I considered attaching the baskets to the boards the other way. I decided that it fits better in her room vertically, but horizontally would be super cute too!
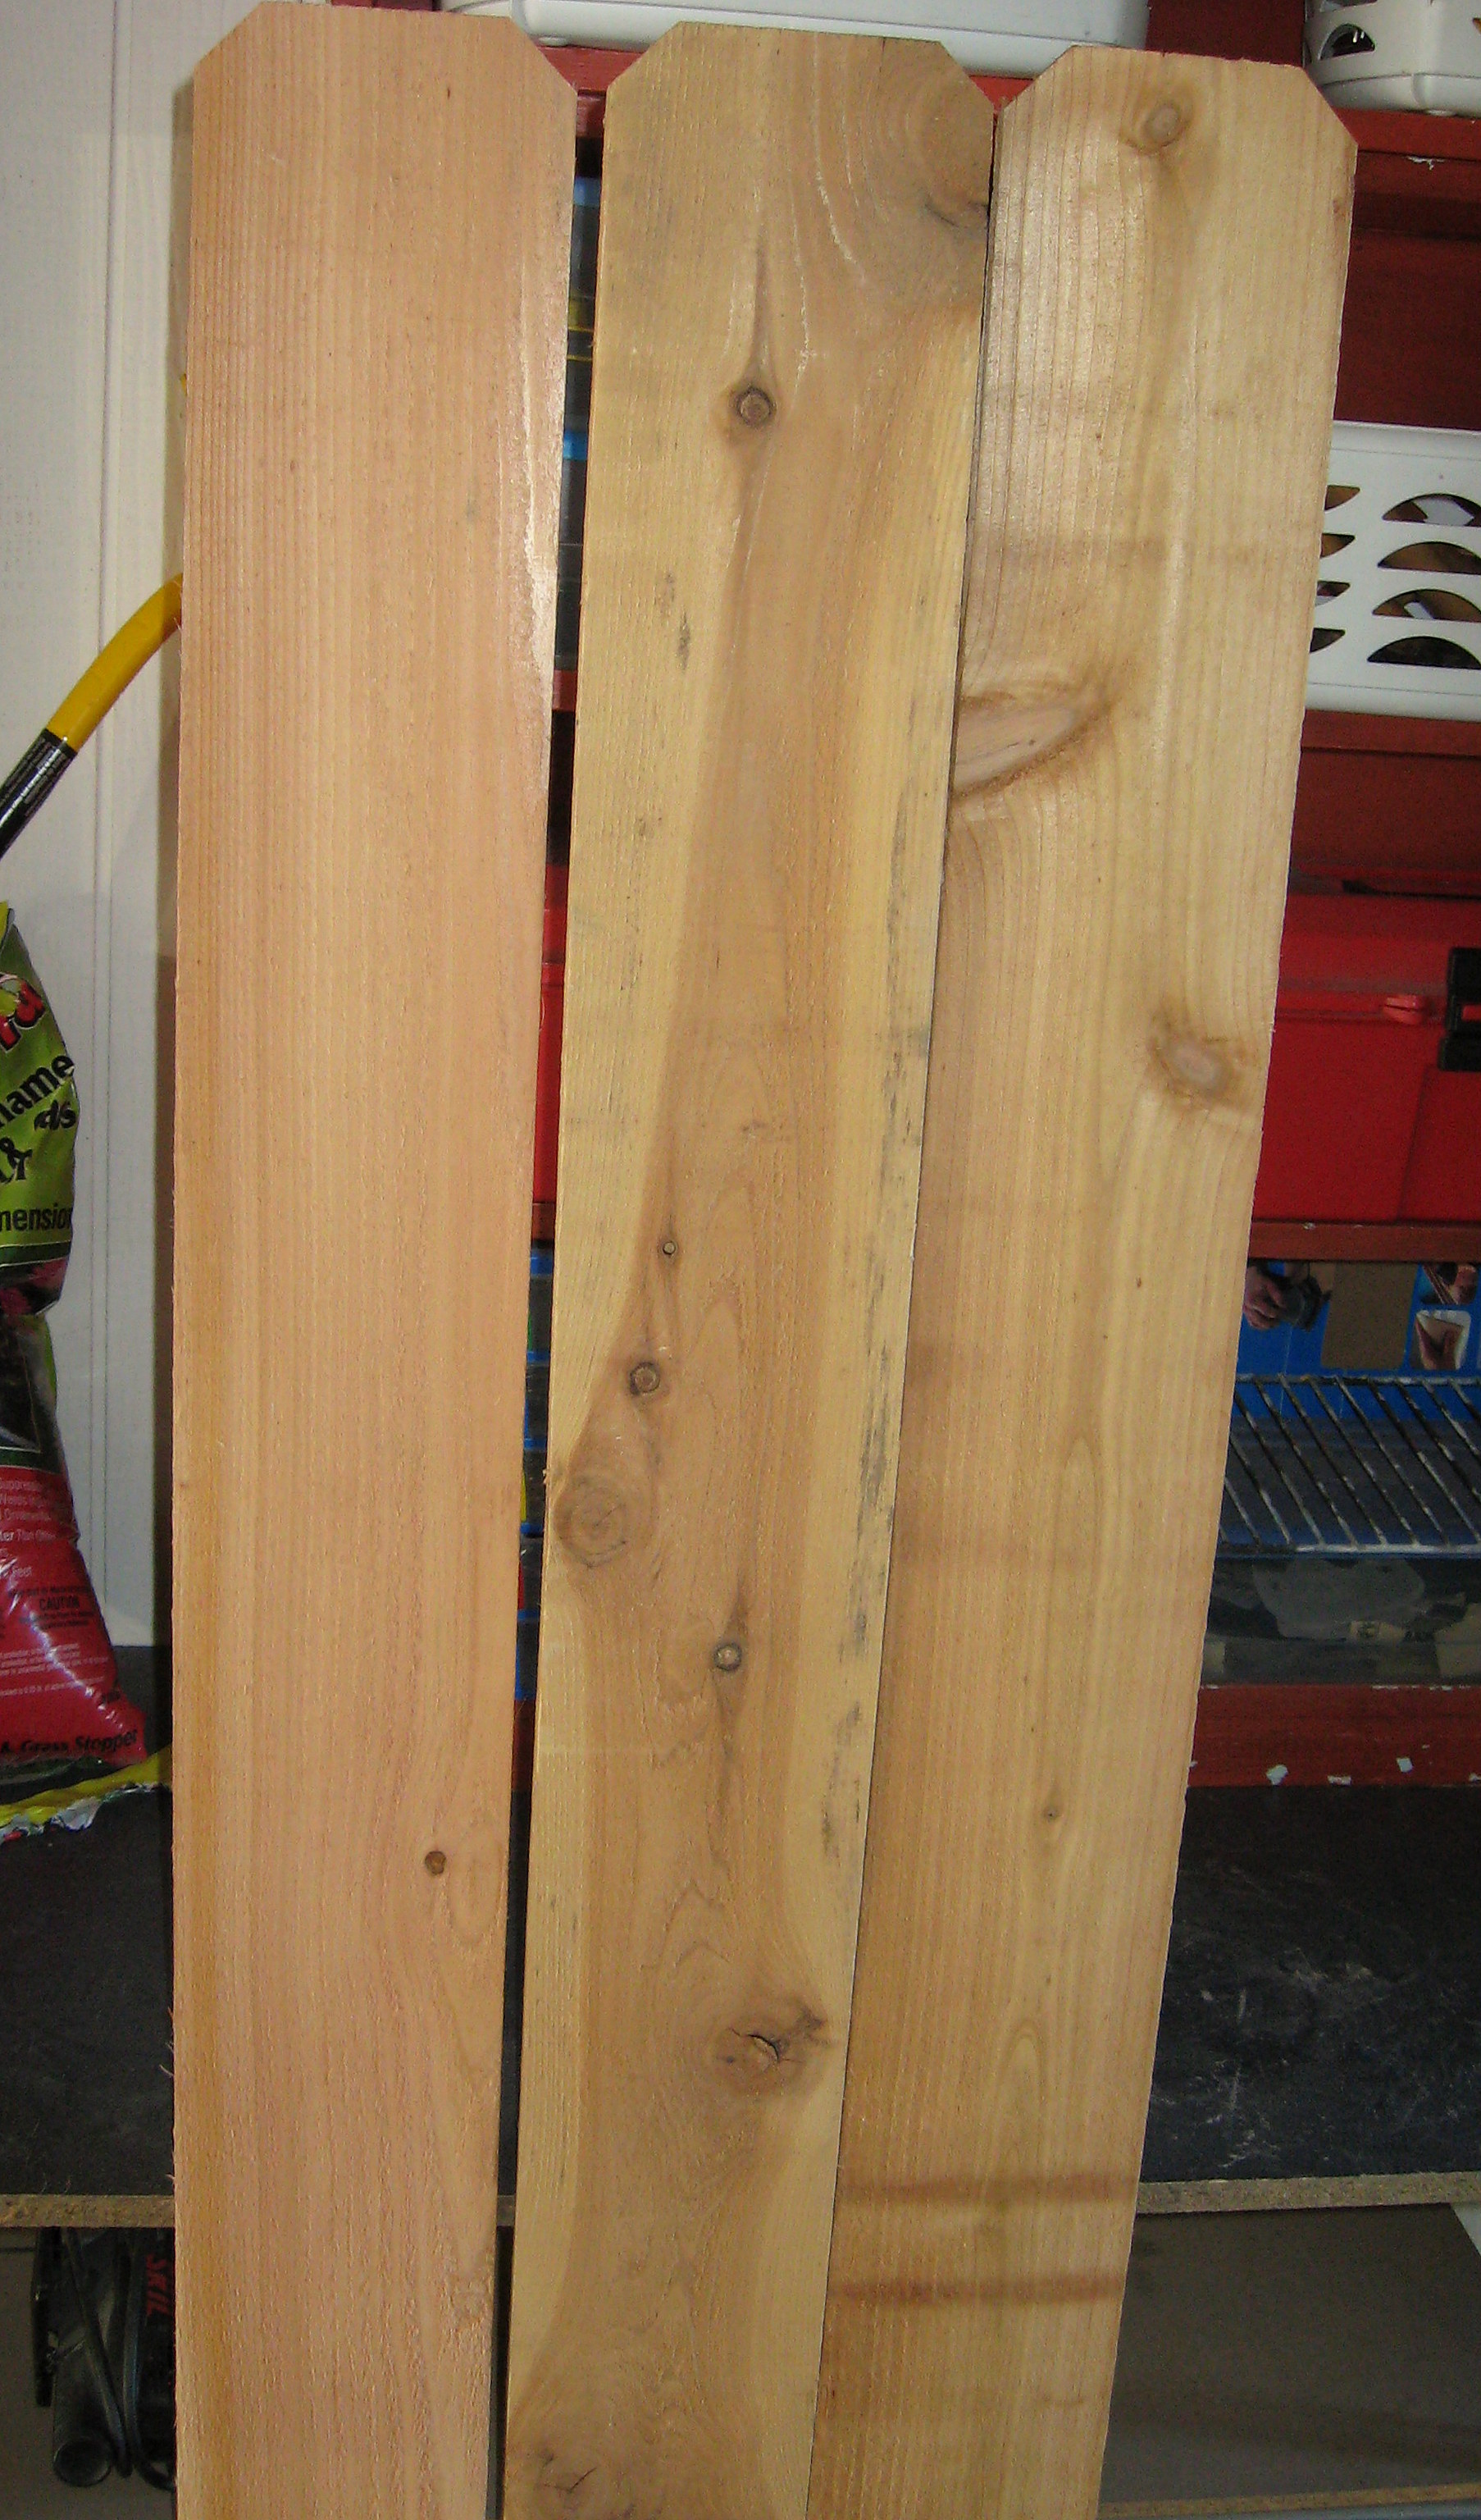
Here we go… cedar fence boards are notoriously warped and wonky. Again, for the style I was going for I didn’t mind if they didn’t fit together really tight, but if that matters to you make sure to take the time in the store to sort through the pile and find the straightest, flattest ones you can find.
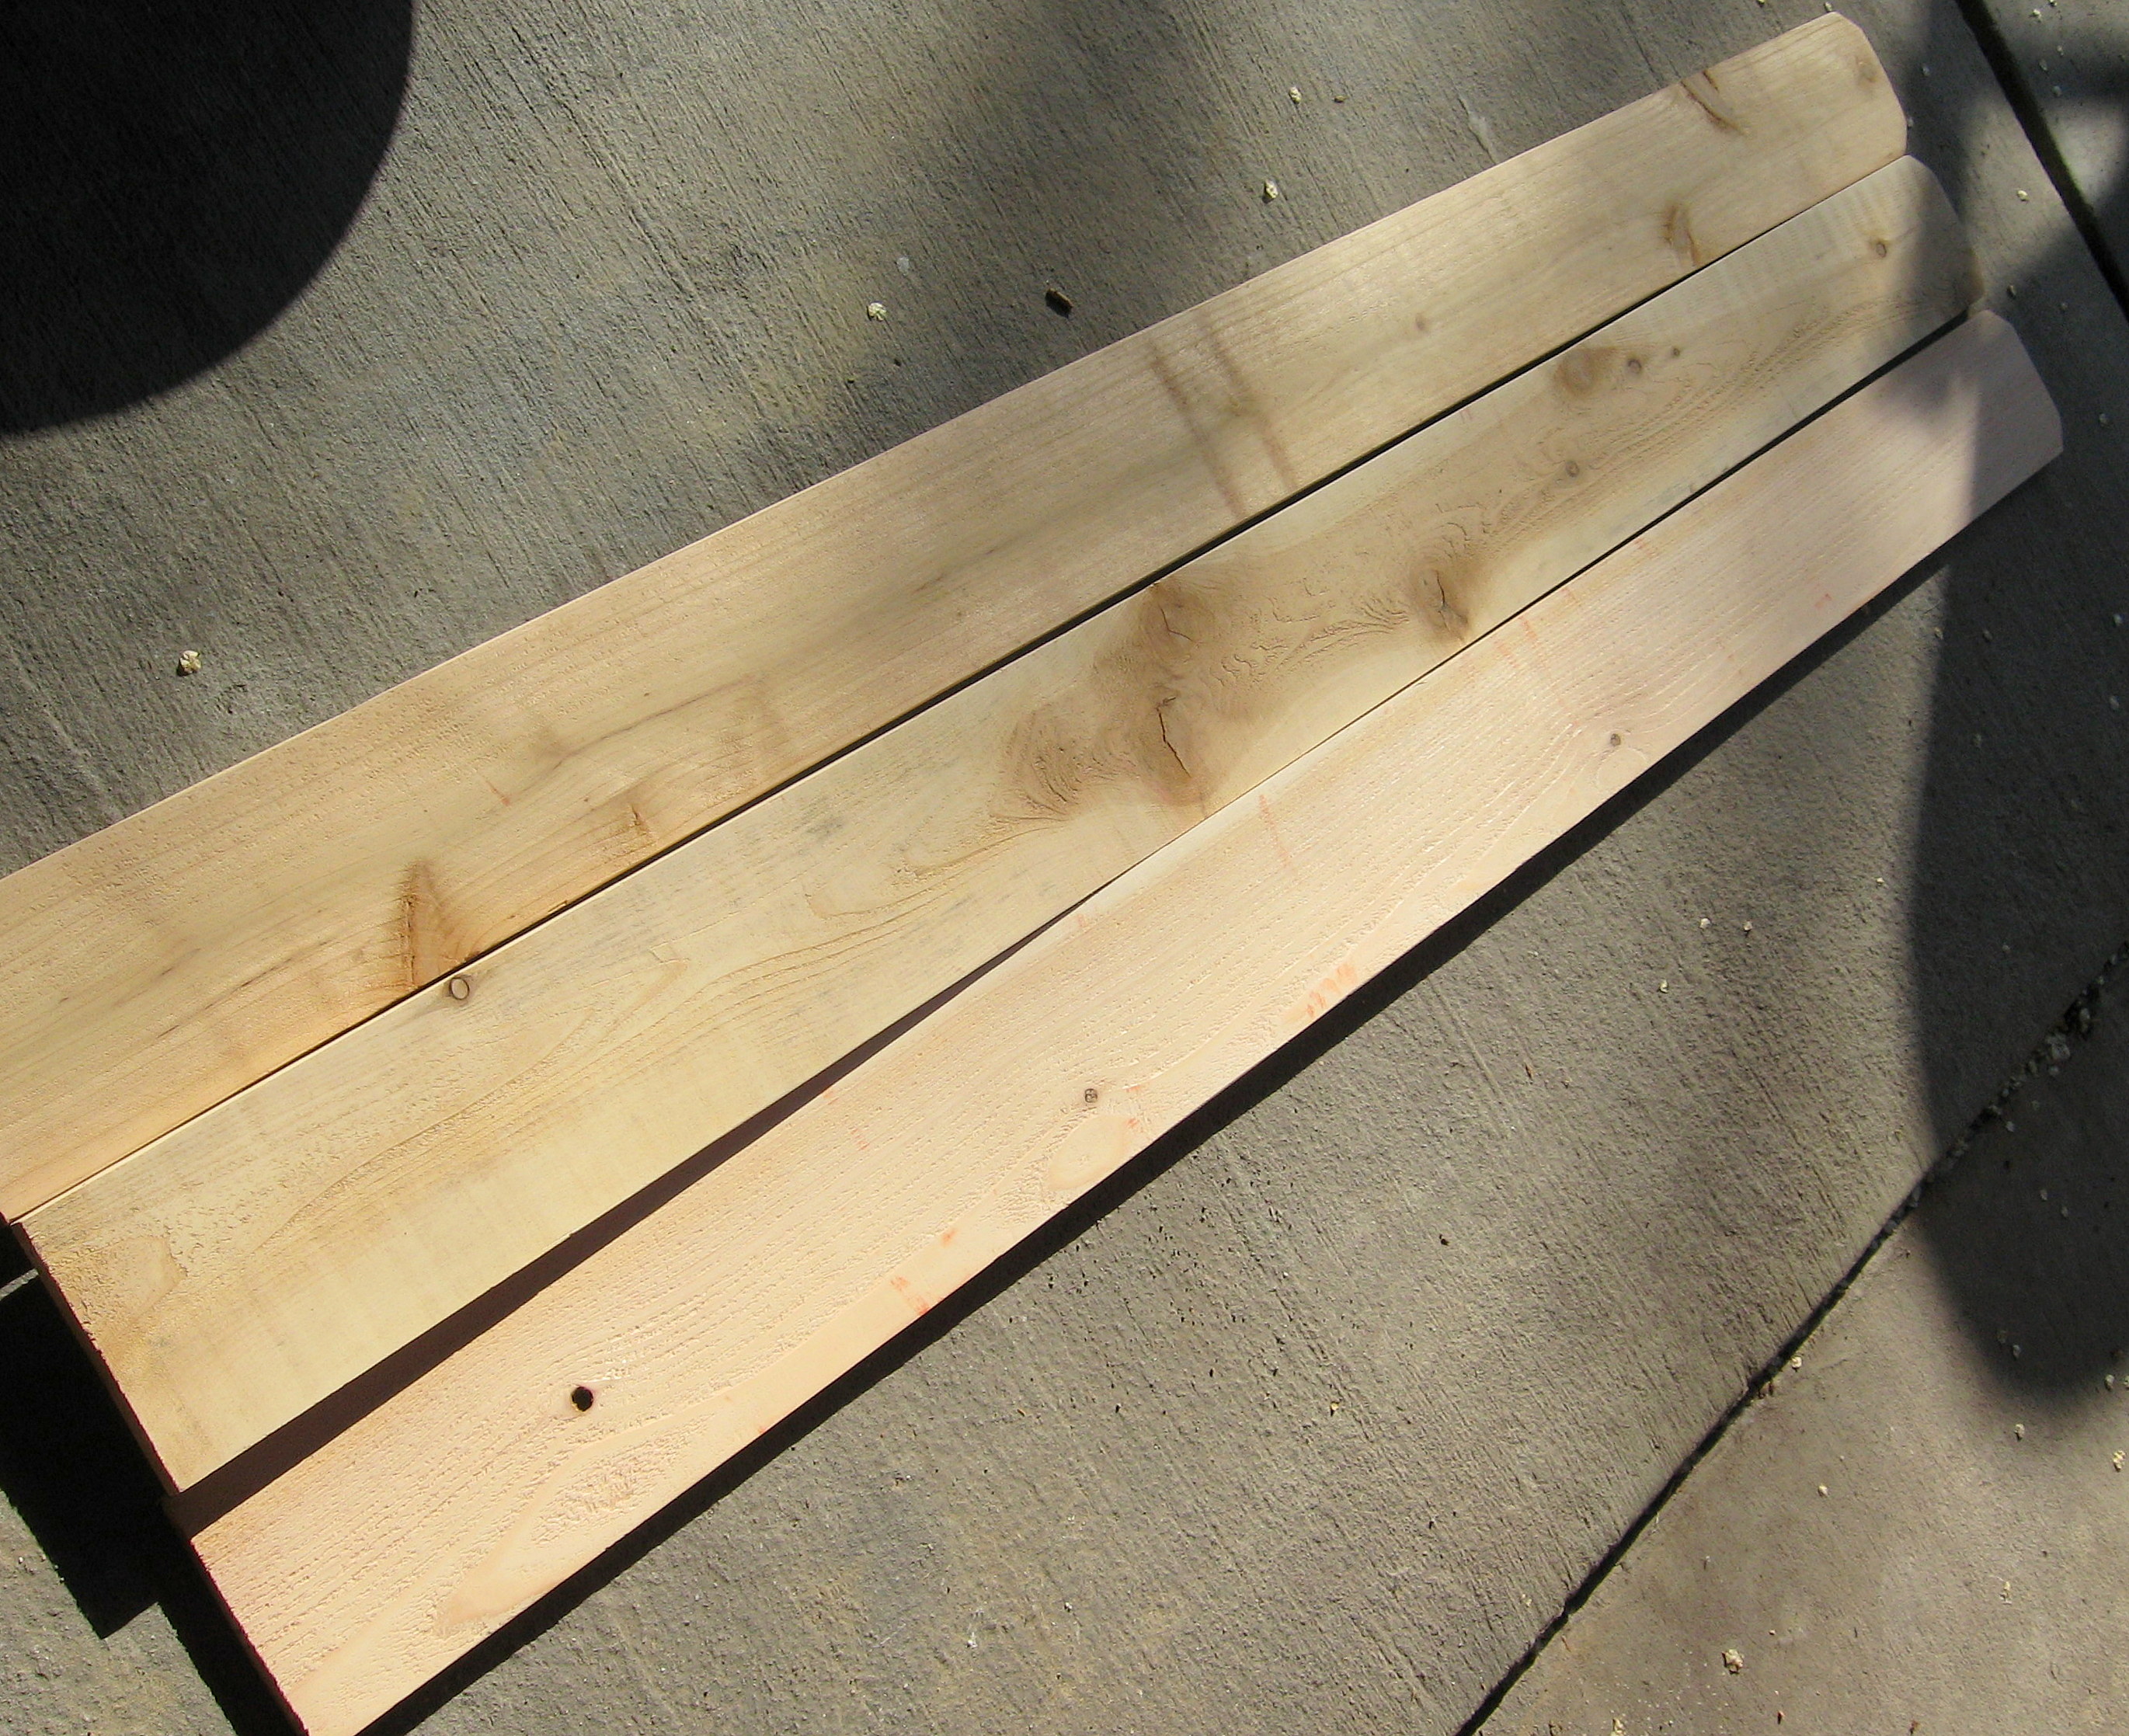
The wood is very rough so start by giving them a quick sanding on all sides. Lay them out on the ground face down. Push them together and line up the bottoms so they are straight and perfectly lined up. See how mine are warped? That is fine; they’ll still go together. Just make sure the bottoms are even.
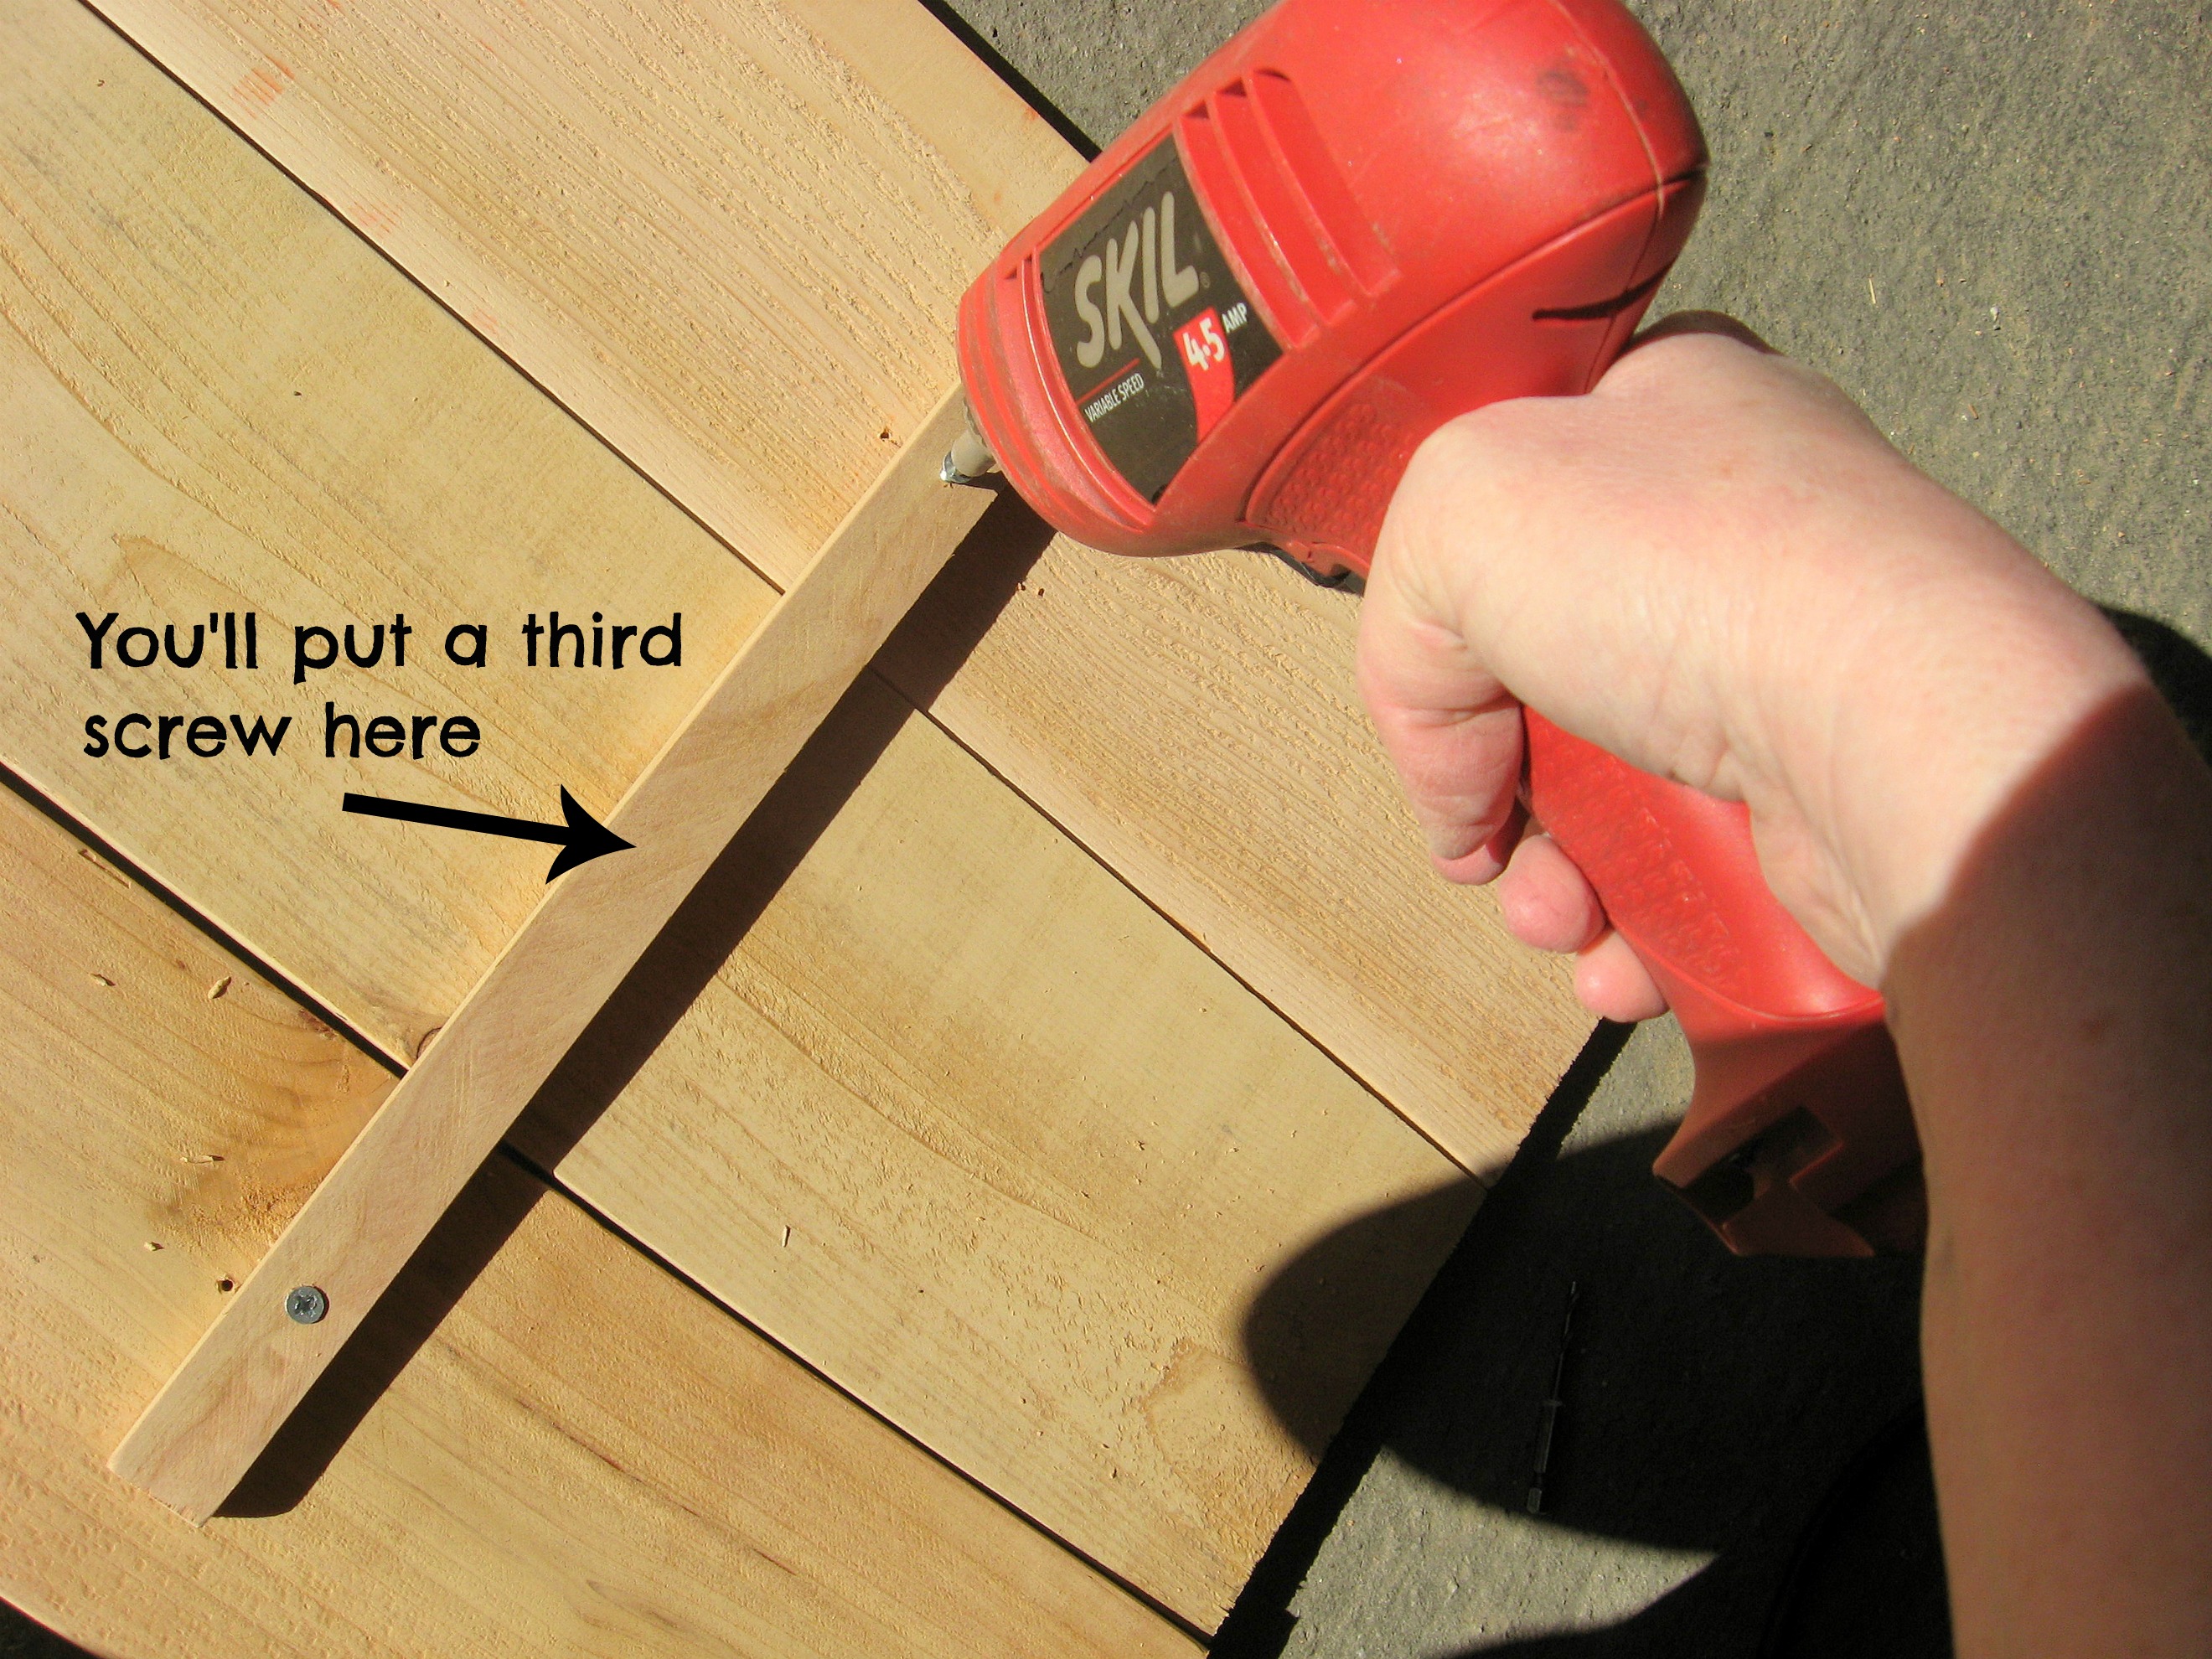
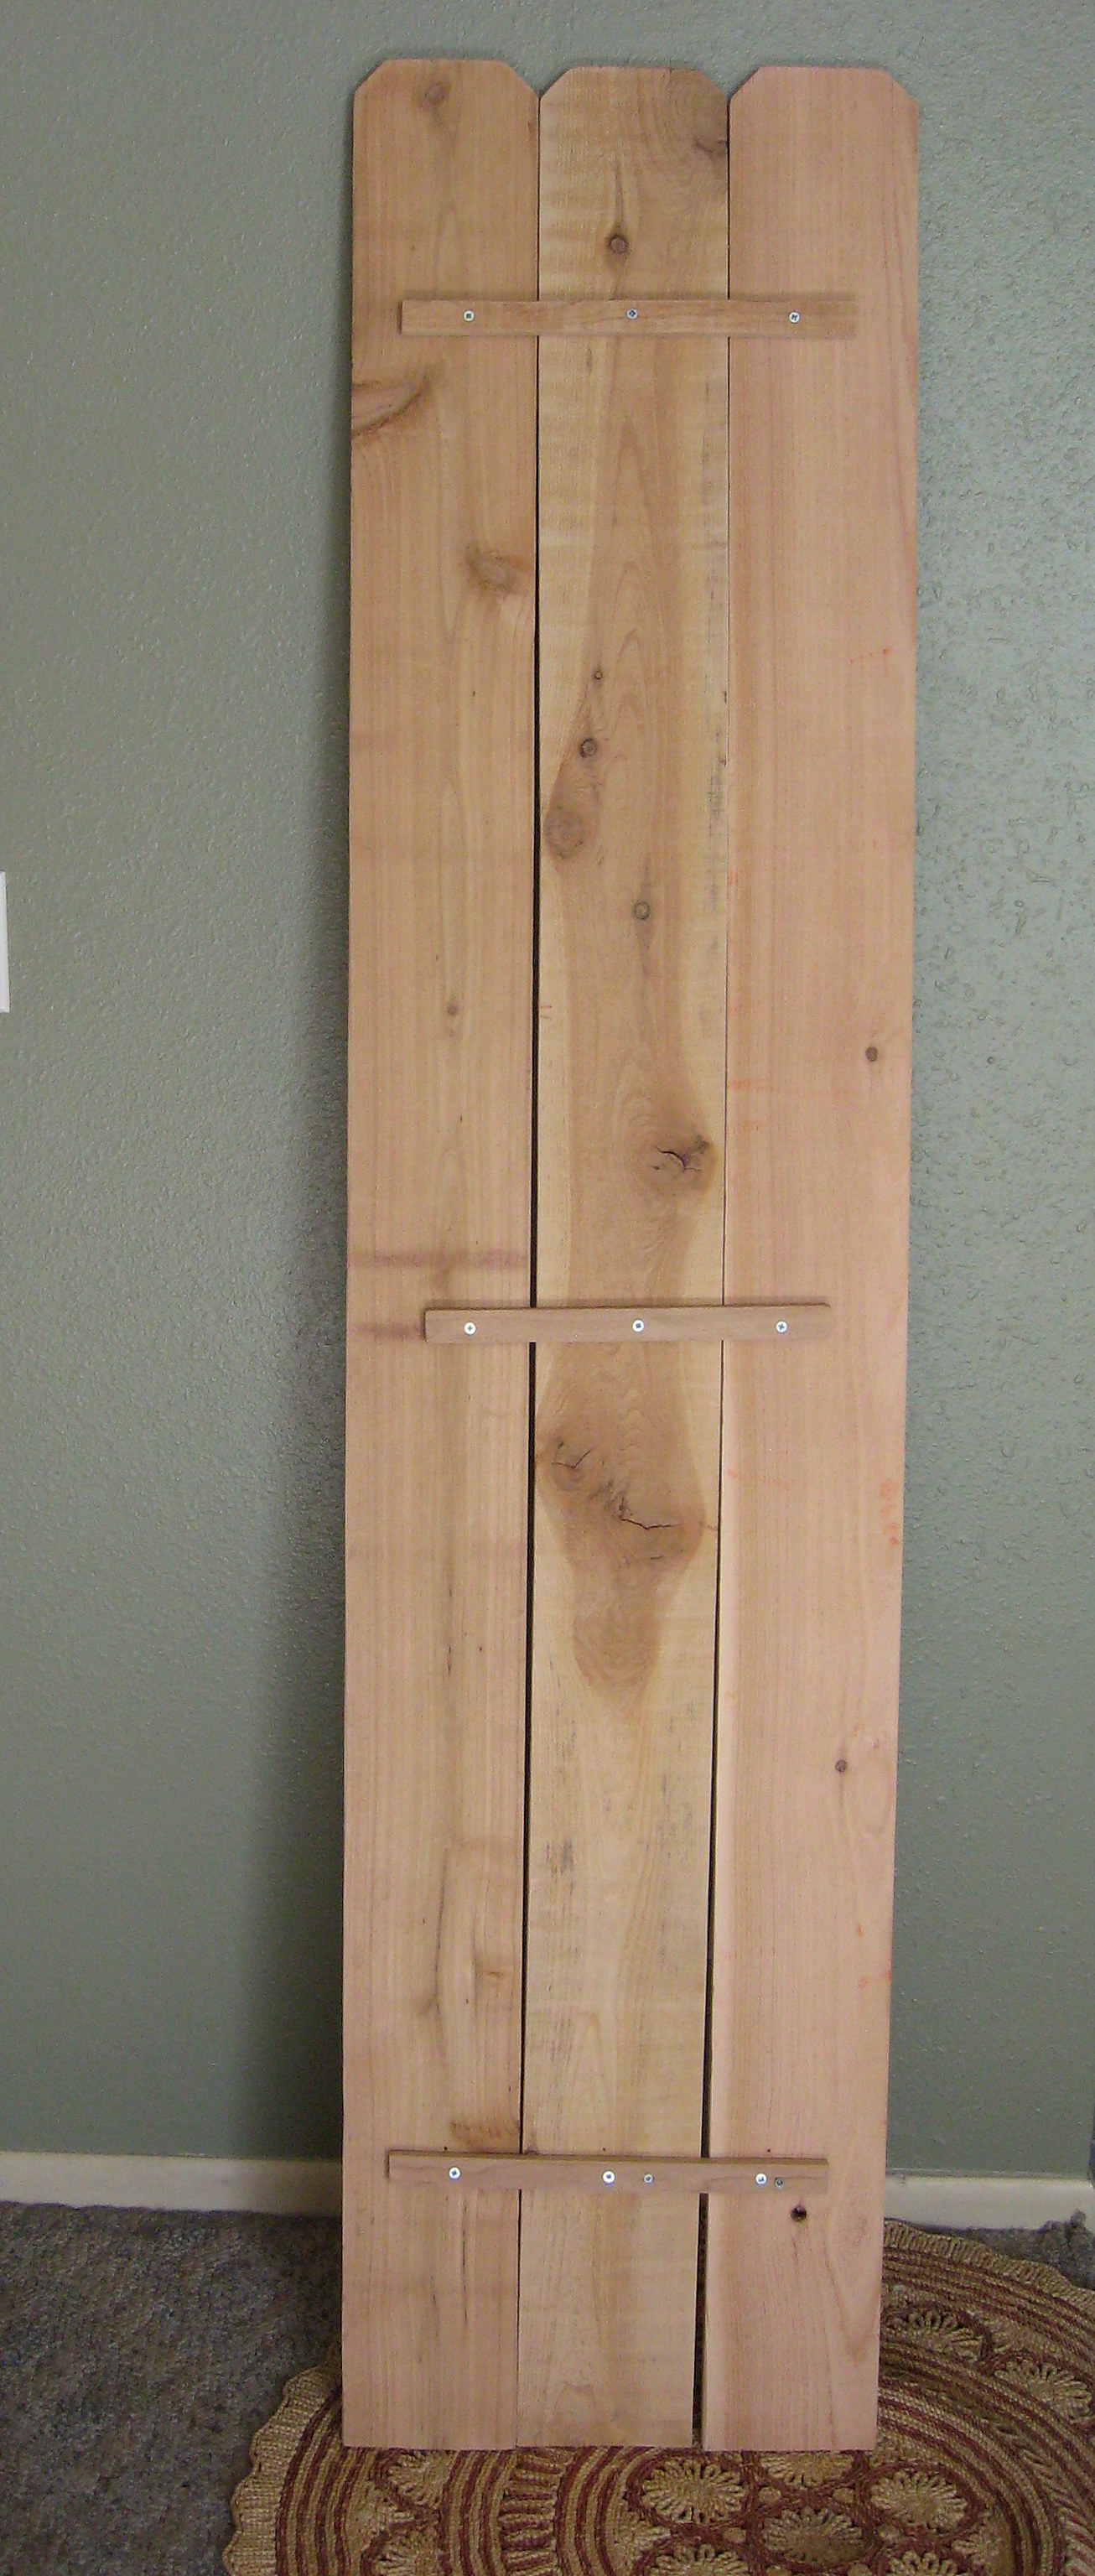
Now you will attach them together by screwing three strips of wood across them through the back. This is the wood I used – sorry for the shadows!
Hold the fence boards together tightly as you screw the cross boards in – use an extra set of hands, a large clamp or even some heavy cinder blocks on either side of the boards. Make sure you pre-drill all the holes so you don’t split the wood.
Here is what the back will look like when you’re all done:
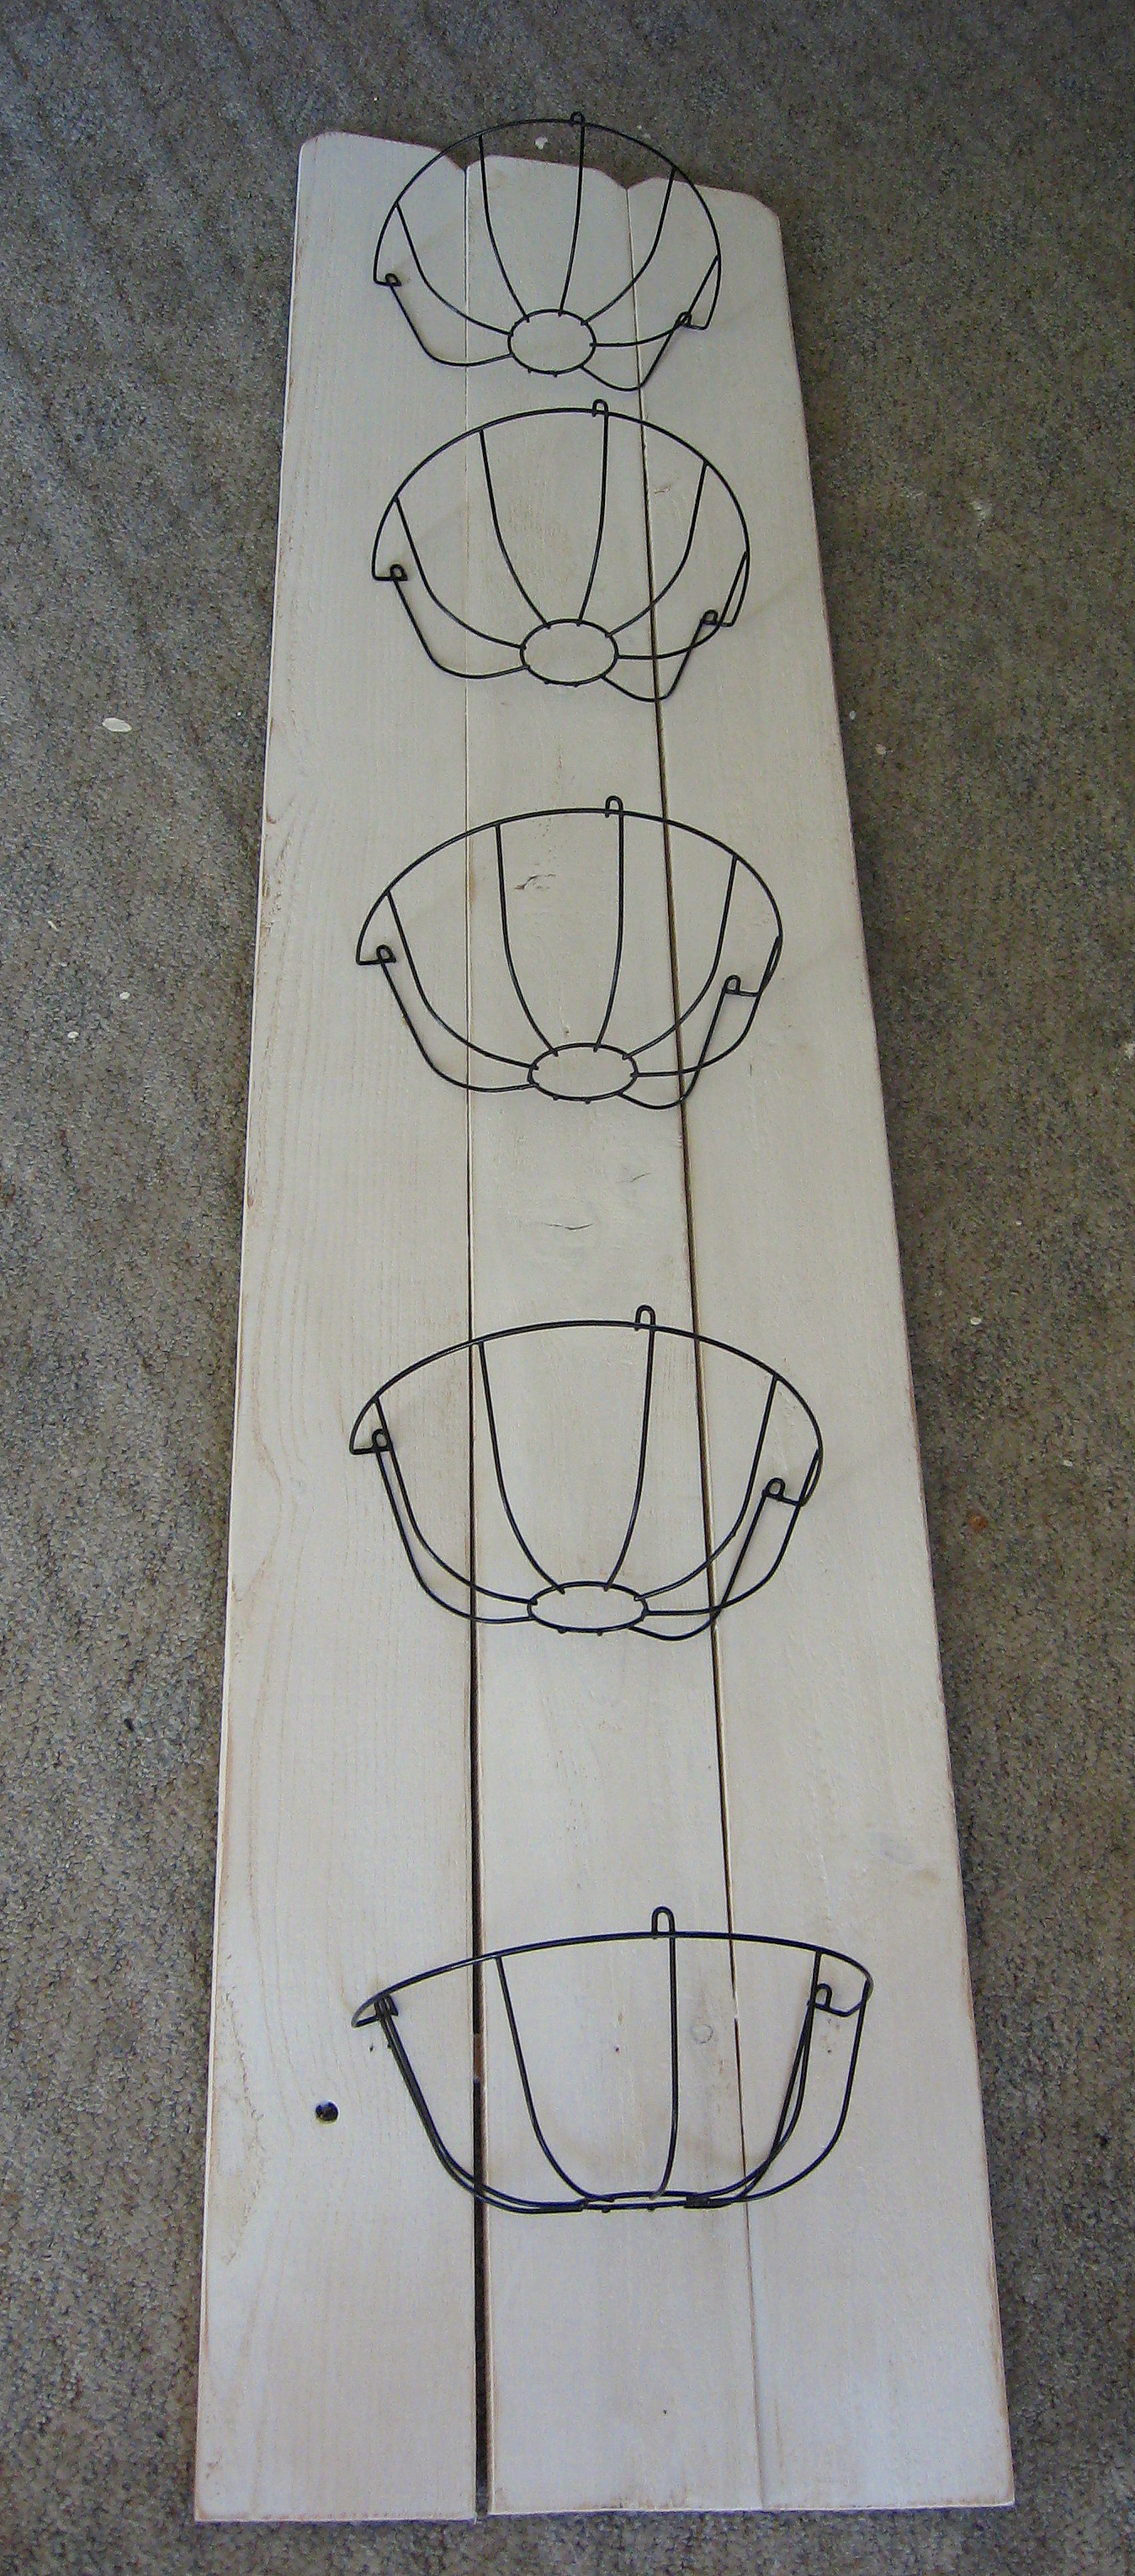
Paint the boards in the color of your choice; I went with white and gave them a good sanding to distress them once it was dry.
Now we will attach the baskets to the boards. Lay the boards out on the floor and decide where you want the baskets. I worked on this for a long time, getting them perfectly lined up and spaced evenly.
Then my son came home and moved them so that they were offset. After I freaked out, I looked at them again and realized I liked it better this way. Just make sure that once you know for sure where you want them, use a pen to mark the placement of each basket through the wire loop before they get moved again 😉 This marks where you will drill.
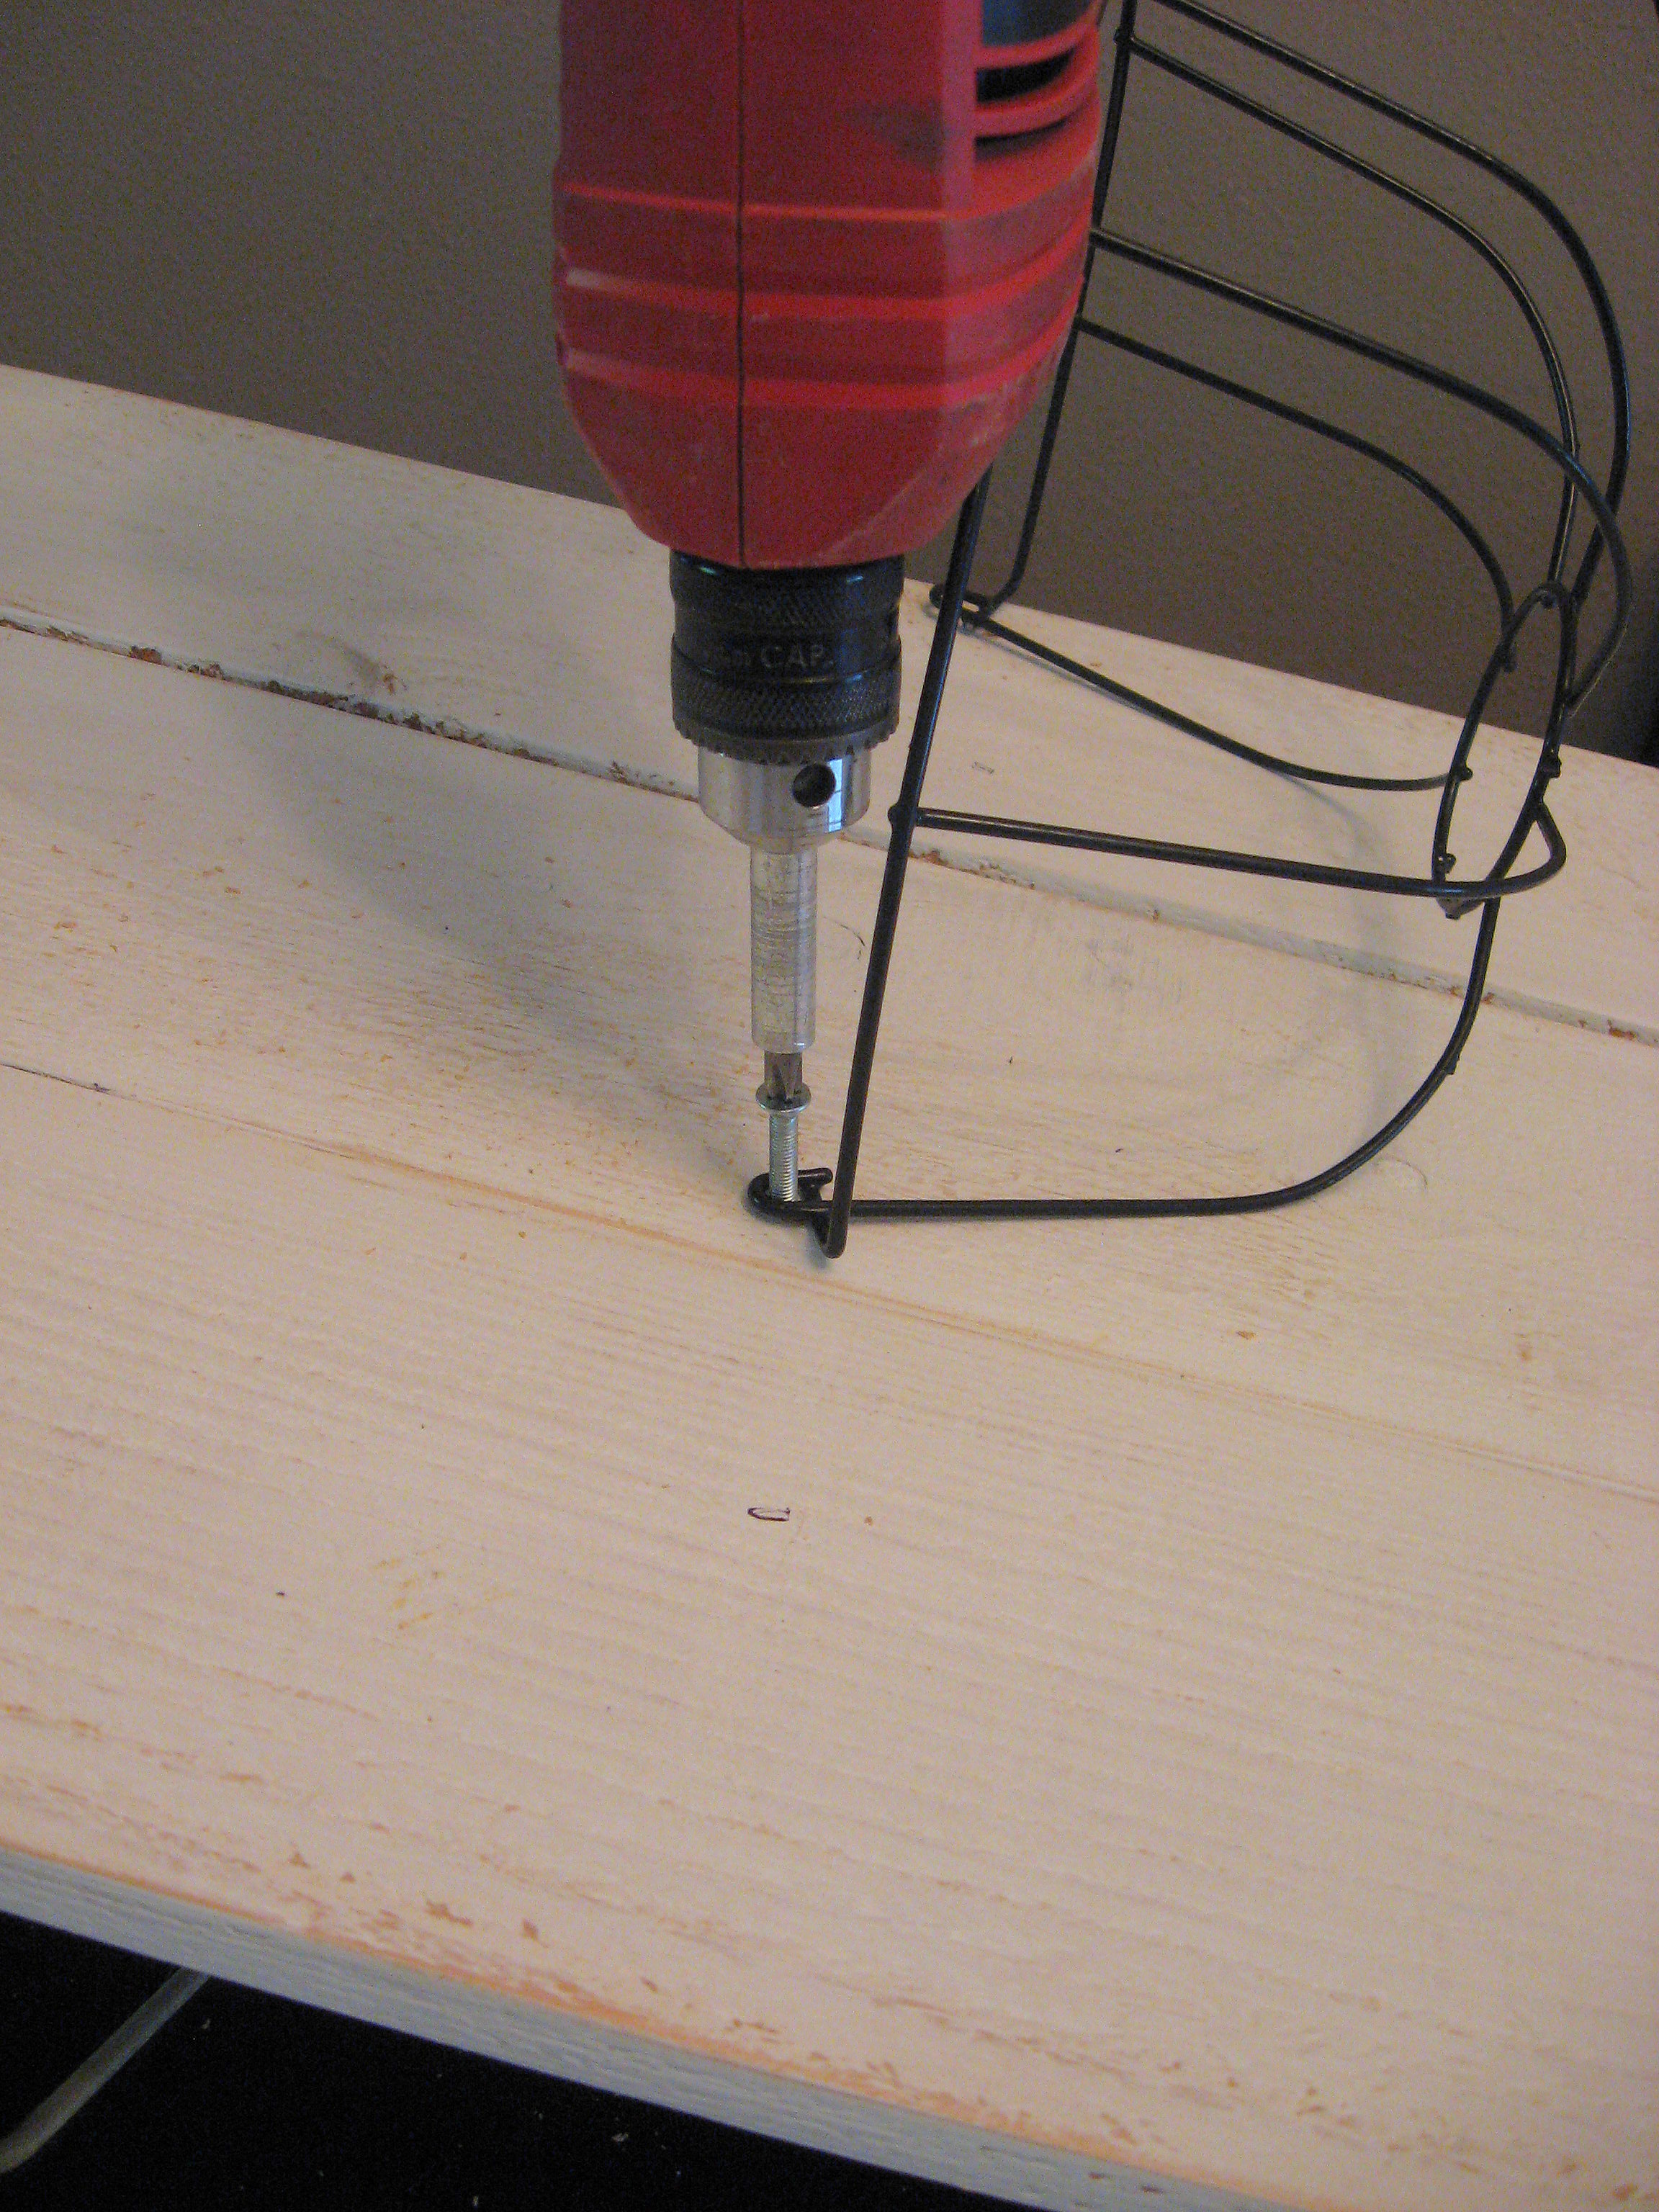
You could just use a screw into the wood, but since the baskets will get a lot of action, I decided I wanted them to be really secure, so I used a nut and bolt. Drill a hole just big enough for the bolt to go through on each of your markings. Then, hold each basket in place and screw the bolt through the wire loop on the basket and through the board.
When all the baskets are screwed into place, flip the board onto its side and screw all the nuts into place using pliers or a…. ummm…. nut-tightening-tool (shoot!! What is that called?)
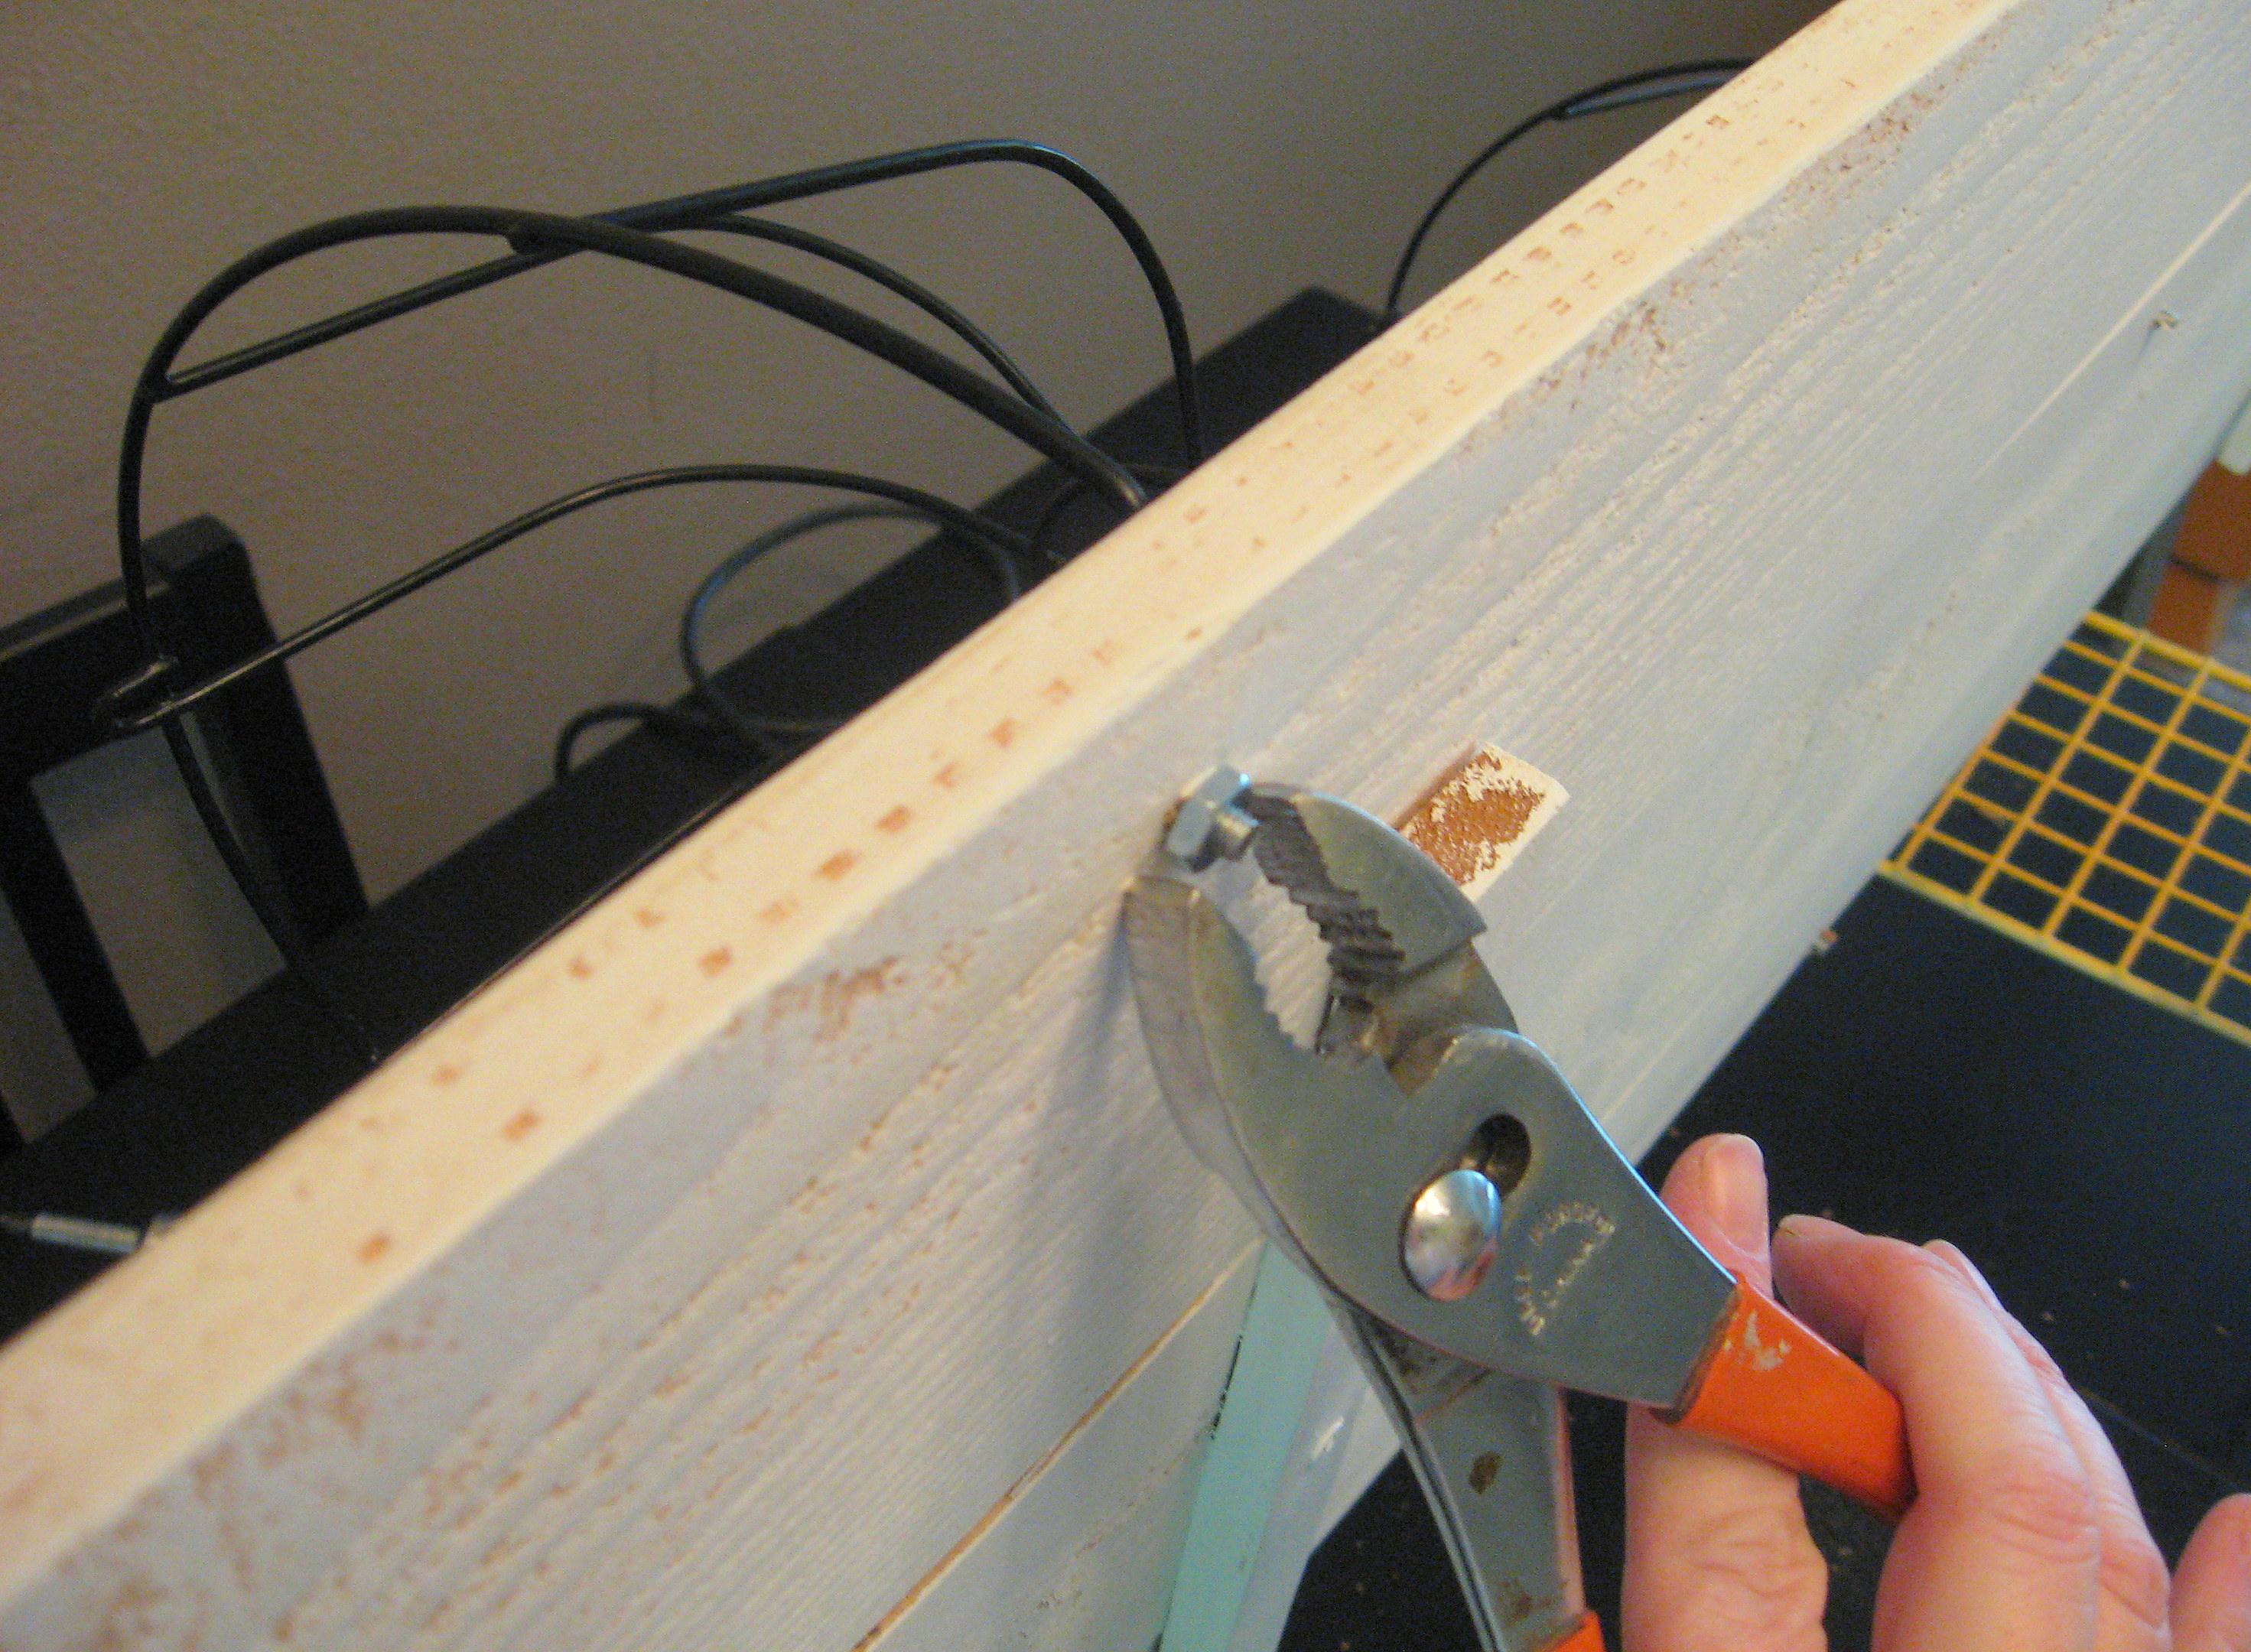
When you tighten all the nuts and bolts, it will make the baskets pop up away from the surface of the board.
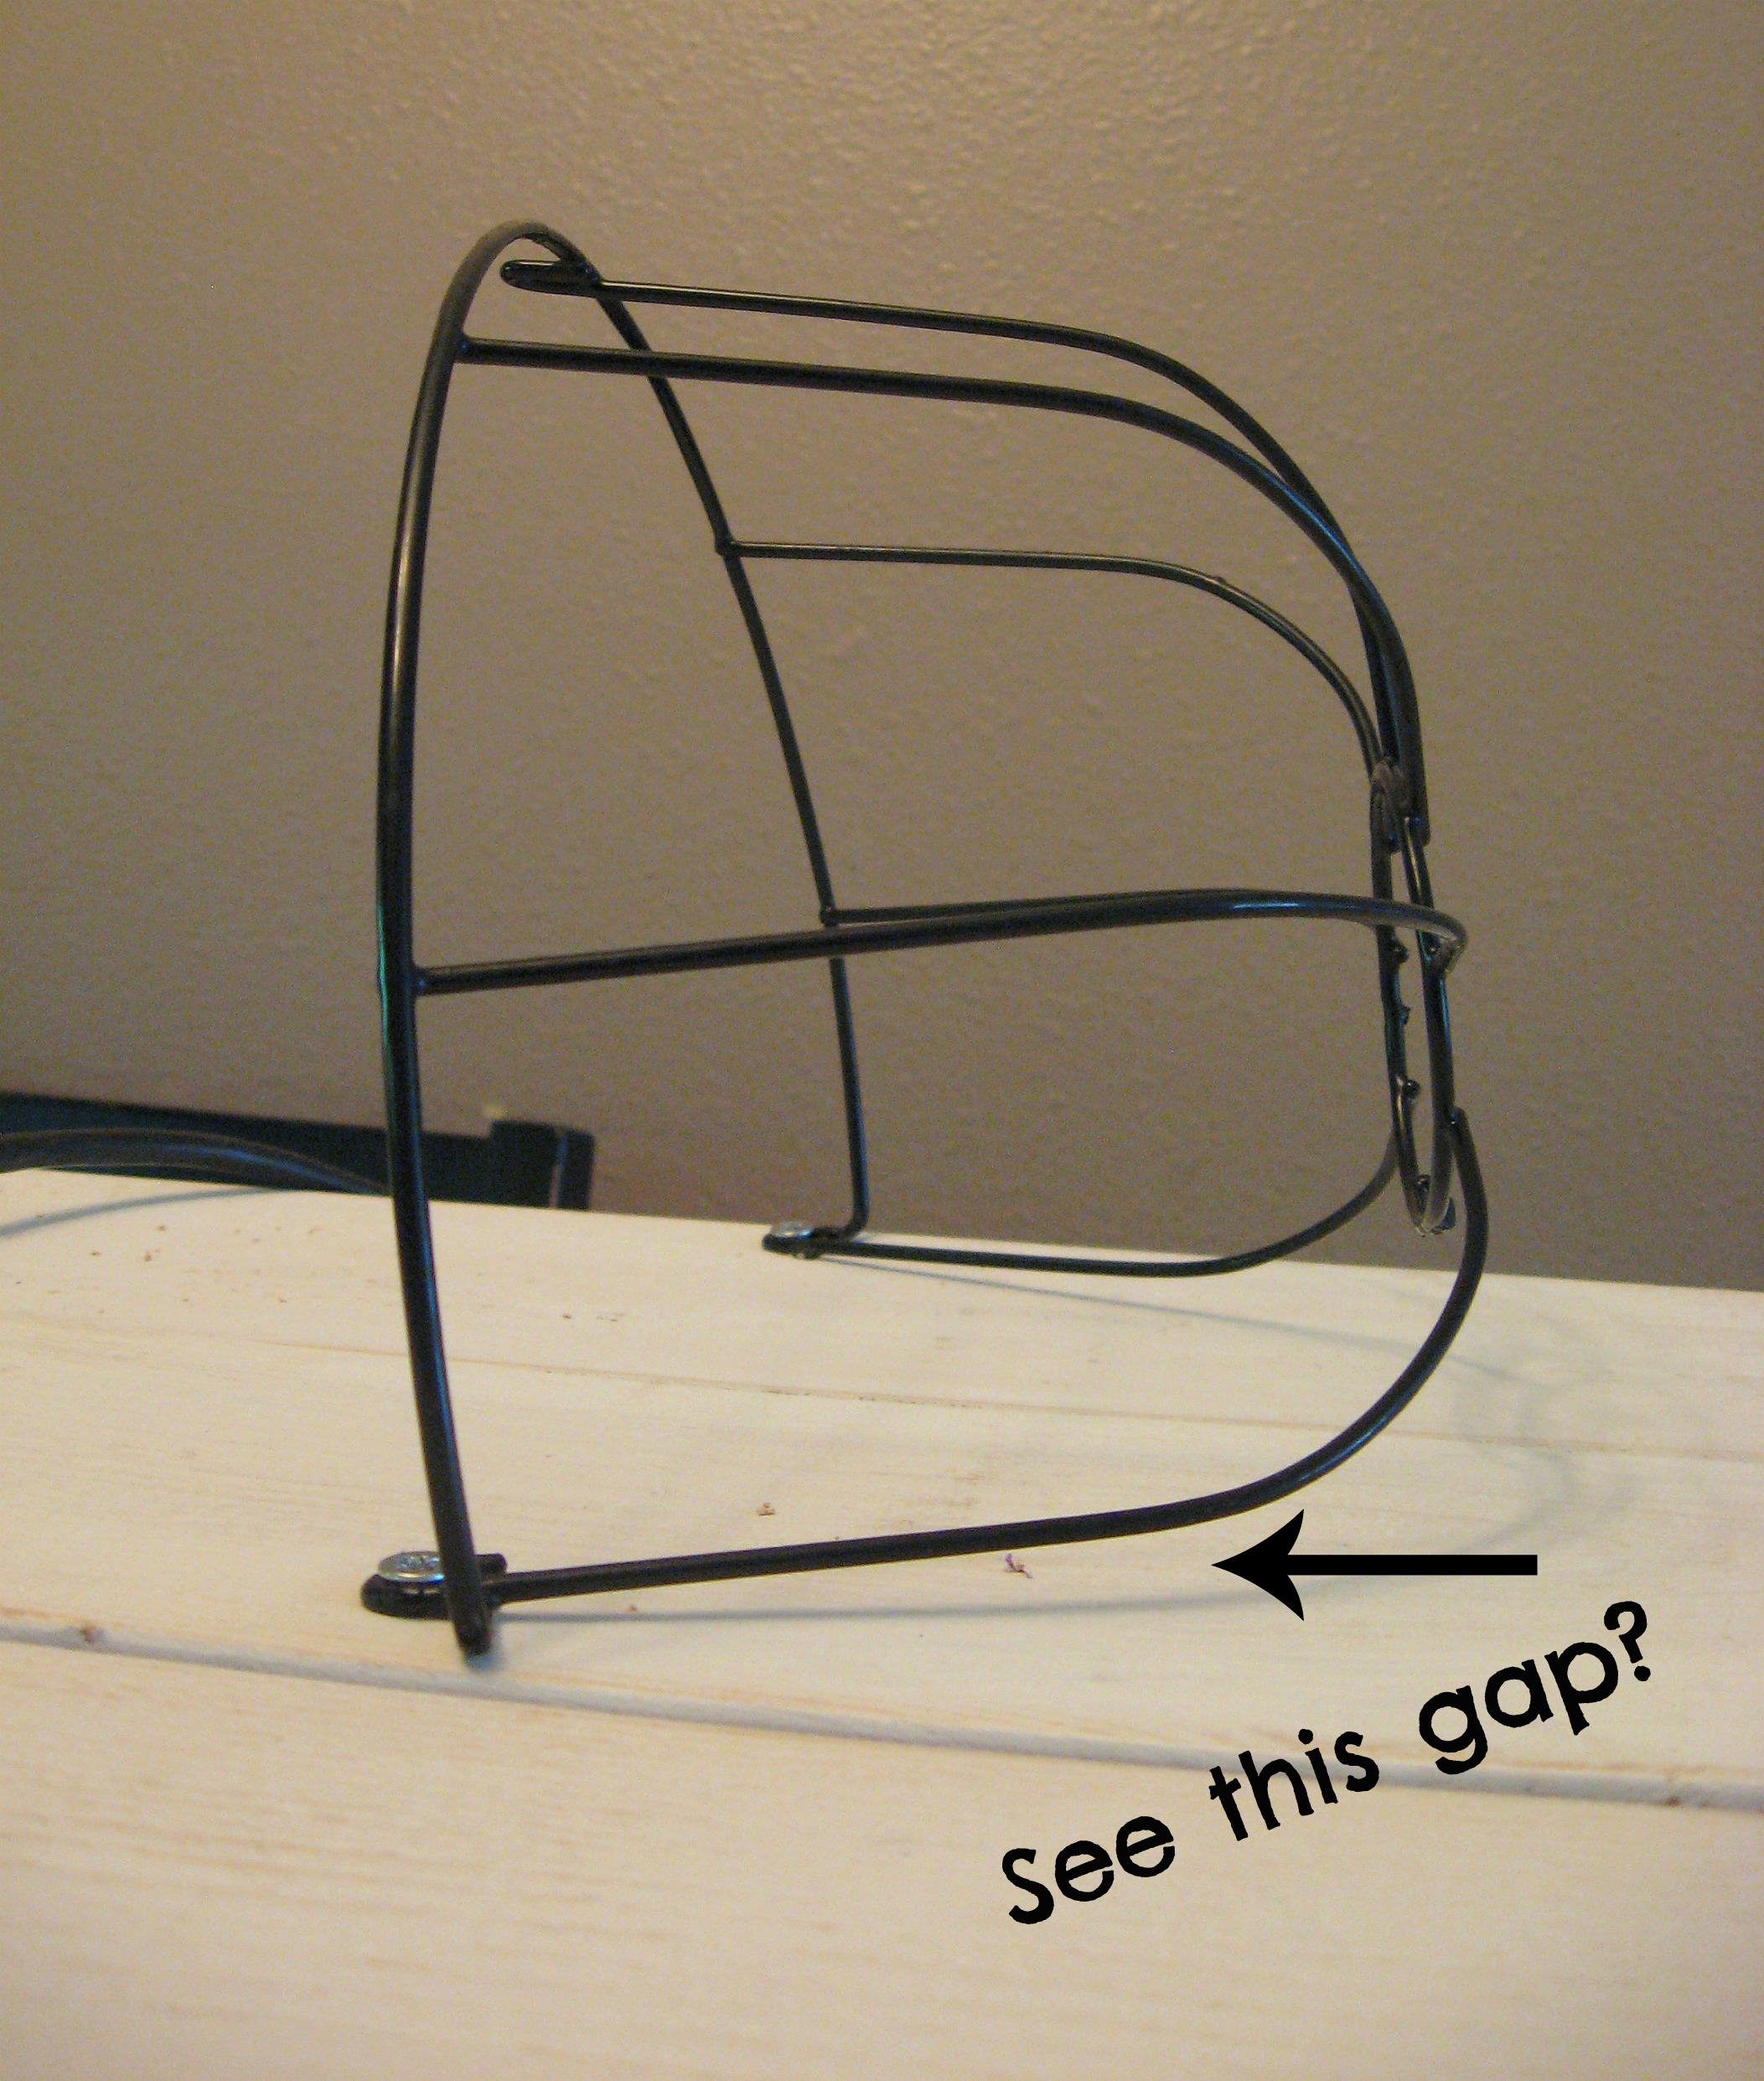
I’m sure it isn’t a big enough gap for the critters to fall through, but I didn’t like the way it looked. I found that if I just pushed it down against the board,
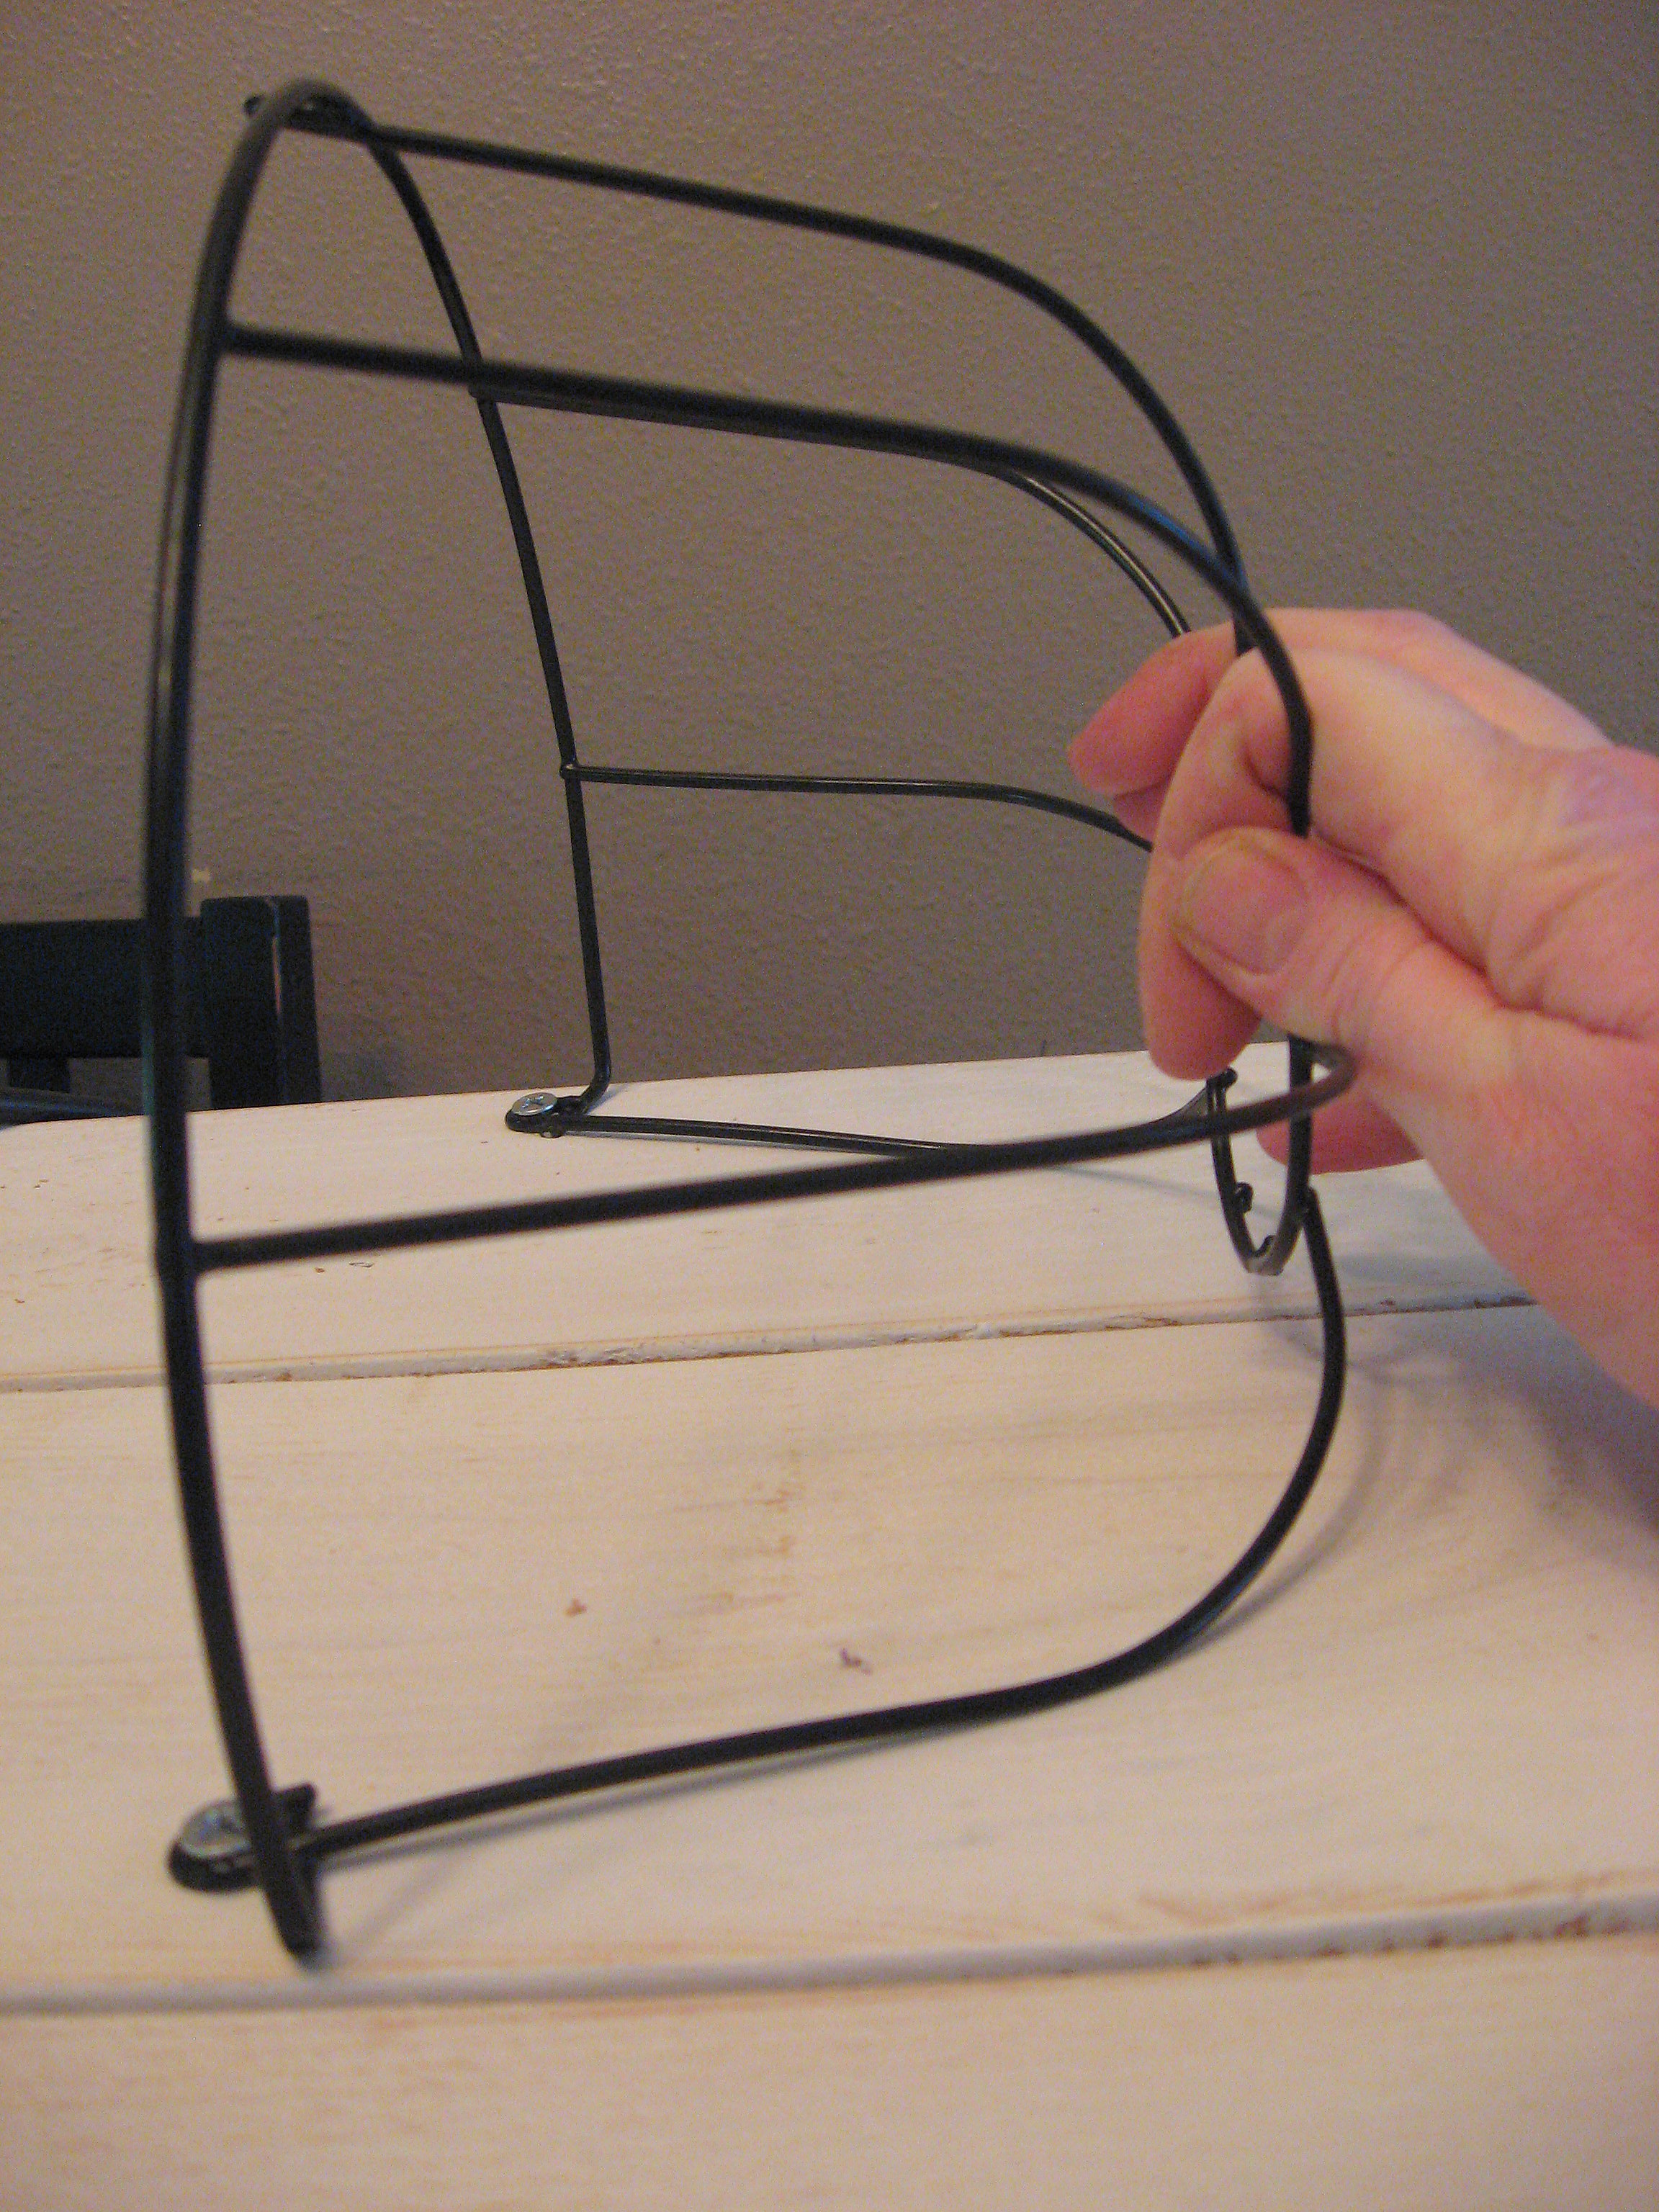
the wires of the basket would bend enough that the basket would sit flat against the board again.
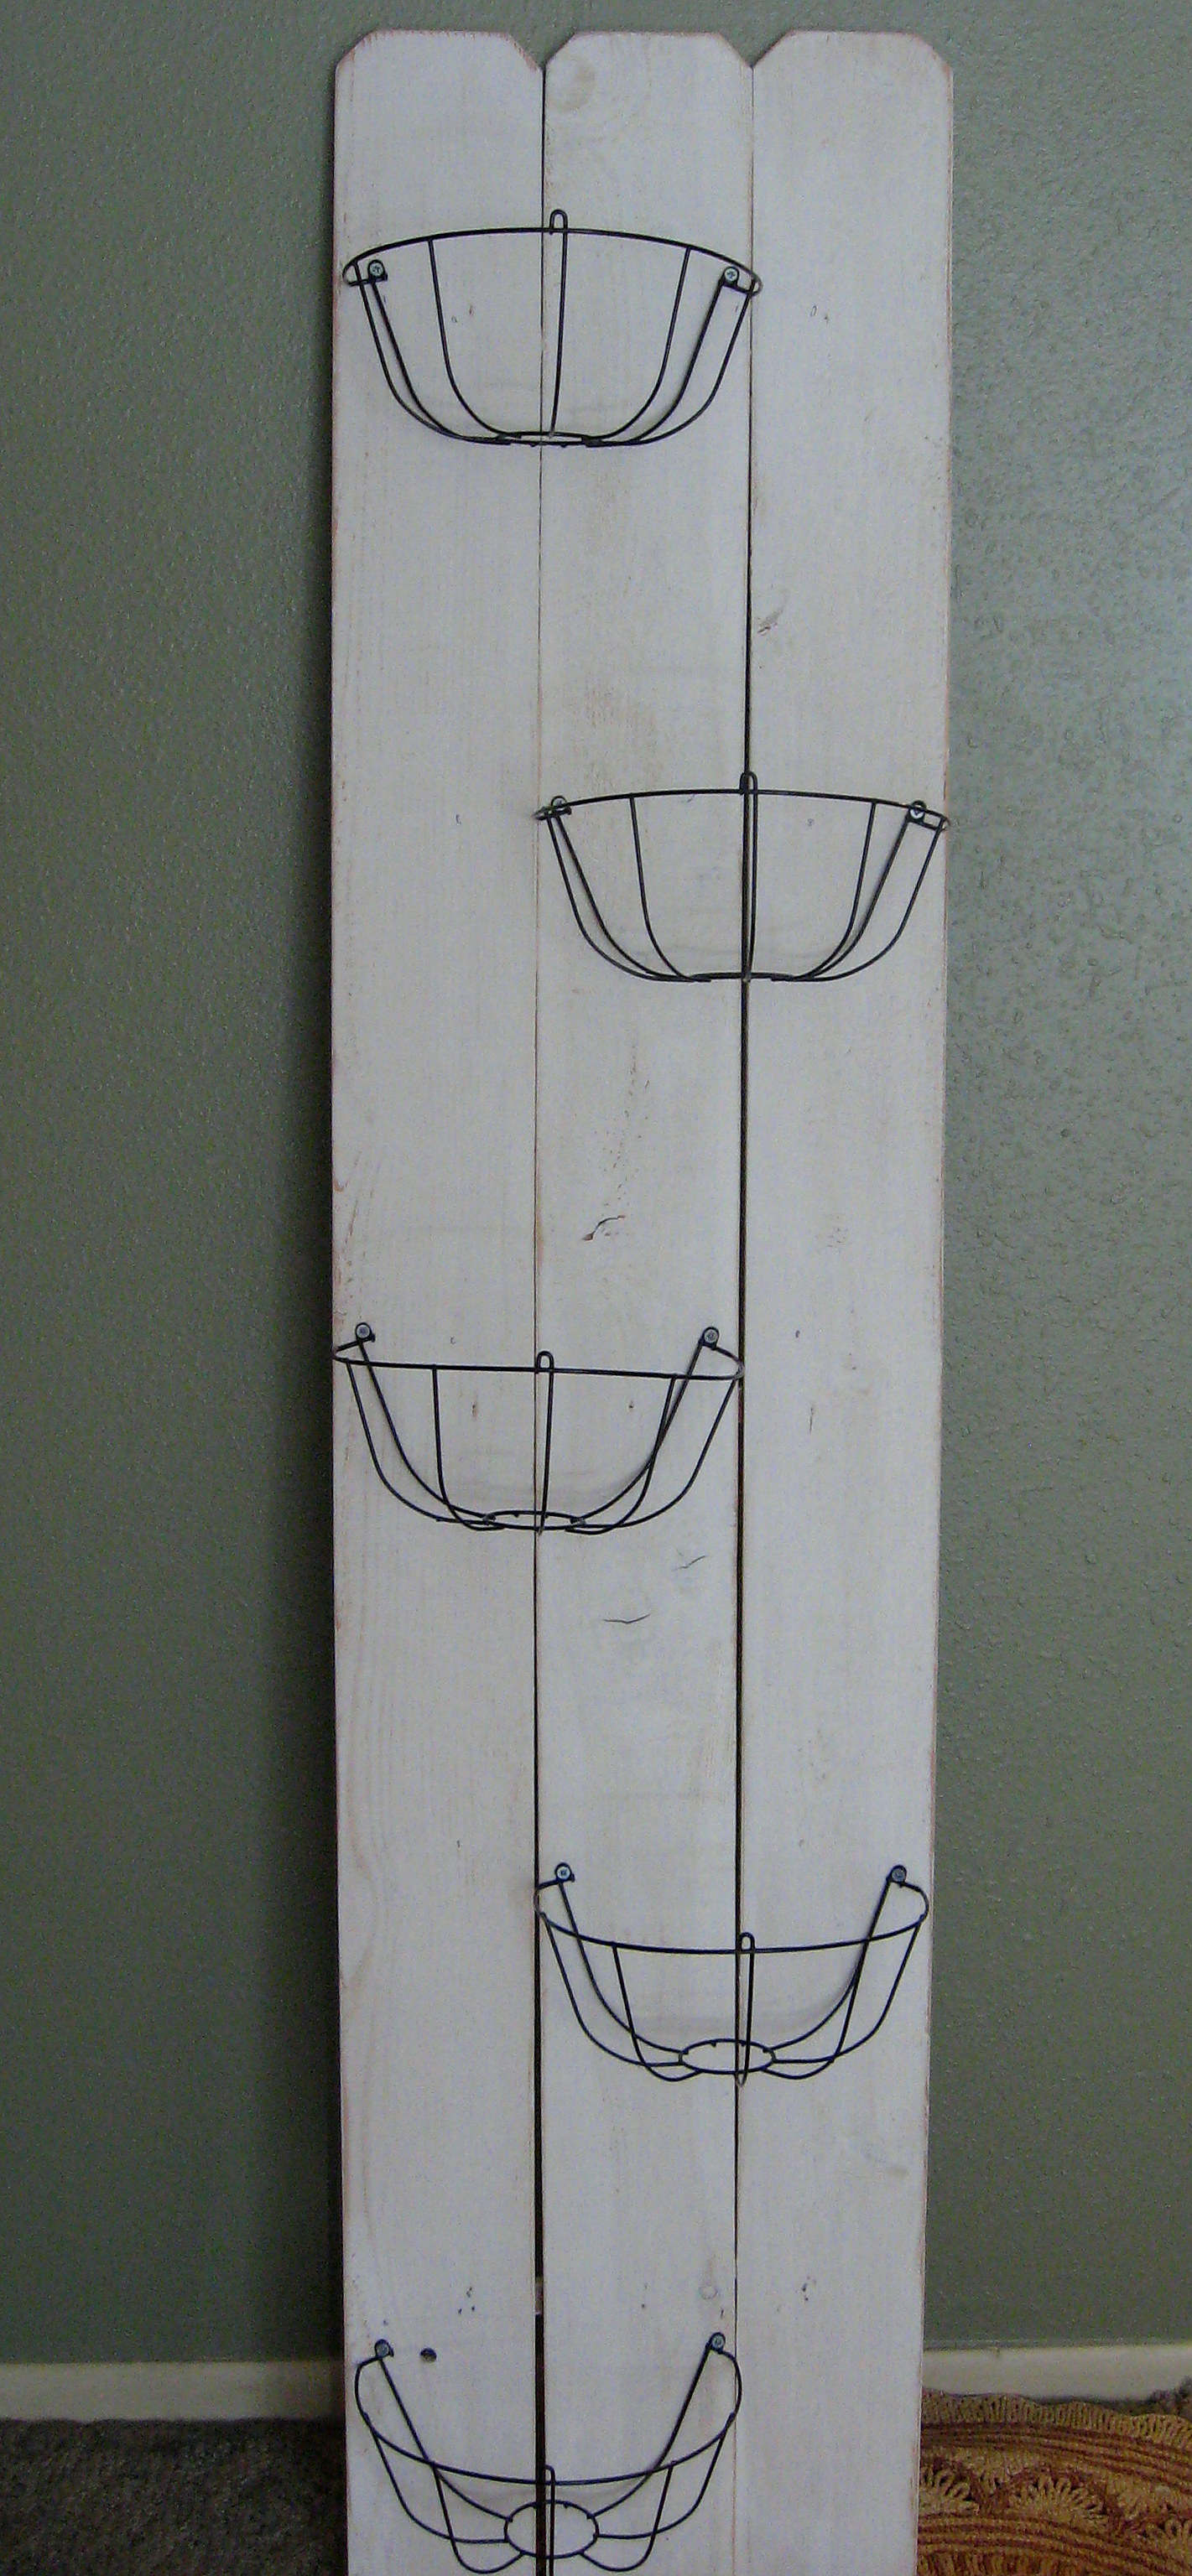
Here it is with all of the baskets attached:
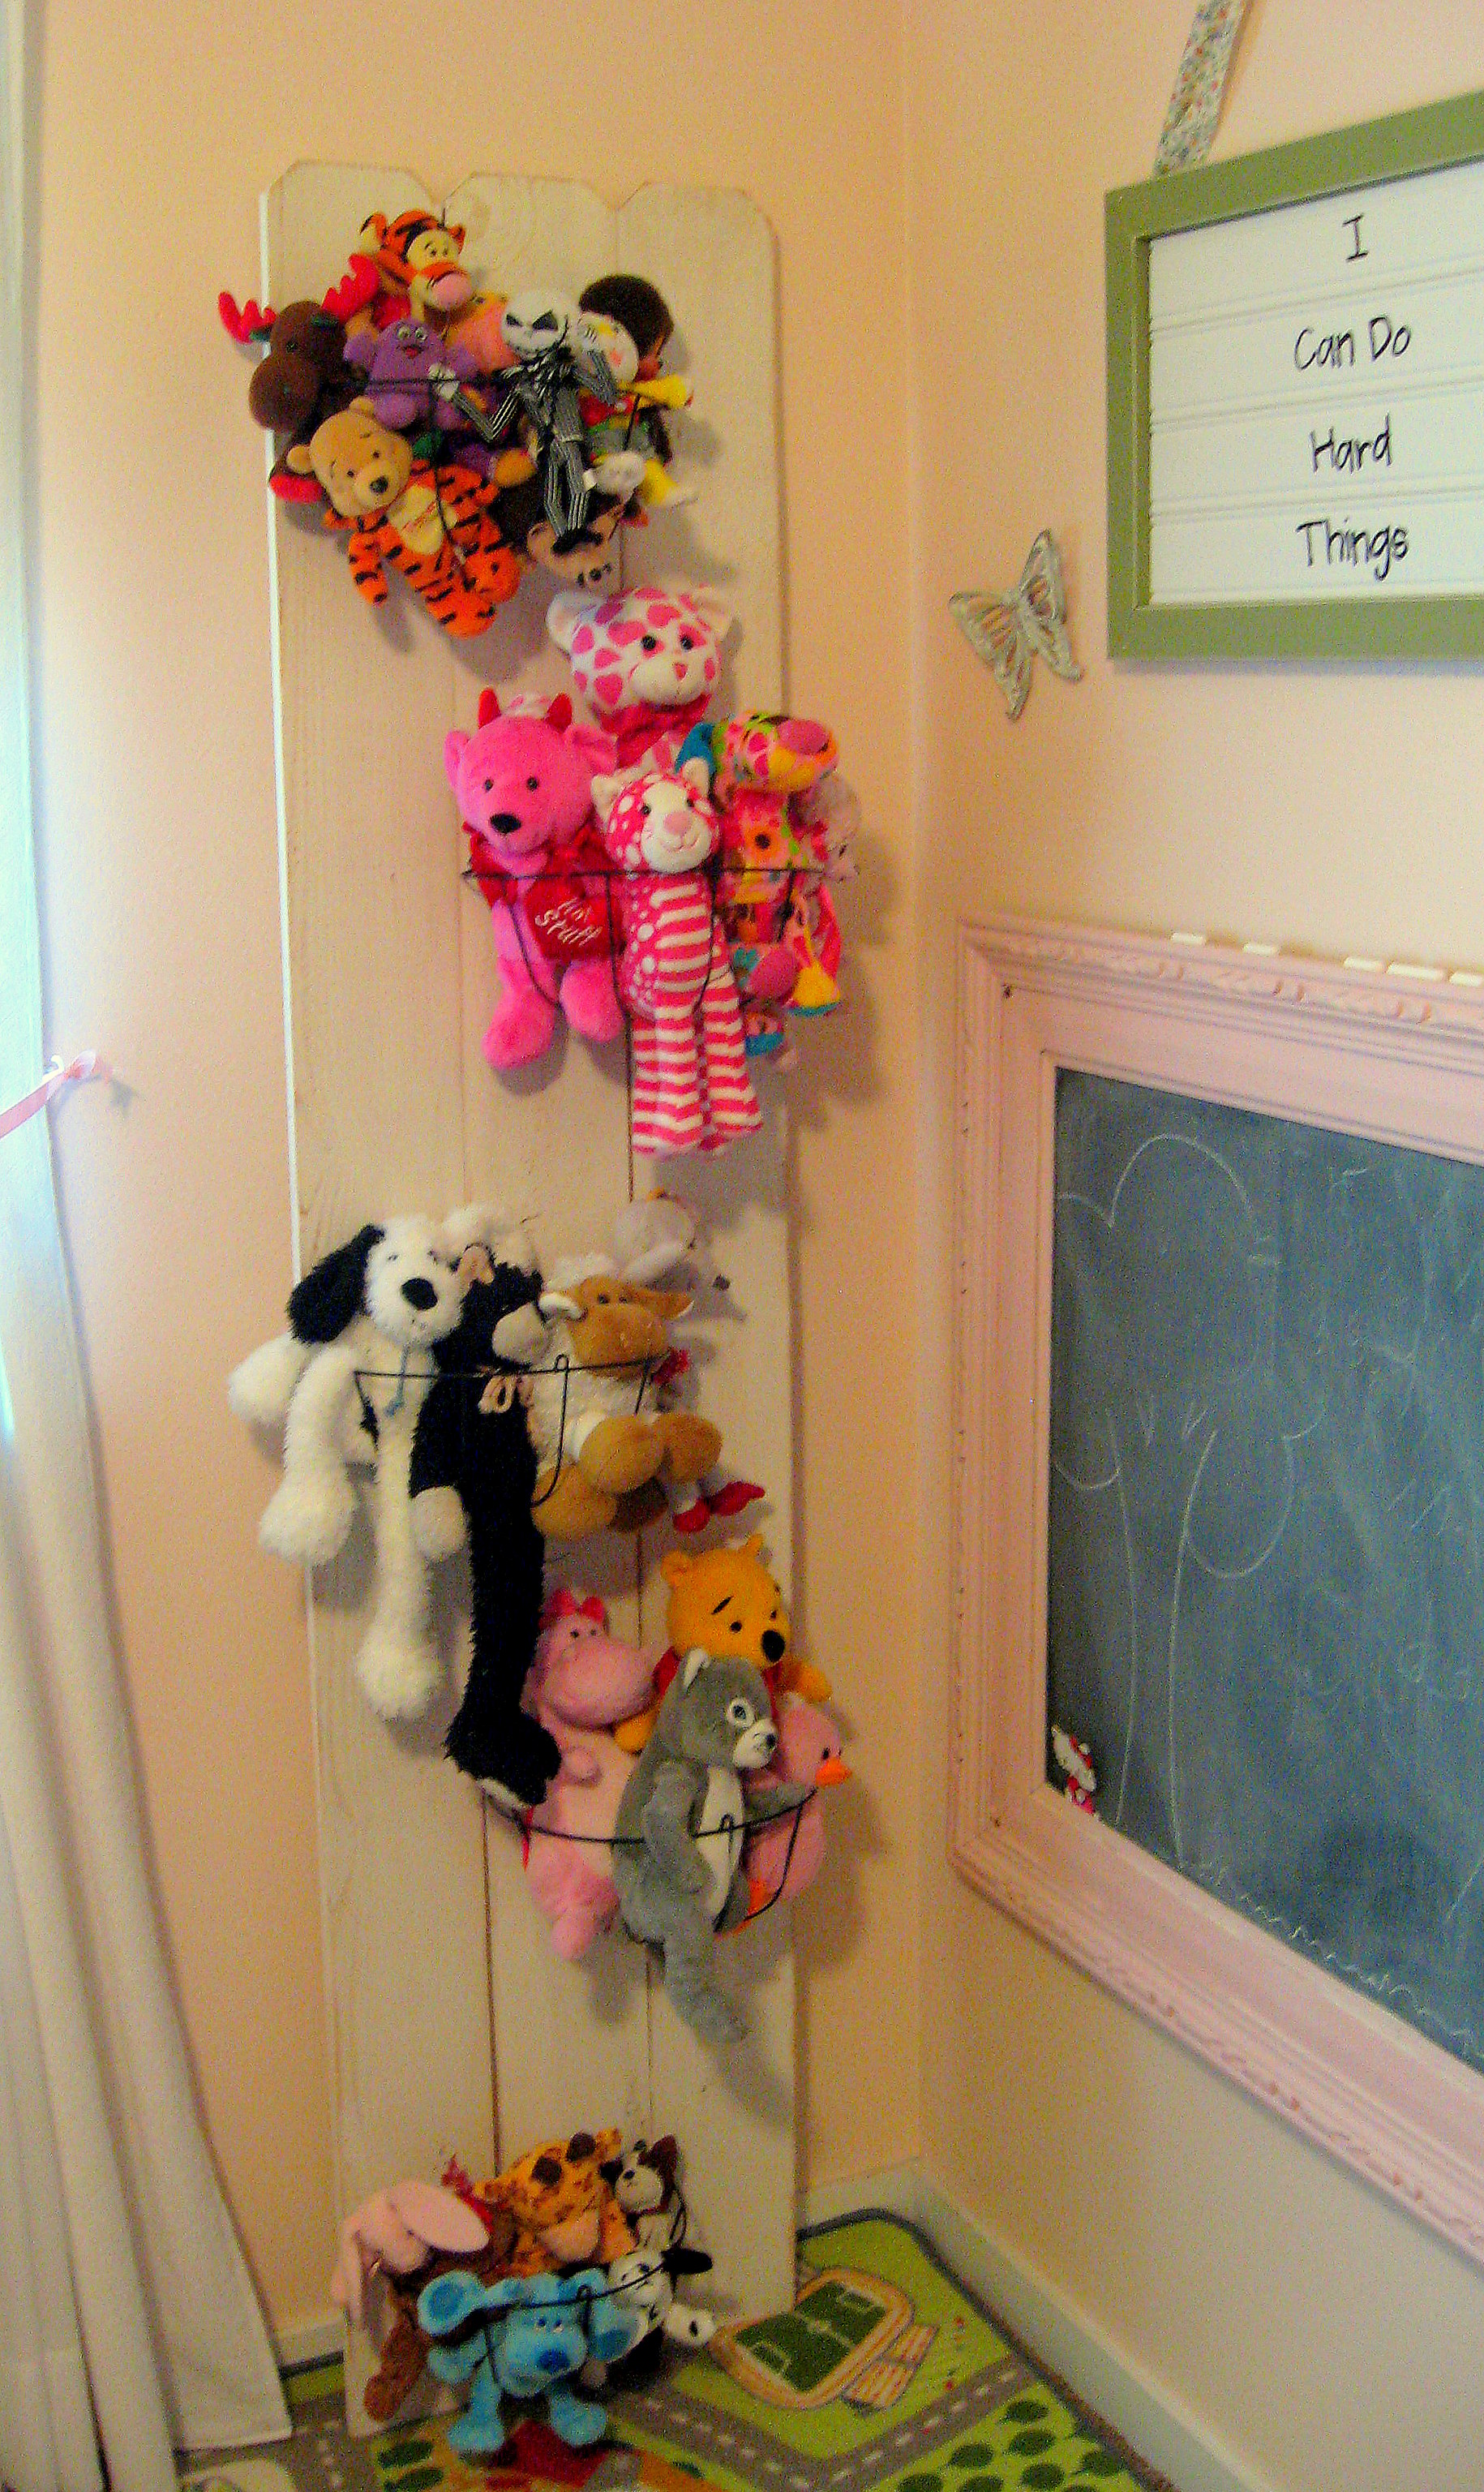
**NOTE – Once this is full of critters, it is very front heavy. My intention is to hang this on the wall as part of my daughters room redo this summer. In the pictures here it is just leaned against the wall. My daughter is old enough that I feel safe leaving it this way until her room is finished, but if your kids are small and you think they might pull this over on themselves, PLEASE attach it to the wall before you fill it!
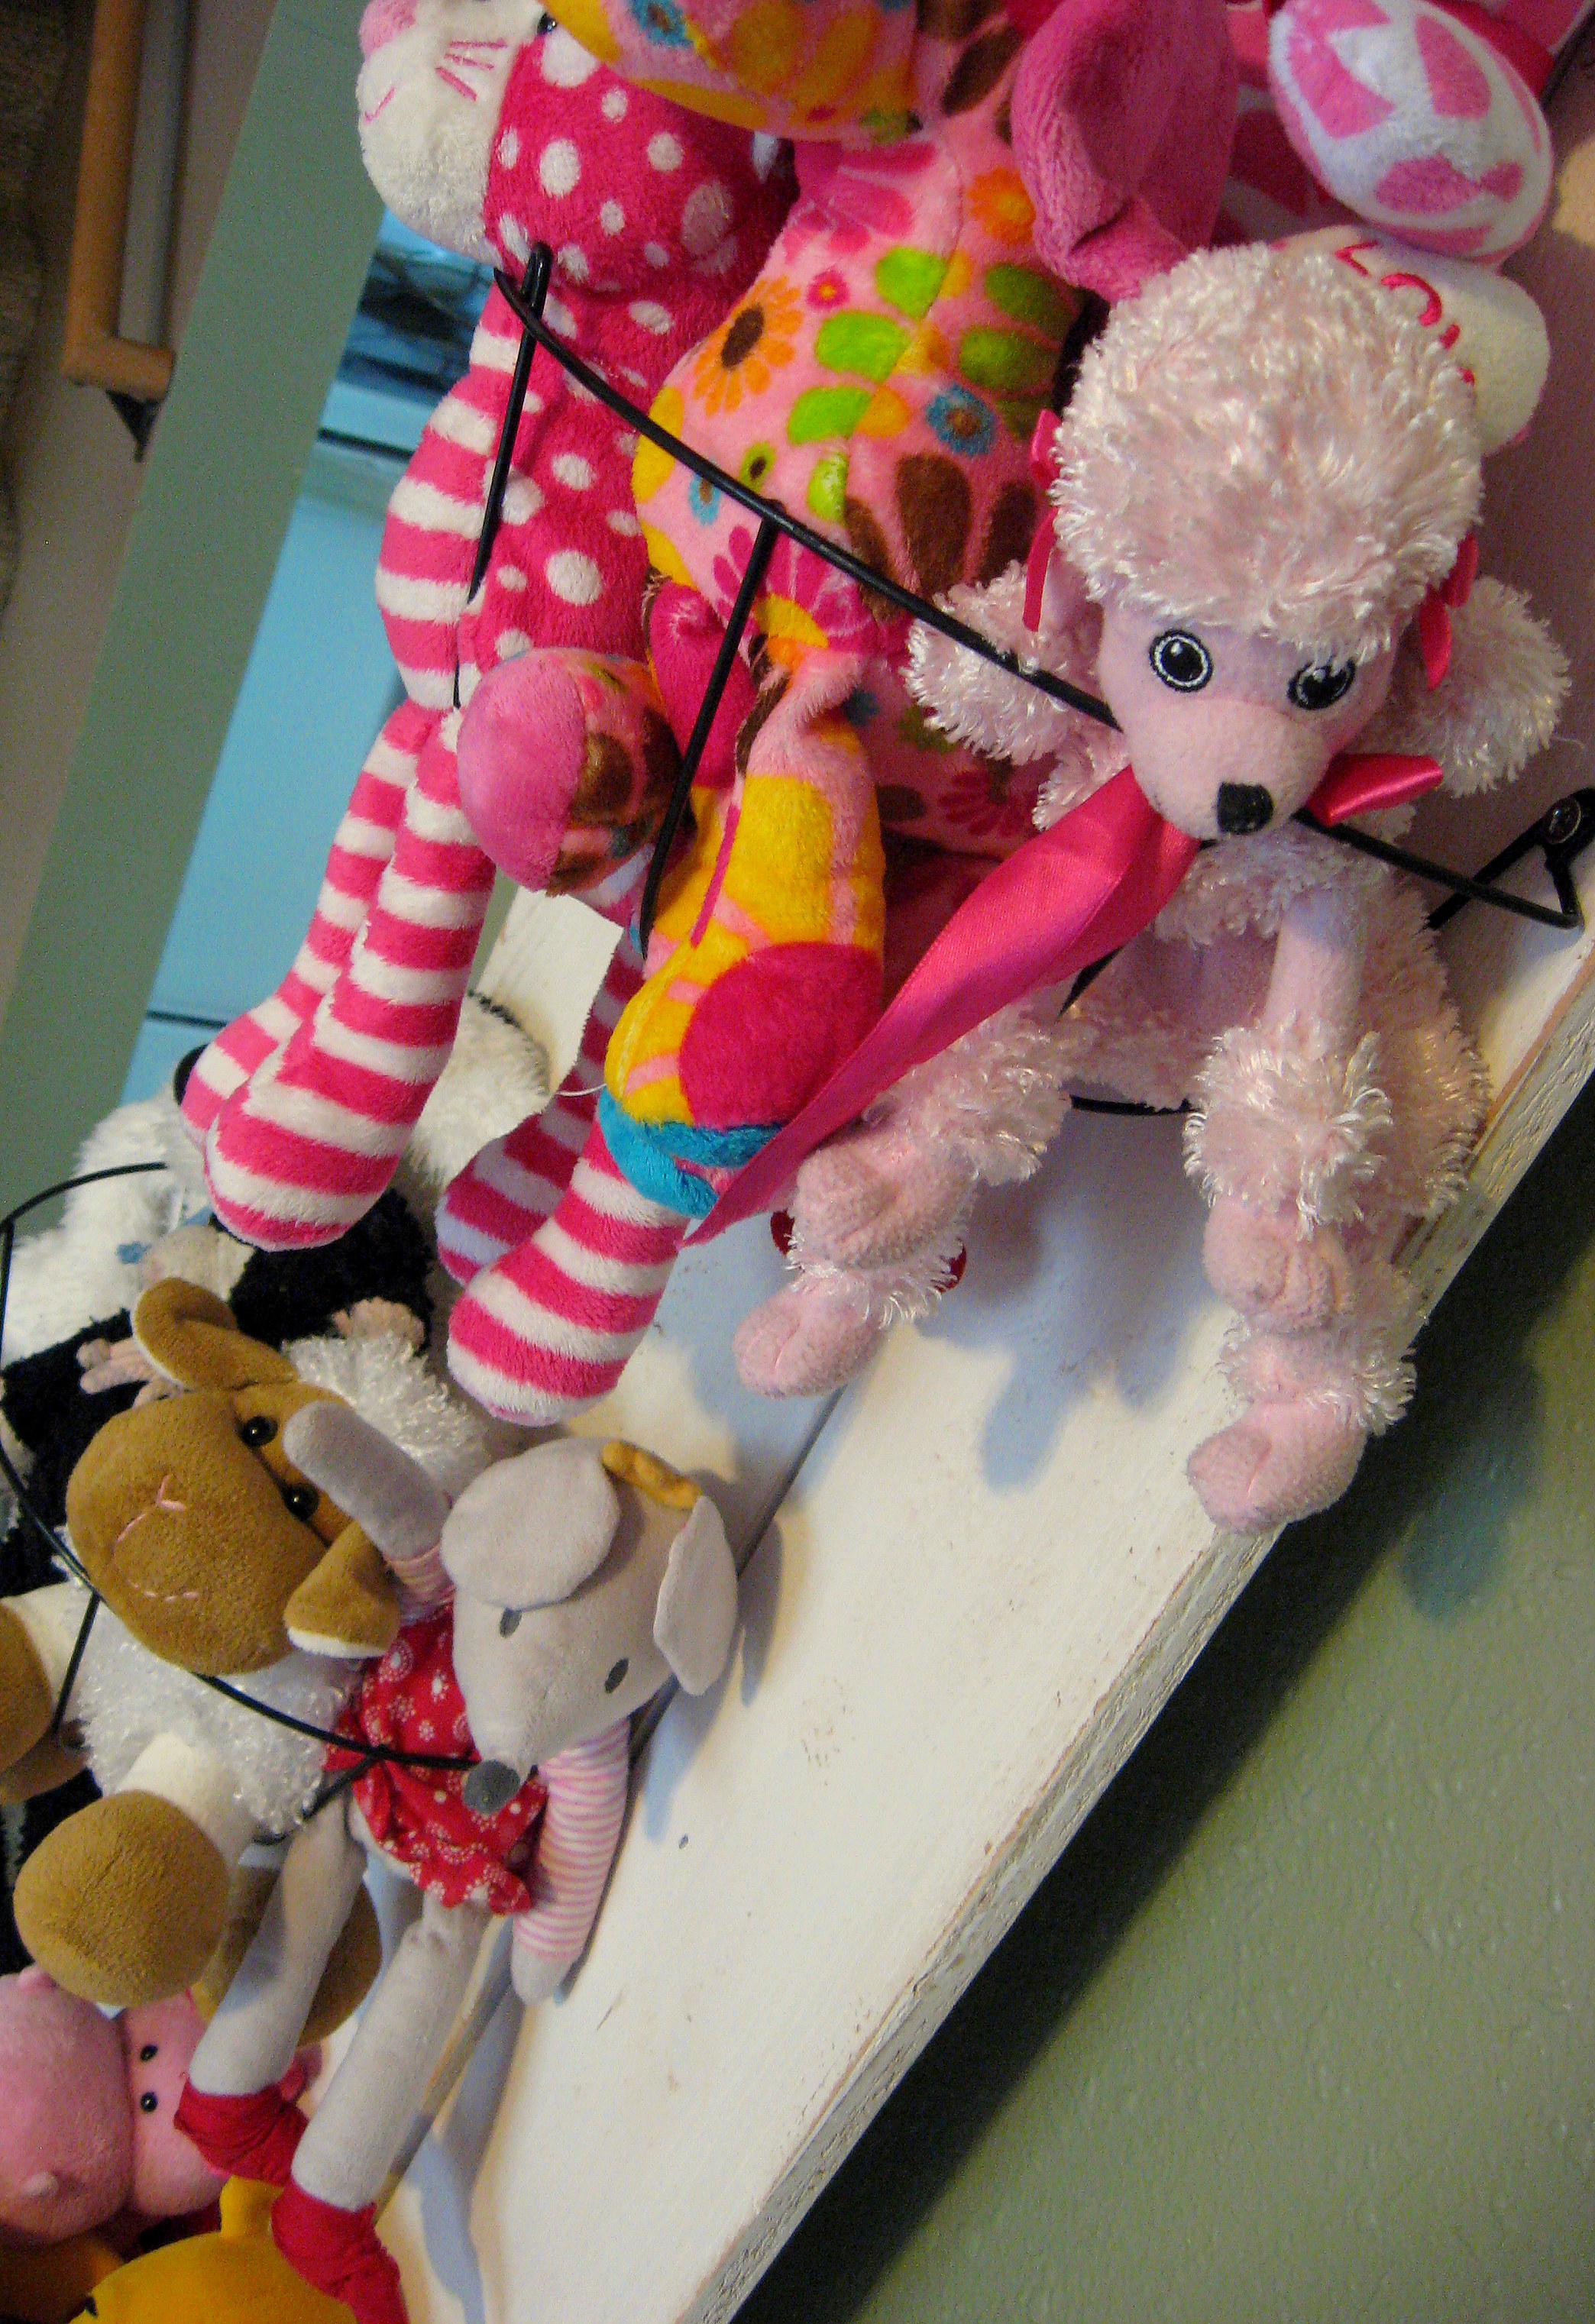
And here it is all filled with critters.
PickYourPlum! Popsicle/Ice Tray Mold! Makeup Brushes A Set of 8! Wooden Bow Ties!


Cool Off – Popsicle/Ice Tray Mold
N”ice” way to taste summer.
Starting at $2.99 (62% off) Retail: $7.99
Brushed to Perfection – Makeup Brushes A Set of 8
You are covered.
Starting at $4.99 (75% off) Retail: $19.99
Lookin’ Sharp – Wooden Bow Ties
You’ve never looked so sharp.
Starting at $5.99 (60% off) Retail: $14.99
Plus lots more CUTE deals!
LOTS of cute deals! Inexpensive shipping!
Elsa & Anna Dresses, Potty Training Undies, Washi Tape & Lots More!
Deals today like…
 $23.99 | Princess Dresses are here! Elsa & Anna!
|
 $9.99 | Men’s Raglan Tee’s Quick Ship!
|


More cute stuff available today! Low shipping prices!
A PYP Best Blog! DIY Roman Shade!
Just in case you missed this article on making a DIY roman shade the first time we shared it a couple of years ago, we are republishing it. After Sharon wrote this blog originally, we got an awesome response. This is one of the PYP Best Blogs!
Summer wreaks havoc on my daughter’s sleep schedule; it is light when I put her to bed and the light in the morning gets her up much earlier than I want to join her! I purchased a black out shade a few summers ago from Ikea for my own bedroom and it works great – totally where I recommend buying them if you don’t want to go the DIY route – but since our Ikea is quite a drive, I just bought a $20 shade from Kmart for my daughter’s room. And it broke in a week. She does have blinds, but they just don’t block out enough light. I decided to use the broken black out shade and some decorative fabric to make my own Roman Shade.
I used these blinds because that is what I had already, but you can follow these same instructions if you have the cheap mini-blinds. OR, if you are starting from scratch, mini blinds are super cheap at Walmart.
Take the blind, open them all the way and lay them out on the floor.
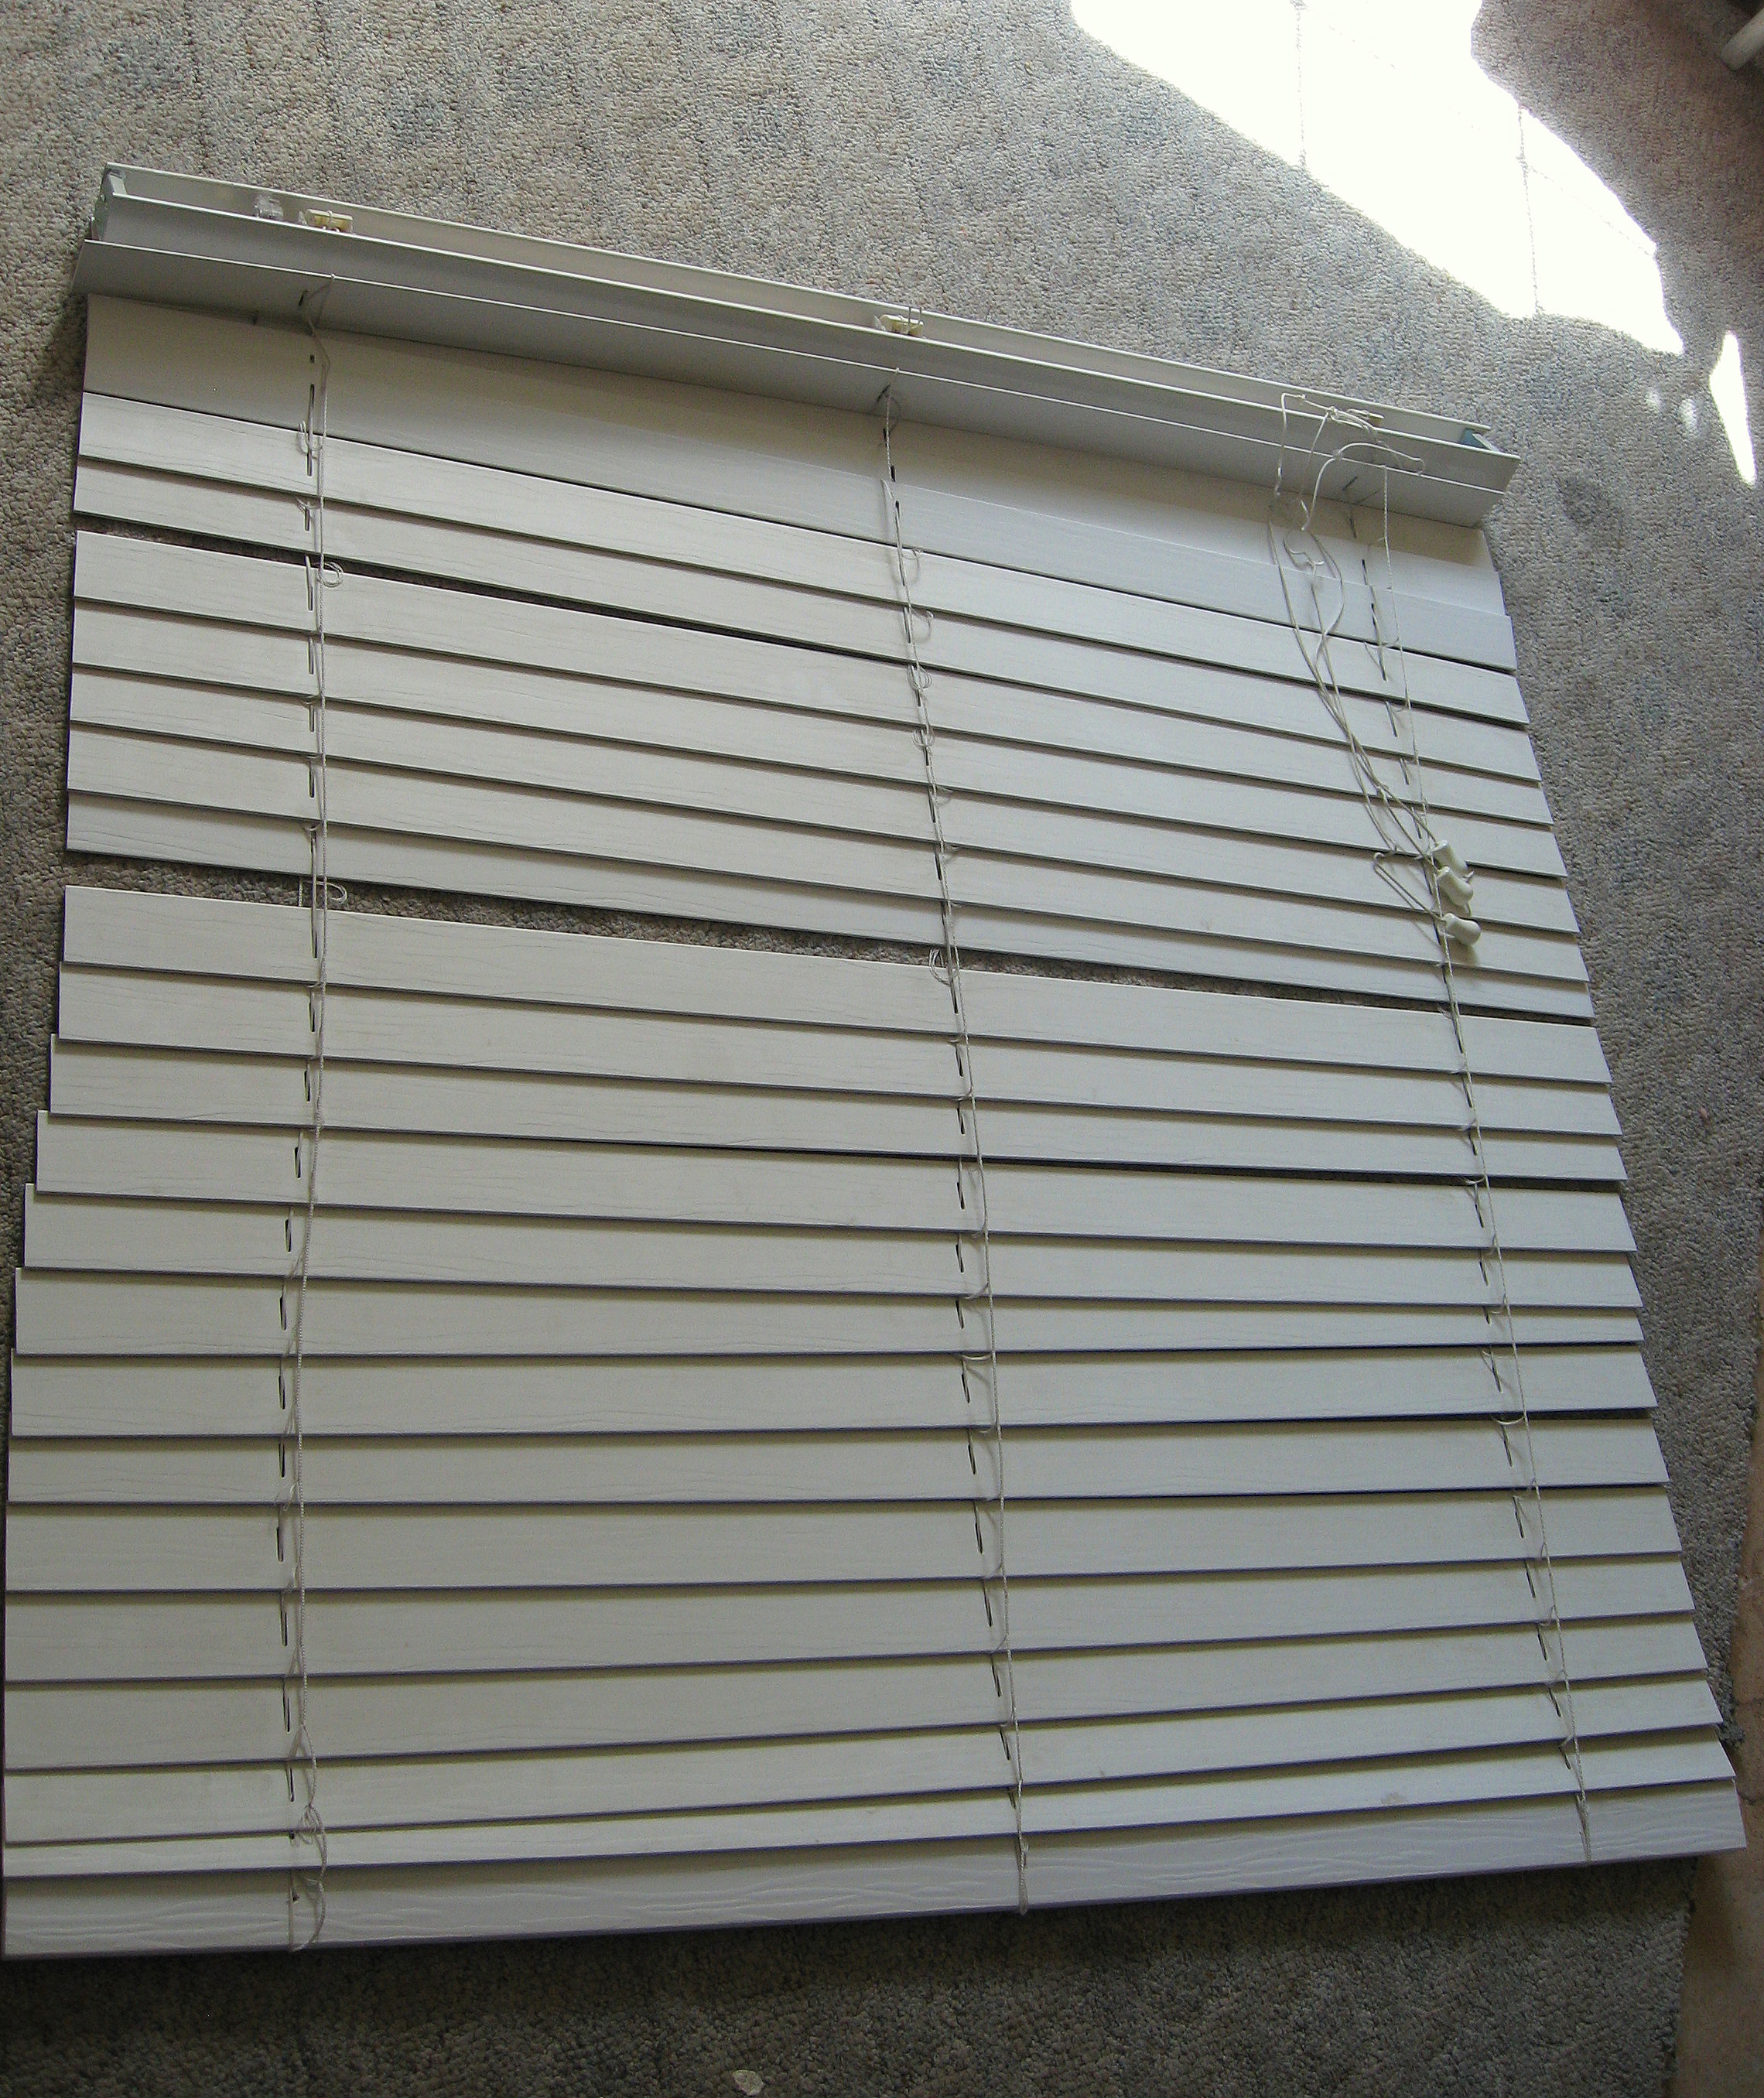
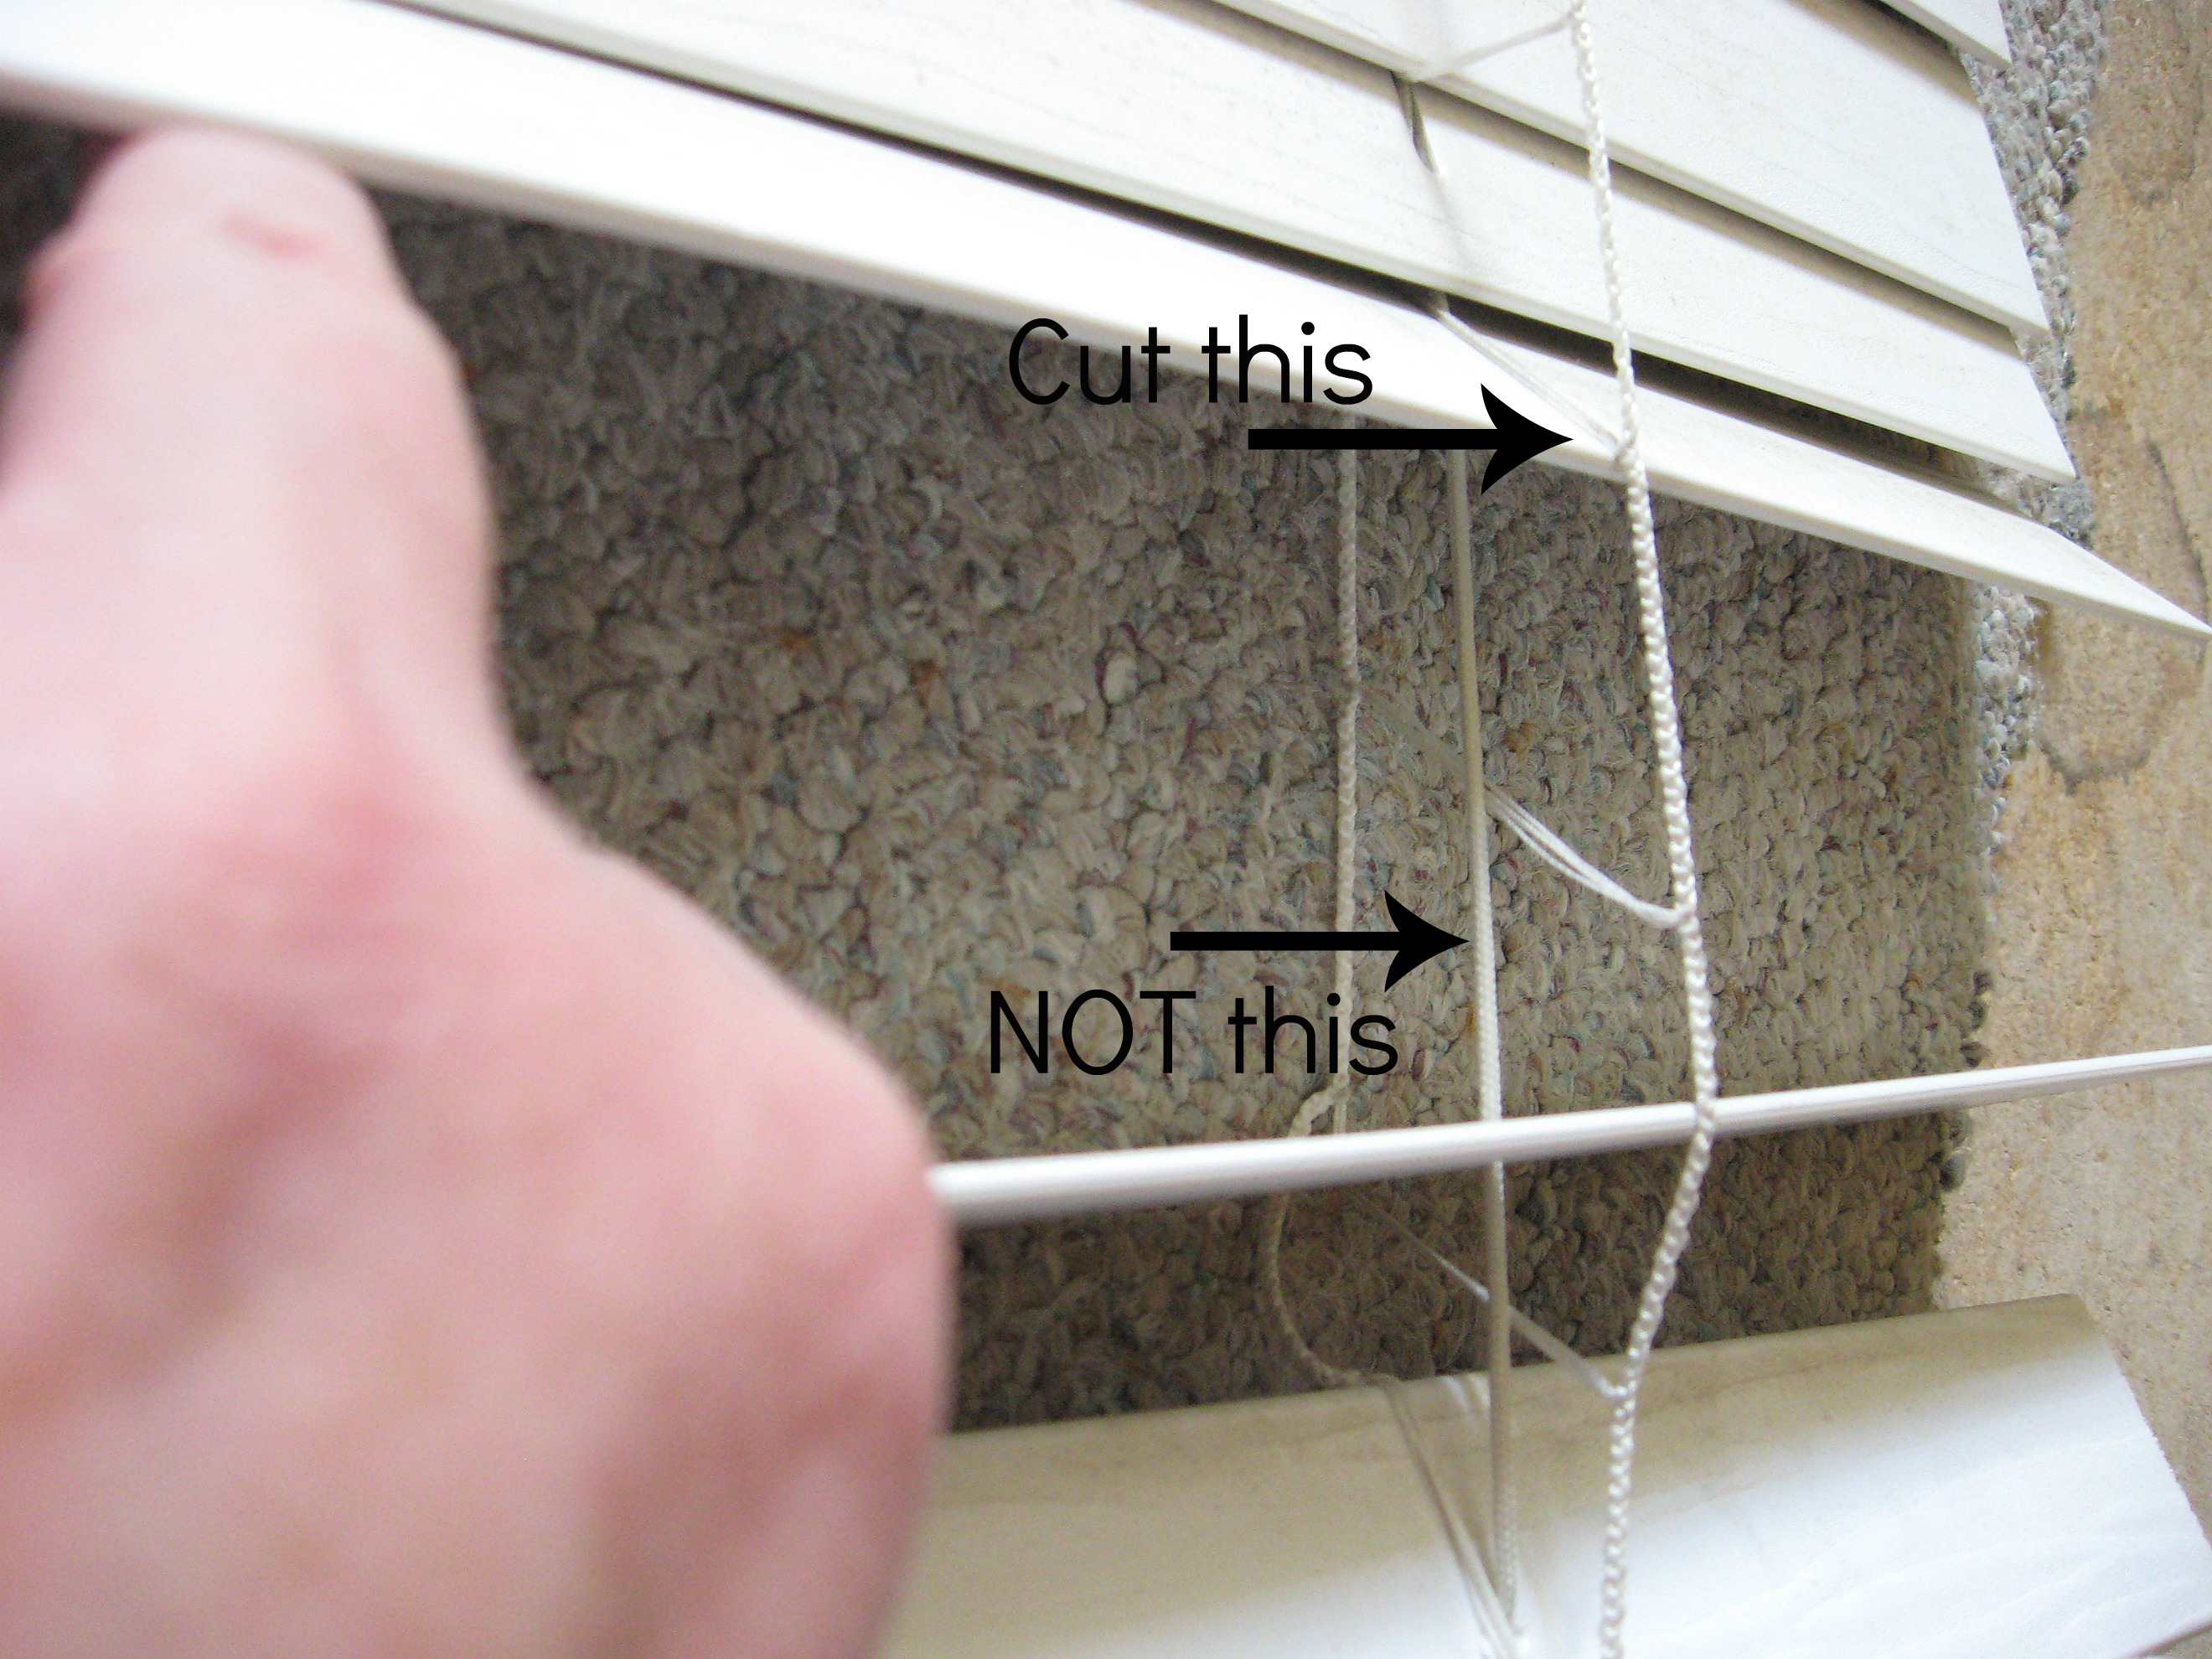
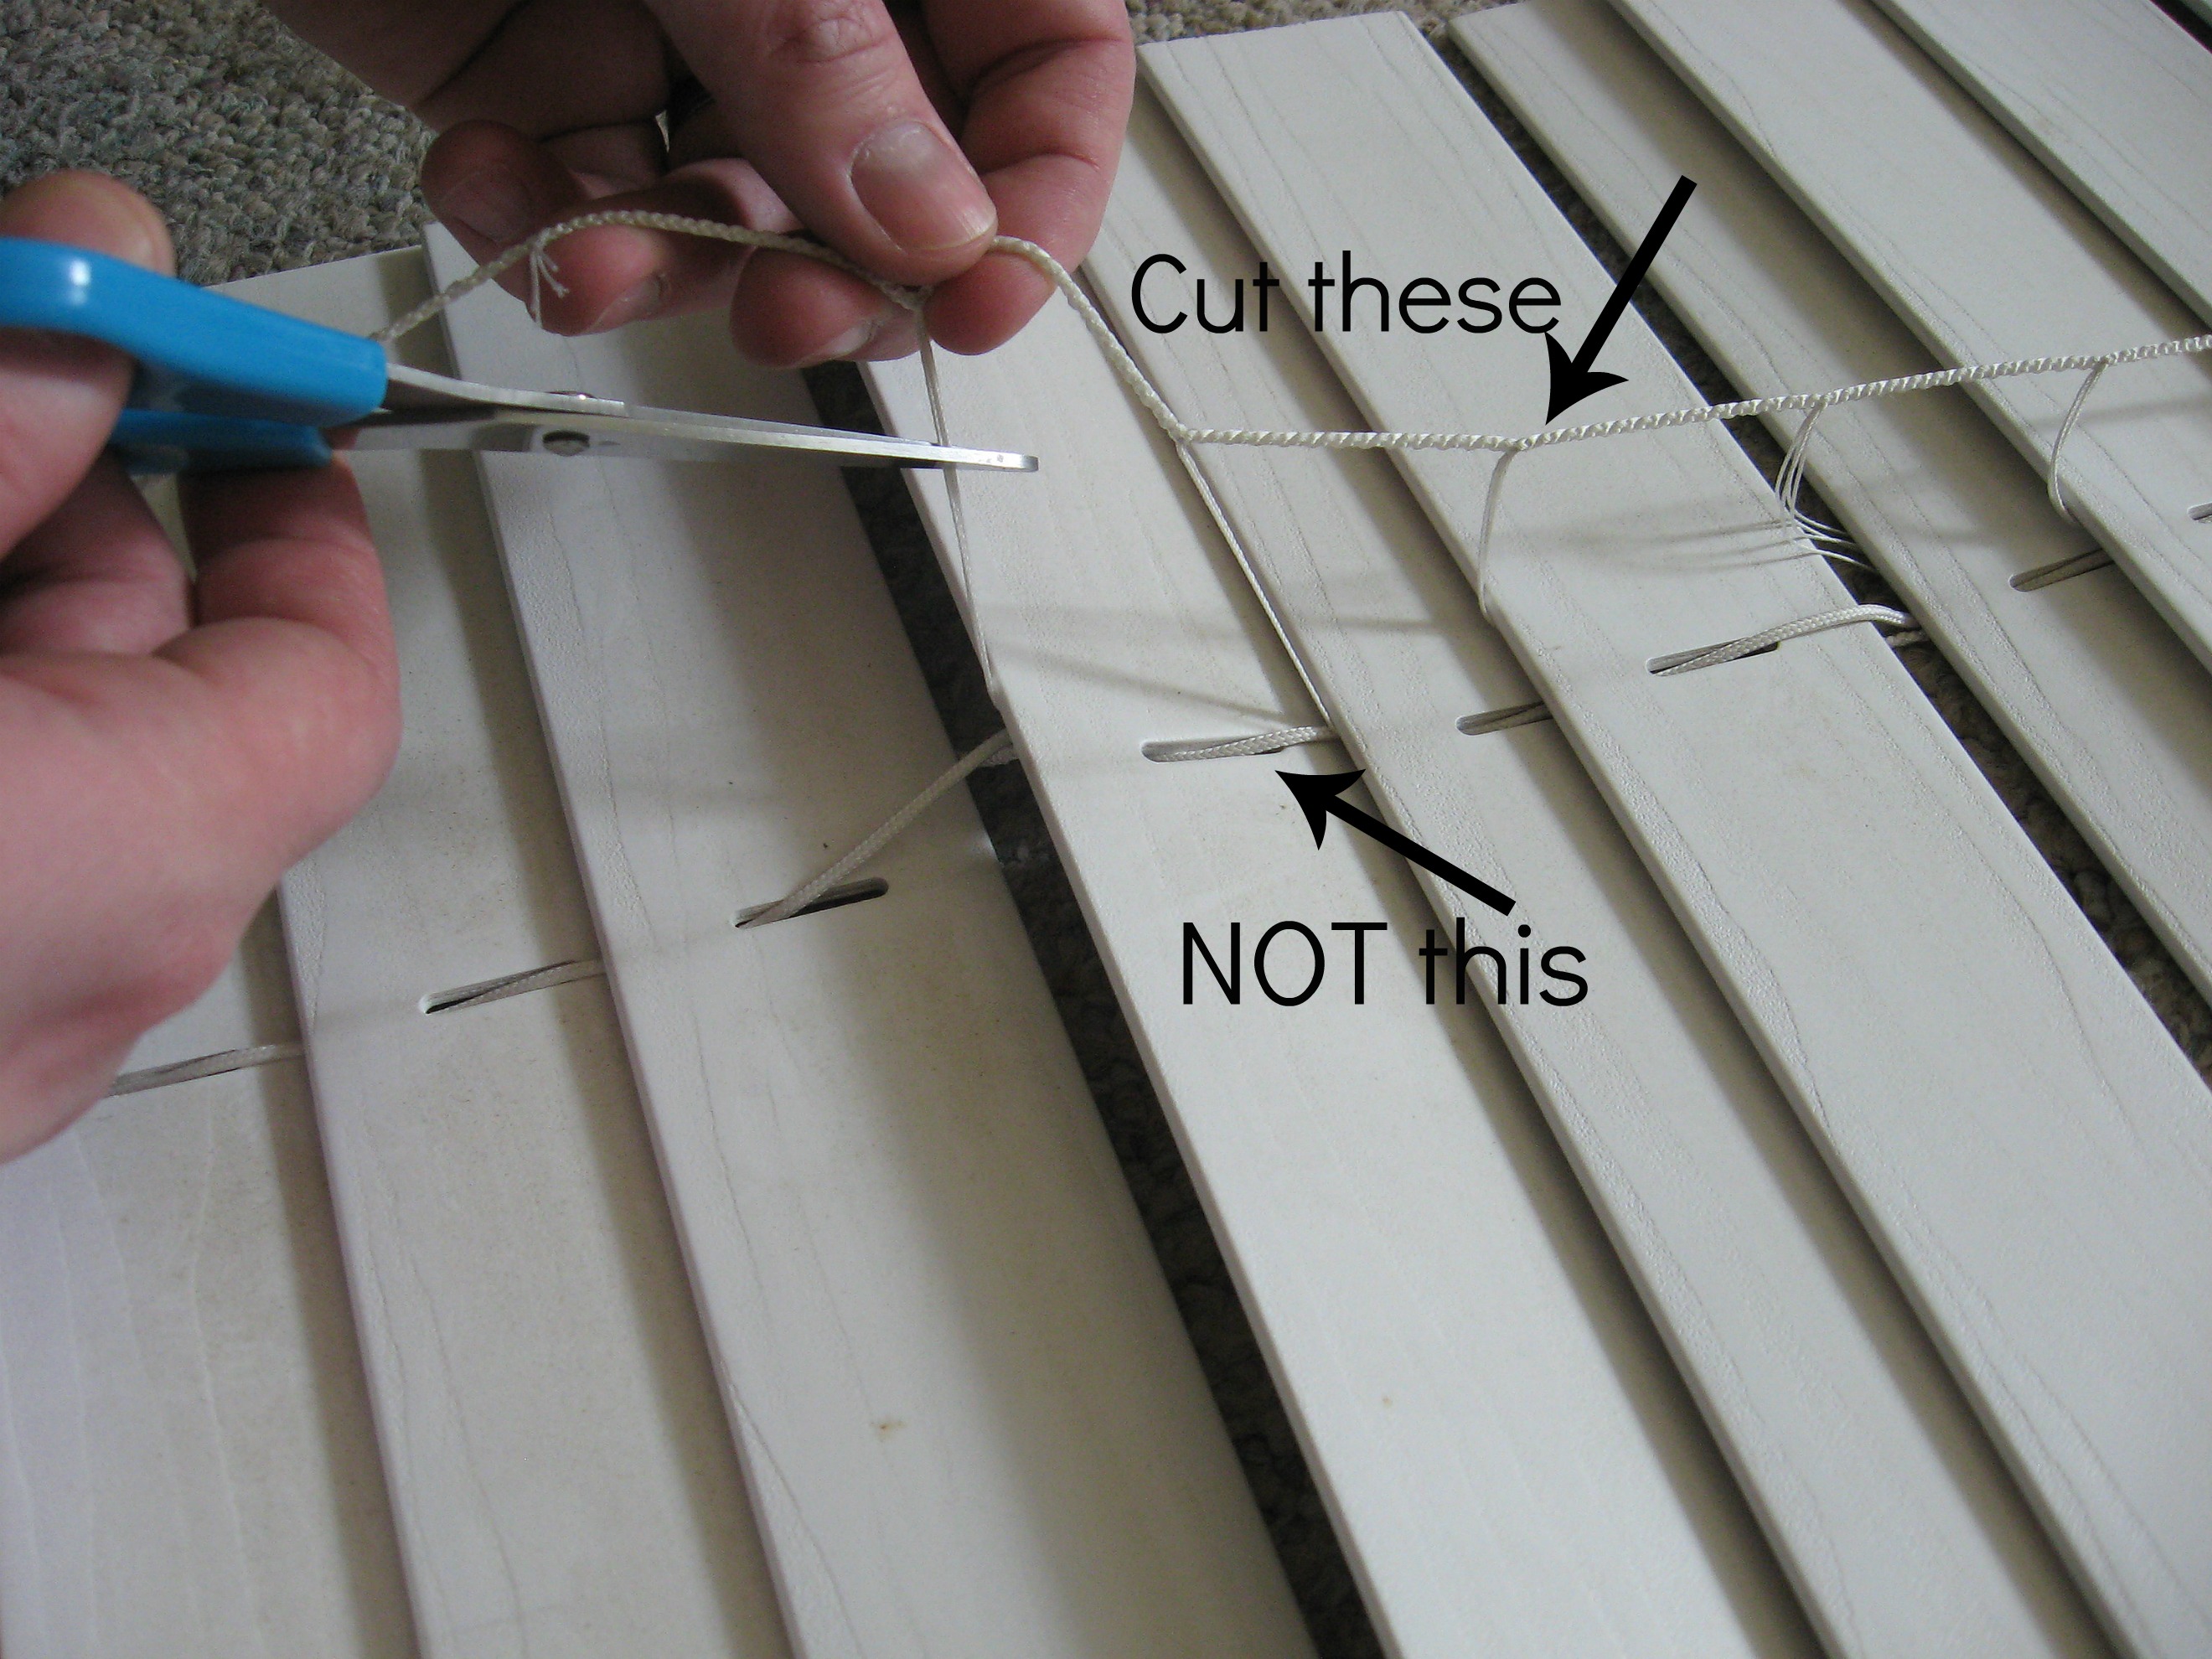
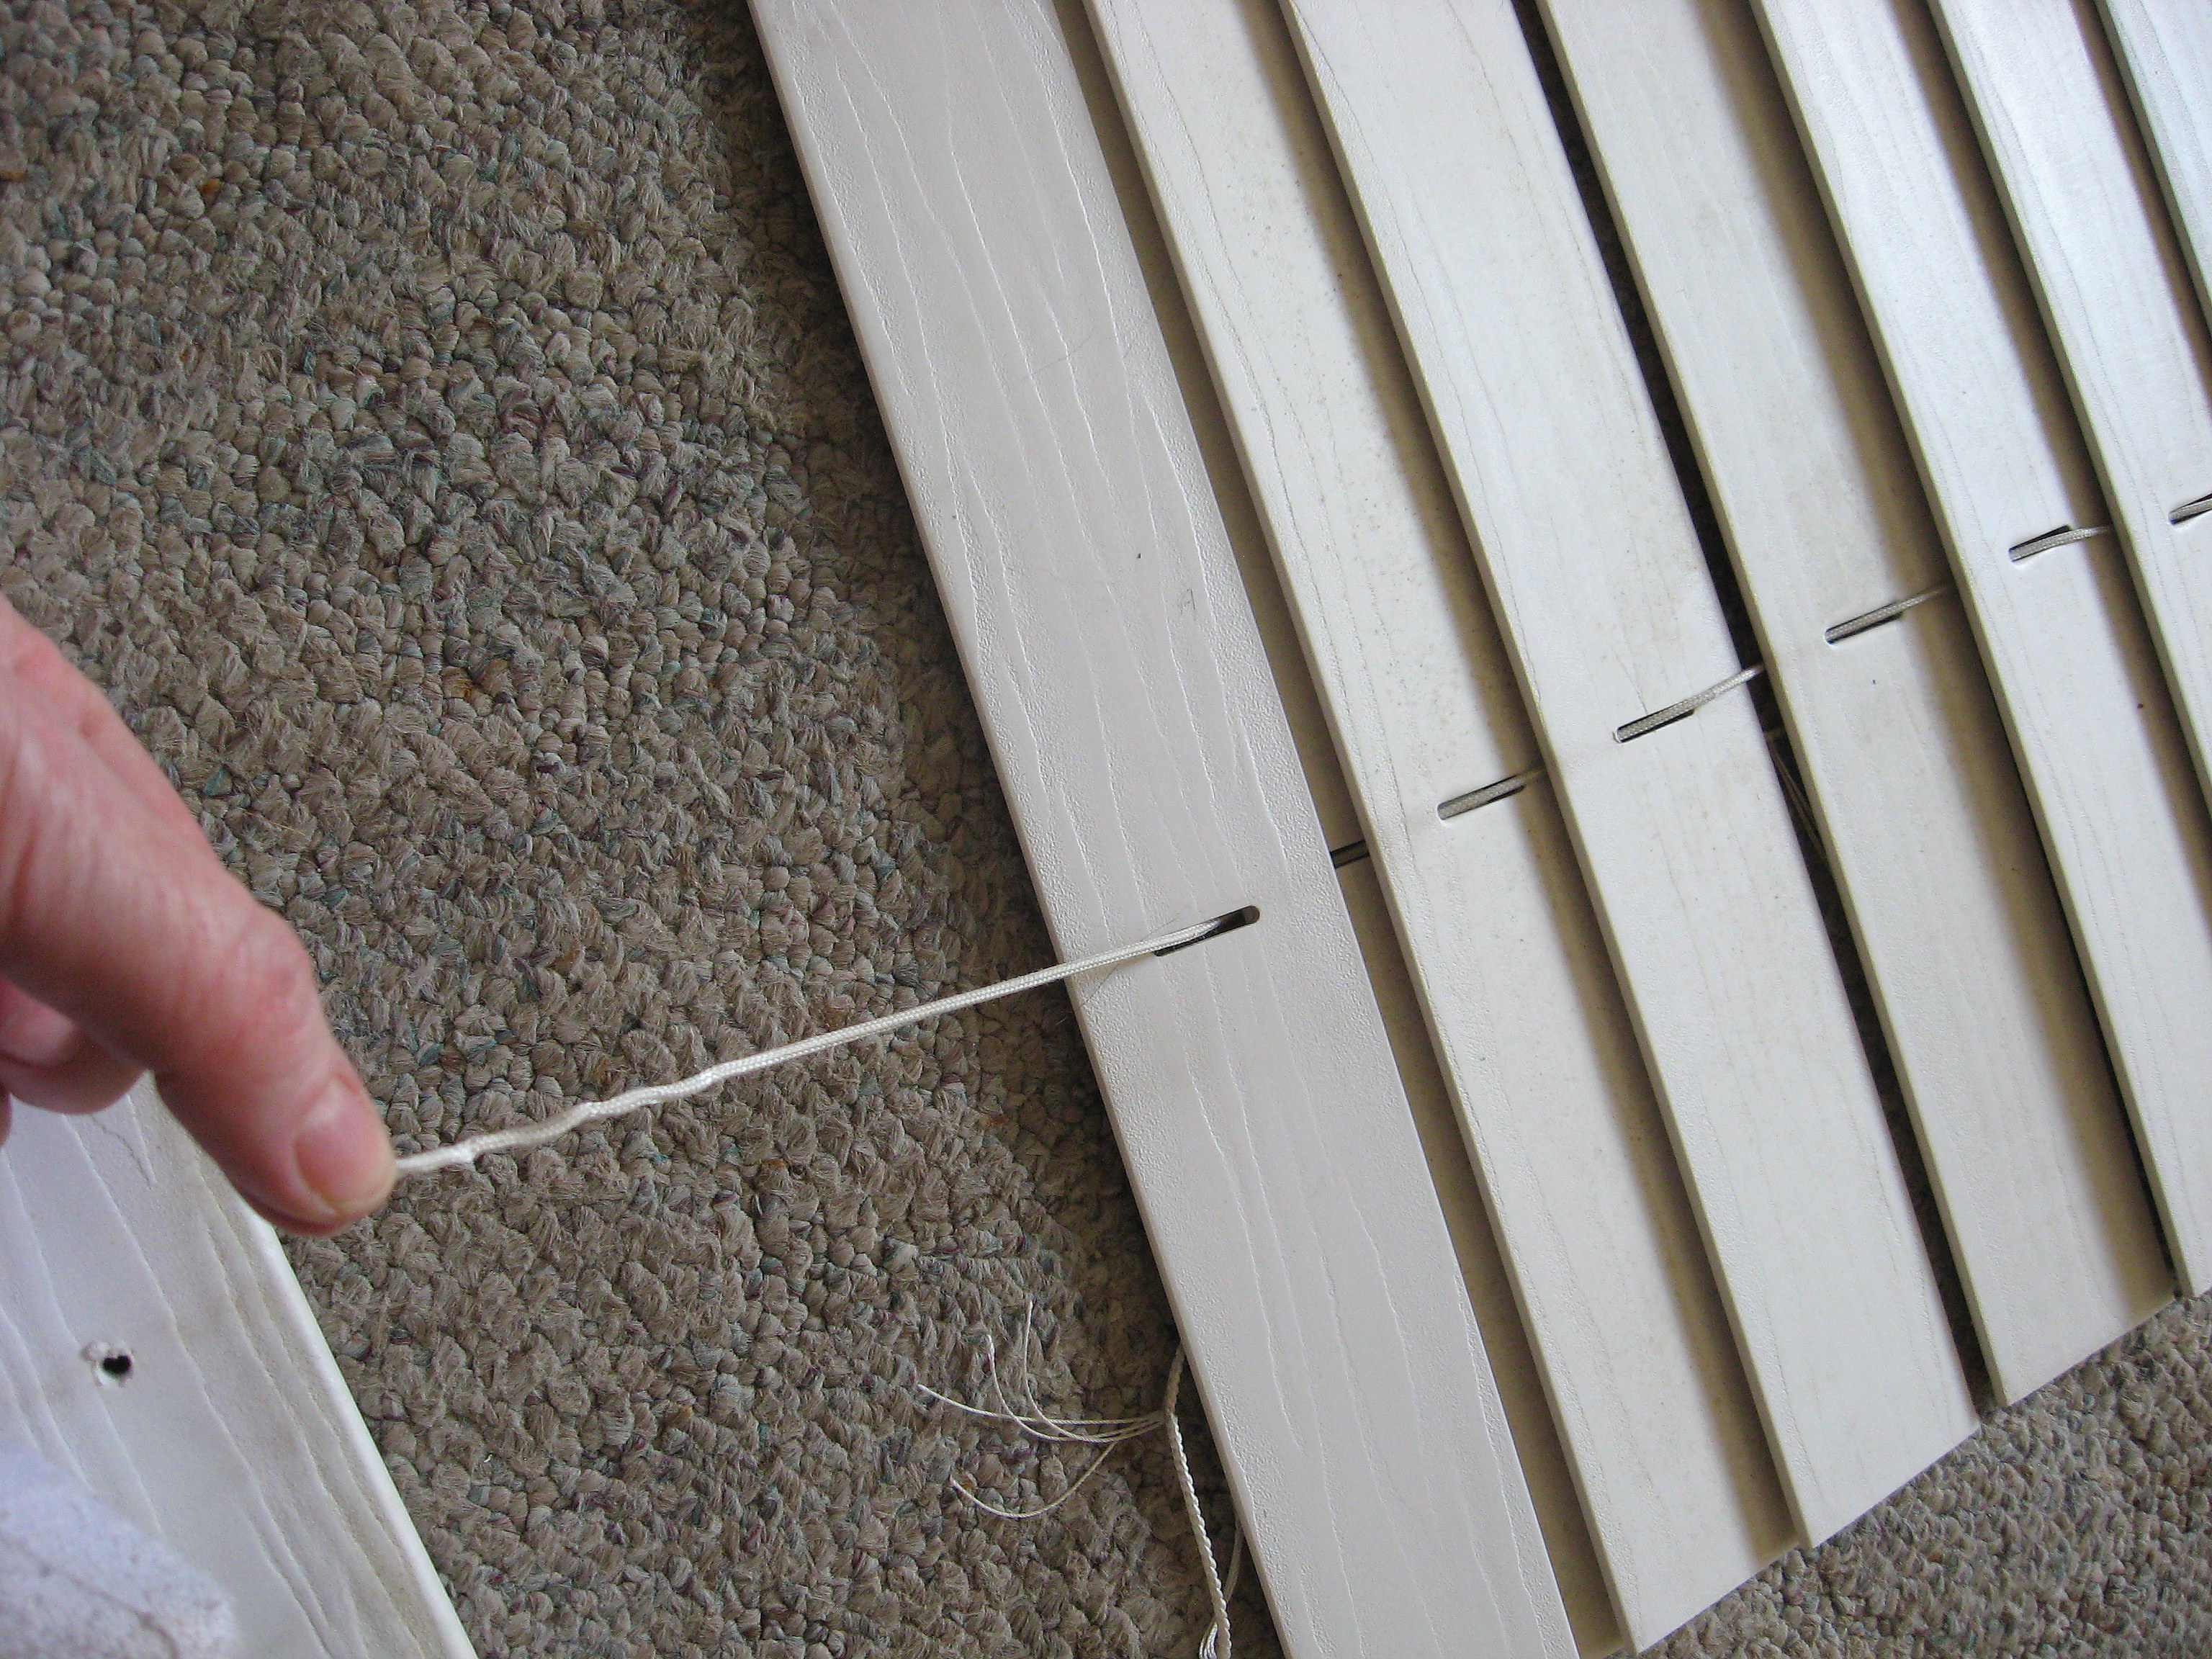
You will cut the thin strings that hold the slats in place – the ones that look like a ladder. DO NOT cut the heavier string that runs up through the holes in the slats – that’s the string that makes the shade go up and down.
Cut them all the way, top to bottom.
Now remove the little plastic plug at the bottom to reveal the knotty mess of strings there. Pull all the strings out – the knots in the thin strings that you just cut can just be cut away. Carefully untie the other string – the thicker one.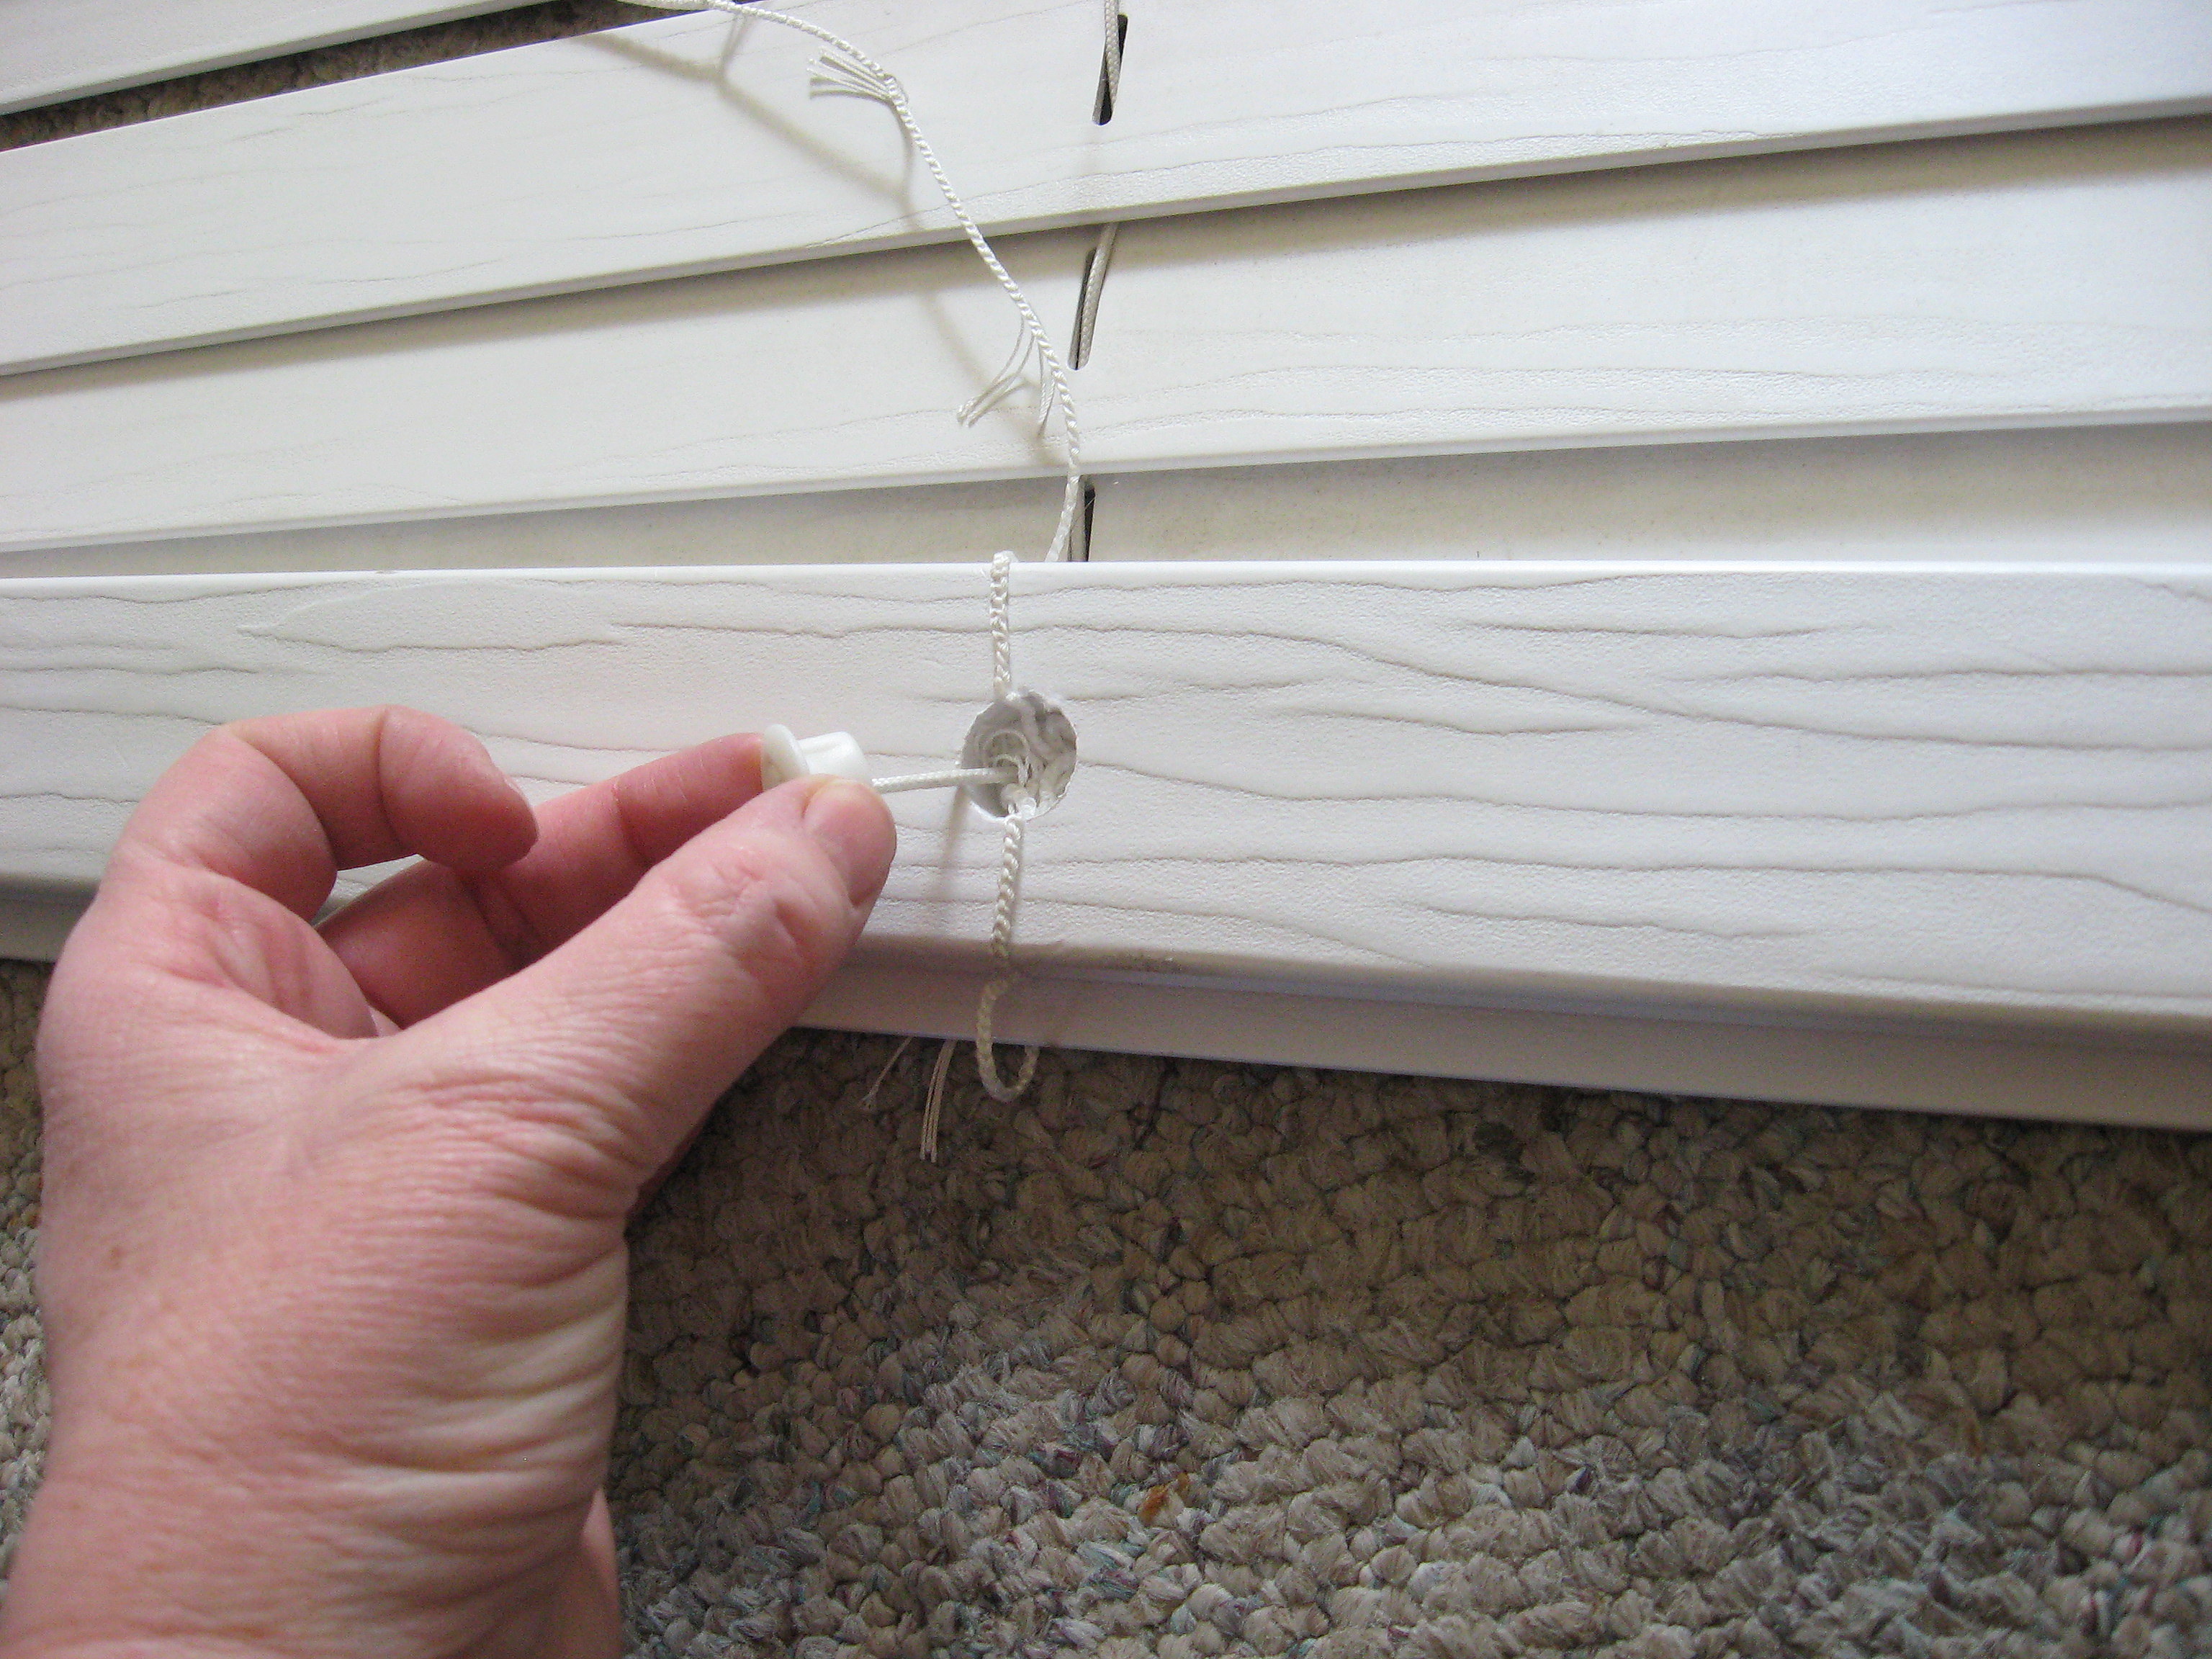
Now take that bottom board off and you will be left with the slats on the thicker string.
Remove all the slats and it will leave you with this:
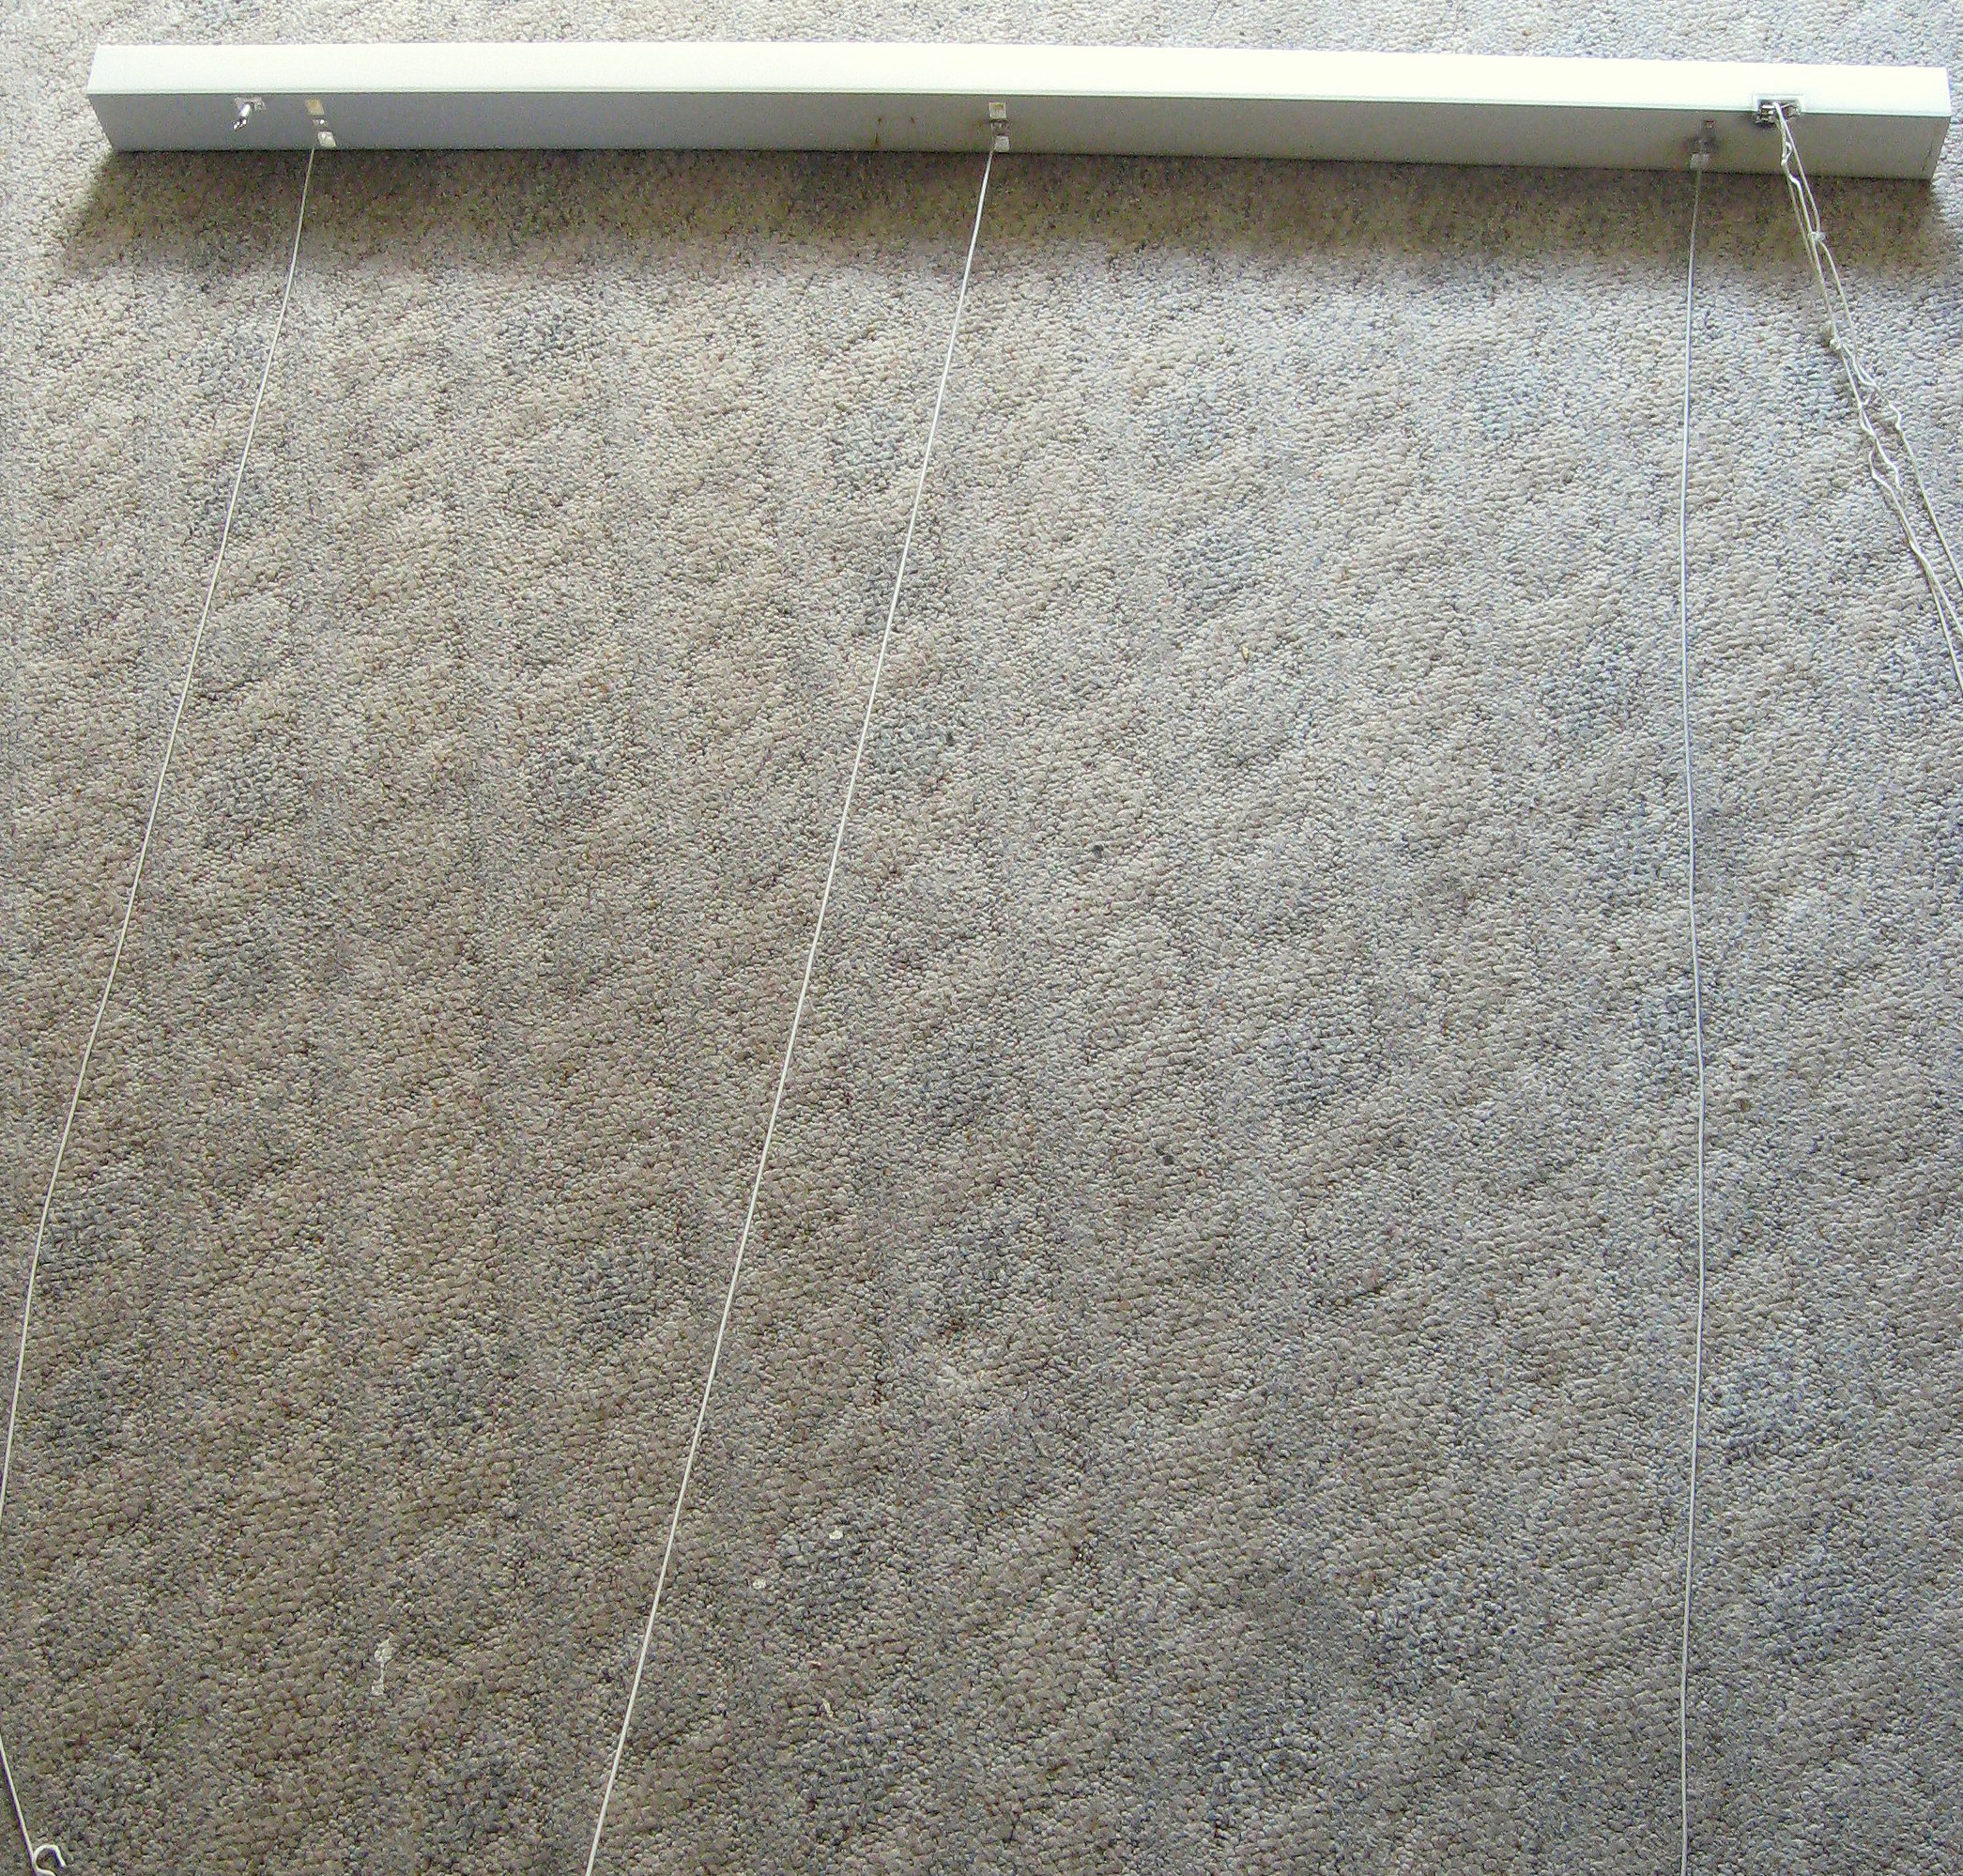
Set this aside and prep the fabric.
I am using a piece of fabric and the plastic from the broken shade. You can buy black out fabric, or you can use just the decorative fabric if your shade is more decorative than for light control.
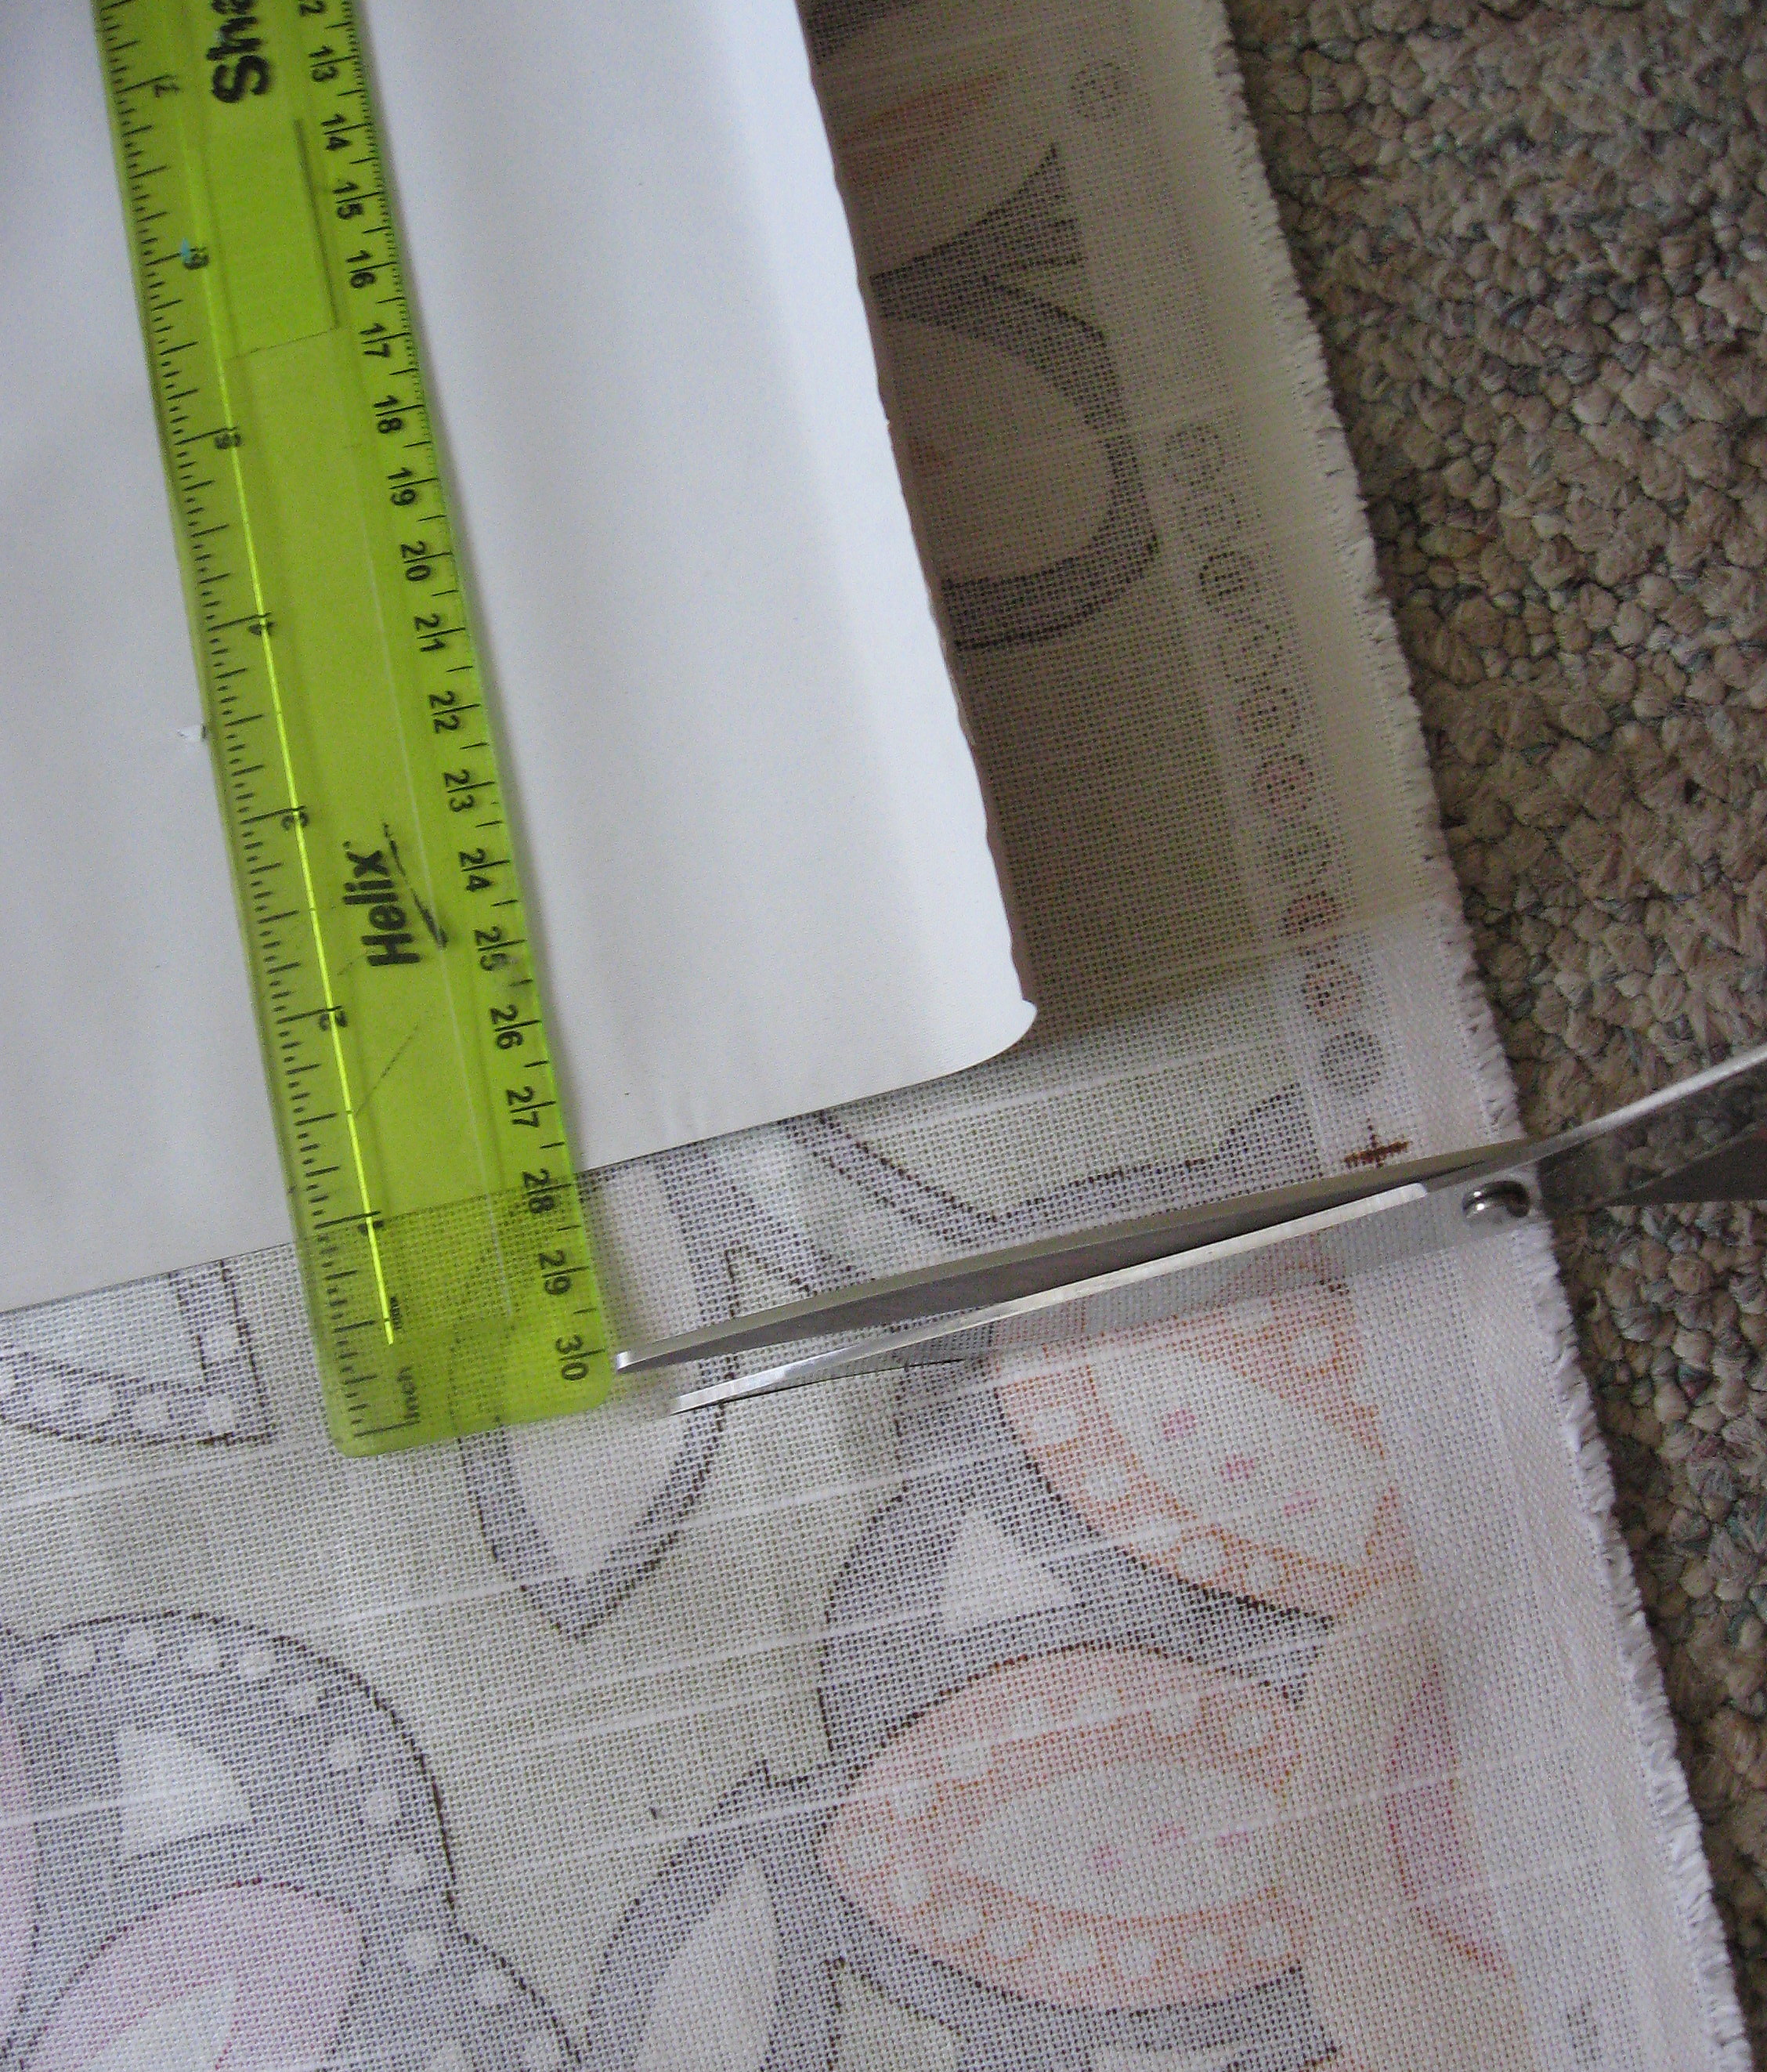
First, you will cut the black out fabric -if you’re using it- to size for your window. Then cut the decorative fabric to size plus one inch on all sides.
Fold the decorative fabric over 1/2 inch on all sides and iron.
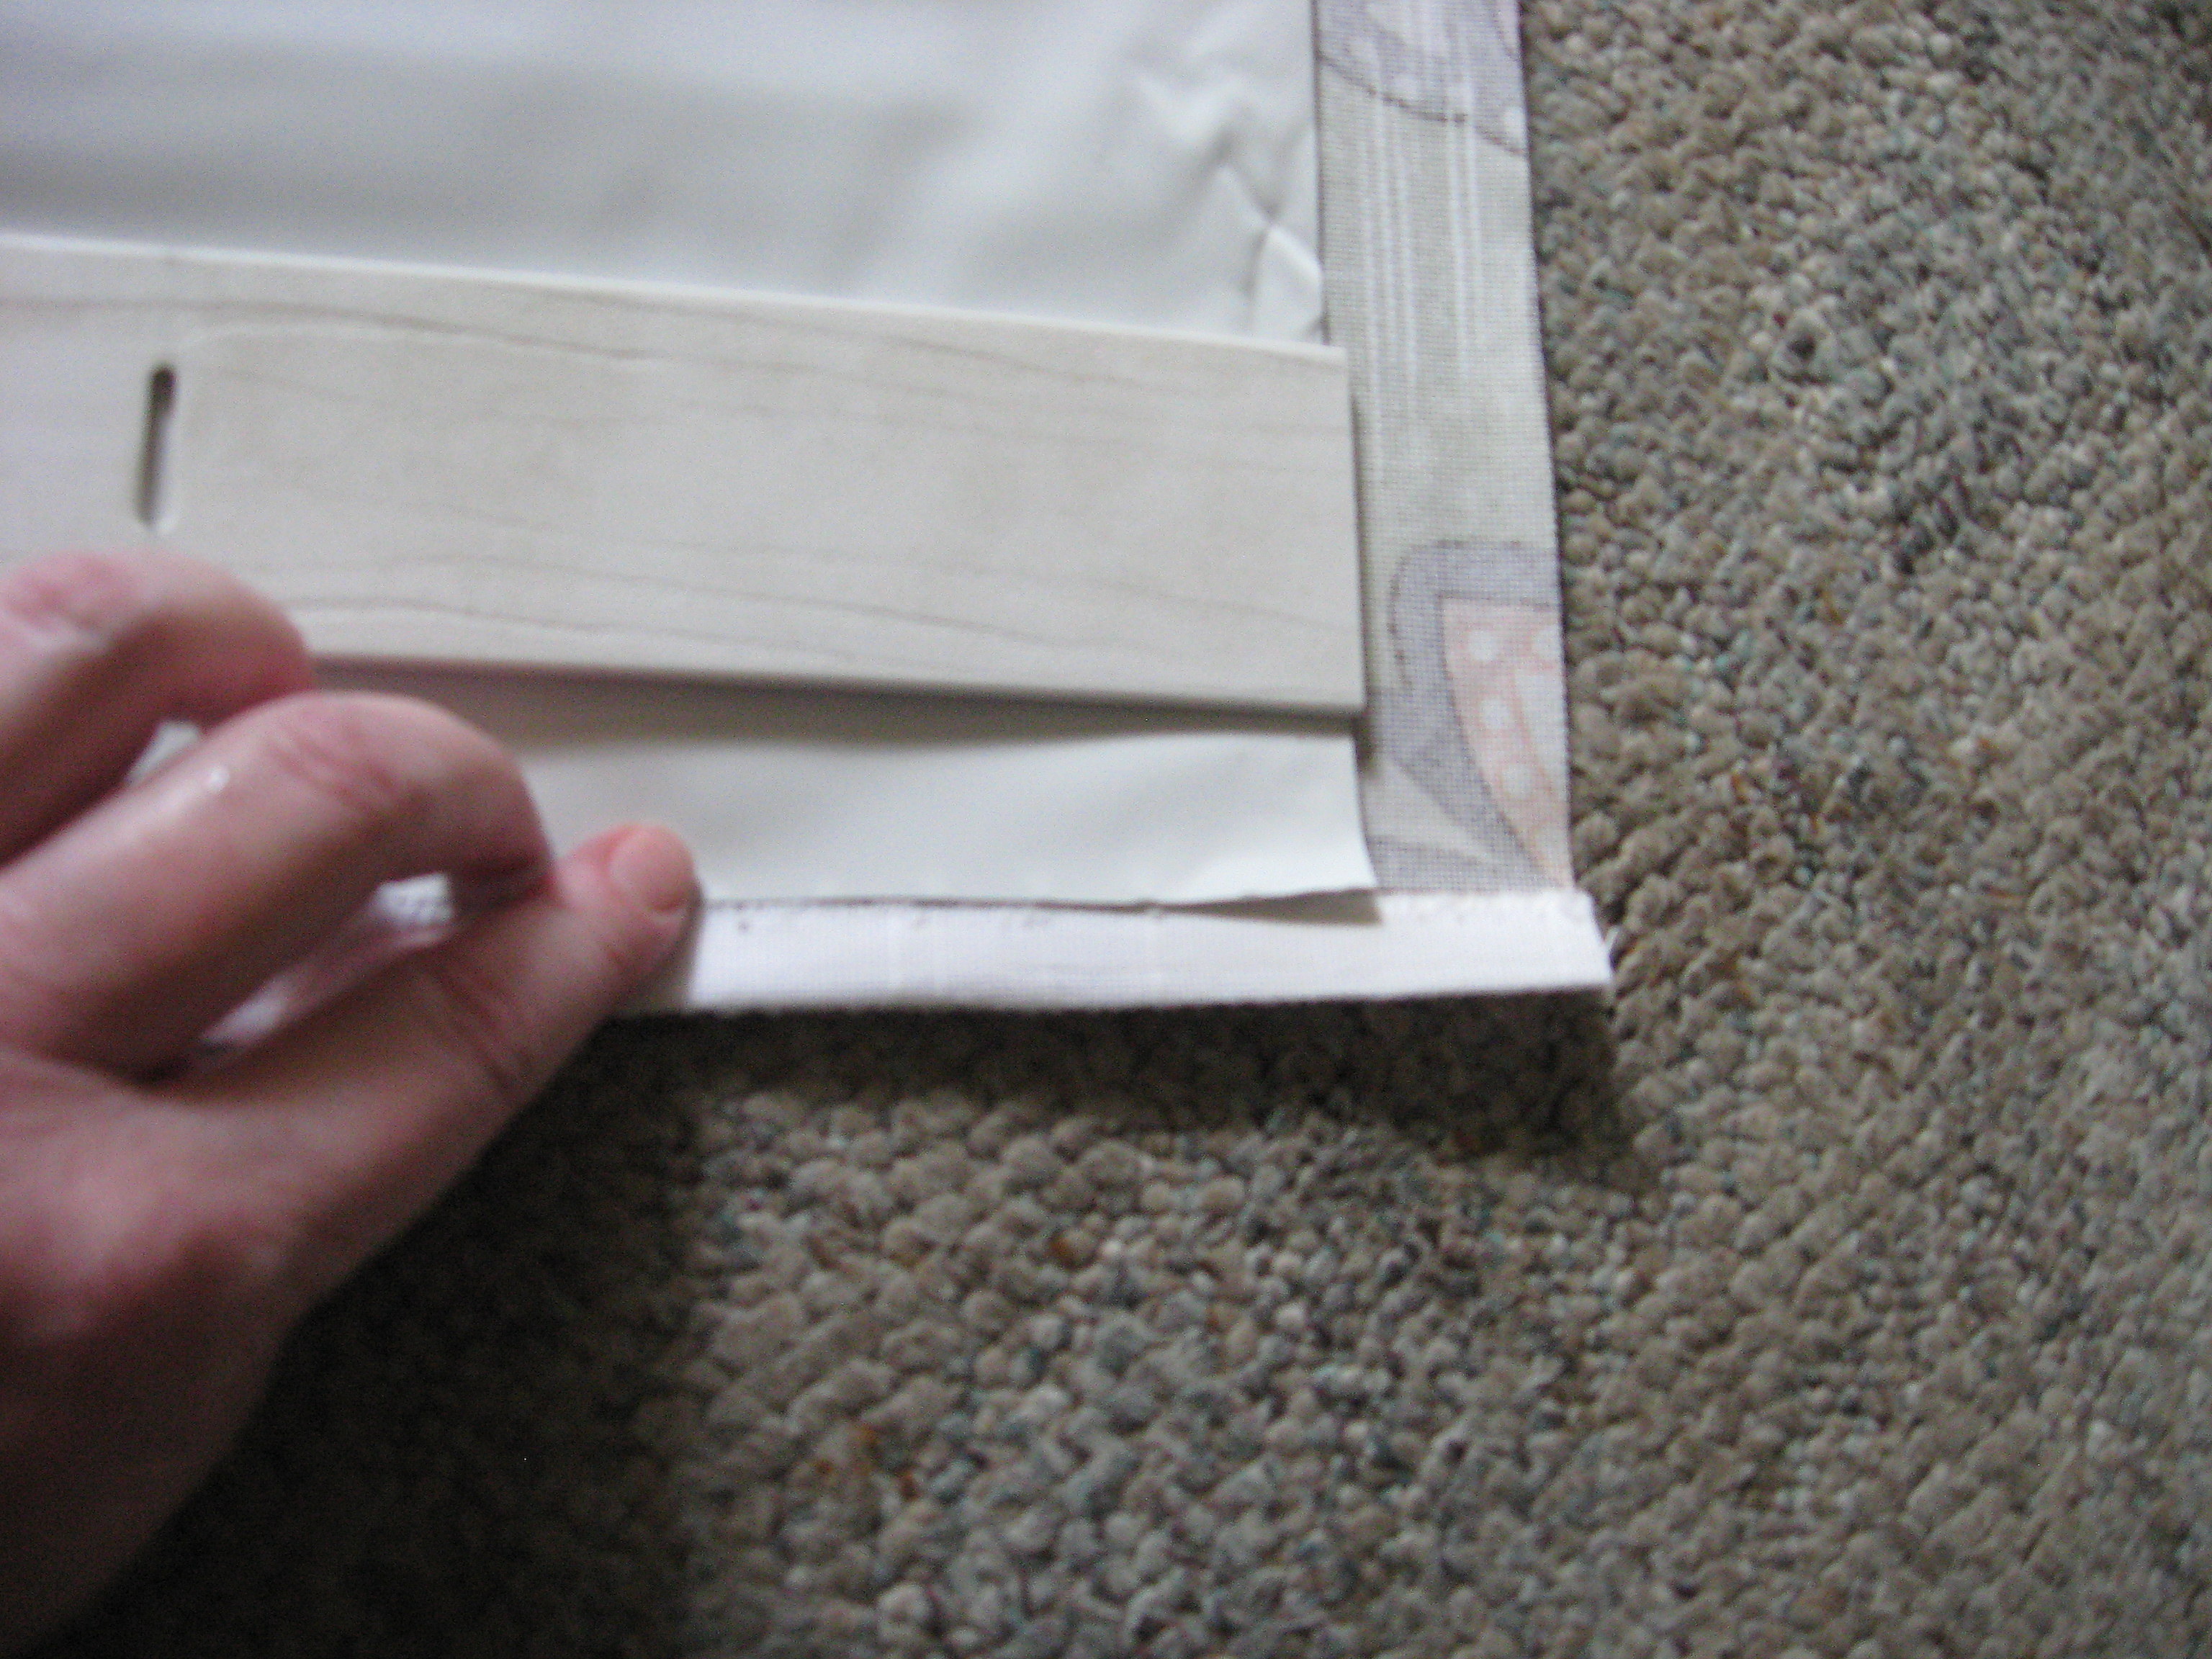
Then fold over 1/2 inch again and iron.
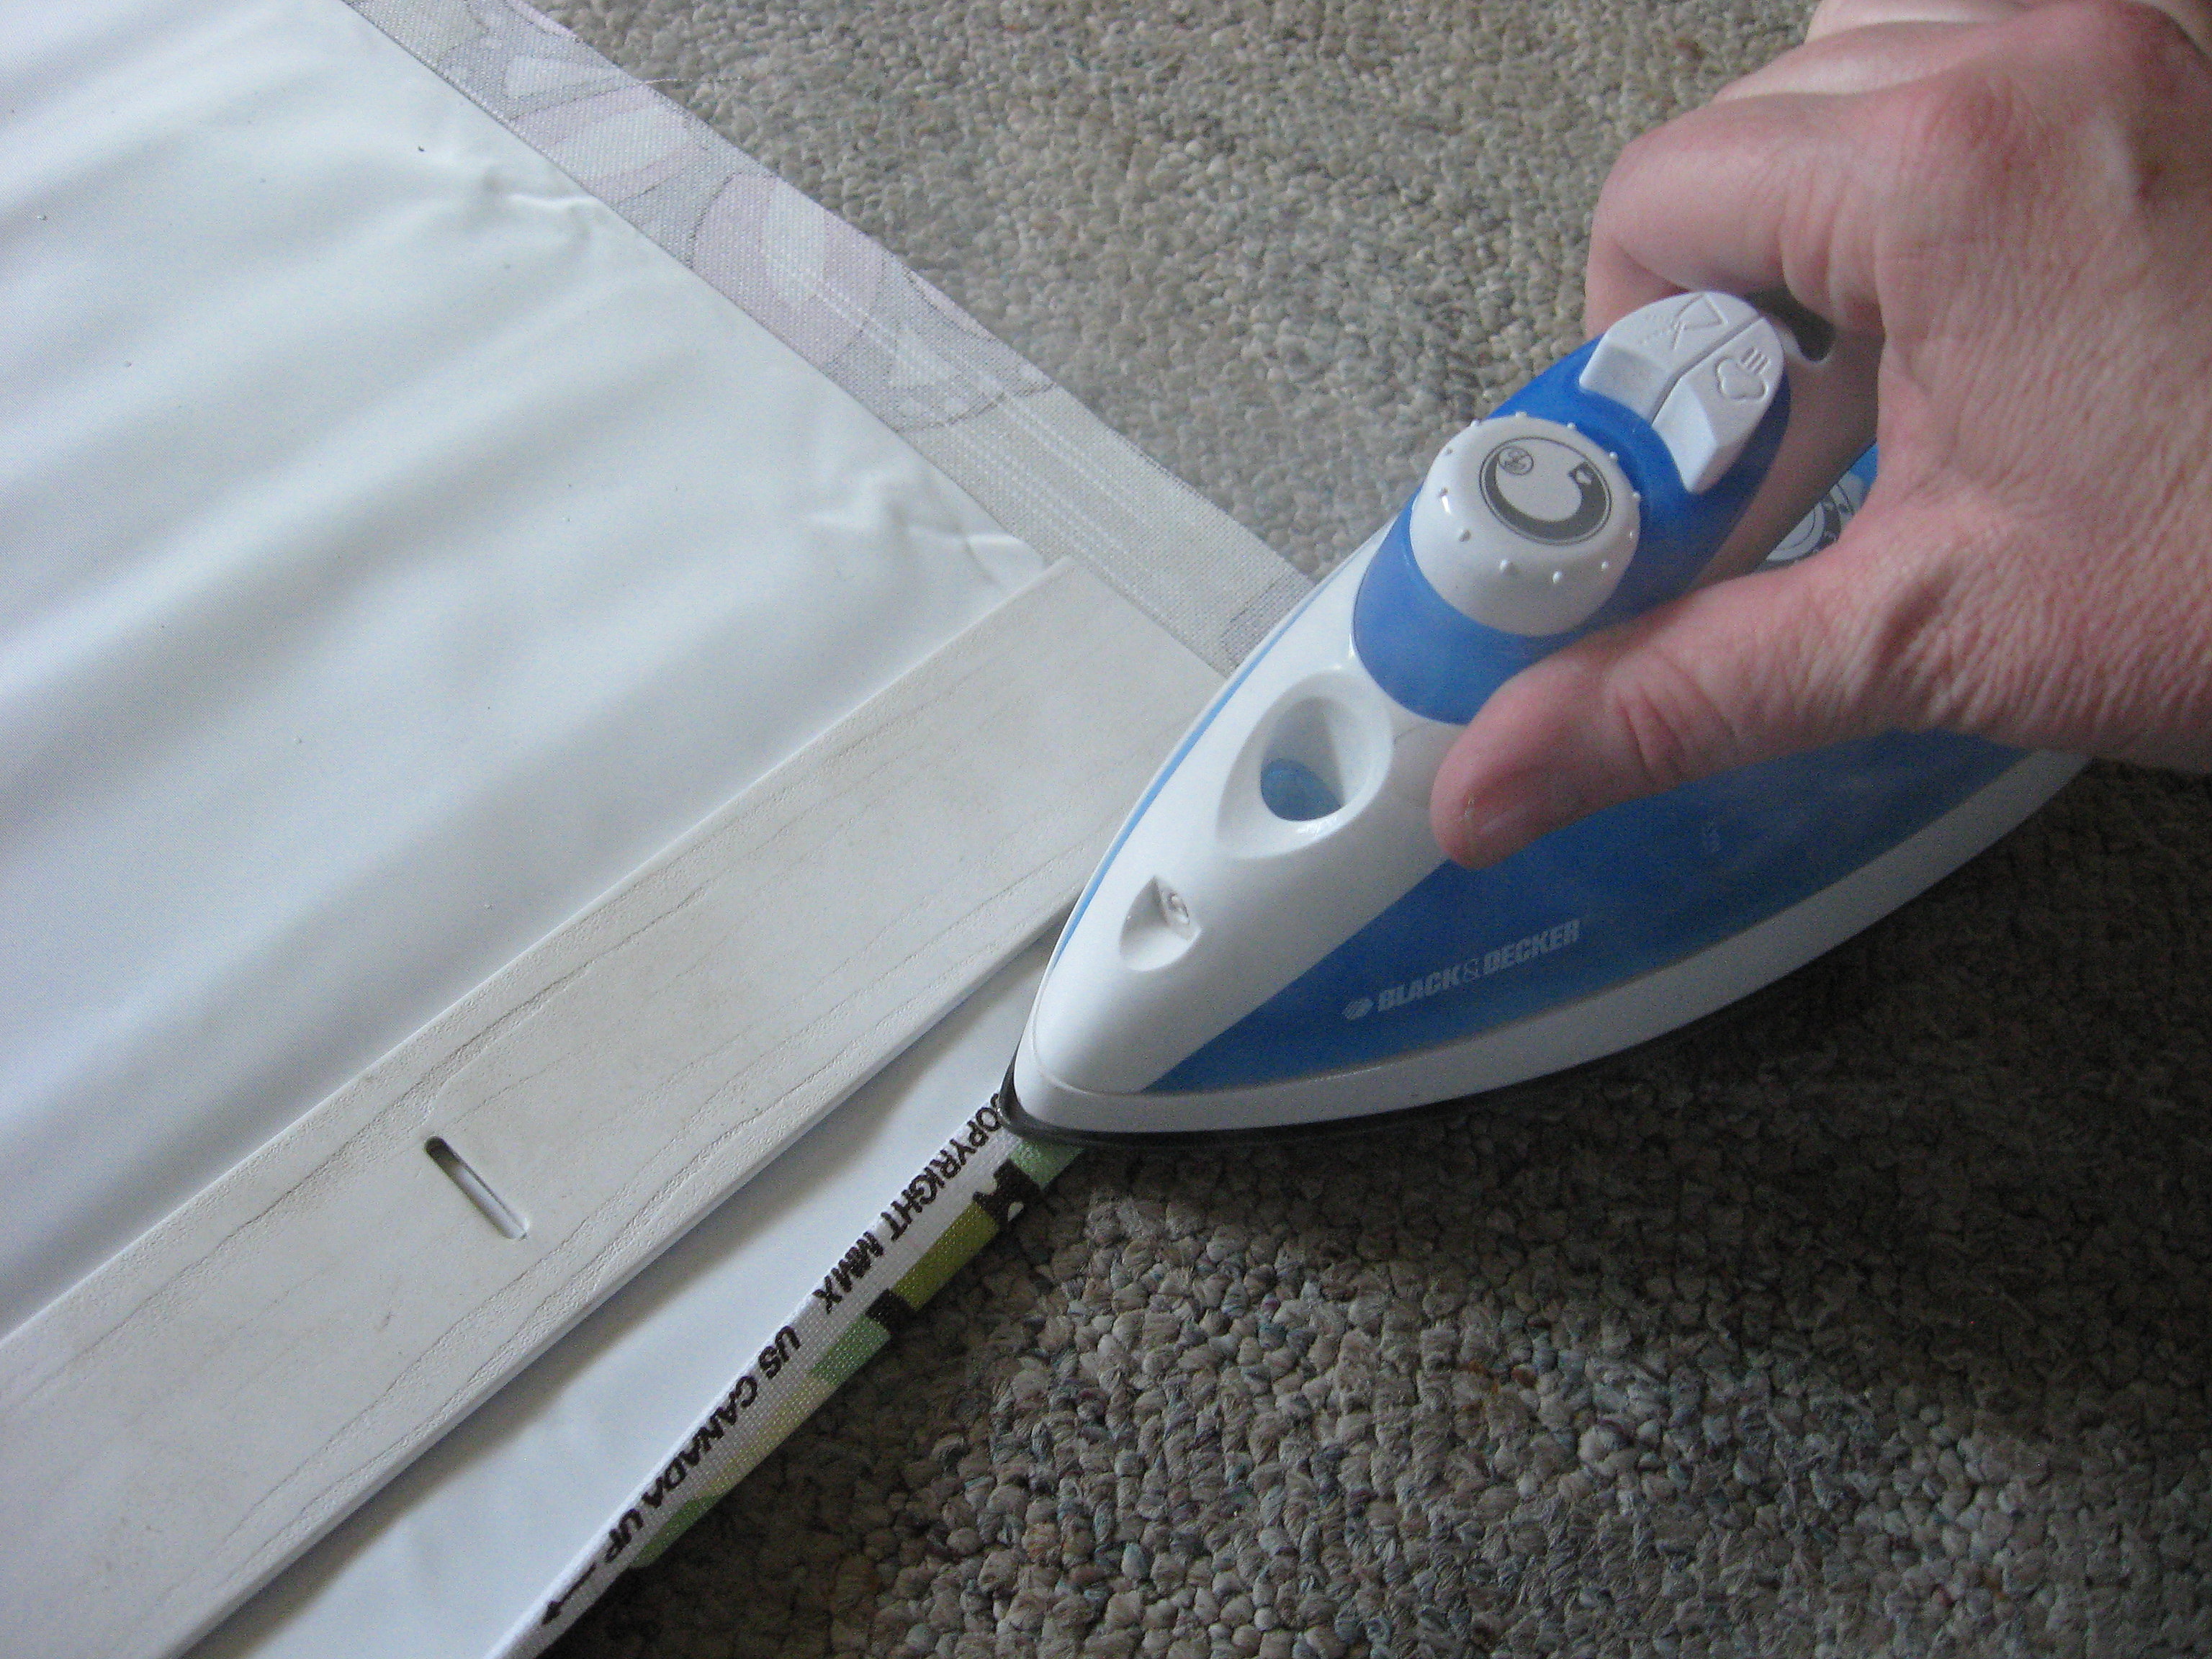
BE CAREFUL if you are using plastic that you don’t melt it!
Now use fabric glue to glue this hem down on all four sides – gluing it to the black out fabric if you are using it.
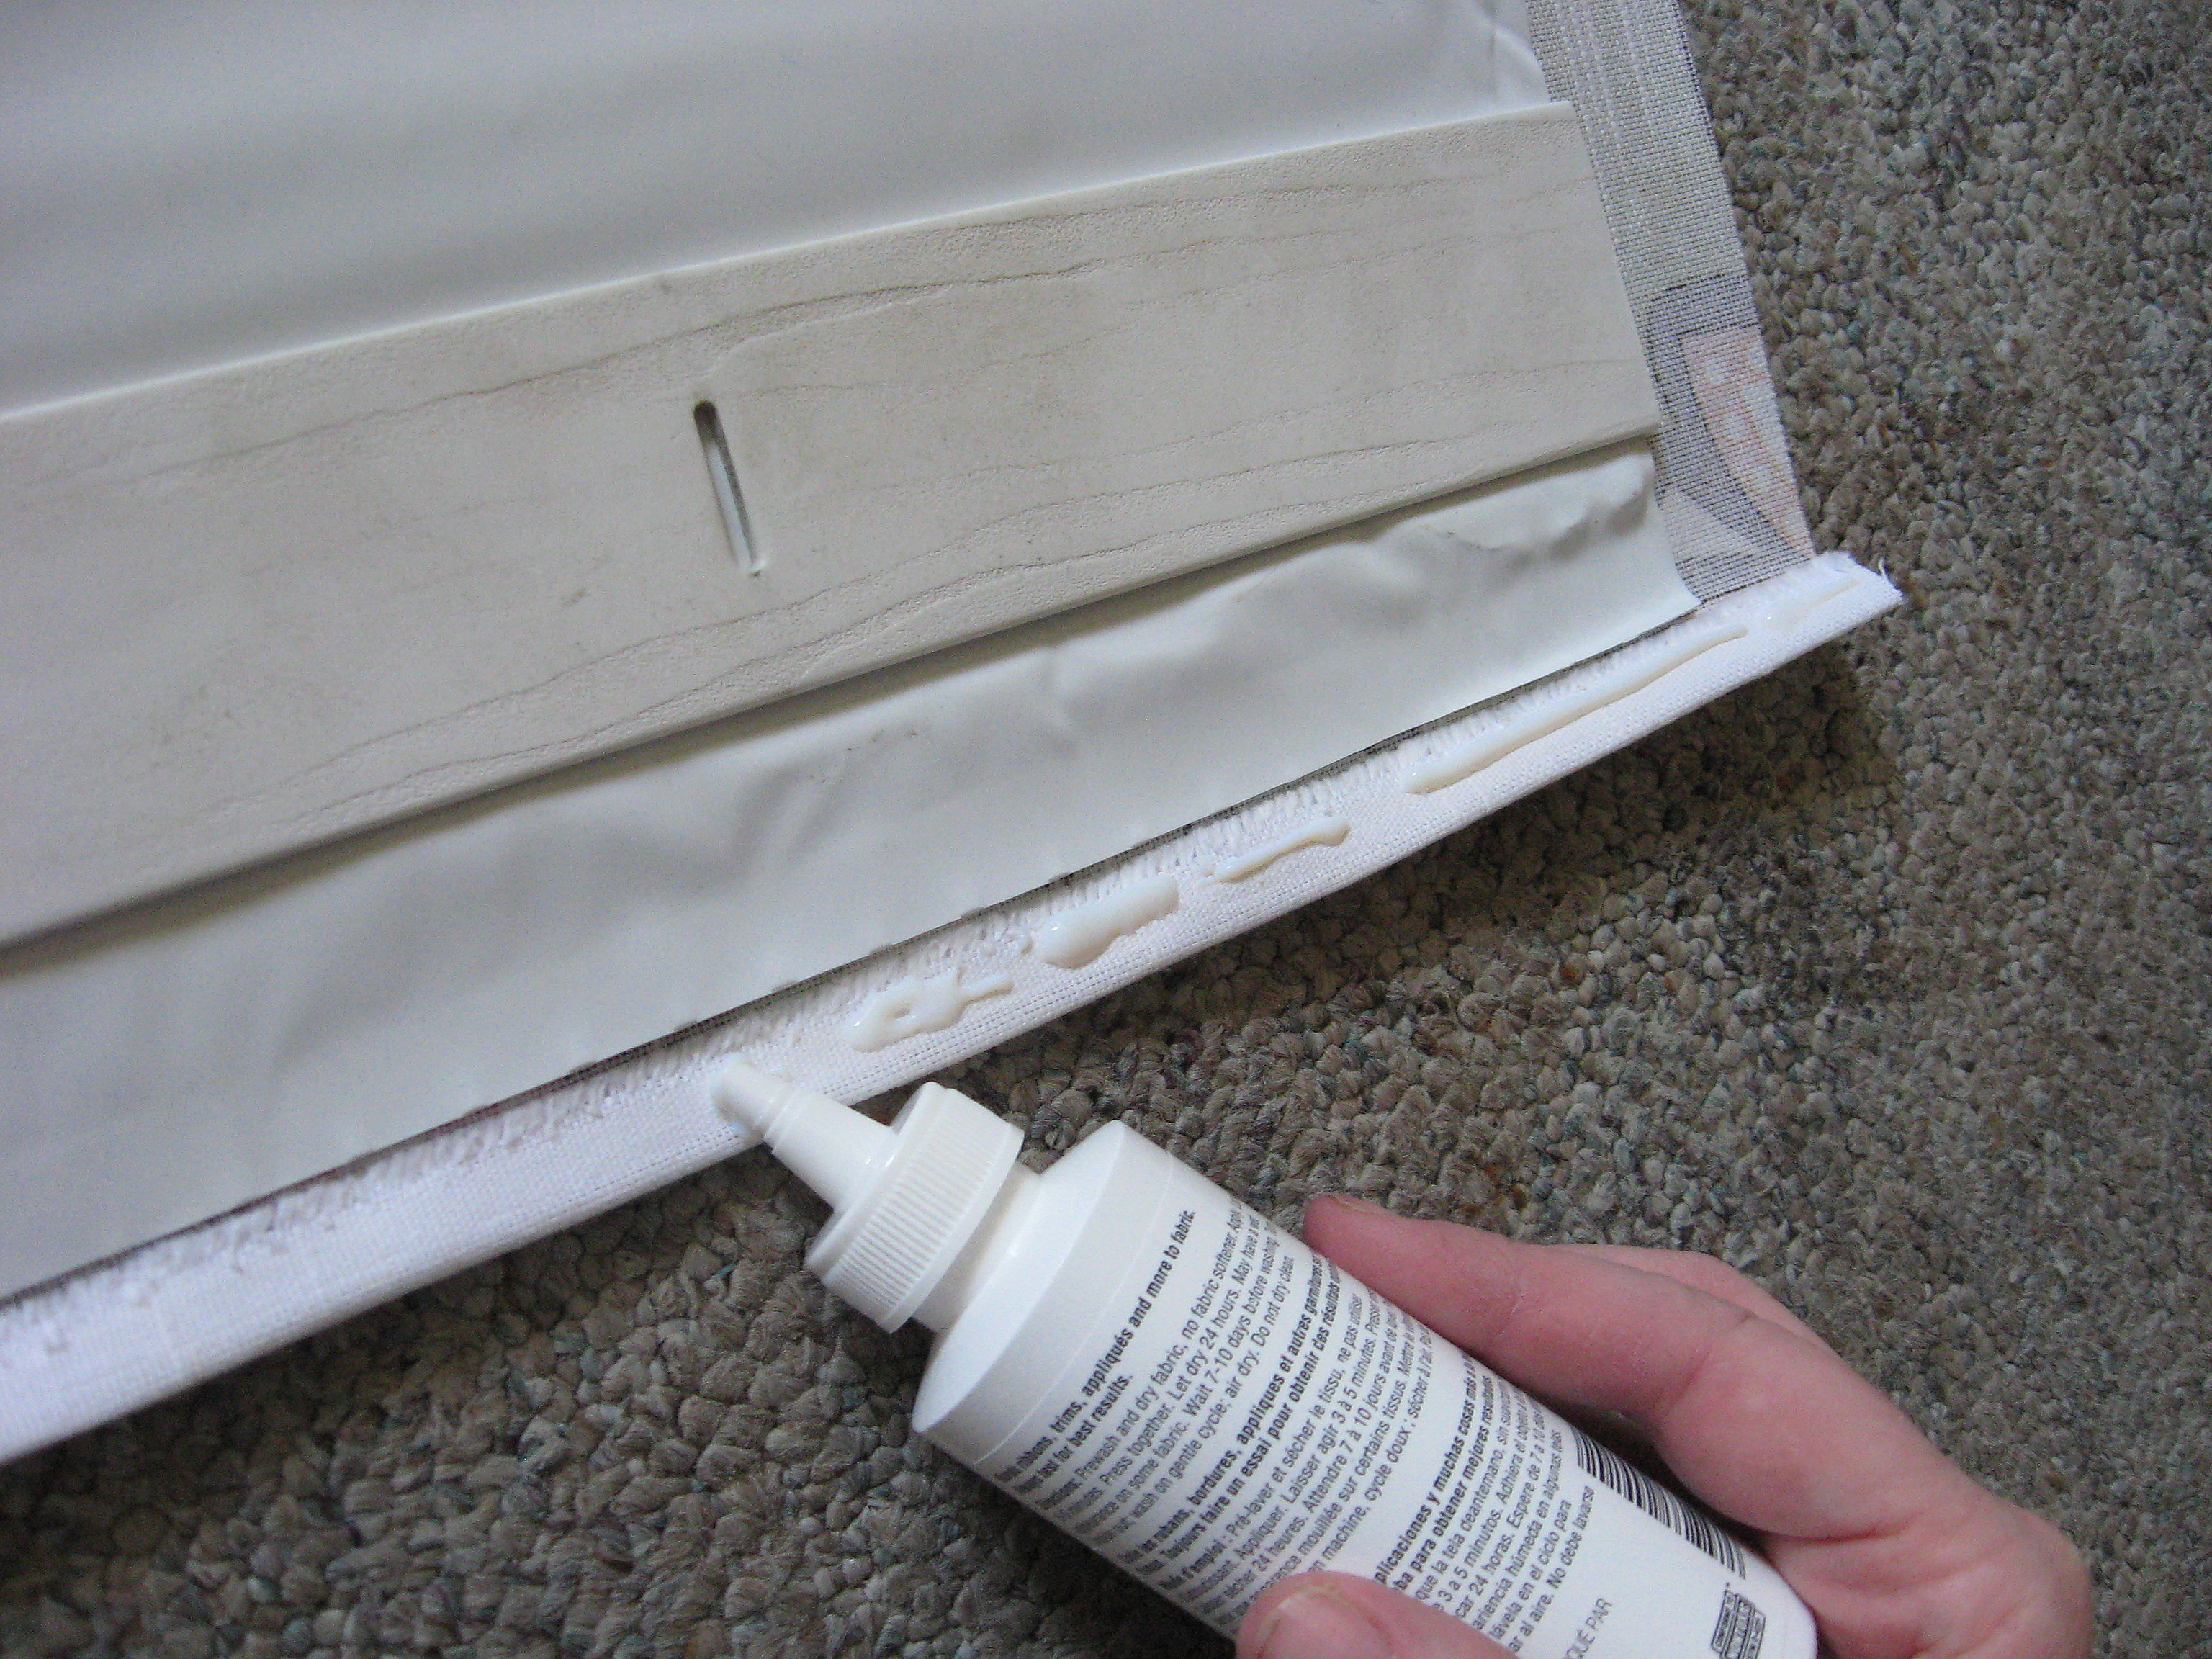
Glue it down on all four sides and weight it down while it dries (I used the slats from the blinds).

Once that’s dry, you will glue the top of the blinds to the top of the fabric. Stop the glue a couple of inches from the ends so that you can hang it back in the brackets when you’re done.
Line it up carefully, weight it down and let it dry. Make sure you don’t get glue on any of the strings.
Once that’s dry, you will start to reassemble the shade. First, you need to decide how many folds you want in the shade when it opens. It’s totally up to you; I just measured the length of my shade and came up with a number that made sense to me; mine are about 9 inches apart.
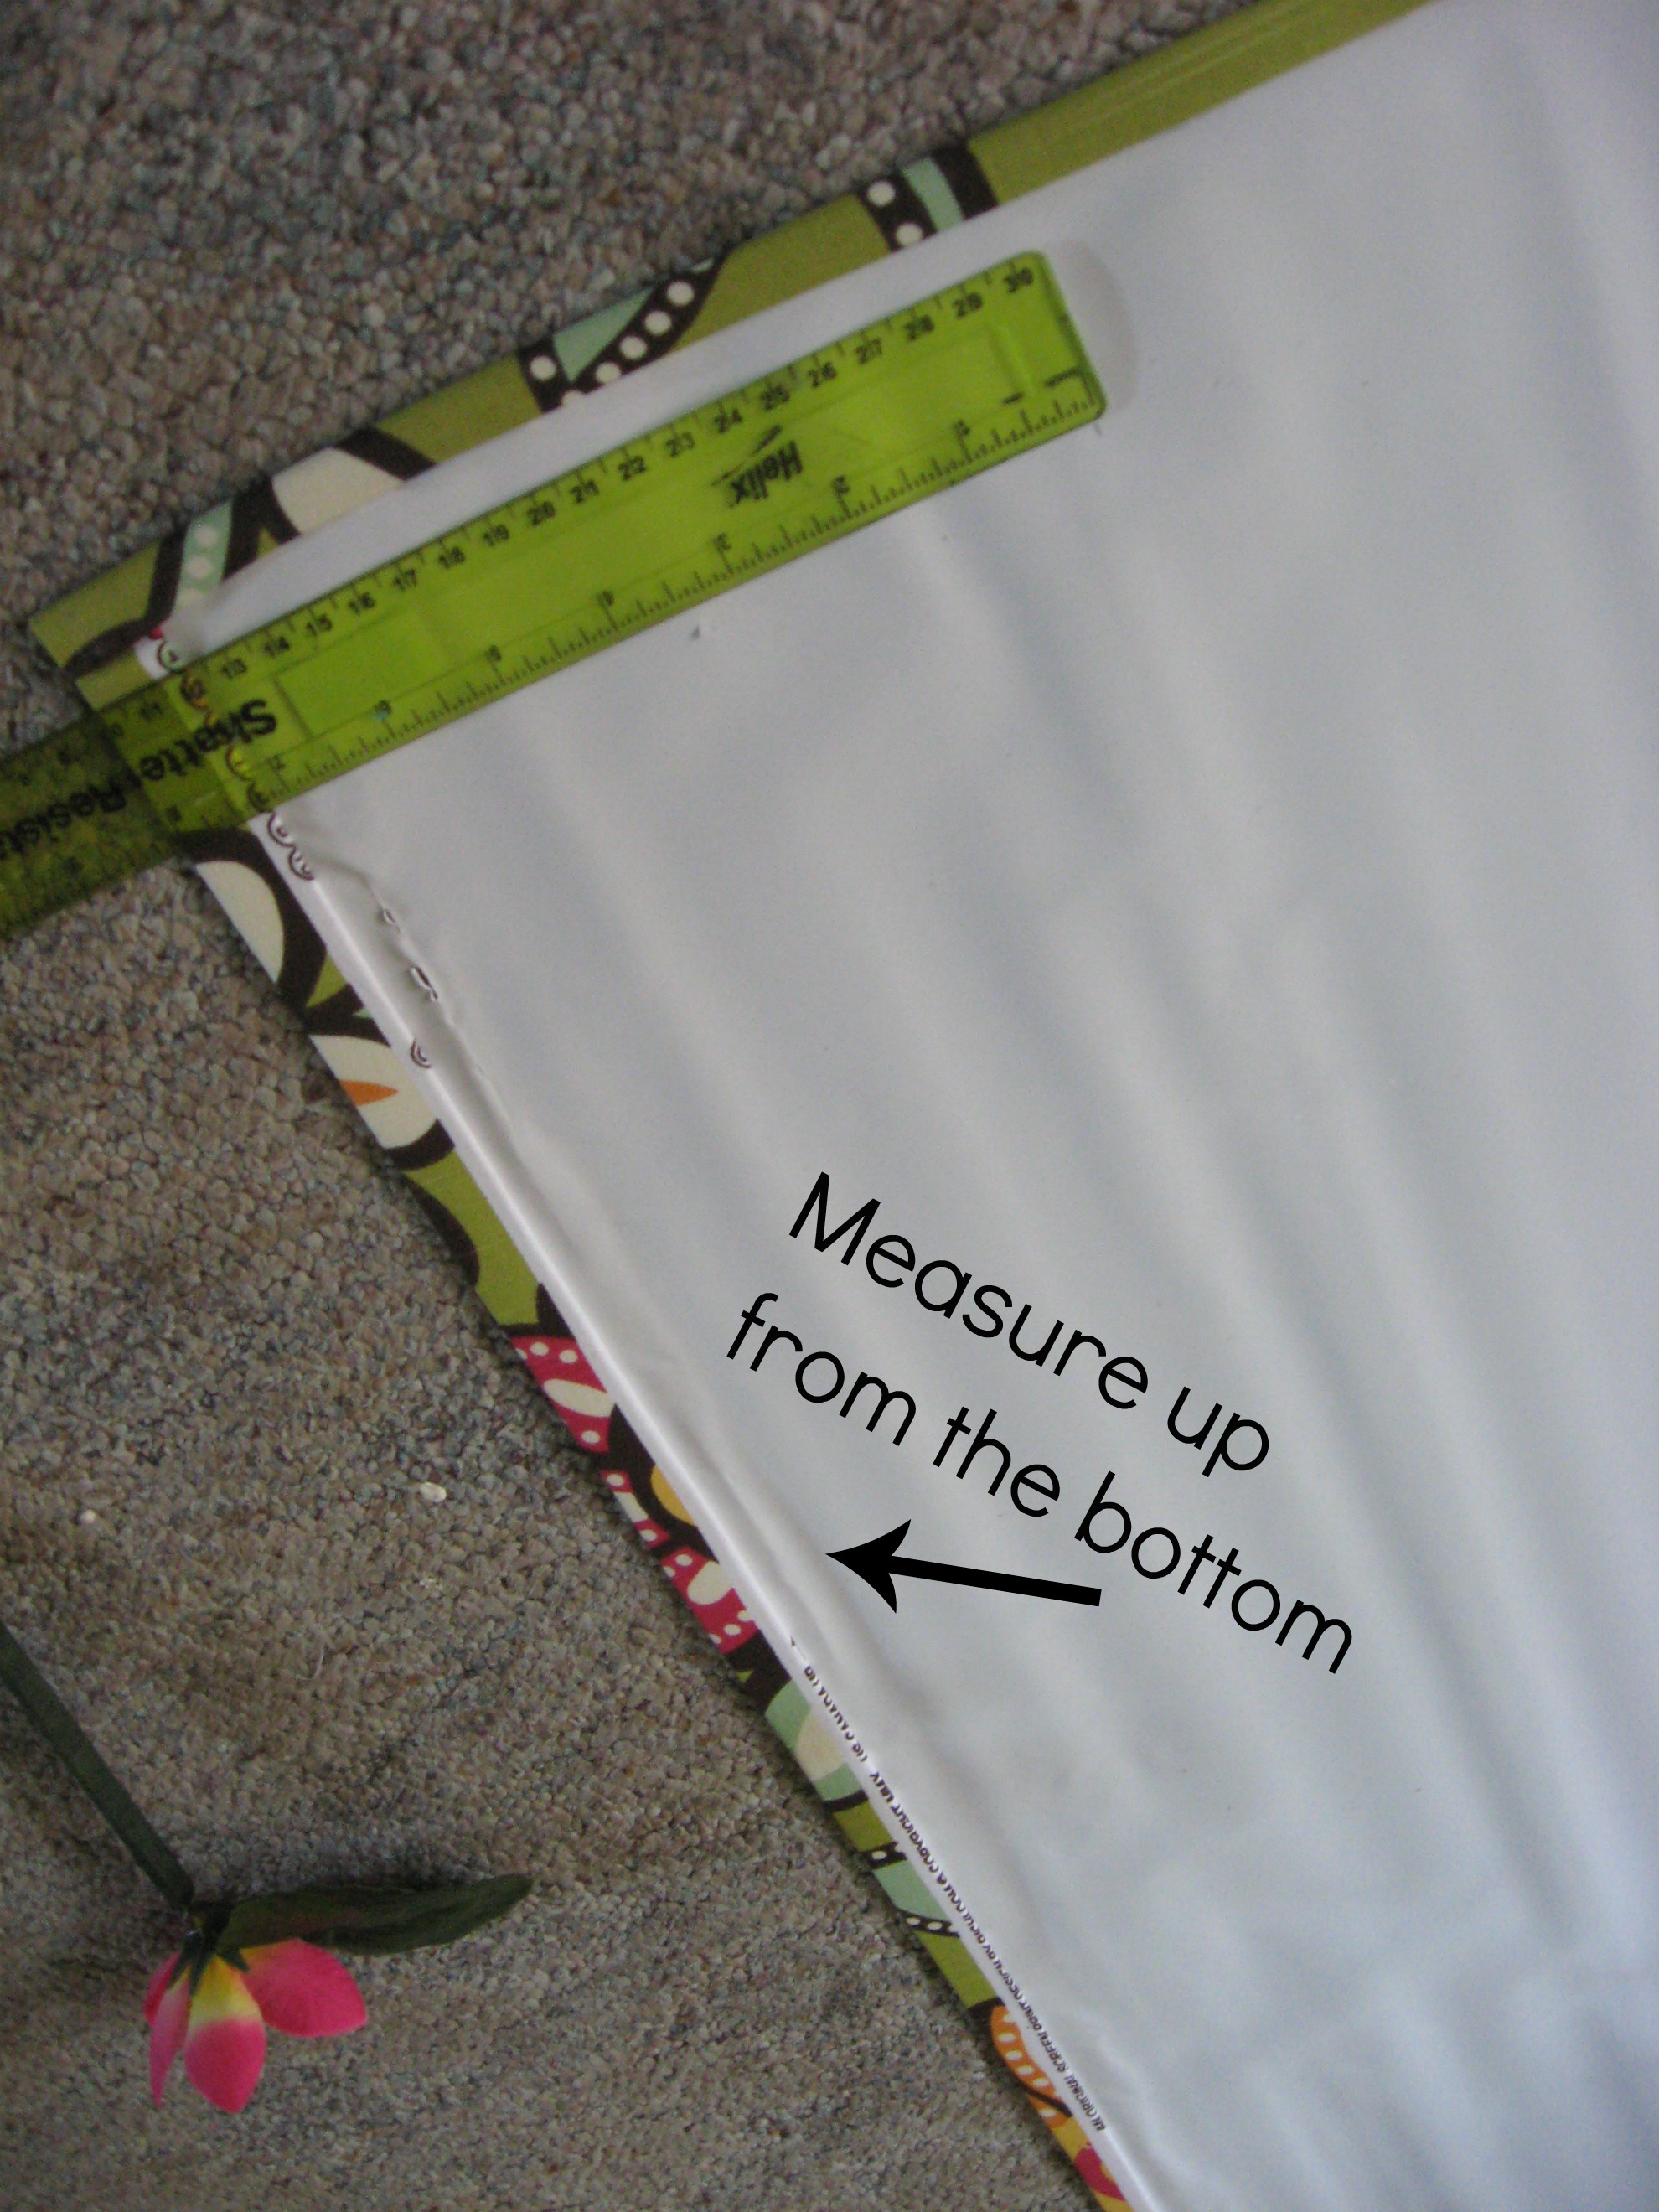
Start at the bottom of the shade and measure up, making a mark on each side of the shade.
However many folds you want (however many marks you made) – that’s how many slats you will use. Slide them back onto the strings.

Put glue on the back of the slat – being careful to avoid the strings – and line it up with the marks you made.
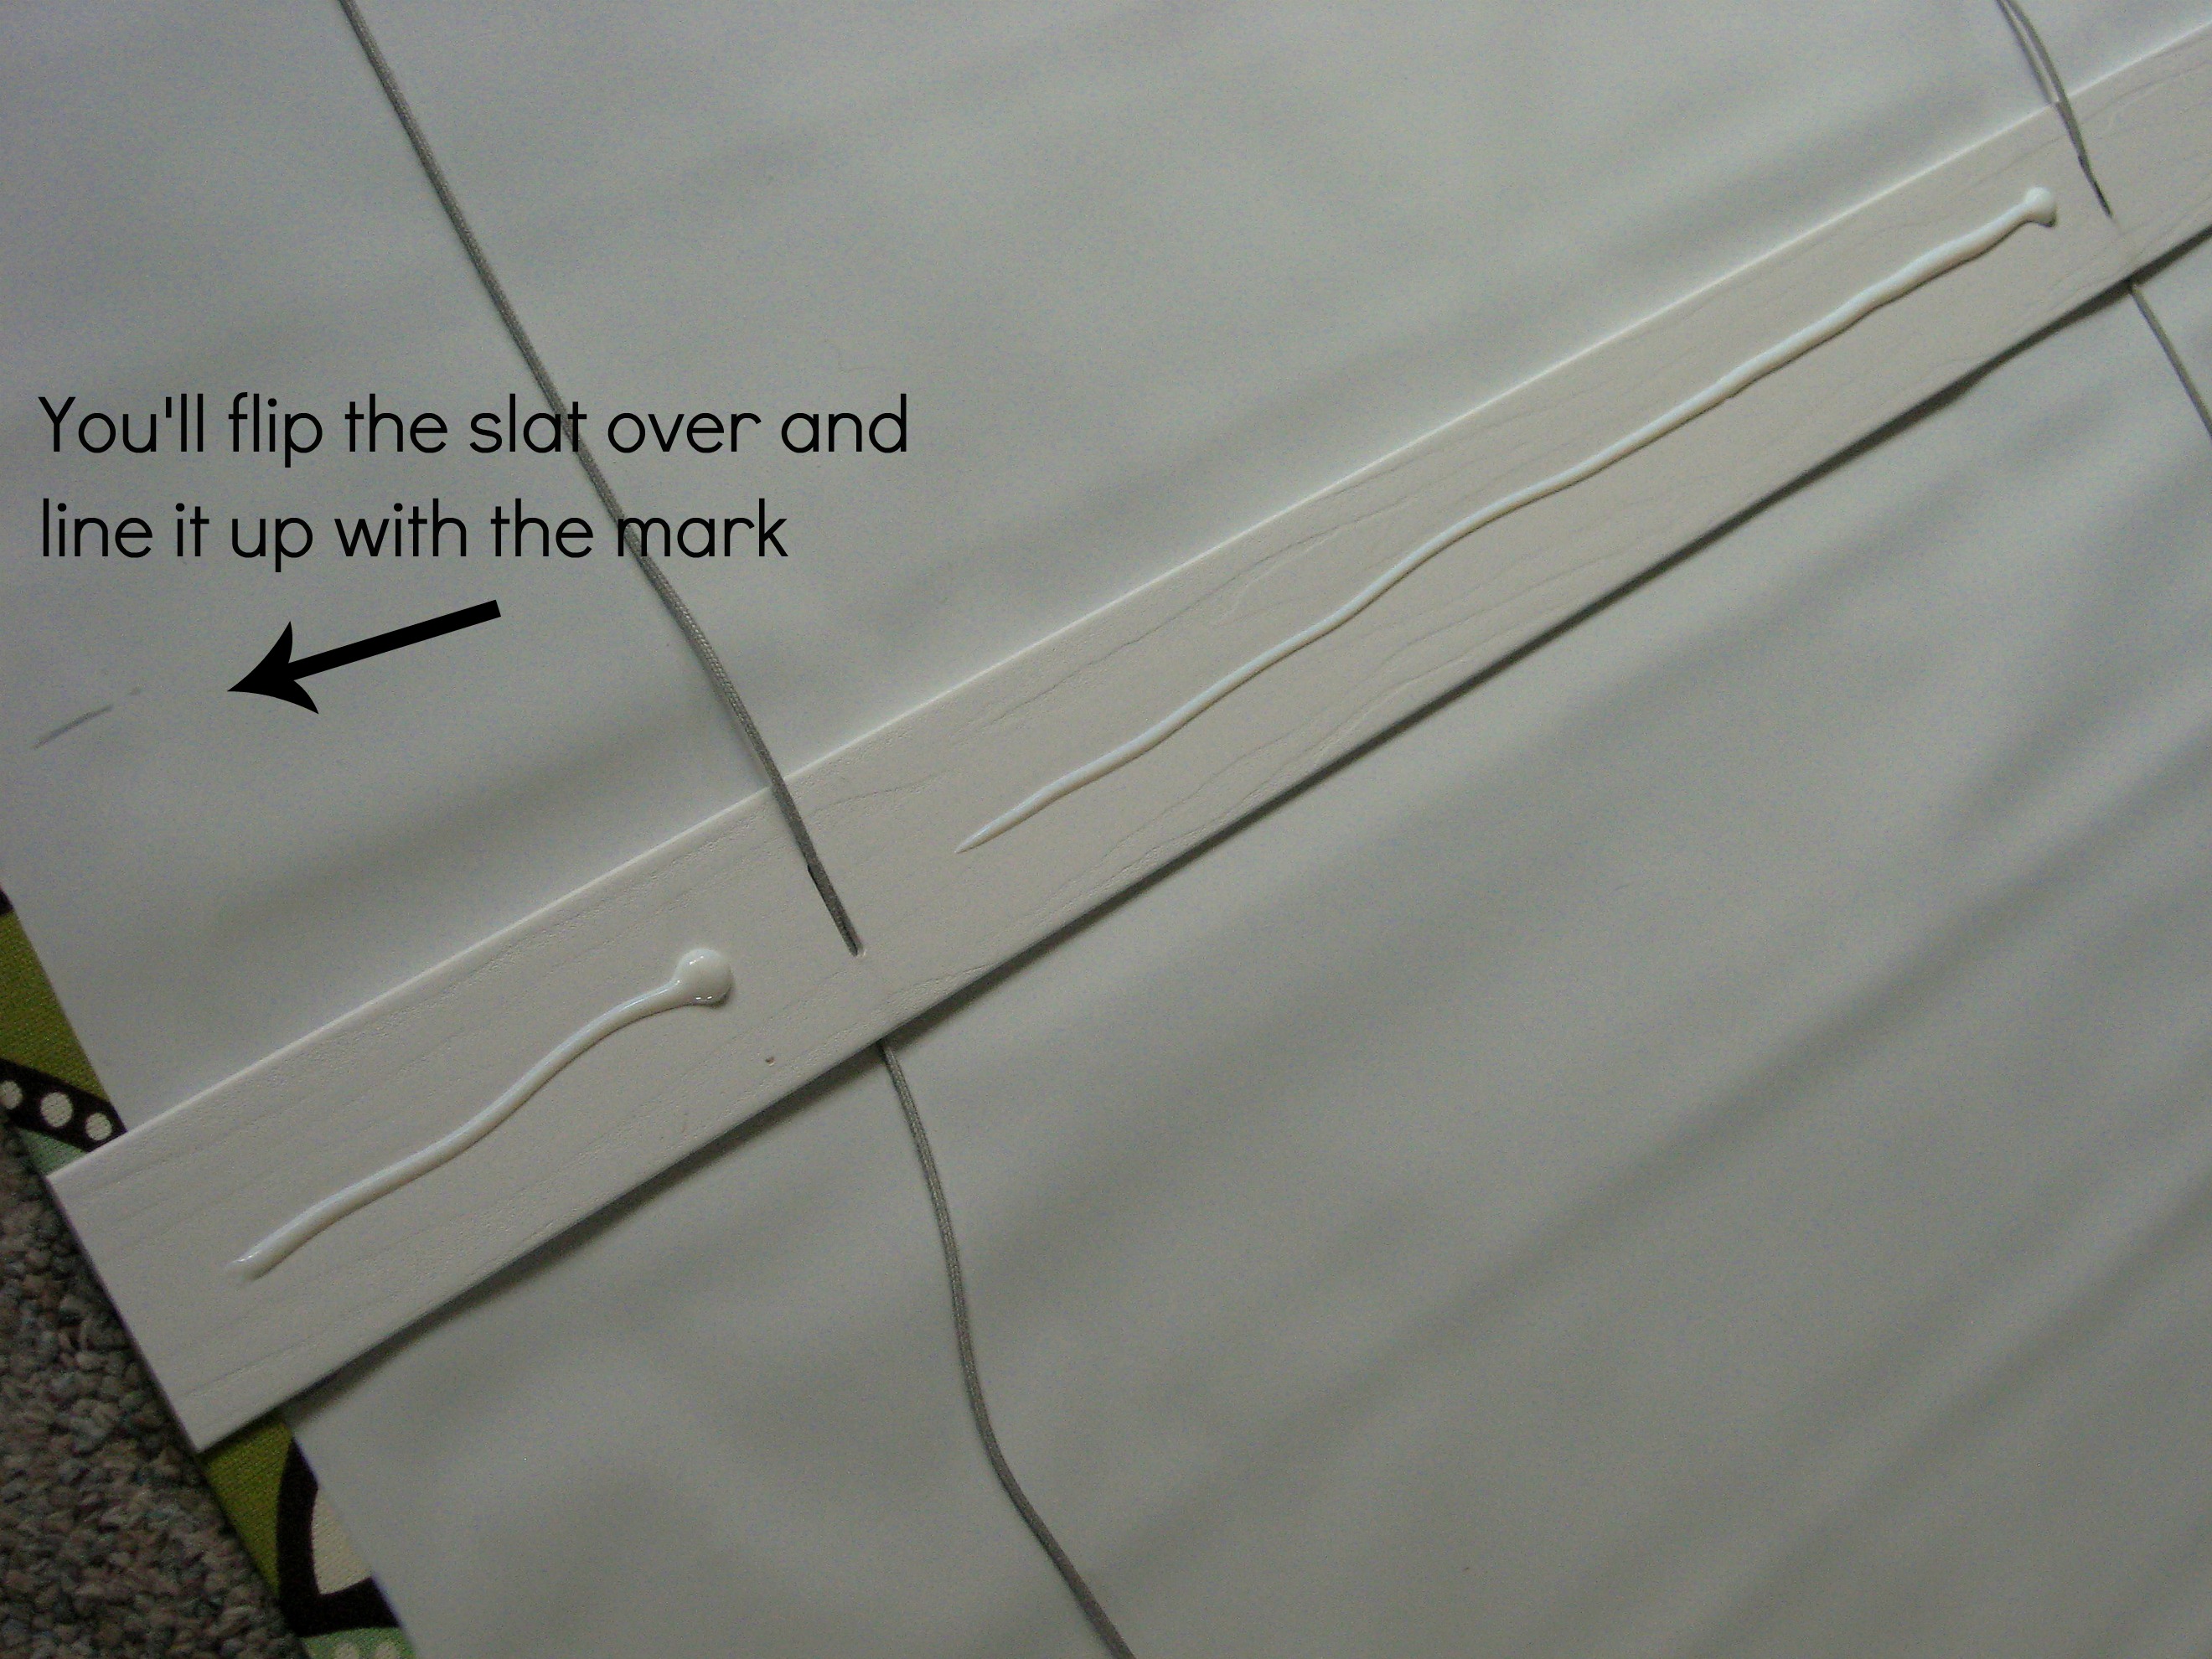
Repeat for all of the marks, weight them down and let them dry.
Now restring the bottom board back on, glue it to the bottom of the shade, and weight it down while it dries.

When everything is dry, retie the strings at the bottom and replace the little plastic plugs.
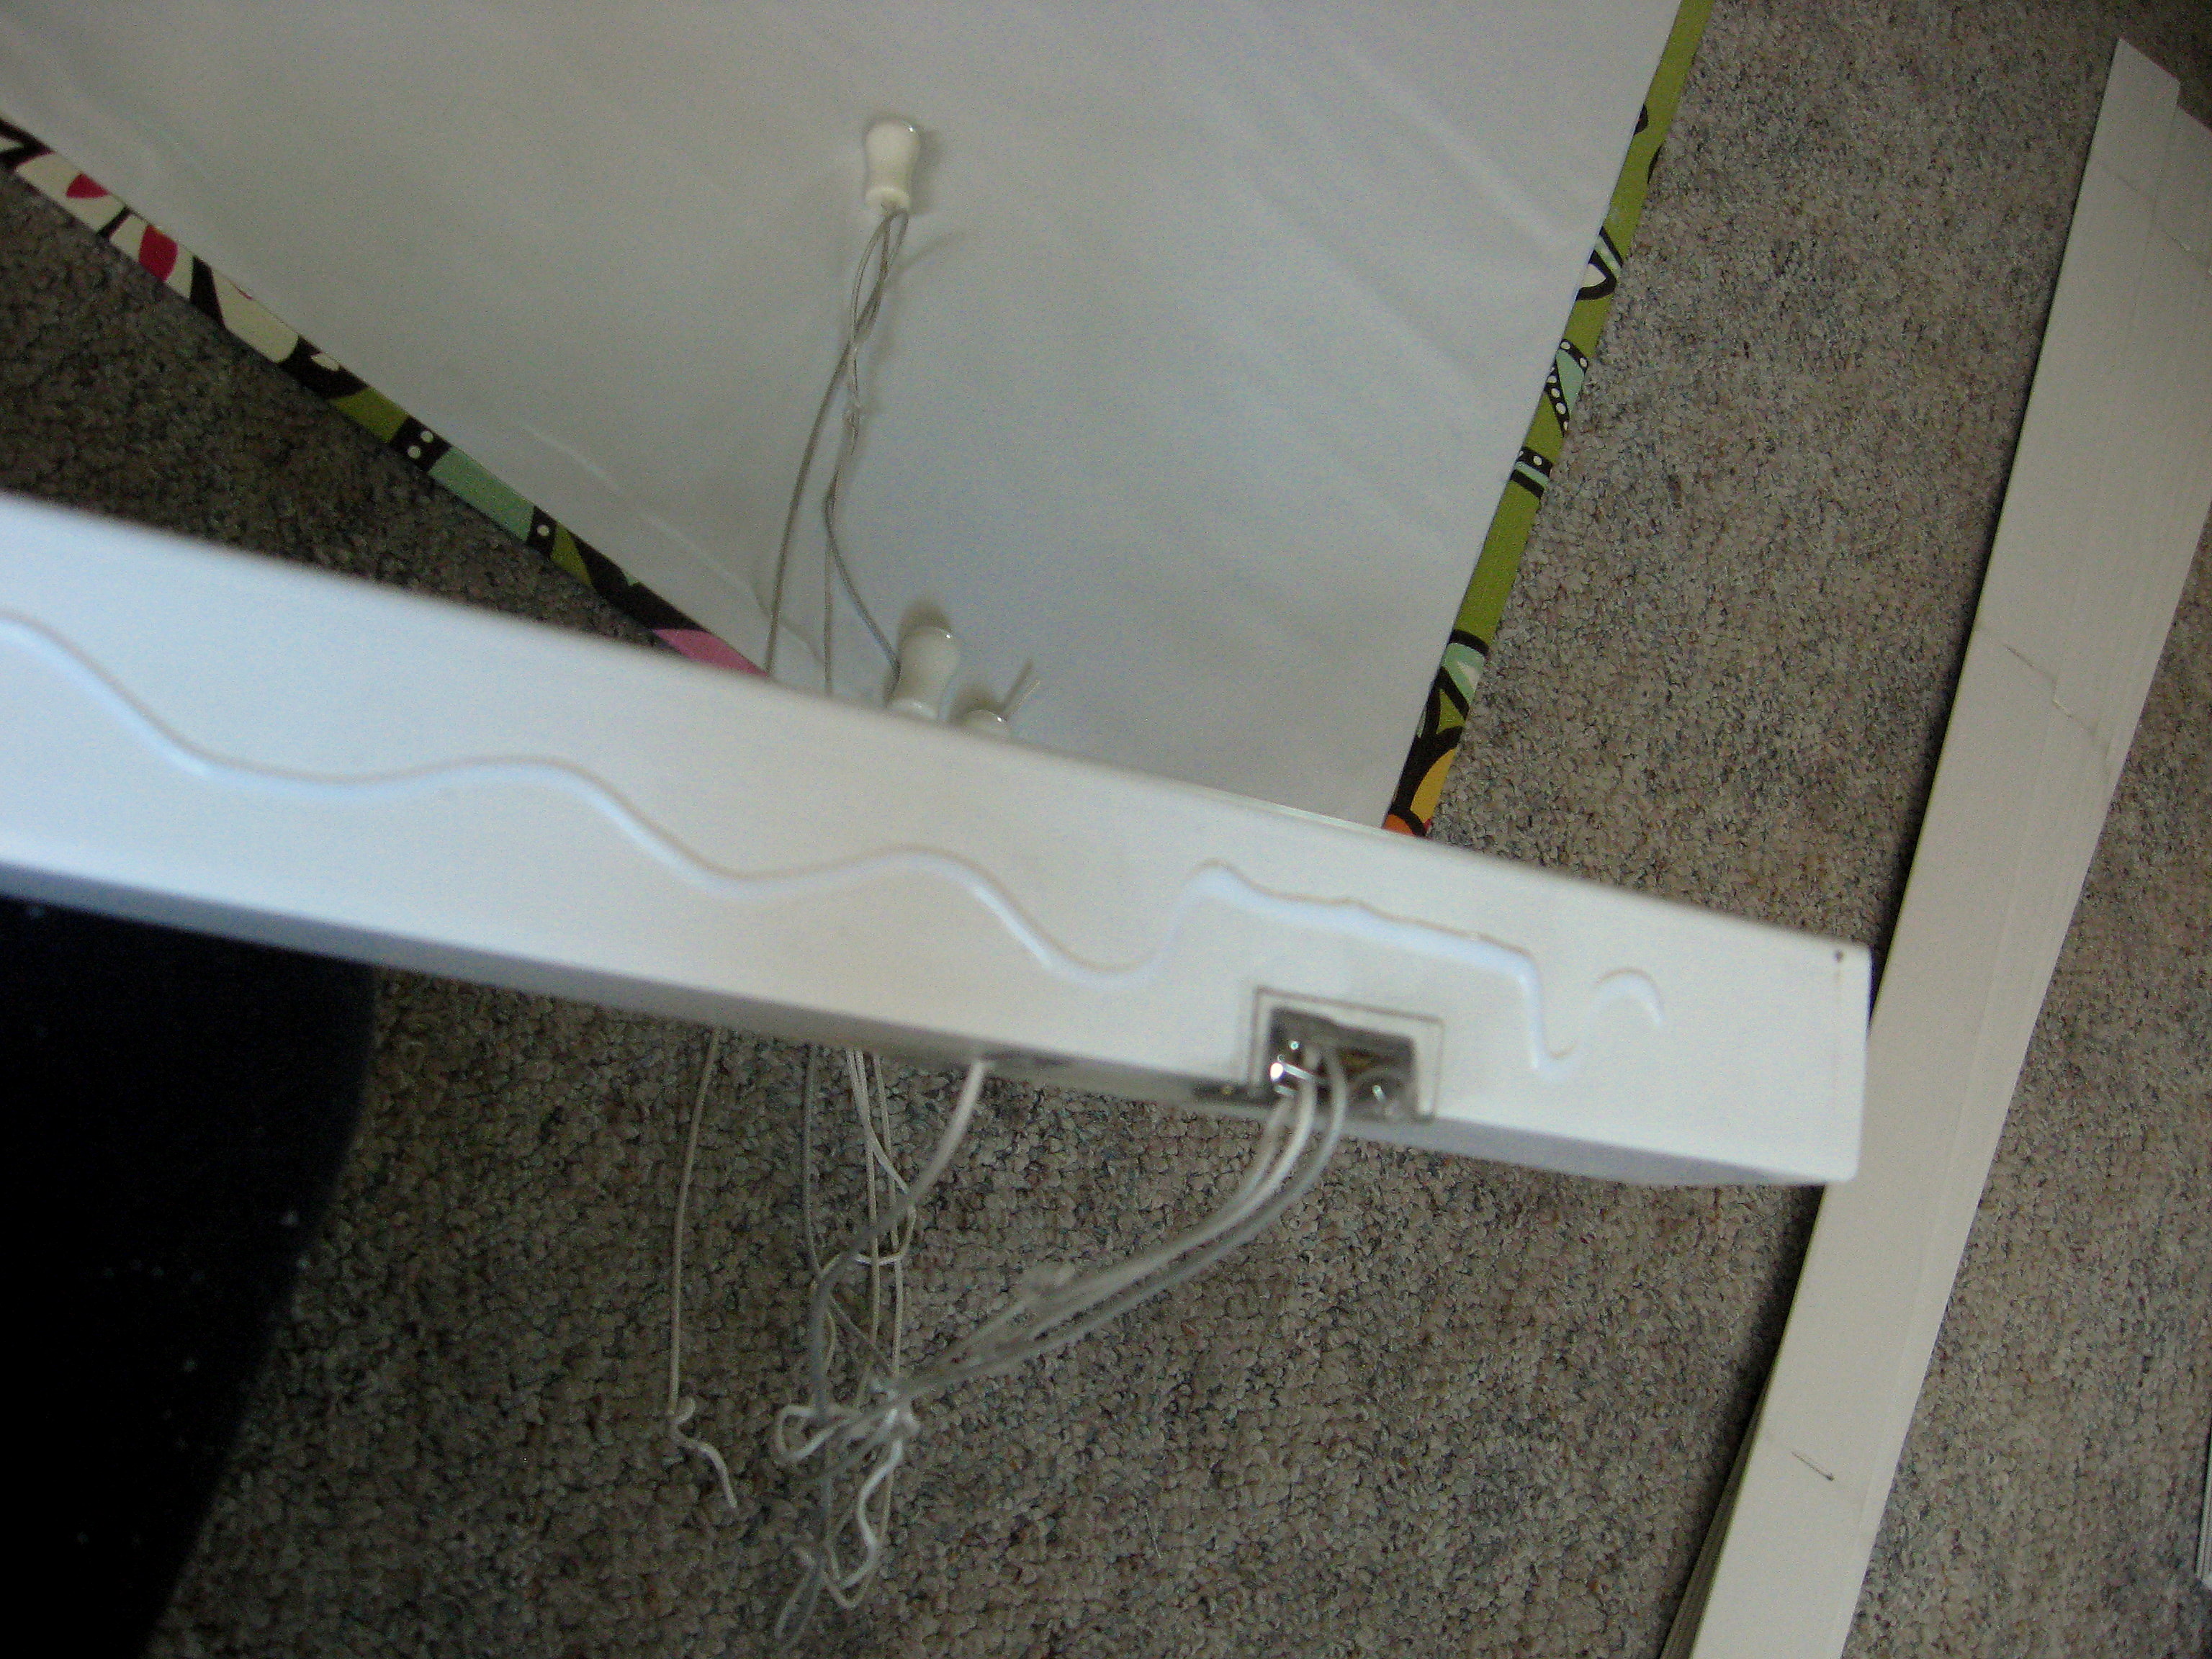
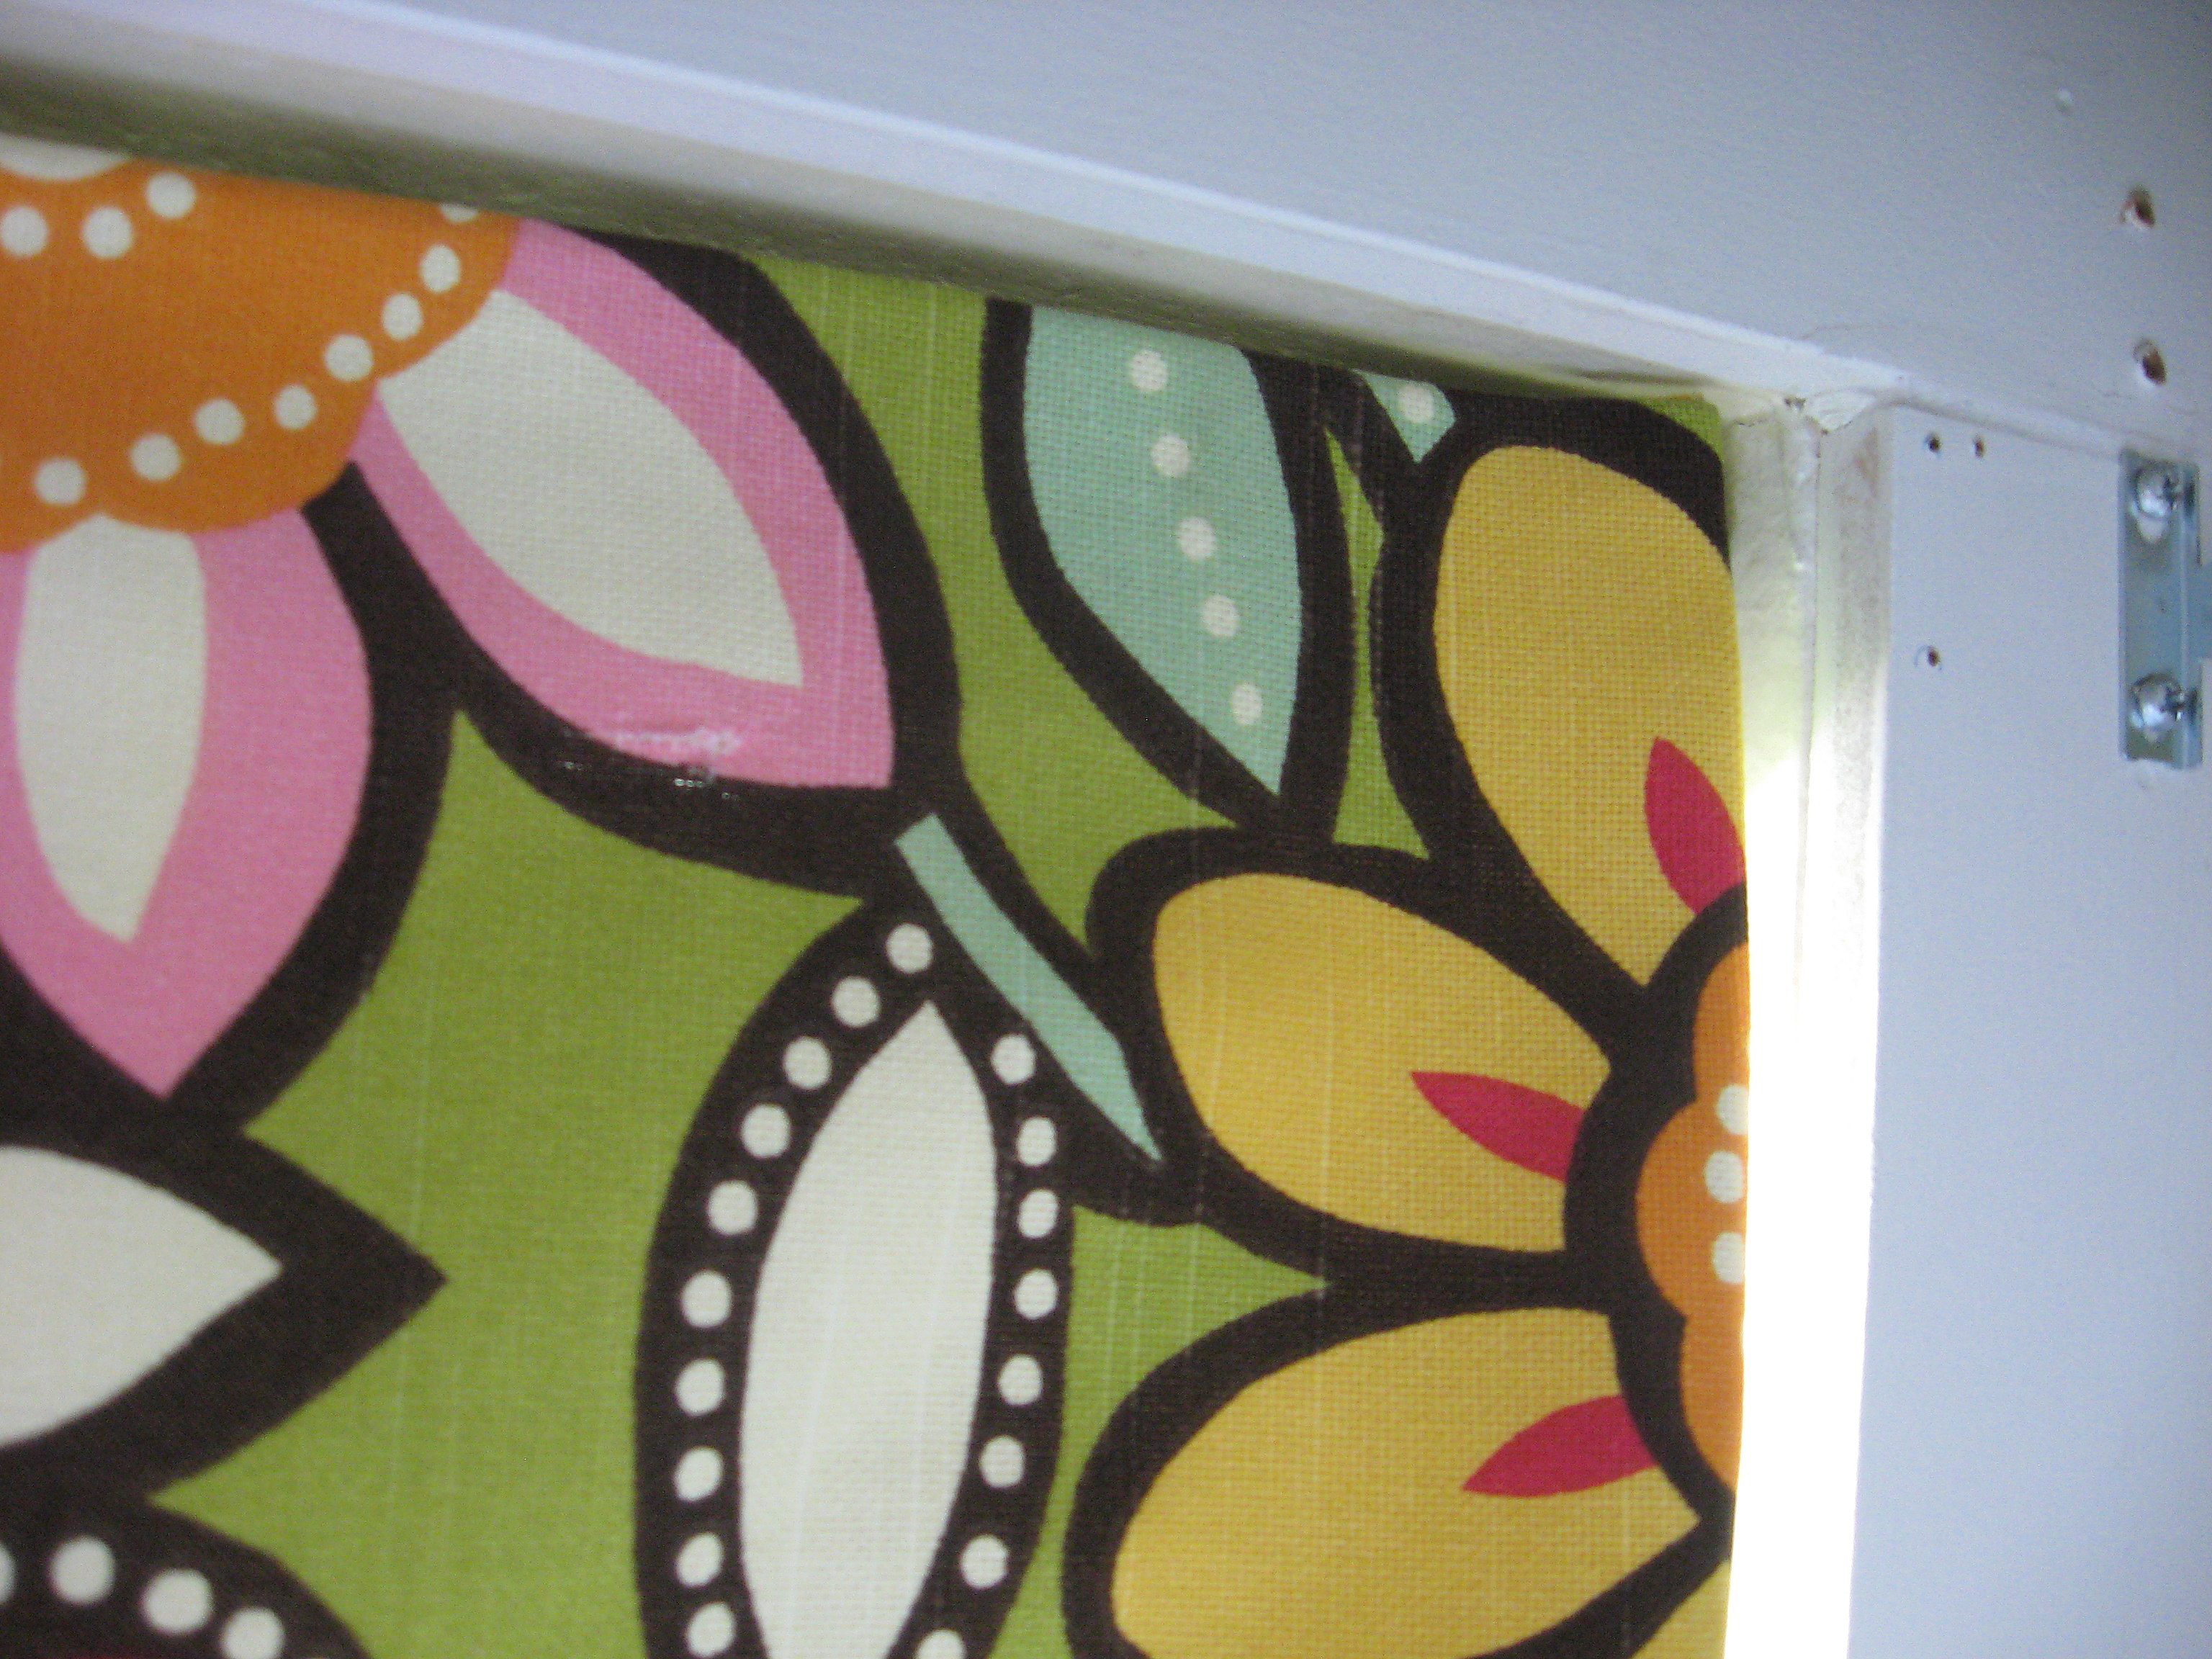
Now rehang the blinds in the brackets. You can see here how I left the fabric loose at the ends, so that I could lock the blinds back in the bracket properly.

But it lies nice and flat:
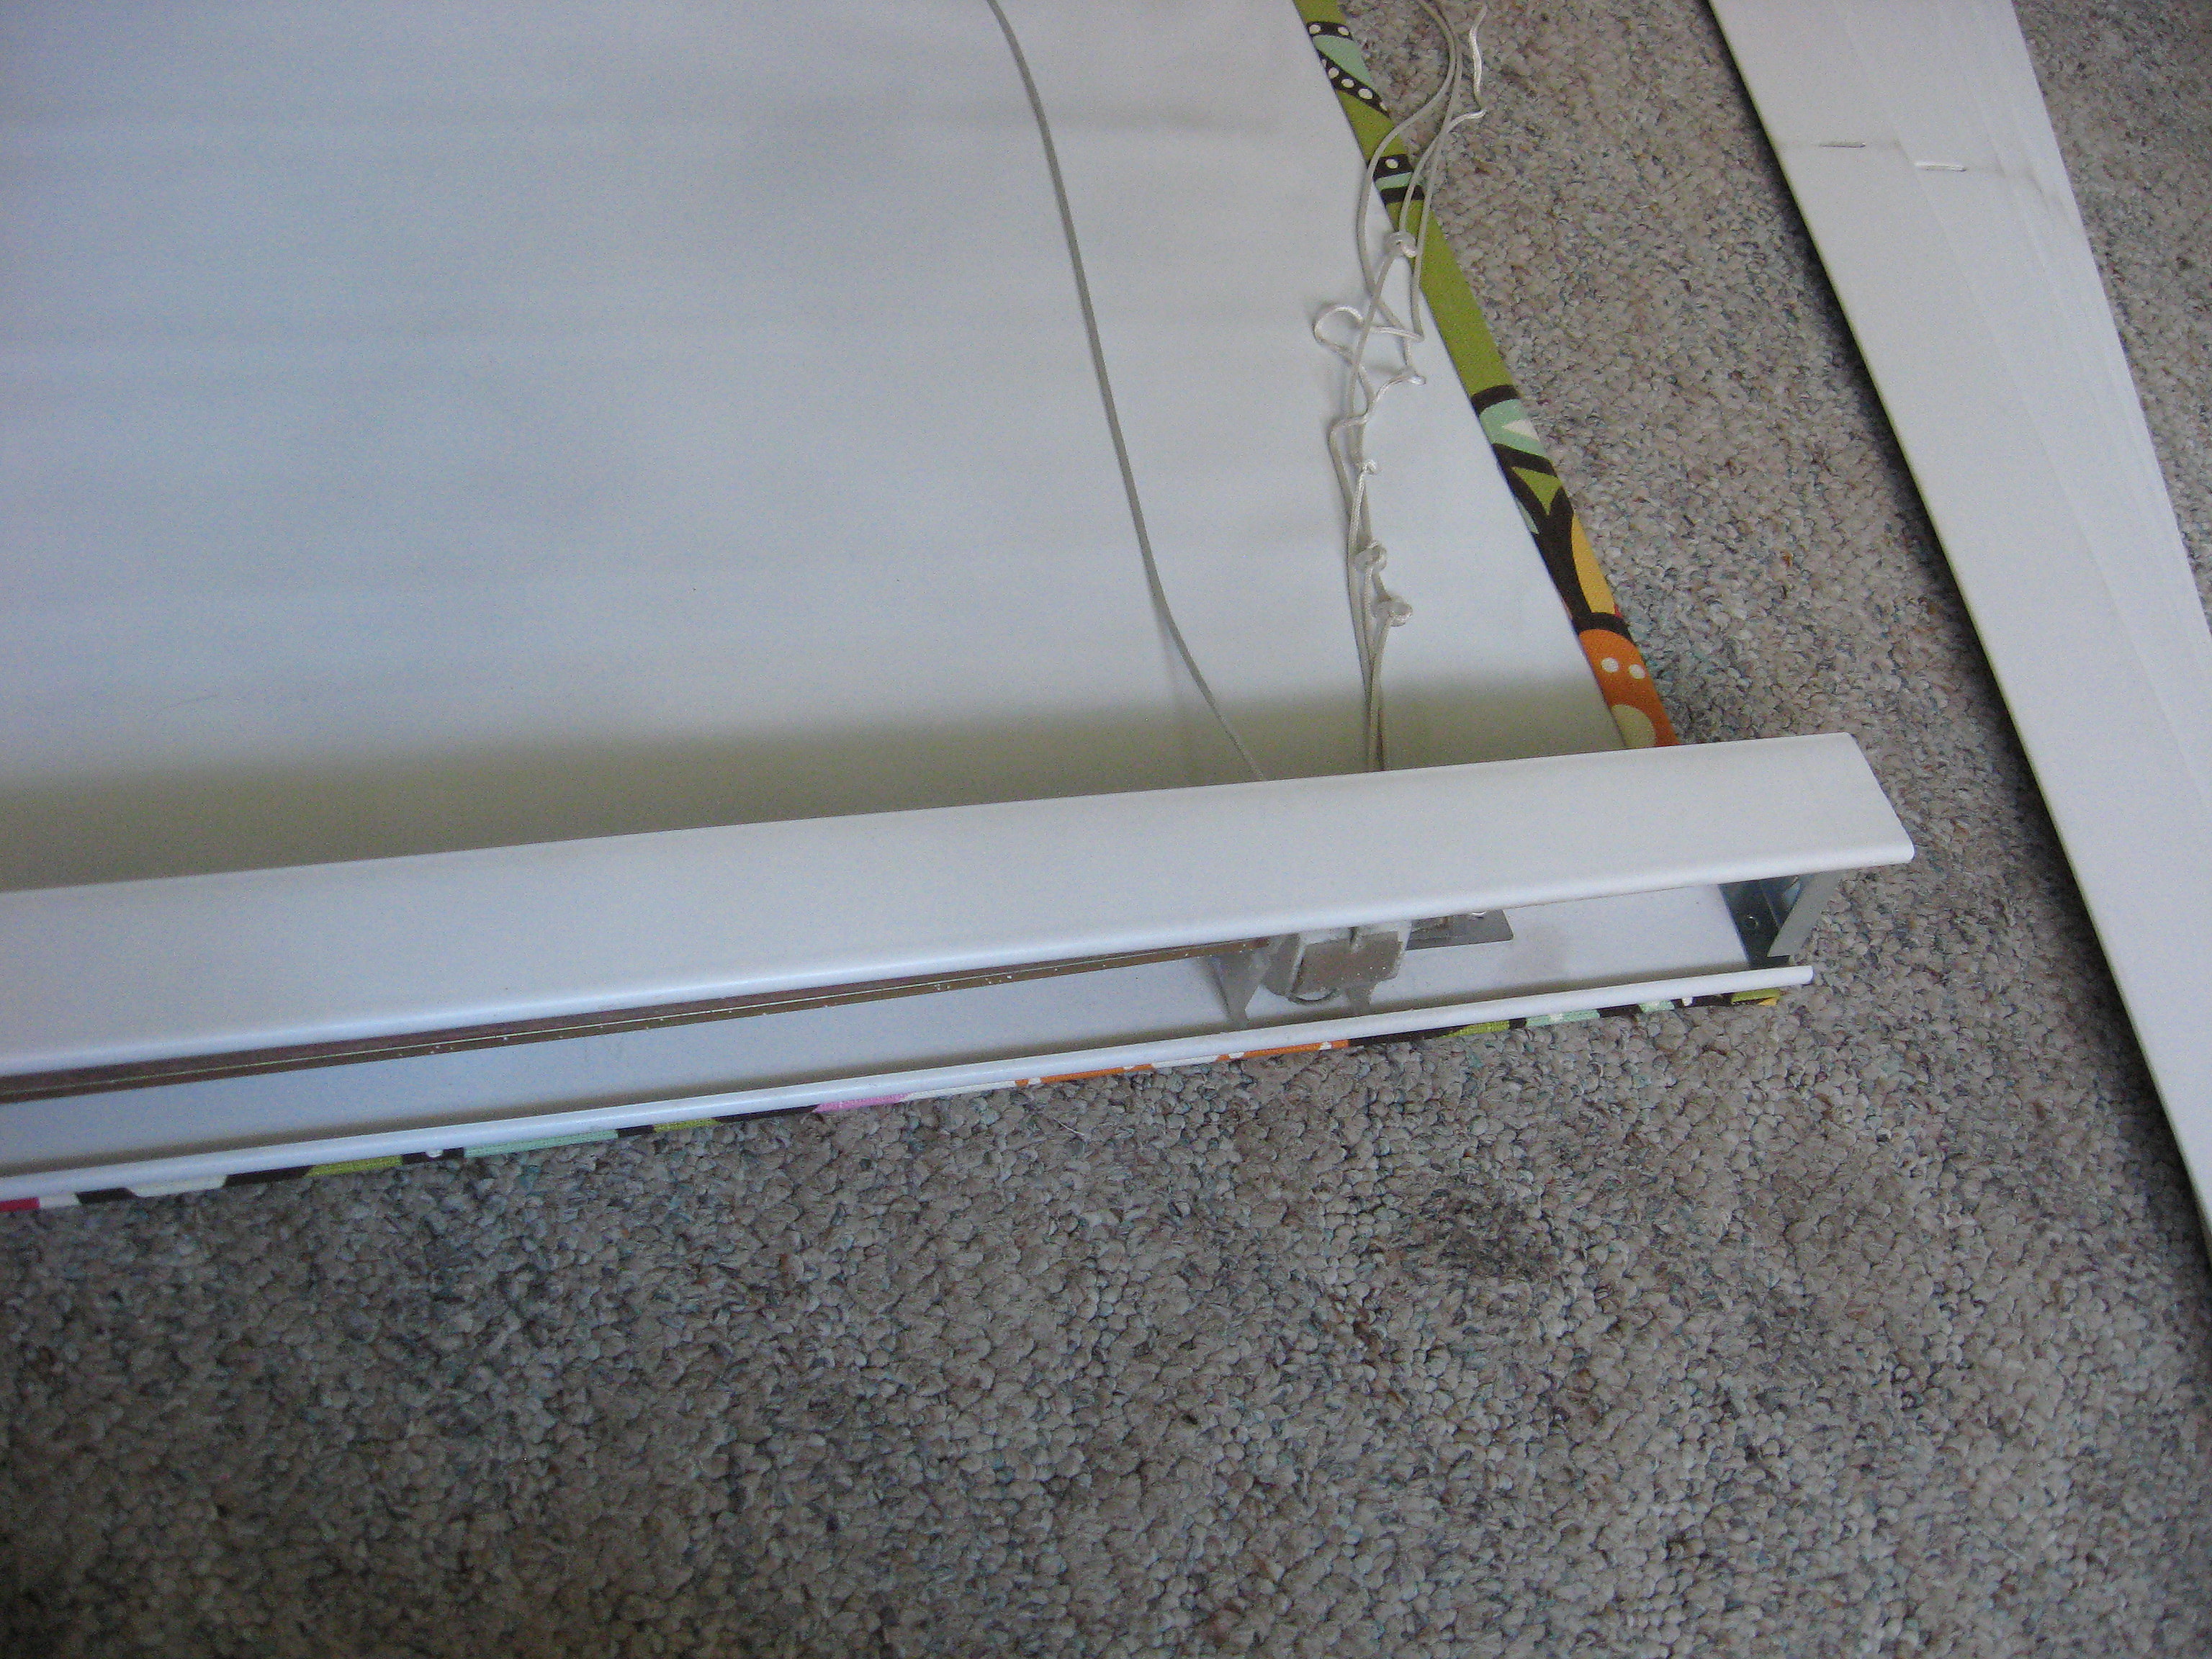
At this point the strings are behind the blind. I’ve seen people deal with this a couple of ways; I’ve seen a few people glue the fabric to the BACK of the top bar on the blinds, but I don’t like the way that looks. Most people seem to leave it behind – you can open and close the shade, but I think it’s inconvenient, and since this is in my little girl’s room I needed her to be able to do it on her own.
I opted to cut a slit in the shade right where the pull strings come out of the top bar. I threaded the pull strings through the slit to the front of the shade. Put a little fabric glue on the fabric around the slit so that it doesn’t fray or tear.
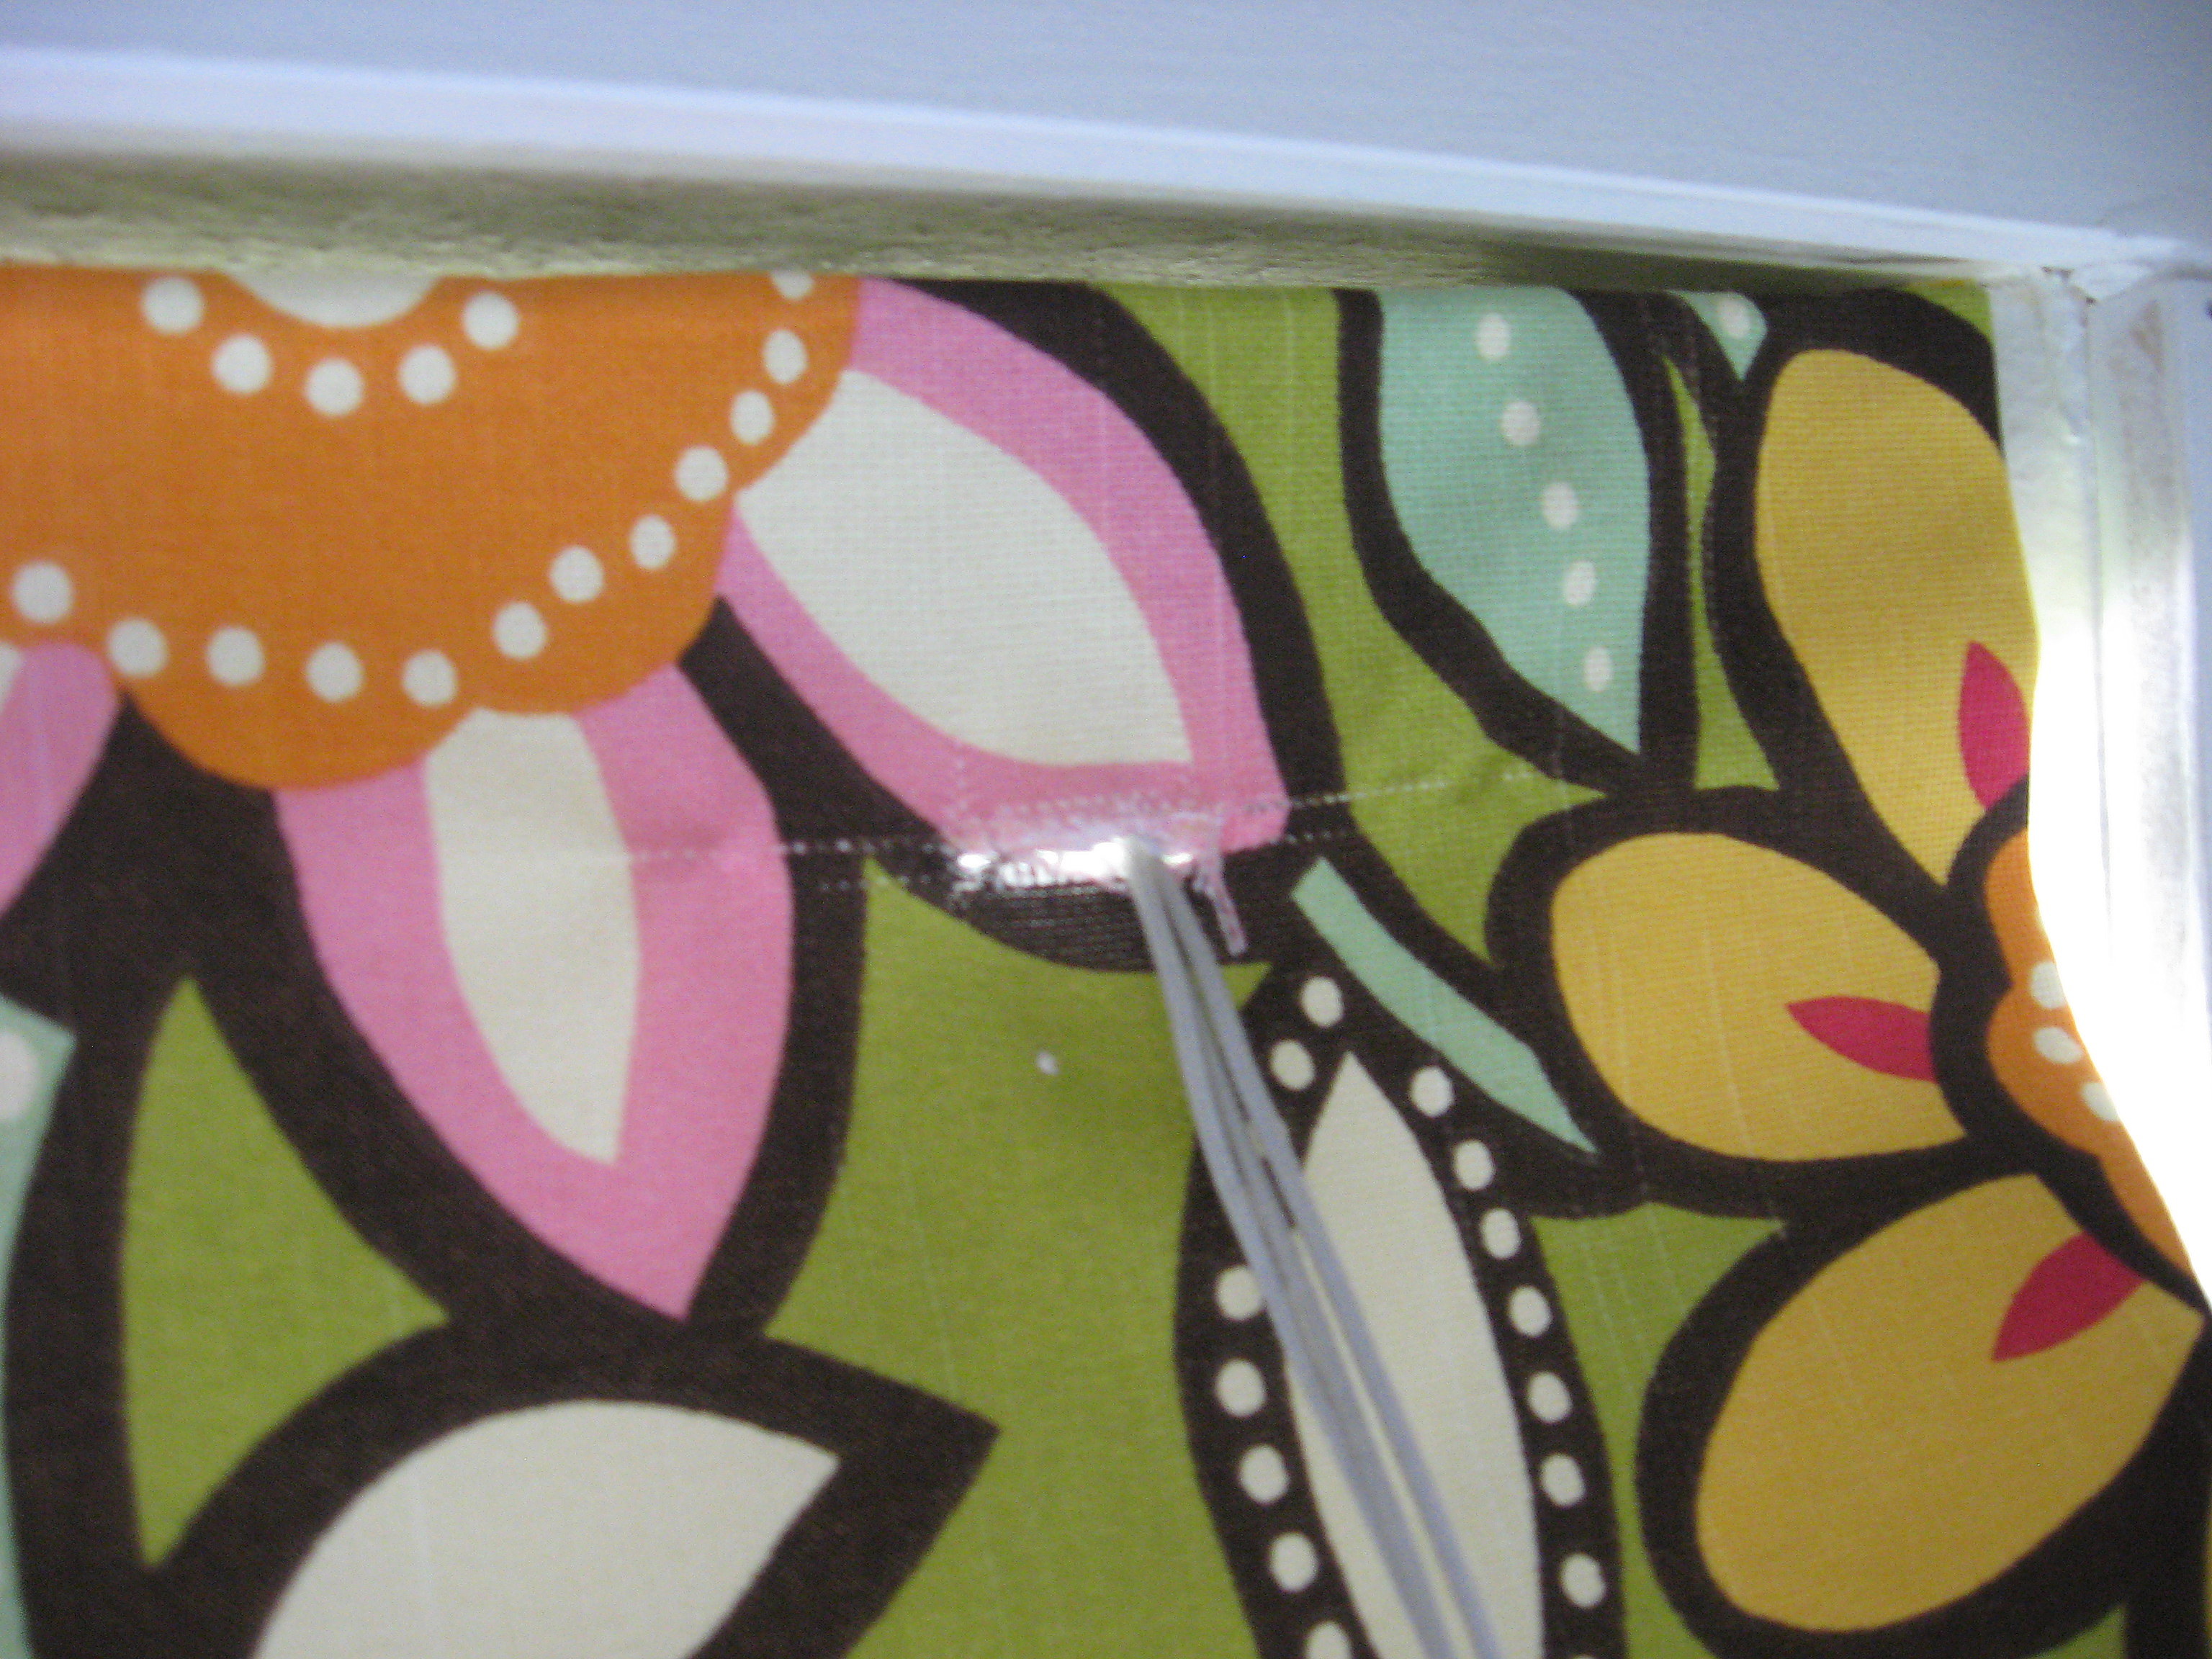
Here they are open:

And closed:
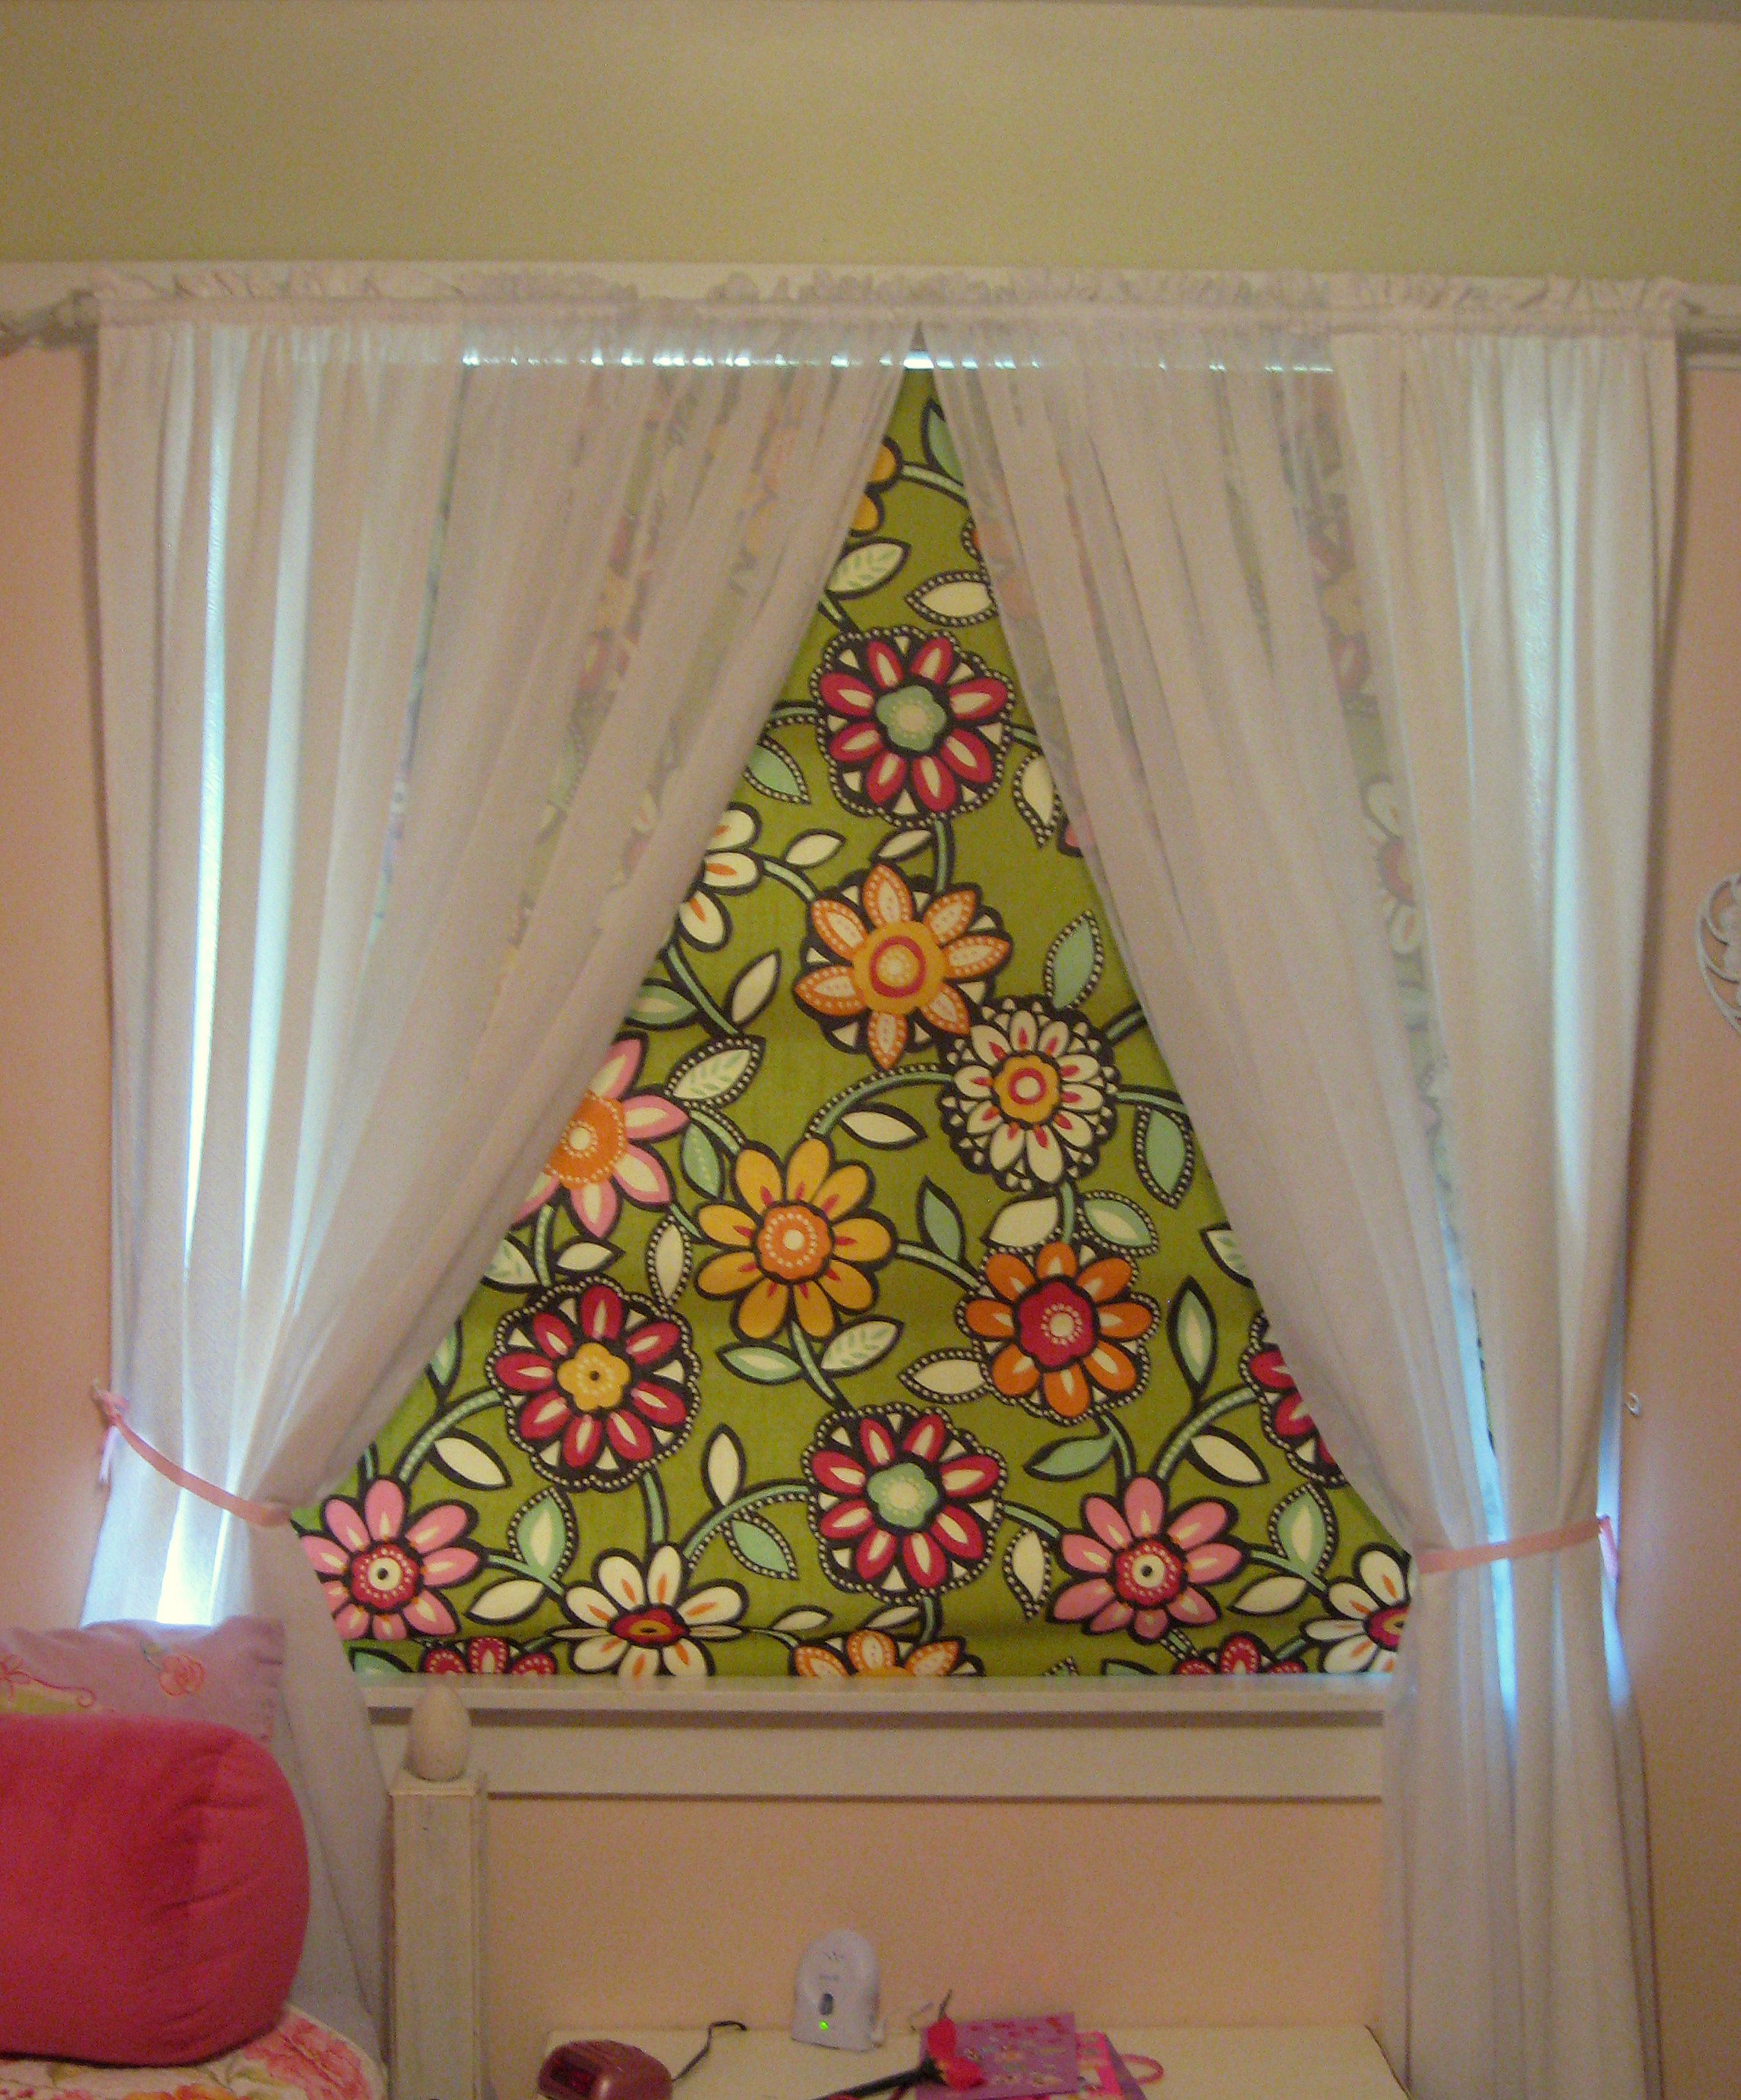
Much better!