
A PYP Best Blog! Making apple pear butter!
Just in case you missed this article on making apple pear butter the first time we shared it a couple of years ago, we are republishing it. After Marne wrote this blog originally, we got an awesome response. This is one of the PYP Best Blogs!
My family love apple butter, but this year I had extra pears and was tired of making pearsauce, so I made apple pear butter. I combined a few different methods and the result was fabulous! Best part about this recipe….NO PEELING OR CORING REQUIRED! Yes, it’s true! So easy. Let’s get started.
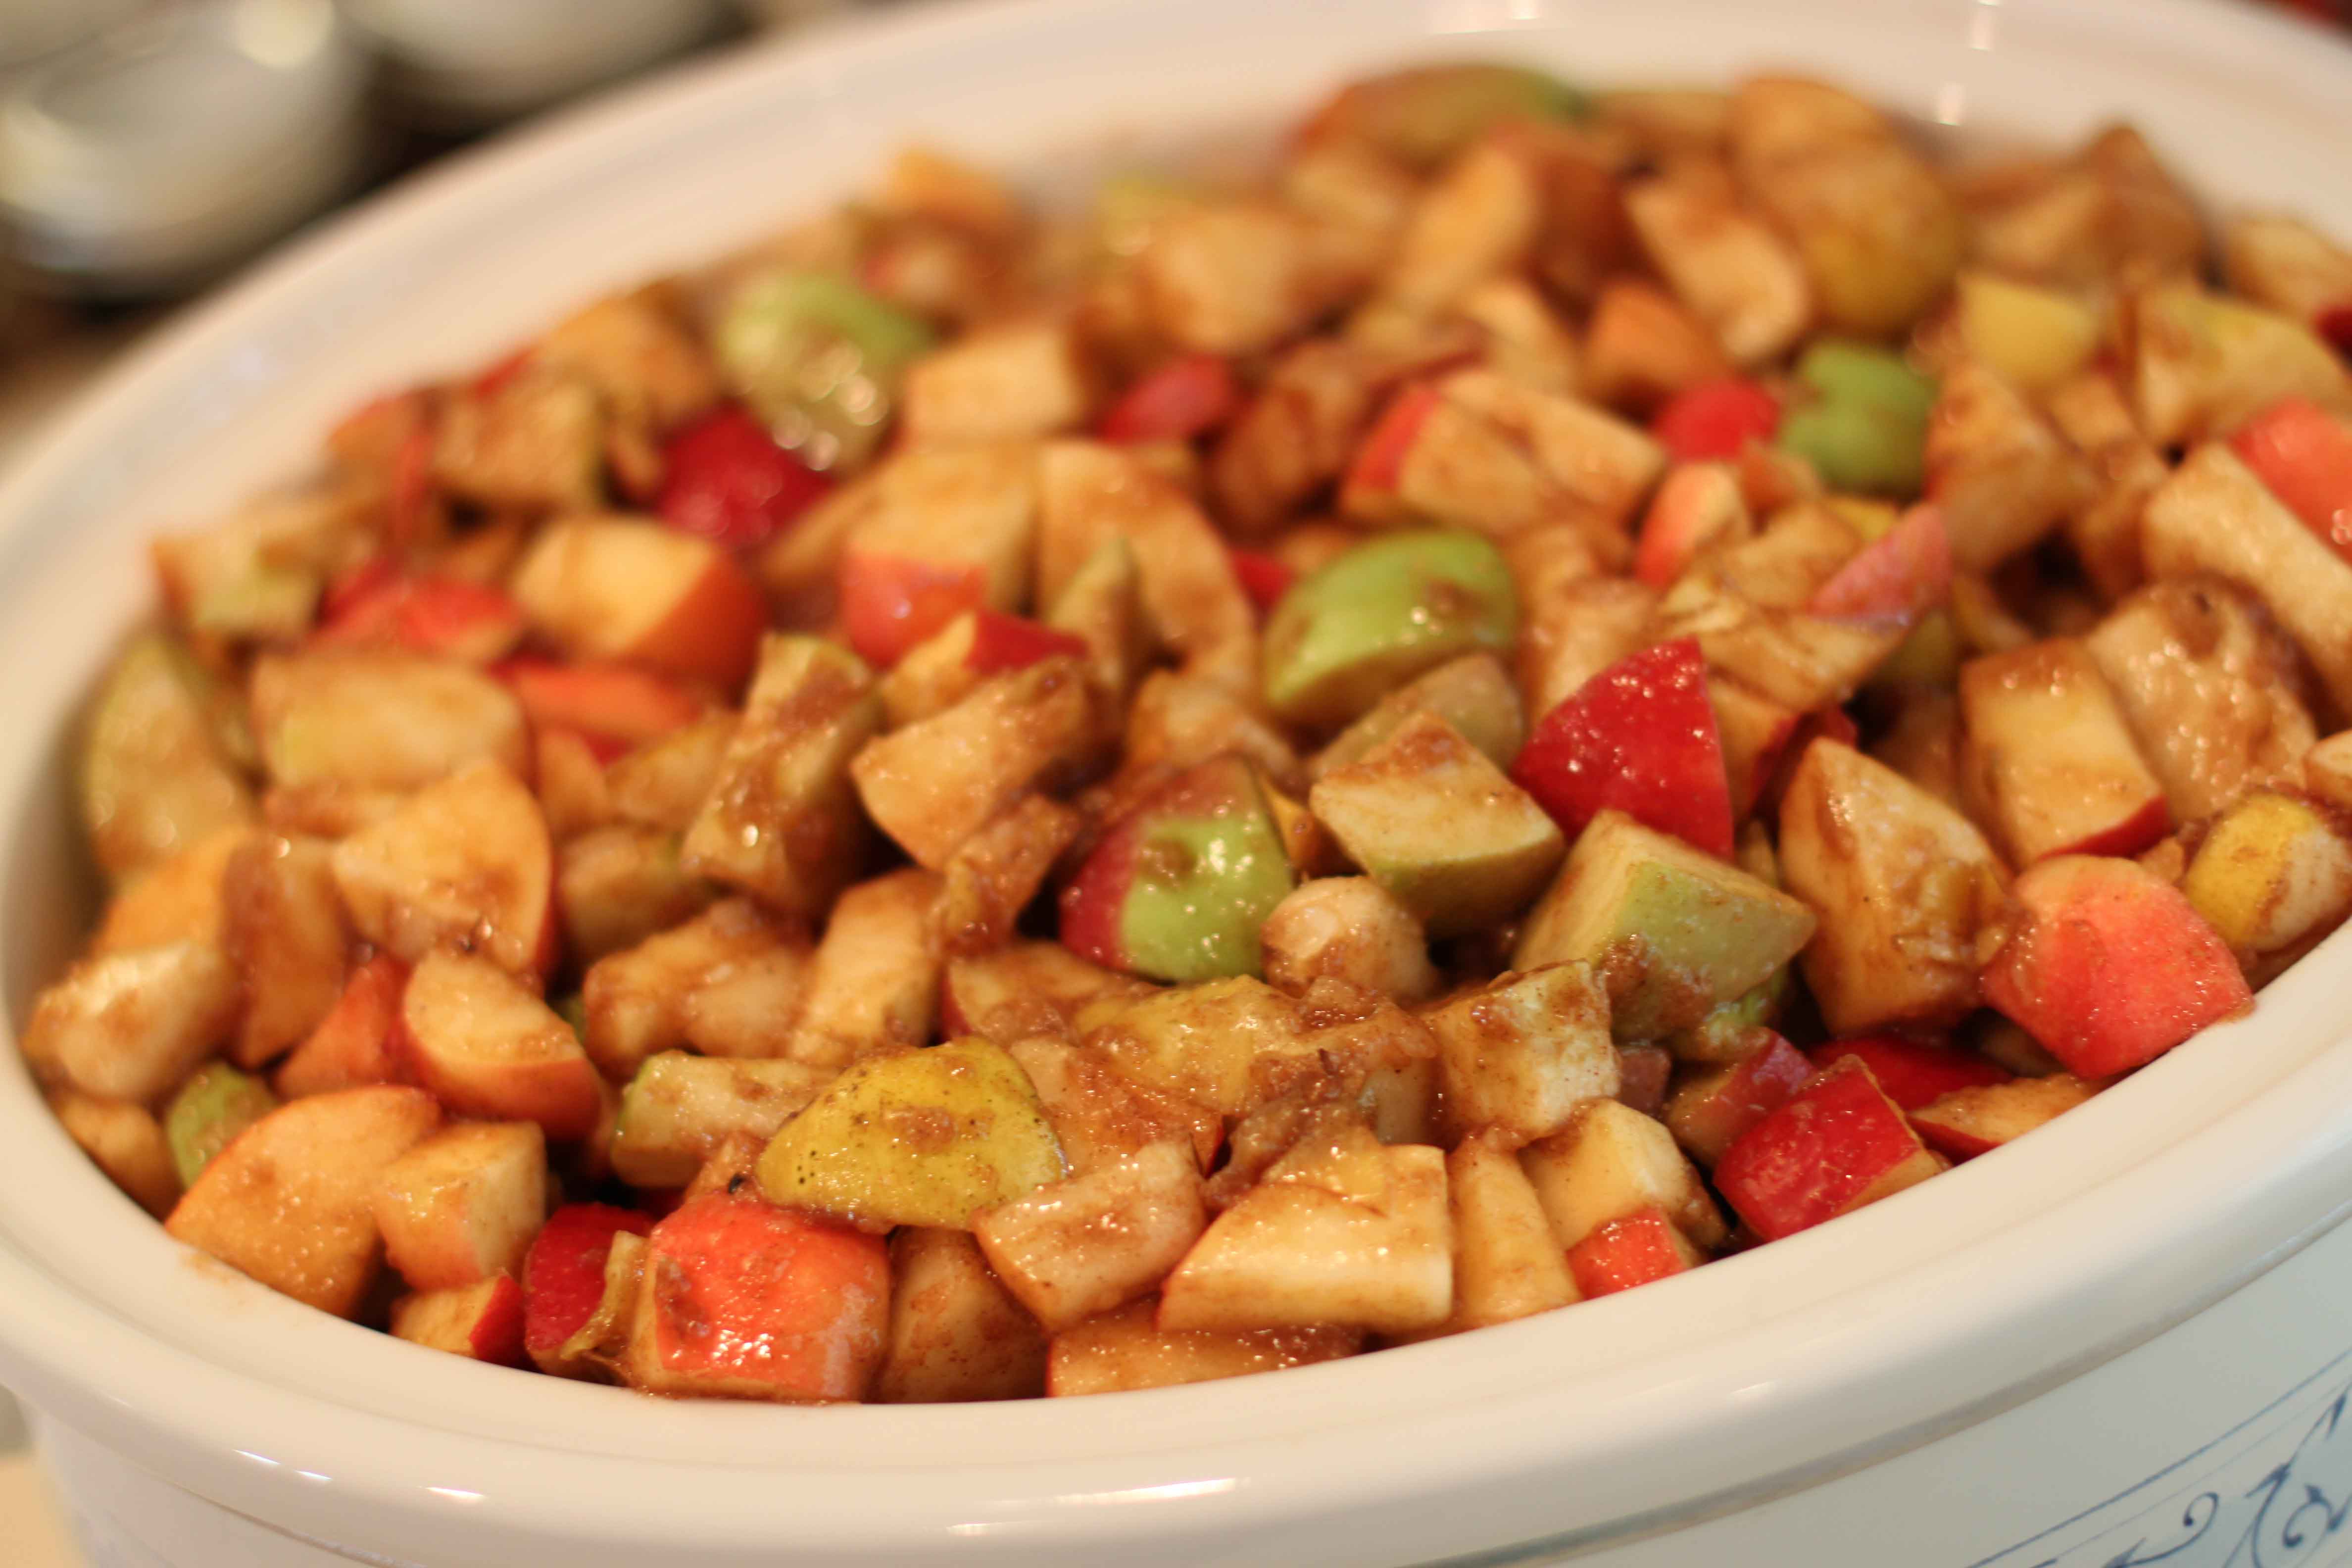
Start by cutting up all your pears and apples. DON’T peel or core them! I know…sounds weird, but bear with me here!
After cutting them up, mix them up with the sugar and spices. Dump everything into a crockpot. It will all break down in the next day or so then you can blend it up. By leaving on the skin & not coring you leave lots of vitamins and fiber that will be in the butter! I used a mixture of Gala & Macintosh apples in mine. Doesn’t it look pretty?
Cover and let it cook for 24 hours on low. By this time, it will look like this, and your house will smell INCREDIBLE.
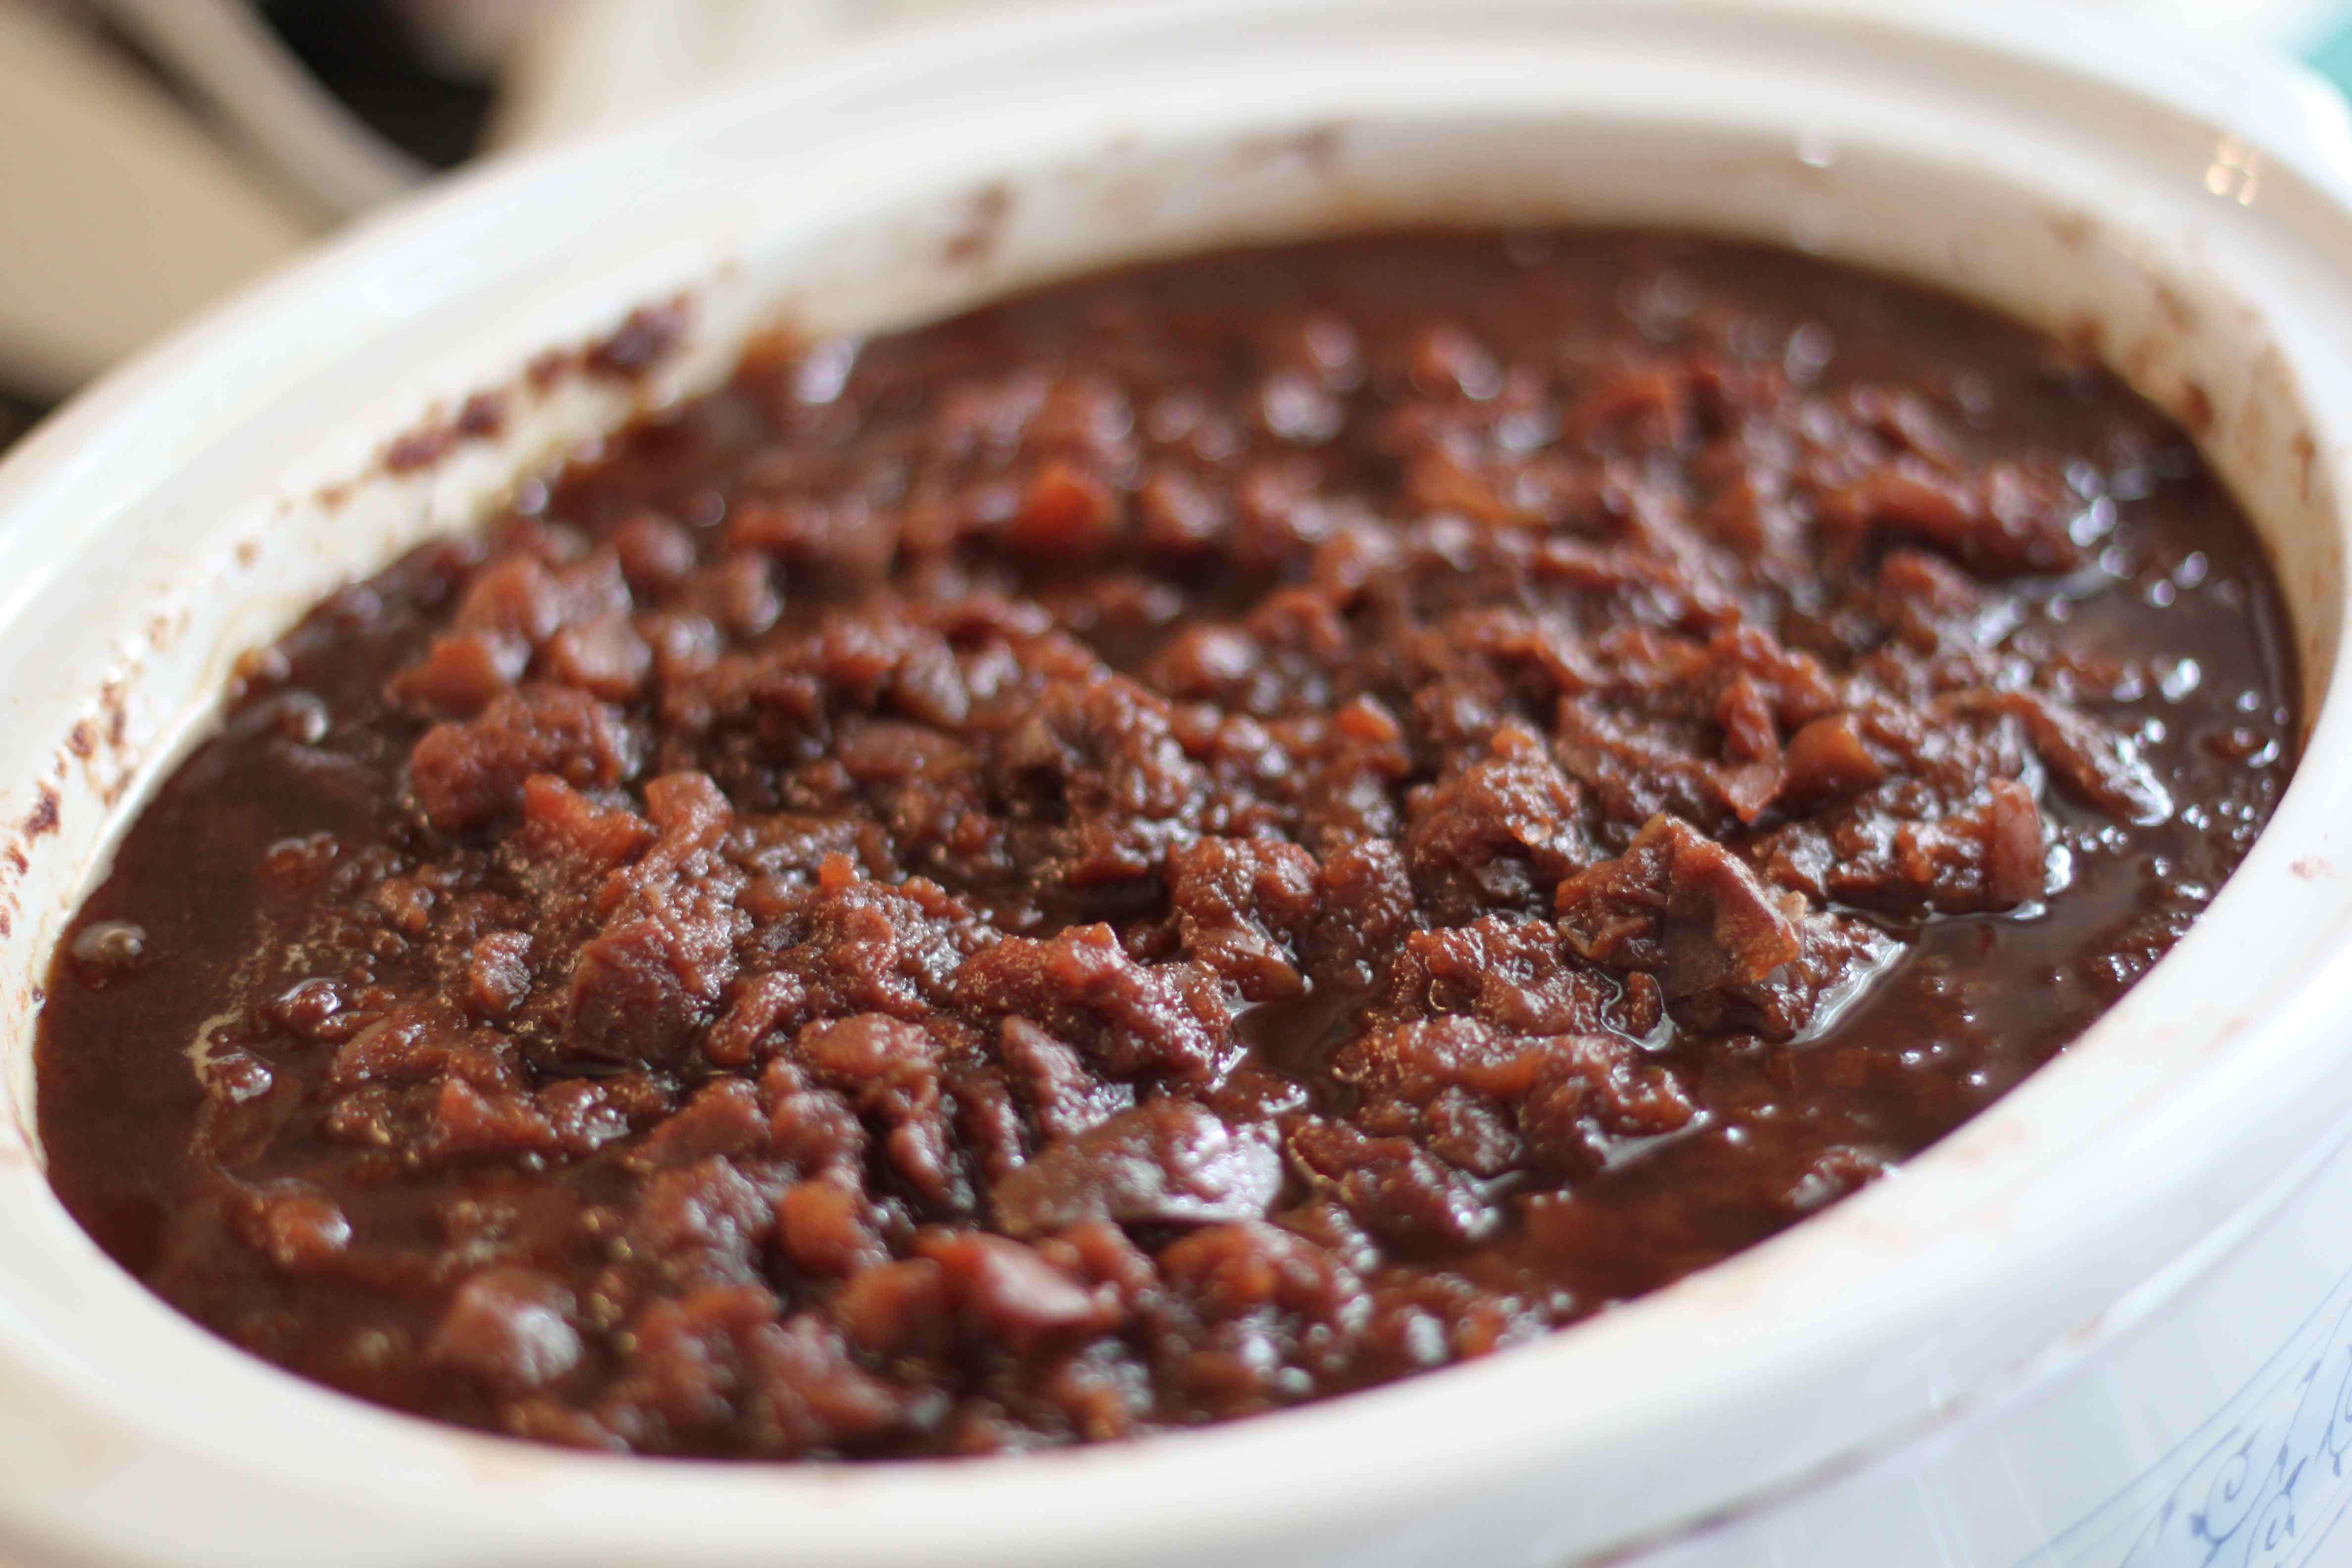
At this point I like to take the lid off and let it cook for about an hour or so like that to let some extra moisture evaporate. Now all you do is use blender or food processor to blend it up nice and smooth!
I canned mine in half pint jars. Looks so pretty, eh? Delicious too. Our favorite way to eat apple pear butter is on toast, pancakes, and even peanut butter sandwiches!
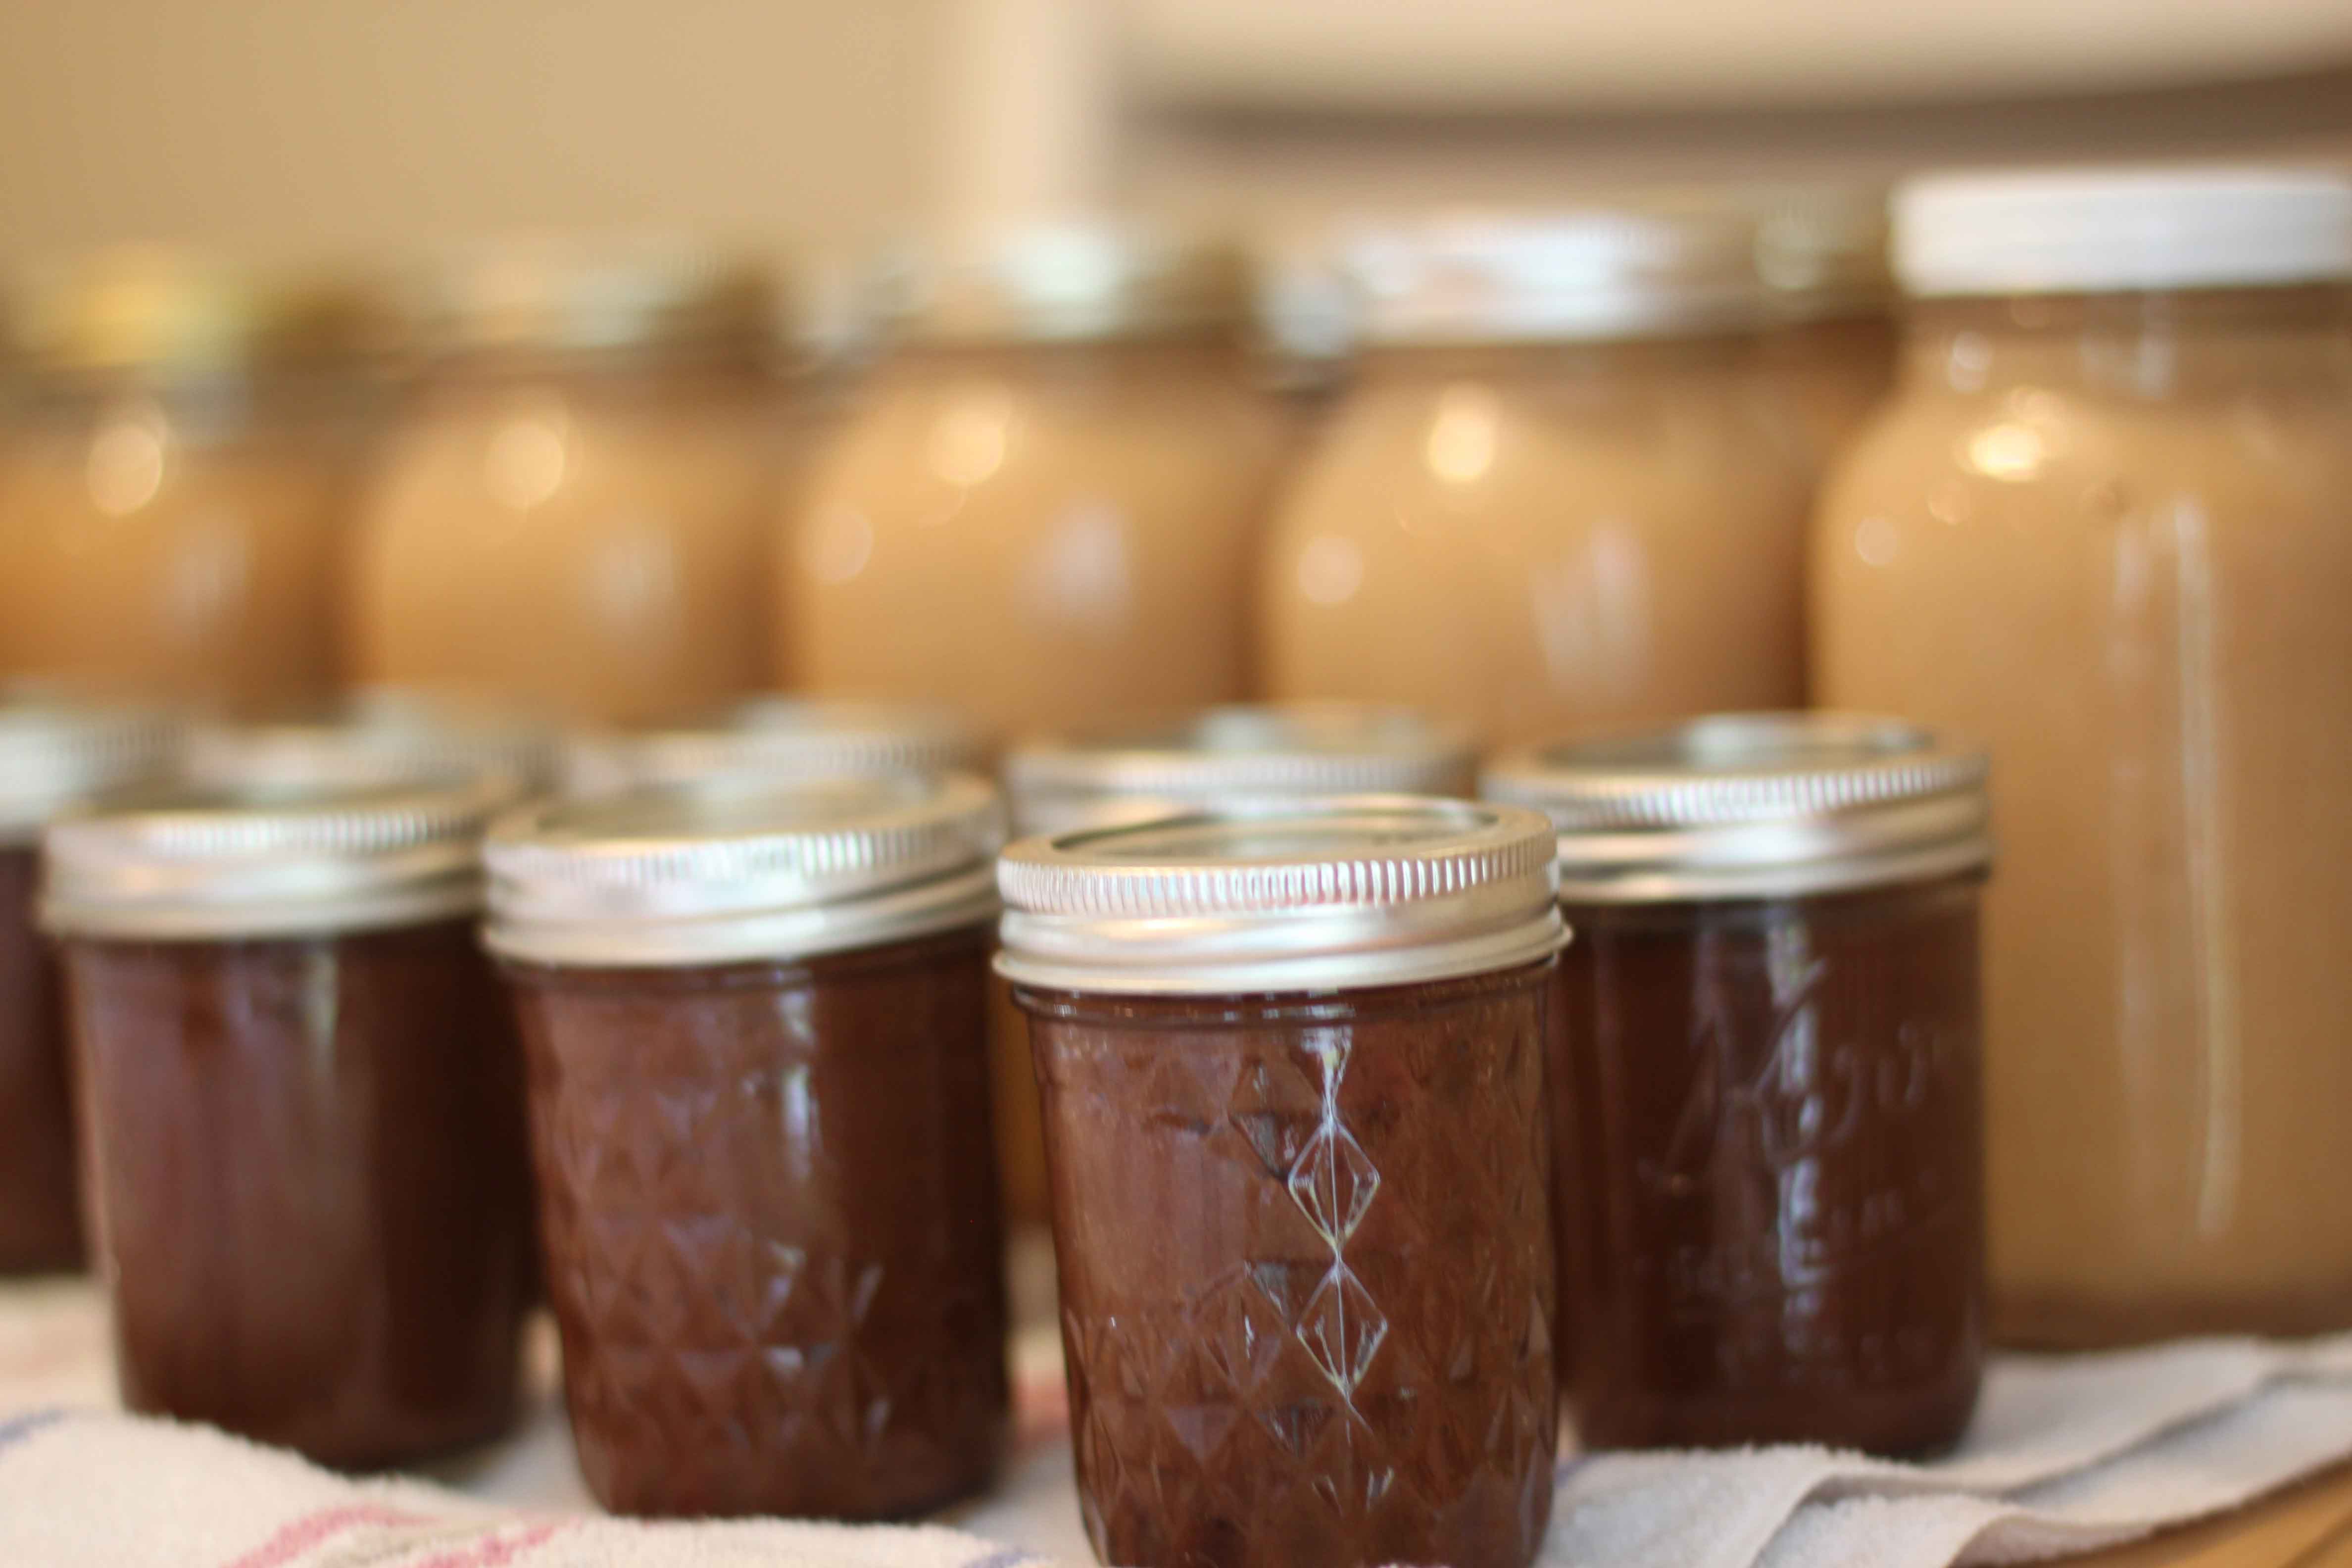
(See that applesauce in the back of the photo? Check out my post I did last year on making homemade applesauce to learn how.)
NOTE: Make sure your pears are nice and ripe, or your butter will be grainy.
Apple Pear Butter
(recipe adapted from Ball Complete Book of Home Preserving)
4 lbs apples, chopped up, NOT peeled or cored
2 lbs pears, chopped up, NOT peeled or cored
1 cup sugar (you can add more for super sweet but 1 c. is fine really)
1 Tbl. cinnamon
1/2 tsp. cloves
1/2 tsp. ginger
Place all ingredients into a large bowl and stir to incorporate. Dump into a crockpot and set on low. Cook on low for around 24 hours, stirring a few times. When nice and thick, blend up smooth.
To can your apple pear butter, prepare your canner, jars, and lids. If you are new to canning, read the basic here. Ladle the hot butter into the jars, making sure to leave about 1/4 inch headspace for expansion. Remove air bubbles with a knife. Clean the rim of the jar with a wet paper towel, and place hot lids on the jar and screw the band down. Place jars in a water bath canner and process for 20 minutes.
(Check your elevation for processing time. This is my elevation time. It is important to process according to your elevation in order to safely preserve your food).
This butter also freezes well if you do not wish to can it. Recipe makes approx. 4 pints.
A PYP Best Blog! Thrifty and Fun Birthday Cake Gift!
Just in case you missed this DIY article on making a thrifty and fun birthday cake gift the first time we shared it a couple of years ago, we are republishing it. After Marne wrote this blog originally, we got an awesome response. This is one of the PYP Best Blogs!
Are you looking for a gift to give a teenager or friend for their birthday? Look no further! This is a fun, quick, easy and satisfying gift idea for all ages! In fact, I made this today for my son’s 12th birthday…as his birthday cake! He LOVED it!

Here is what you need to make this fun birthday cake!

Empty 2 liter bottle (with the top cut off so it sits flat)
8 soda cans of your choice
12-14 mini candy bars of your choice
wide ribbon for the cake
thin ribbon for the top
candle
cake plate
tape
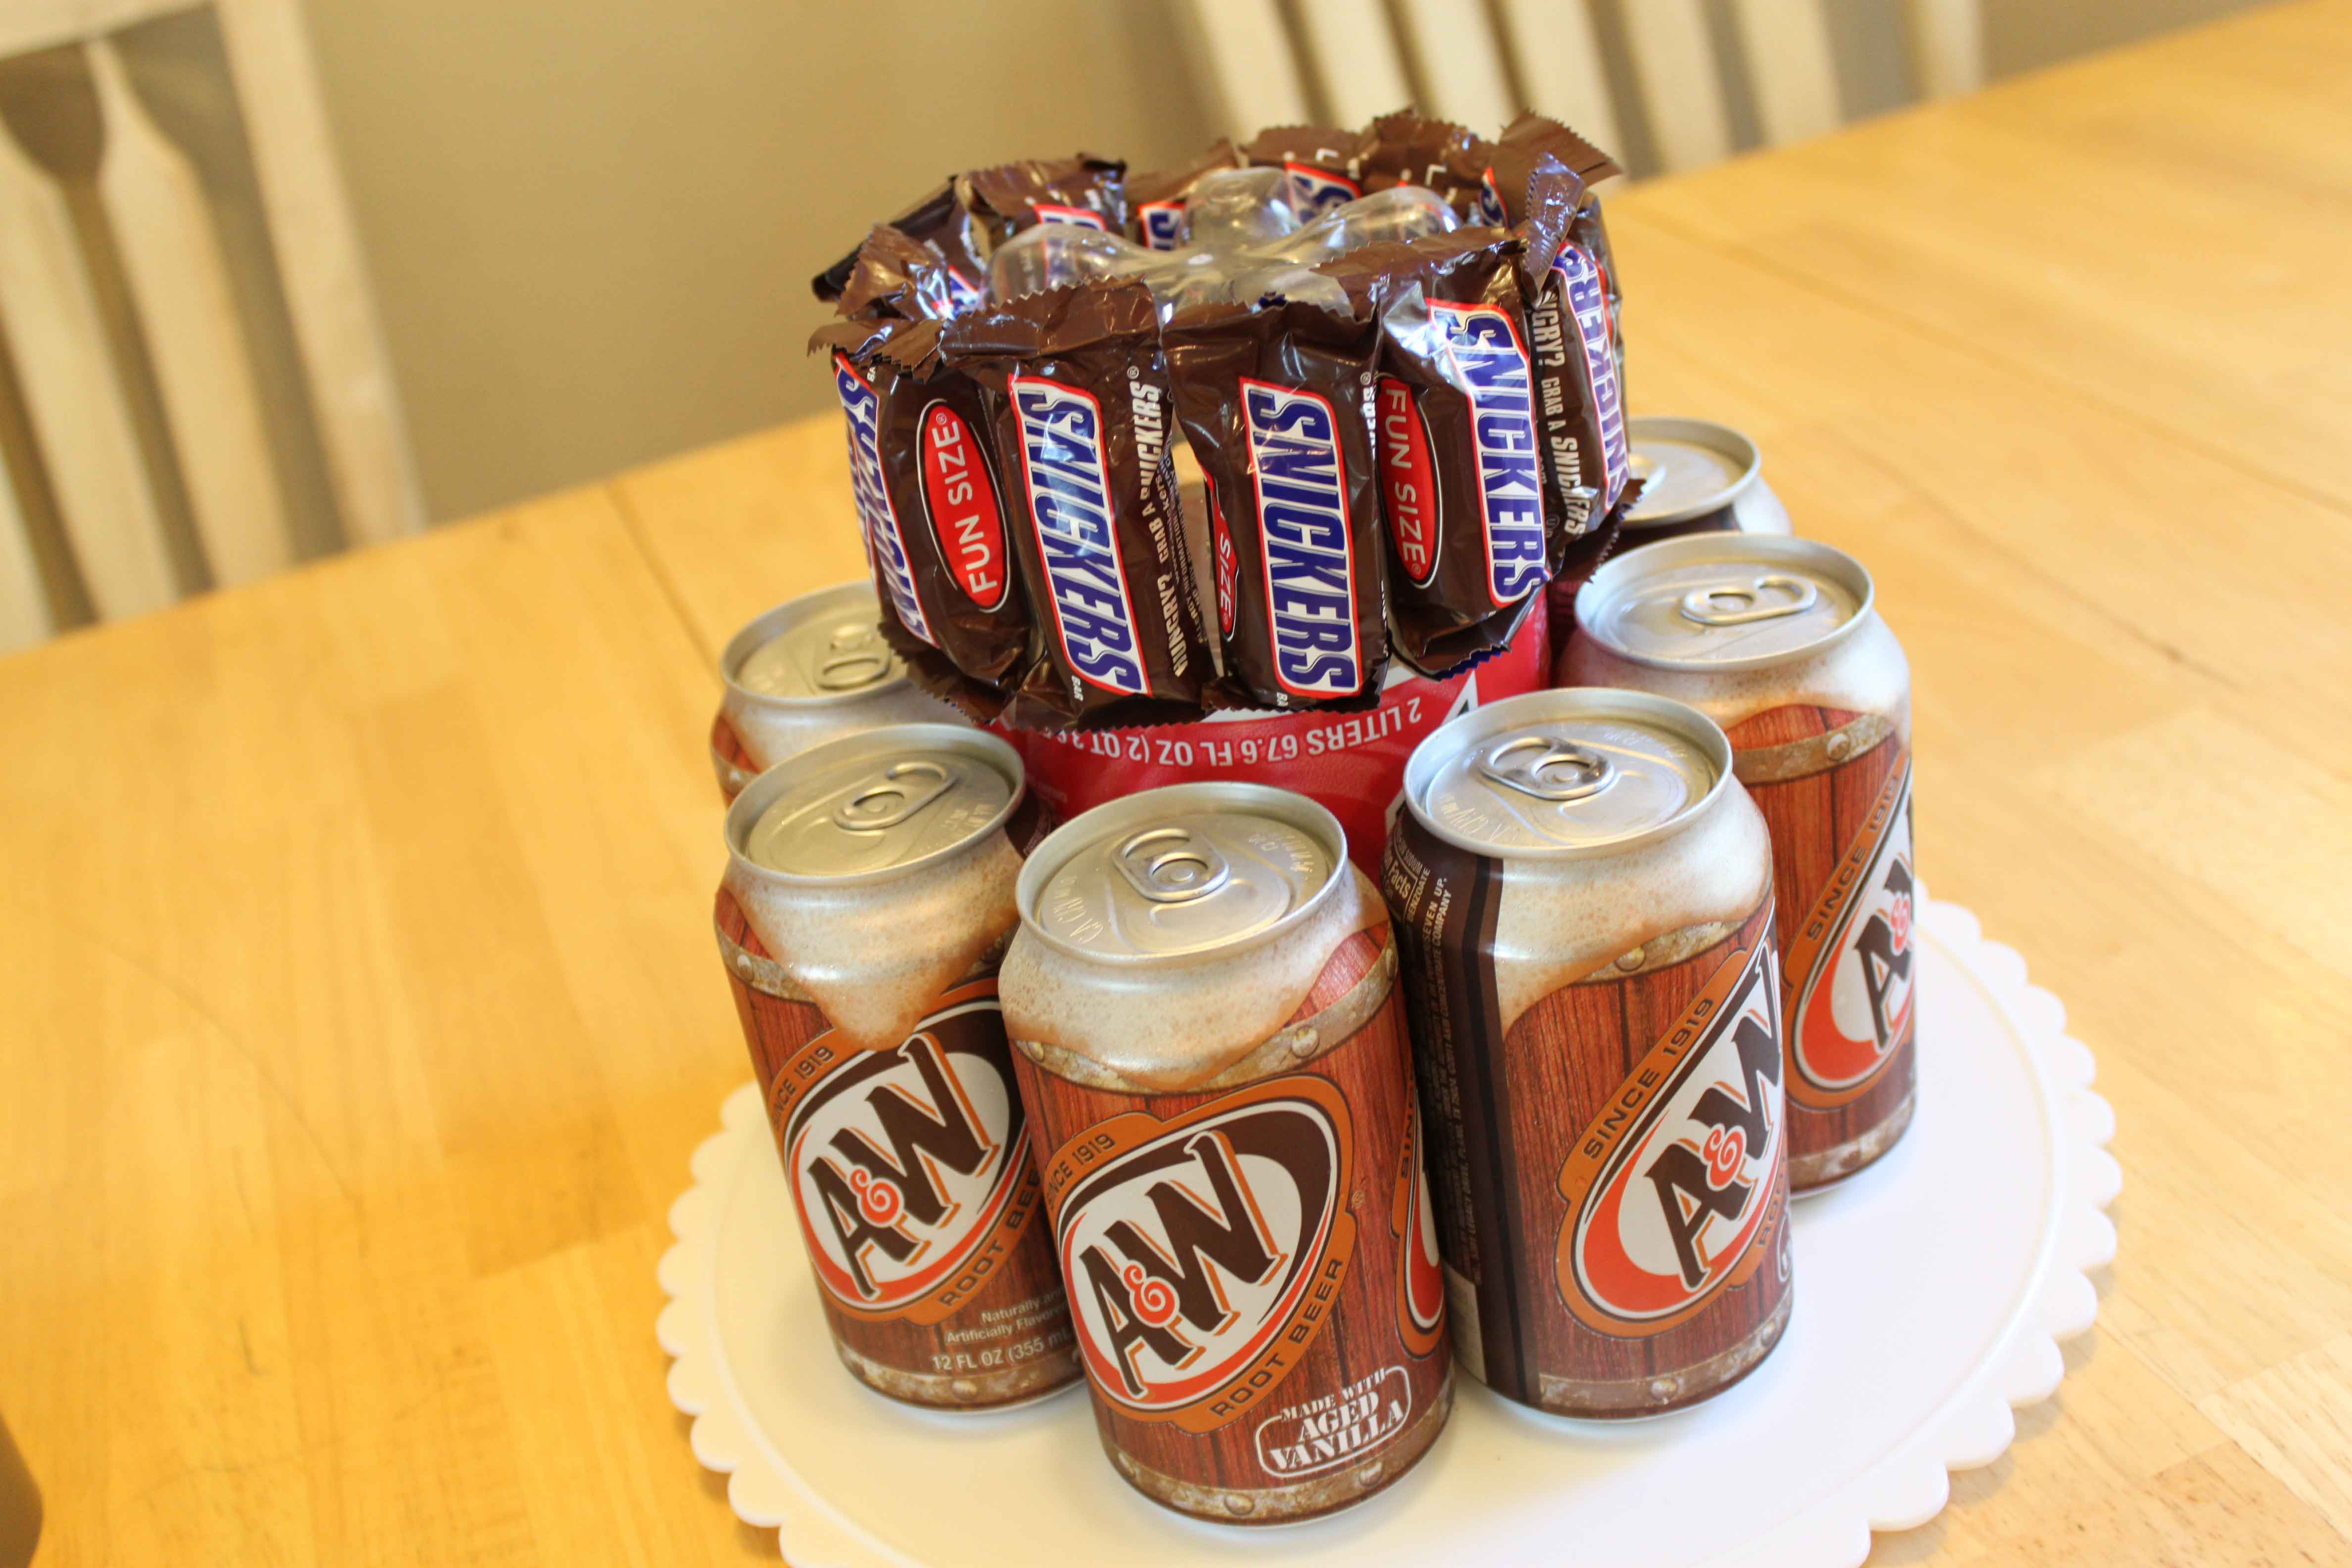
Begin by placing the two liter on the cake plate upside down (so the rutted edge bottom is now the top) and place the soda cans around it. You can place tape on the soda cans so they stick to the plastic bottle and don’t shift.
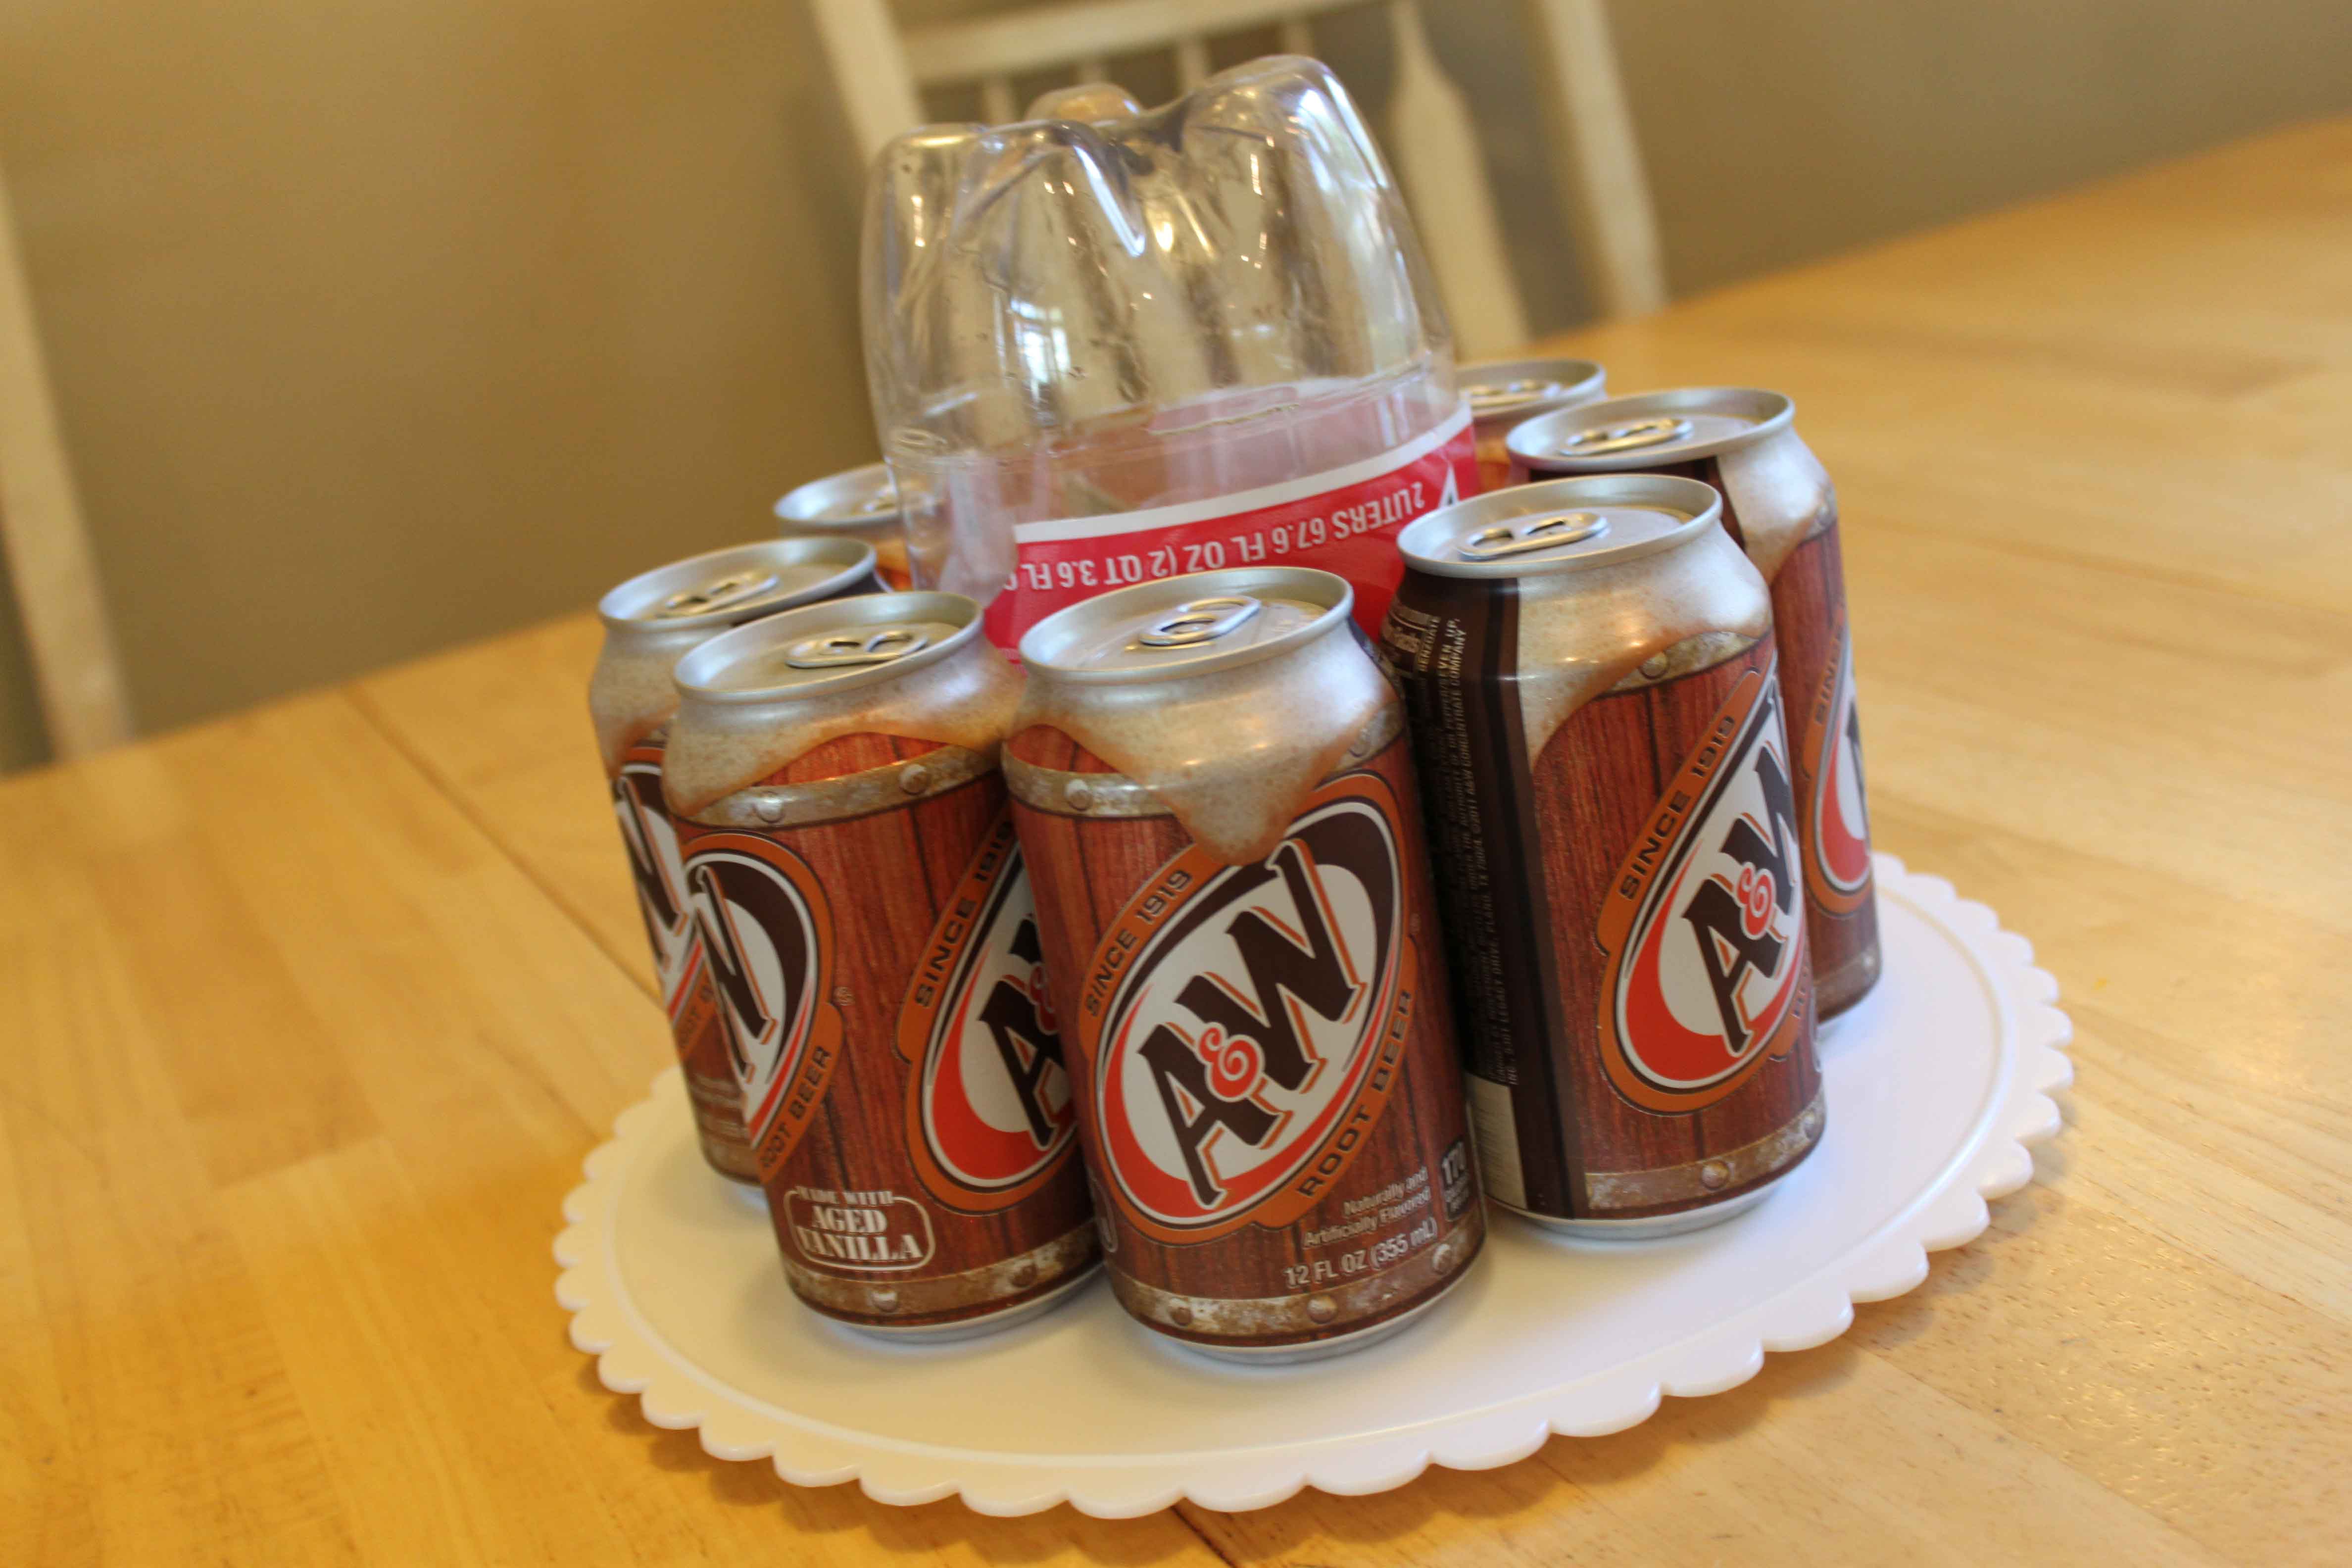
Then place the candy bars around the same way. I also used tape so they didn’t fall. I placed them up a little higher as the wide ribbon would cover it.
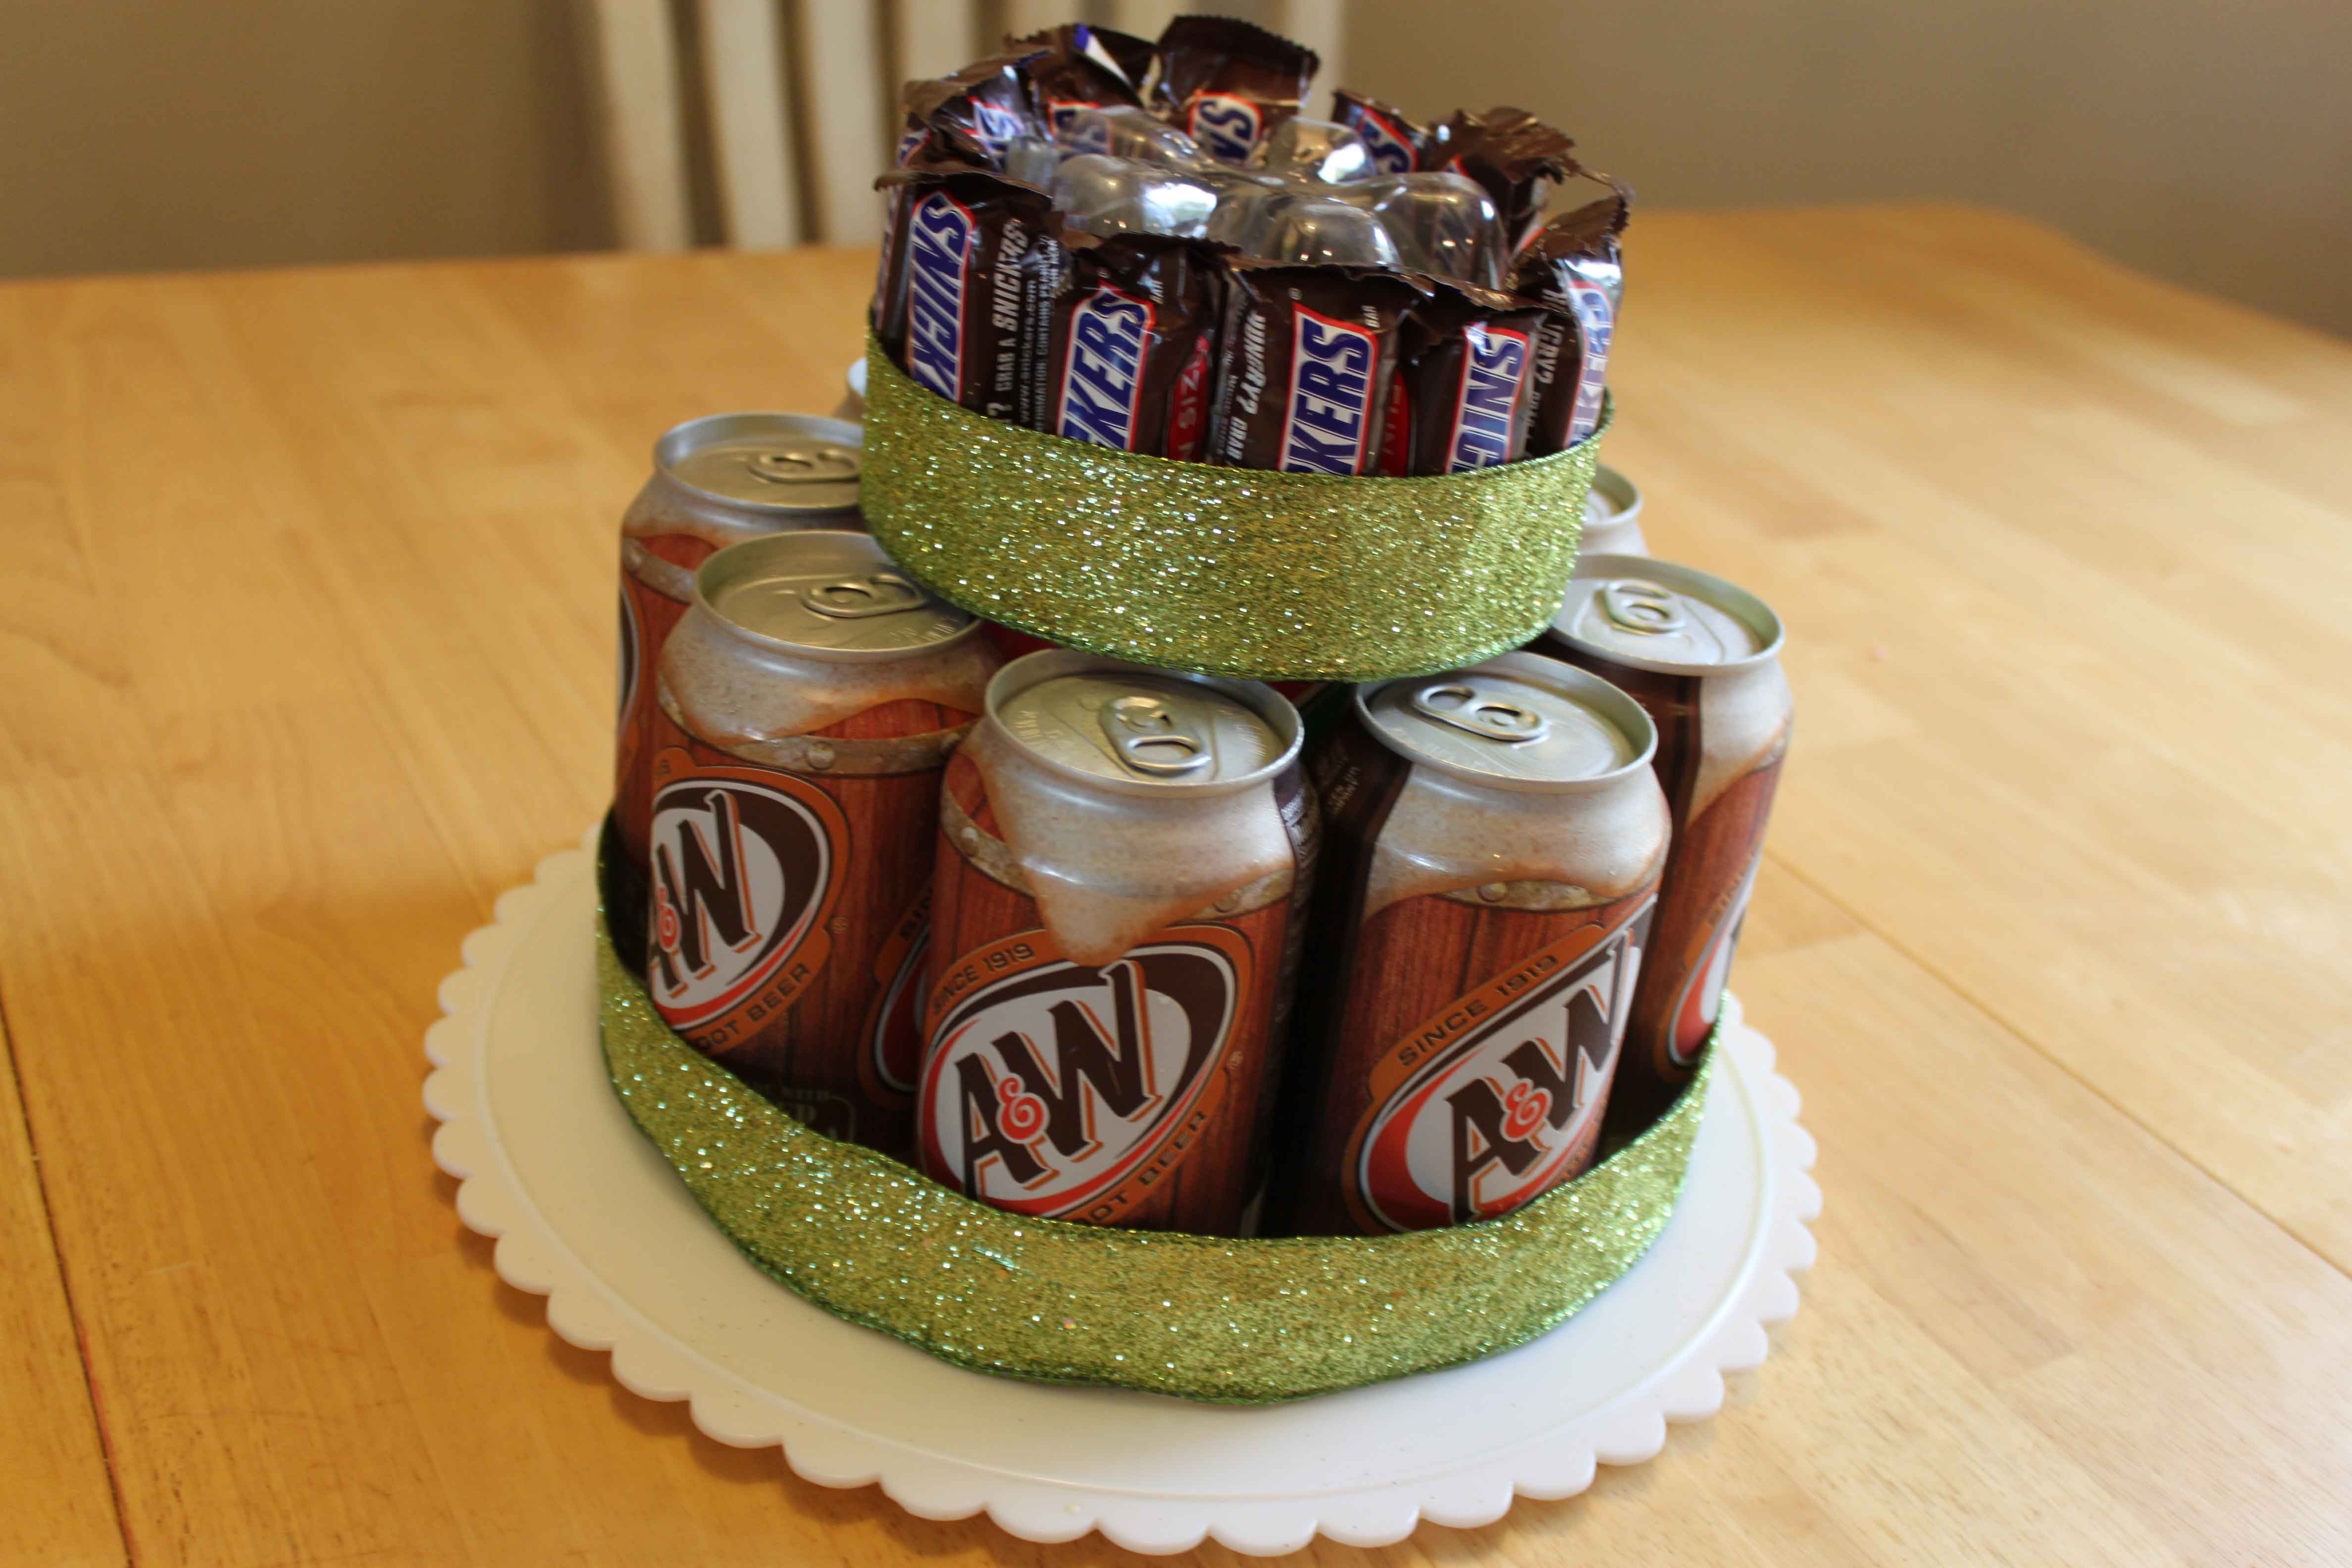
Then cut the wide ribbon to size and put it around both spots as shown. I stapled my ribbon together after measuring it and cutting it, then slipped it over where it needed to go.
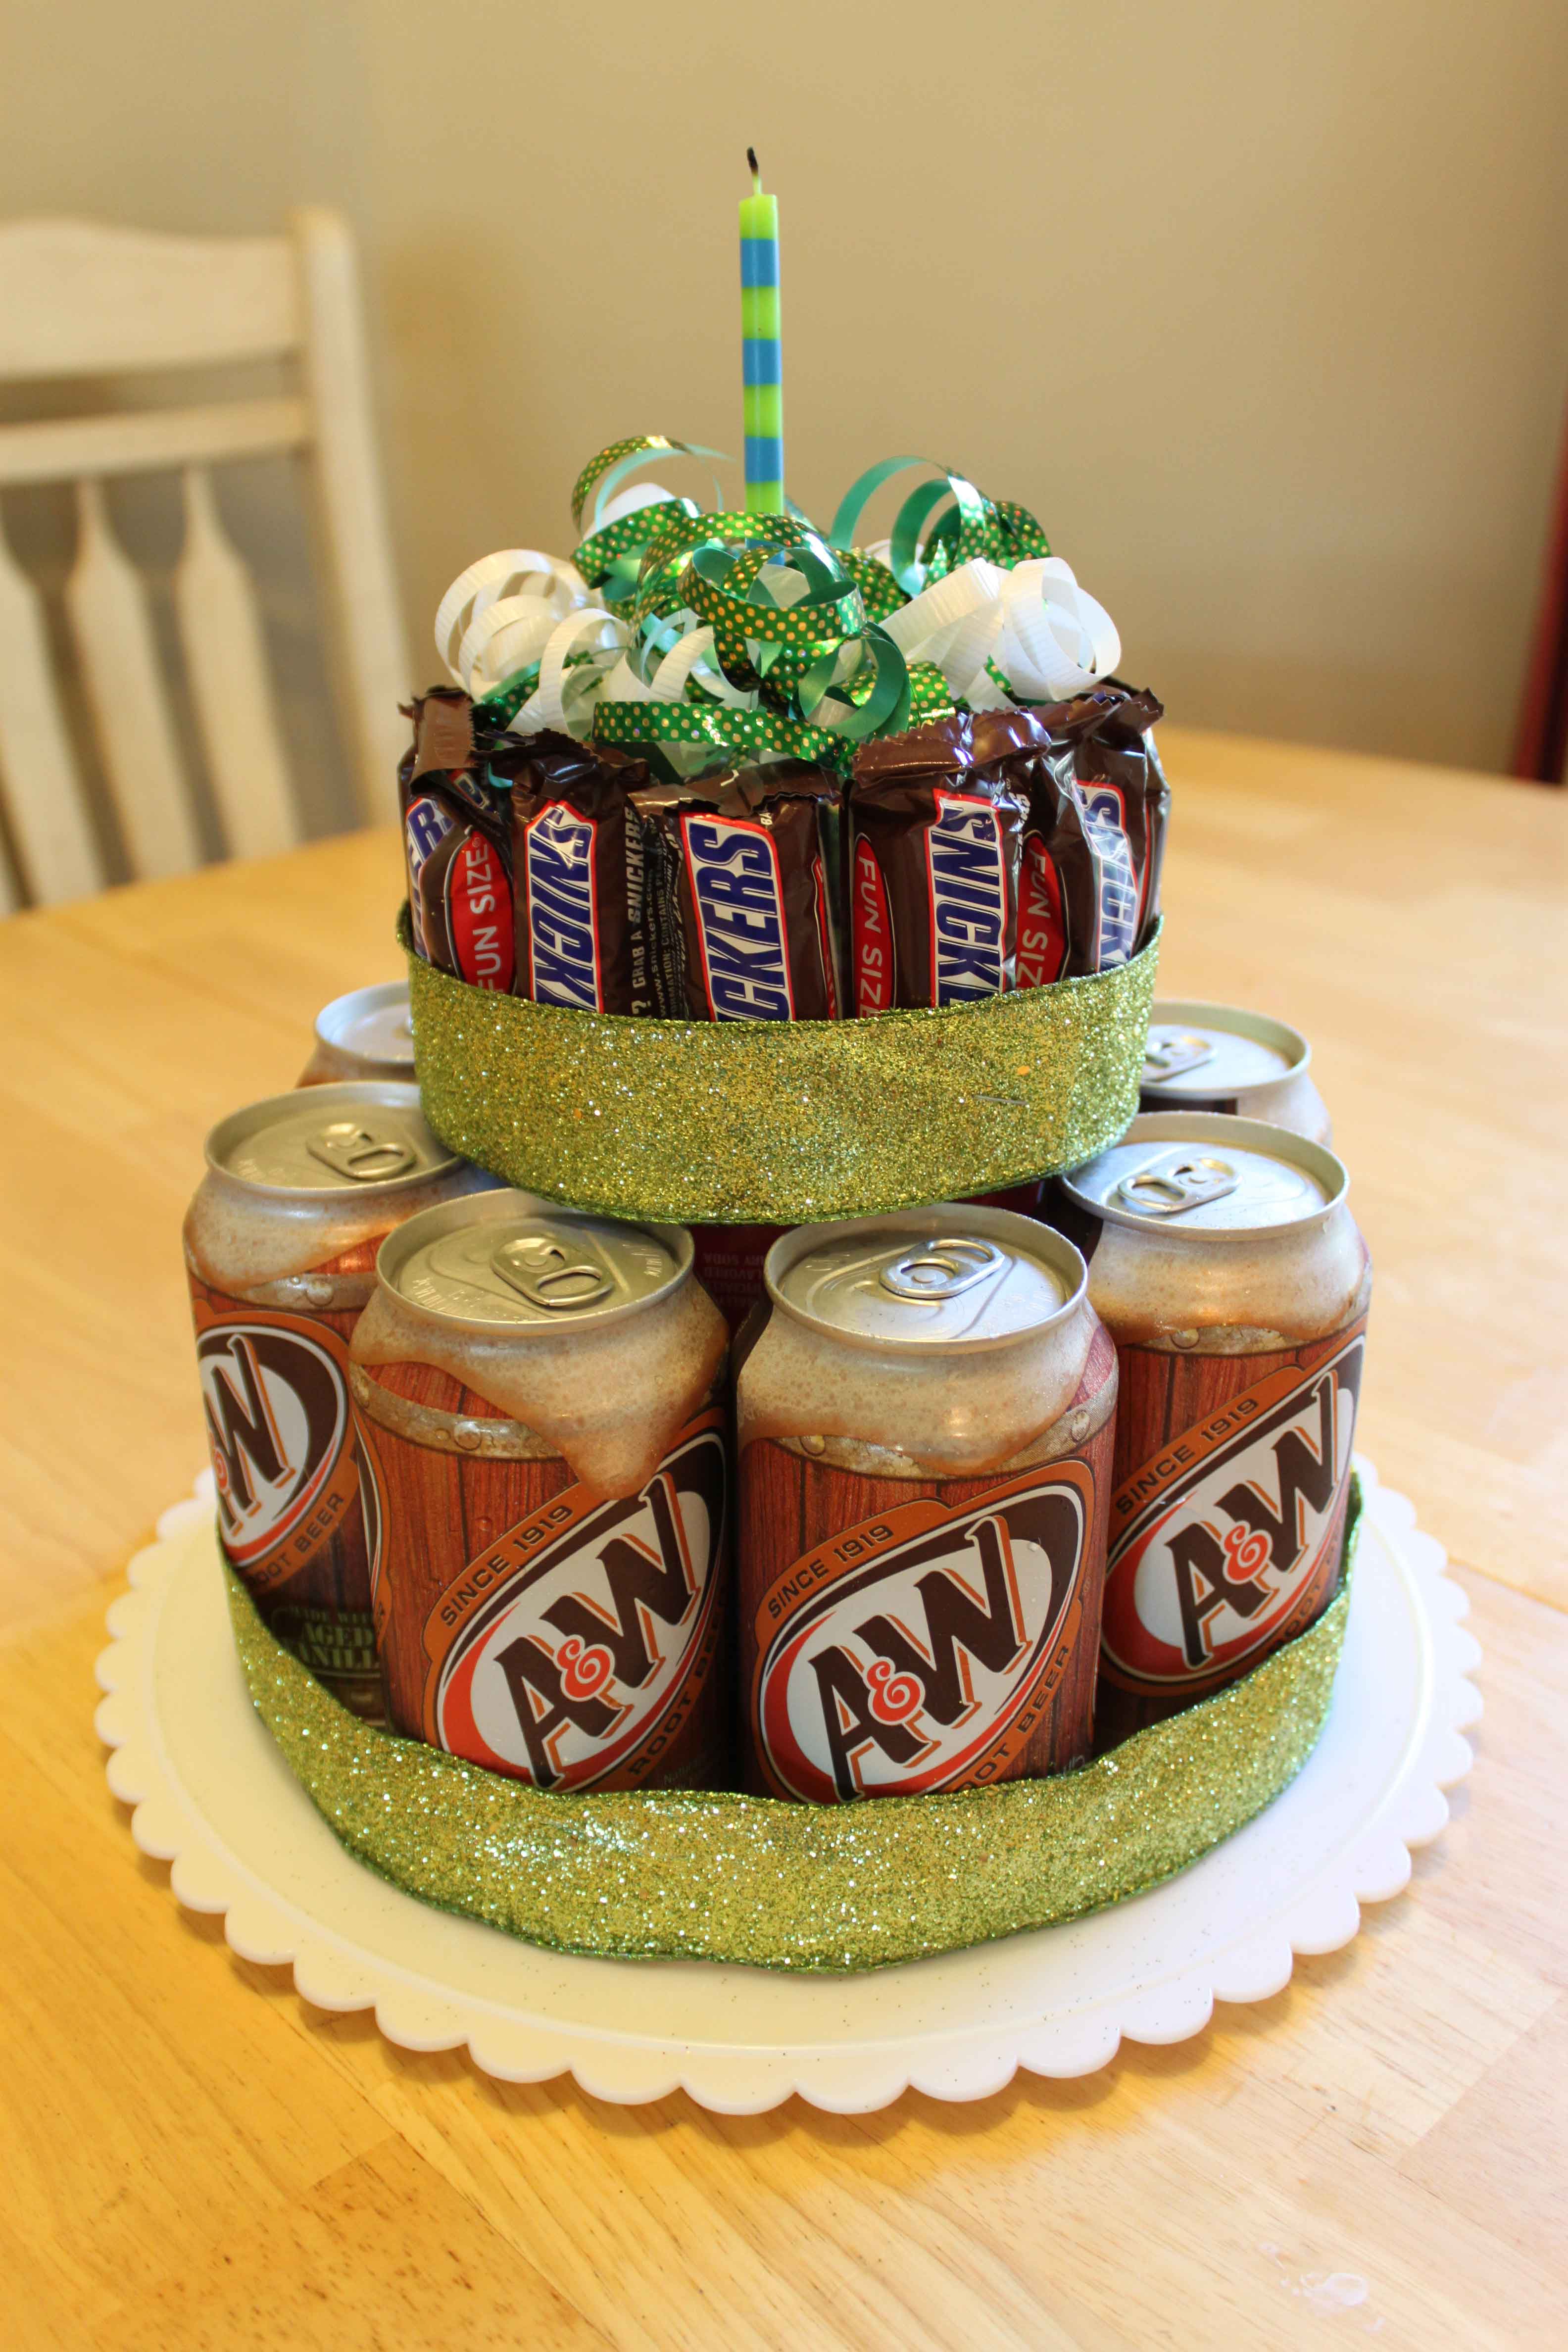
The last step is to poke a hole in the top of the bottle (in the middle of the notches) and put your candle in. I actually hot glued my candle on tonight, and it worked just fine! Then cut a bunch of thin ribbon, curl it, and tape it in place to cover the rest of the bottle. Now you have a totally fun, cute, thrifty and awesome gift for a birthday! This is a perfect idea for those who don’t bake.
A PYP Best Blog! Taking Meals to Those in Need!
Just in case you missed this article on taking meals to those in need the first time we shared it a couple of years ago, we are republishing it. After Marne wrote this blog originally, we got an awesome response. This is one of the PYP Best Blogs!
Many of us have been in a position where we have taken a meal to a friend or someone else we know. Life circumstances like having a new baby, surgery, moving or lost of employment to those we care about can make us want to help them out a little. A good meal taken into someone can lift their spirits as well as keep the stress level for that day low…they don’t have to worry about fixing dinner that evening.
Here are a few tips if you are planning to take dinner into someone you care about.
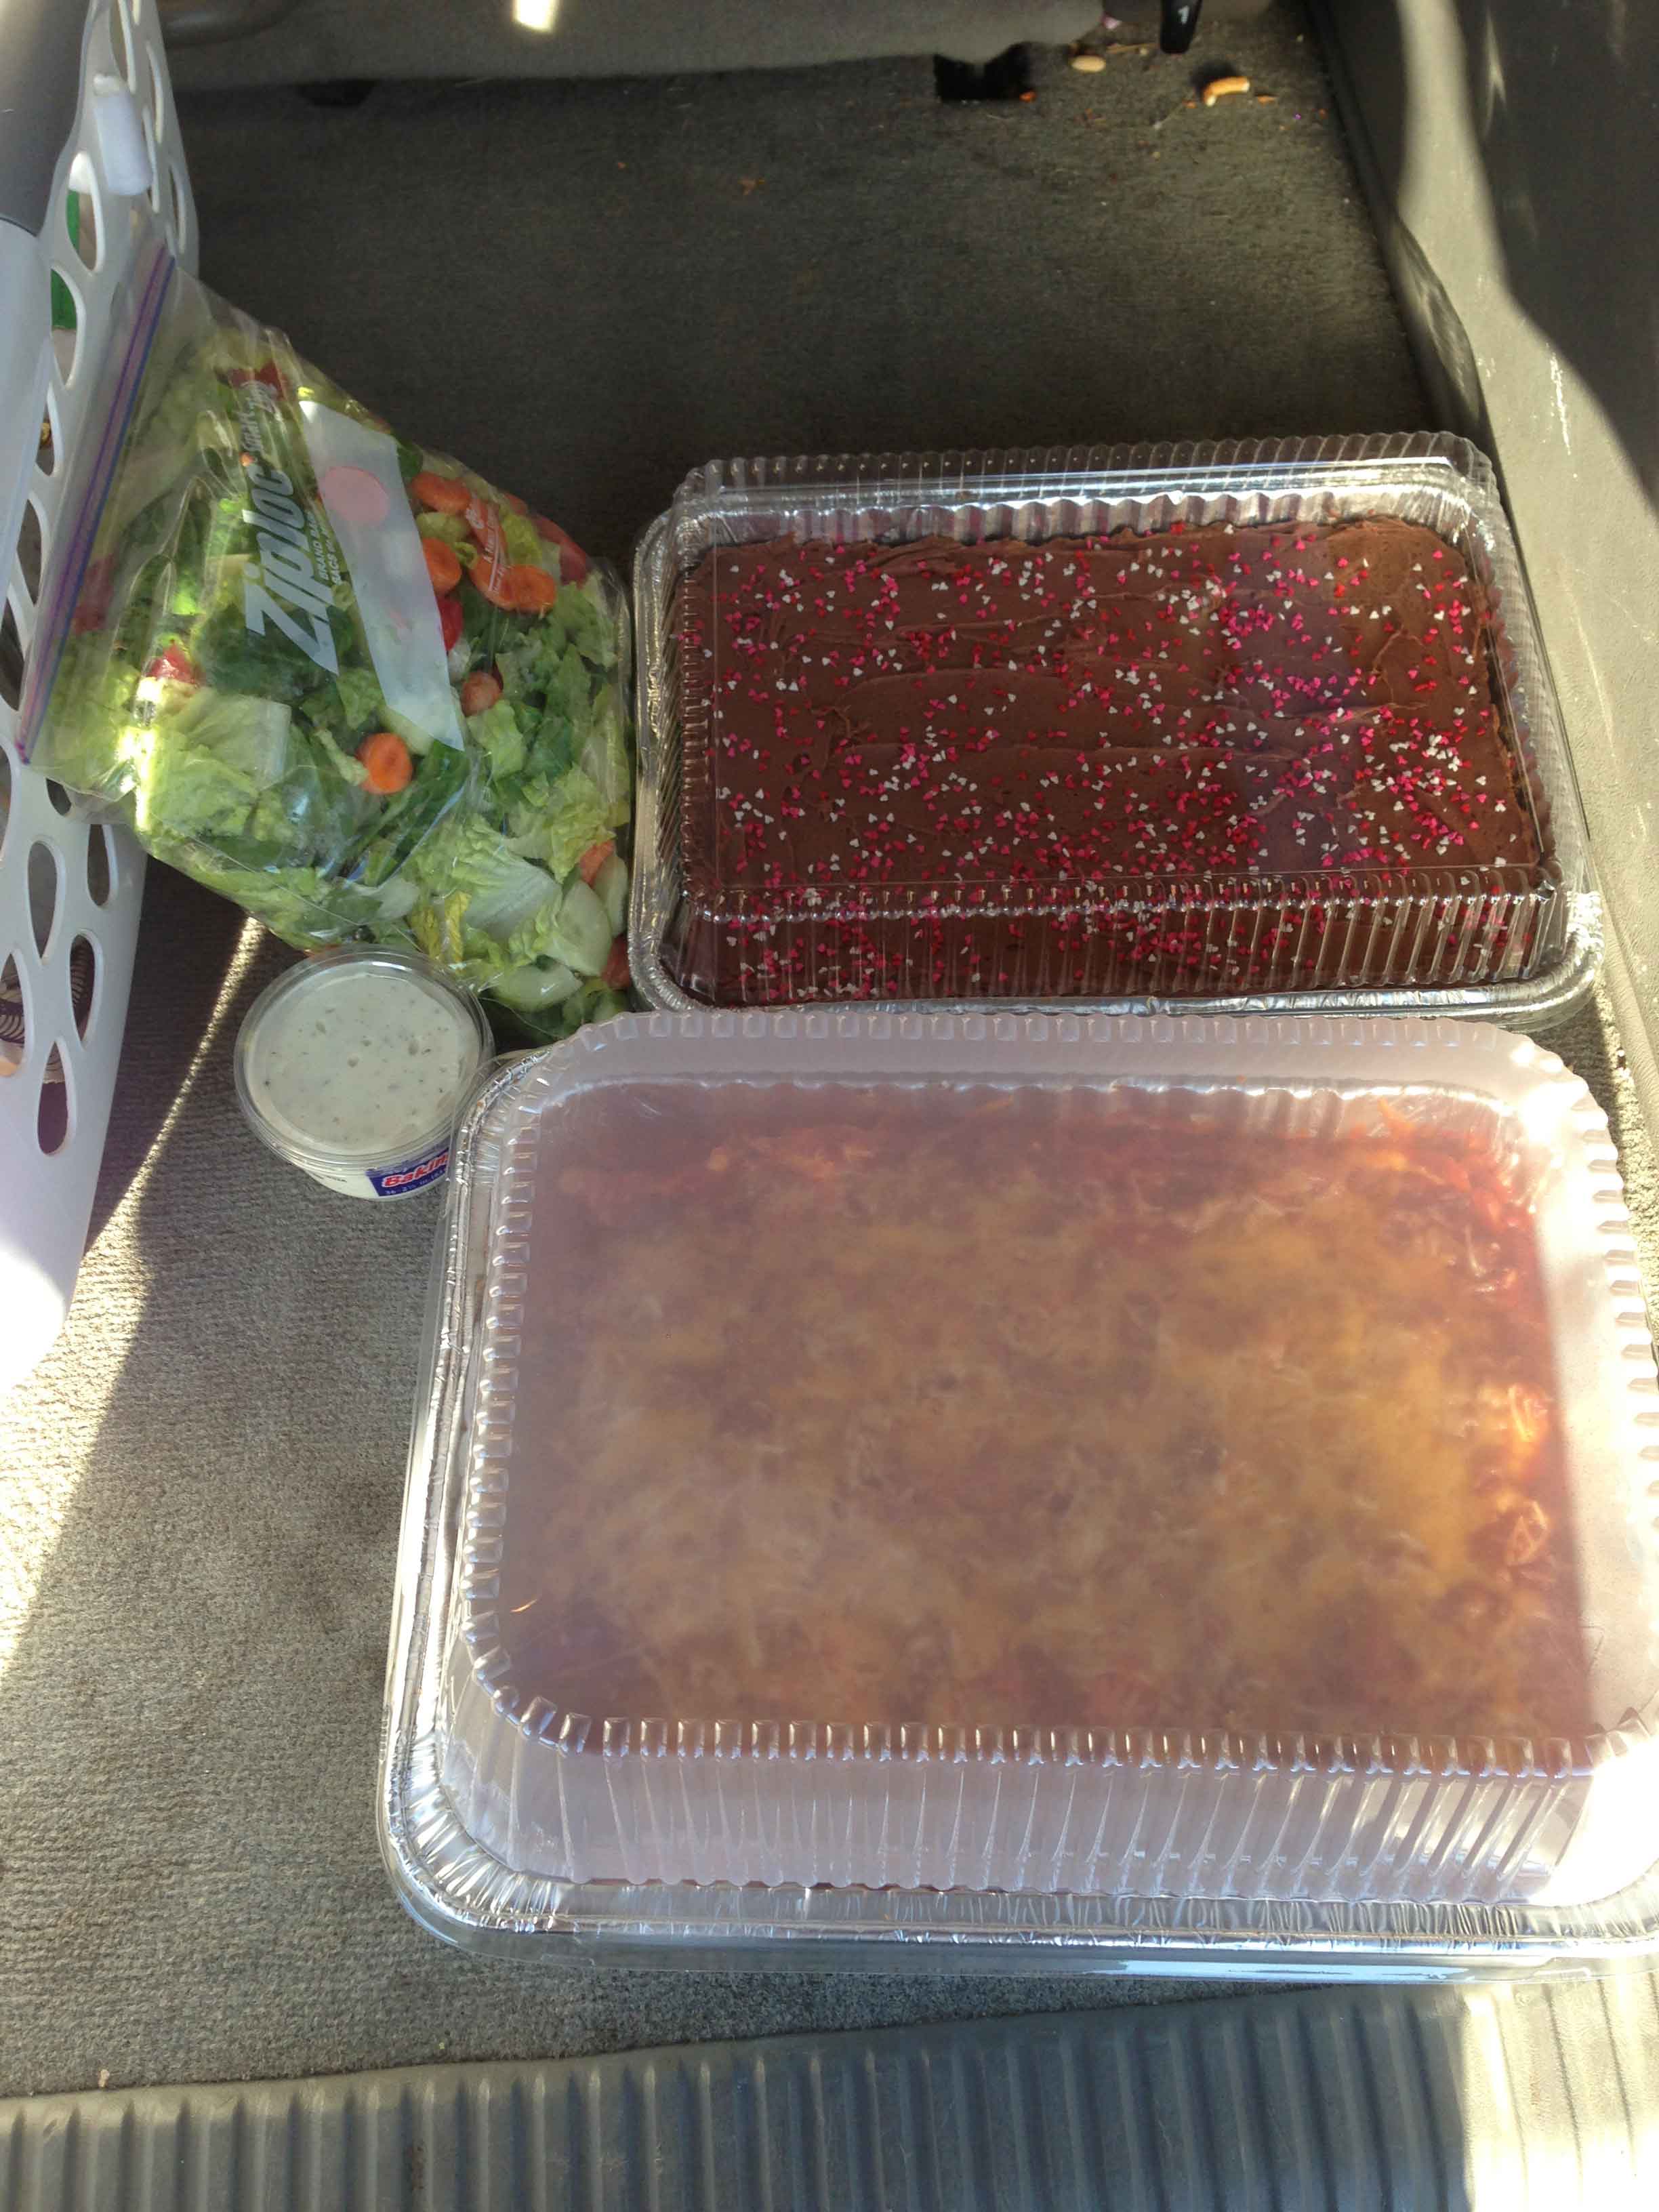
(The meal pictured above is one I took to a friend yesterday who is moving this week. I forgot to take a photo at home, so I took it in my car. Sorry about the photo quality.)
1. Find out if there are any food allergies or strong dislikes. You don’t want to make something they cannot eat.
2. Make something that is family-friendly, especially if they have children. Foods that most everyone will like and appreciate. This is not the time to try out a new recipe! Make something that you know will turn out and that your family enjoys. Some of my favorite take-in meals are homemade lasagna, baked ziti, lemon chicken, sloppy joes, chicken noodle soup, taco soup, and spaghetti pie.
3. Take the meals in containers that do not have to be returned. There is nothing worse that someone having extra dishes at home and trying to get them back to you. Invest a few small dollars in disposable pans that you can cook the food in and they can throw away when they are finished.
4. Take balanced meals. I like to take in a salad or side dish with the main dish, then a simple dessert. We all need a little sweet at the end!
5. Depending on the situation, make meals big enough for leftovers. Sometimes they might need leftovers the next day for lunch or dinner, or to freeze for next week. Gauge that by the individual situation.
6. Sometimes taking in meals that are not cooked, but can be immediately frozen, is a good idea. Then they can make it when they need it most. Just make sure you send cooking directions with the meals.
A PYP Best Blog: Homemade Shower Cleaner and the many uses for vinegar
 So for today’s PYP’s Best Blog post I am combining 2 of our best blogs into one post! I recently needed an amazing shower cleaner and I was reminded of this post that we did several years ago. Since one of the ingredients is vinegar I also wanted to re-share a post we did on the many uses of vinegar, bringing 2 of PYP’s Best Blog posts together!
Everybody’s making this stuff. Are you? Simply put 1 C white vinegar in the microwave until warm and mix with 1 C Dawn Dish. Put this into a spray bottle and you have an AMAZING shower cleaner. For tough soap scum, you can spray and leave overnight. This stuff really works!!
.
PS – You can actually use ANY amount of vinegar and an equal part of Dawn. Also, you don’t need to reheat this every time you use it. You just heat it once to get the ingredients to combine well.
The many uses of vinegar:
There are so many ways that you can use vinegar in your home. It is very inexpensive and not harmful at all to children or the environment. It is a go-to staple in my home. I have a gallon in my kitchen and laundry room at all times. It is also something that we keep in our food storage. I use it for cooking, cleaning, canning, and even in my dog’s water bowl!!
FOOD
When you can’t get the last bit of mayonnaise or salad dressing out of the jar, try dribbling a little of your favorite vinegar into it, put the cap on tightly and shake well. You’ll be amazed at how much you’ve been wasting.
Try soaking fish in vinegar and water before cooking it. It will be sweeter, more tender and hold its shape better. When boiling or poaching fish, a tablespoon of vinegar added to the water will keep it from crumbling so easily.
Cake icing can be prevented from becoming sugary if a little vinegar is added to the ingredients before cooking. The same is true when making homemade candy.
When boiling an egg and it’s cracked, a little vinegar in the water will keep the white from running out.
A teaspoon of white distilled or cider vinegar added to the water in which you boil potatoes will keep them nice and white. You can keep peeled potatoes from turning dark by covering them with water and adding 2 teaspoons of vinegar.
Freshen up slightly wilted vegetables by soaking them in cold water and vinegar.
Add 2 tablespoons white distilled vinegar to 1 pint water and use to wash fresh fruits and vegetables, then rinse thoroughly. Research has shown that vinegar helps kill bacteria on fruits and vegetables.
Before frying doughnuts, add ½ teaspoon of vinegar to hot oil to prevent doughnuts soaking up extra grease. Use caution when adding the vinegar to the hot oil.
Perk up a can of soup, gravy or sauce with a teaspoon of your favorite specialty vinegar. It adds flavor and taster fresher.
As a tenderizer for tough meat or game, make a marinade in the proportion of half a cup of your favorite vinegar to a cup of heated liquid, such as bouillon; or for steak, you may prefer to a mix of vinegar and oil, rubbed in well and allowed to stand for two hours.
Remove fruit or berry stains from your hands by cleaning them with vinegar.
For fluffier and great tasting rice, add a teaspoon of white distilled vinegar to the boiling water before adding rice. Rice will be easier to spoon and less sticky.
CLEANING
It is easy to take out the heavy stale smell often found in lunch boxes. Dampen a piece of fresh bread with white distilled vinegar and leave it in the lunch box overnight.
Get rid of cooking smells:
Let simmer a small pot of vinegar and water solution.
Soak a paper towel with 1-2 Tablespoons of white distilled vinegar. Wipe mixing bowl and beaters or whisk with the vinegar-soaked paper towel, then dry with a cloth or paper towel prior to whipping egg whites.
Bathtub film can be removed by wiping with white distilled vinegar and then with soda. Rinse clean with water.
Rub down shower doors with a sponge soaked in white distilled vinegar to remove soap residue.
Corrosion may be removed from shower heads or faucets by soaking them in diluted white distilled vinegar overnight. This may be easily accomplished by saturating a terry cloth towel in vinegar and wrapping it around the shower head or faucet.
Stubborn stains can be removed from the toilet by spraying them with white distilled vinegar and brushing vigorously. The bowl may be deodorized by adding 3 cups of white distilled vinegar. Allow it to remain for a half hour, then flush.
PETS
A teaspoon of white distilled vinegar for each quart bowl of drinking water helps keep your pet free of fleas and ticks. The ratio of one teaspoon to one quart is for a forty-pound animal.
Test the color fastness of the carpet with white distilled vinegar in an inconspicuous place. Then sprinkle distilled vinegar over the fresh pet accident. Wait a few minutes and sponge from the center outward. Blot up with a dry cloth. This procedure may need to be repeated for stubborn stains.
.
.
A PYP Best Blog! Making Your Own Laundry Detergent – An Update!
Just in case you missed this article on DIY an update on making your own laundry detergent the first time we shared it a couple of years ago, we are republishing it. After Marne wrote this blog originally, we got an awesome response. This is one of the PYP Best Blogs!
Remember my previous post on how to save money and make your own laundry detergent?
Well, I wanted to post an update for you. I just ran out of it about a week ago. So this mix lasted me 7 months. Not quite as long as I had thought, but I do A LOT of laundry. With four kids and three of them in sports (and the other a messy 3 year old0, my washer rarely gets a rest. Here is the breakdown for you for me and my lifestyle:
Cost of original detergent: approx. $20
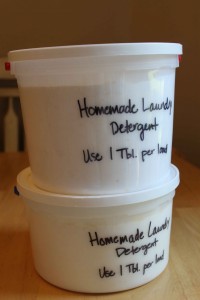
Amount made: approx. 2 gallons (see photo above)
Length of use: 7 months (29 weeks)
Loads done: 10-15 loads per week (average)
Amount of detergent used:1-2 Tbl. per load
So, if I am doing my math correctly, for each week I did laundry for 29 weeks my detergent cost me $.69 cents (I divided $20 into 29 weeks). And…as I am doing between 10-15 loads per week, that means each load of laundry was between $.04-$.06 cents per load!
That is pretty awesome.
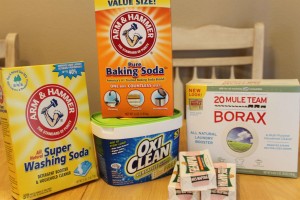
For now I am going to keep on making my own detergent. I like how easy it is to make, how well it cleans my clothes, and how cost effective it is to make. Remember, the recipe I gave you has Oxi Clean in it, which does raise the price of the original cost. You can leave it out of the recipe in order to lower your overall cost. HOWEVER, I think it is worth it because it helps keep my whites from getting too dingy.
Did you make this recipe of detergent? How has it worked for you?
A PYP Best Blog! DIY making your own lotion!
Just in case you missed this article on DIY making your own lotion the first time we shared it a couple of years ago, we are republishing it. After Marne wrote this blog originally, we got an awesome response. This is one of the PYP Best Blogs!
My friend recently taught me how to make some incredible homemade lotion! I love this stuff. I have been using it for about a month now consistently and I have noticed my skin is much softer. I love how this lotion isn’t greasy yet it contains healthy minerals and vitamins for my skin. It is so easy to make!
First, gather up your ingredients. You will need:
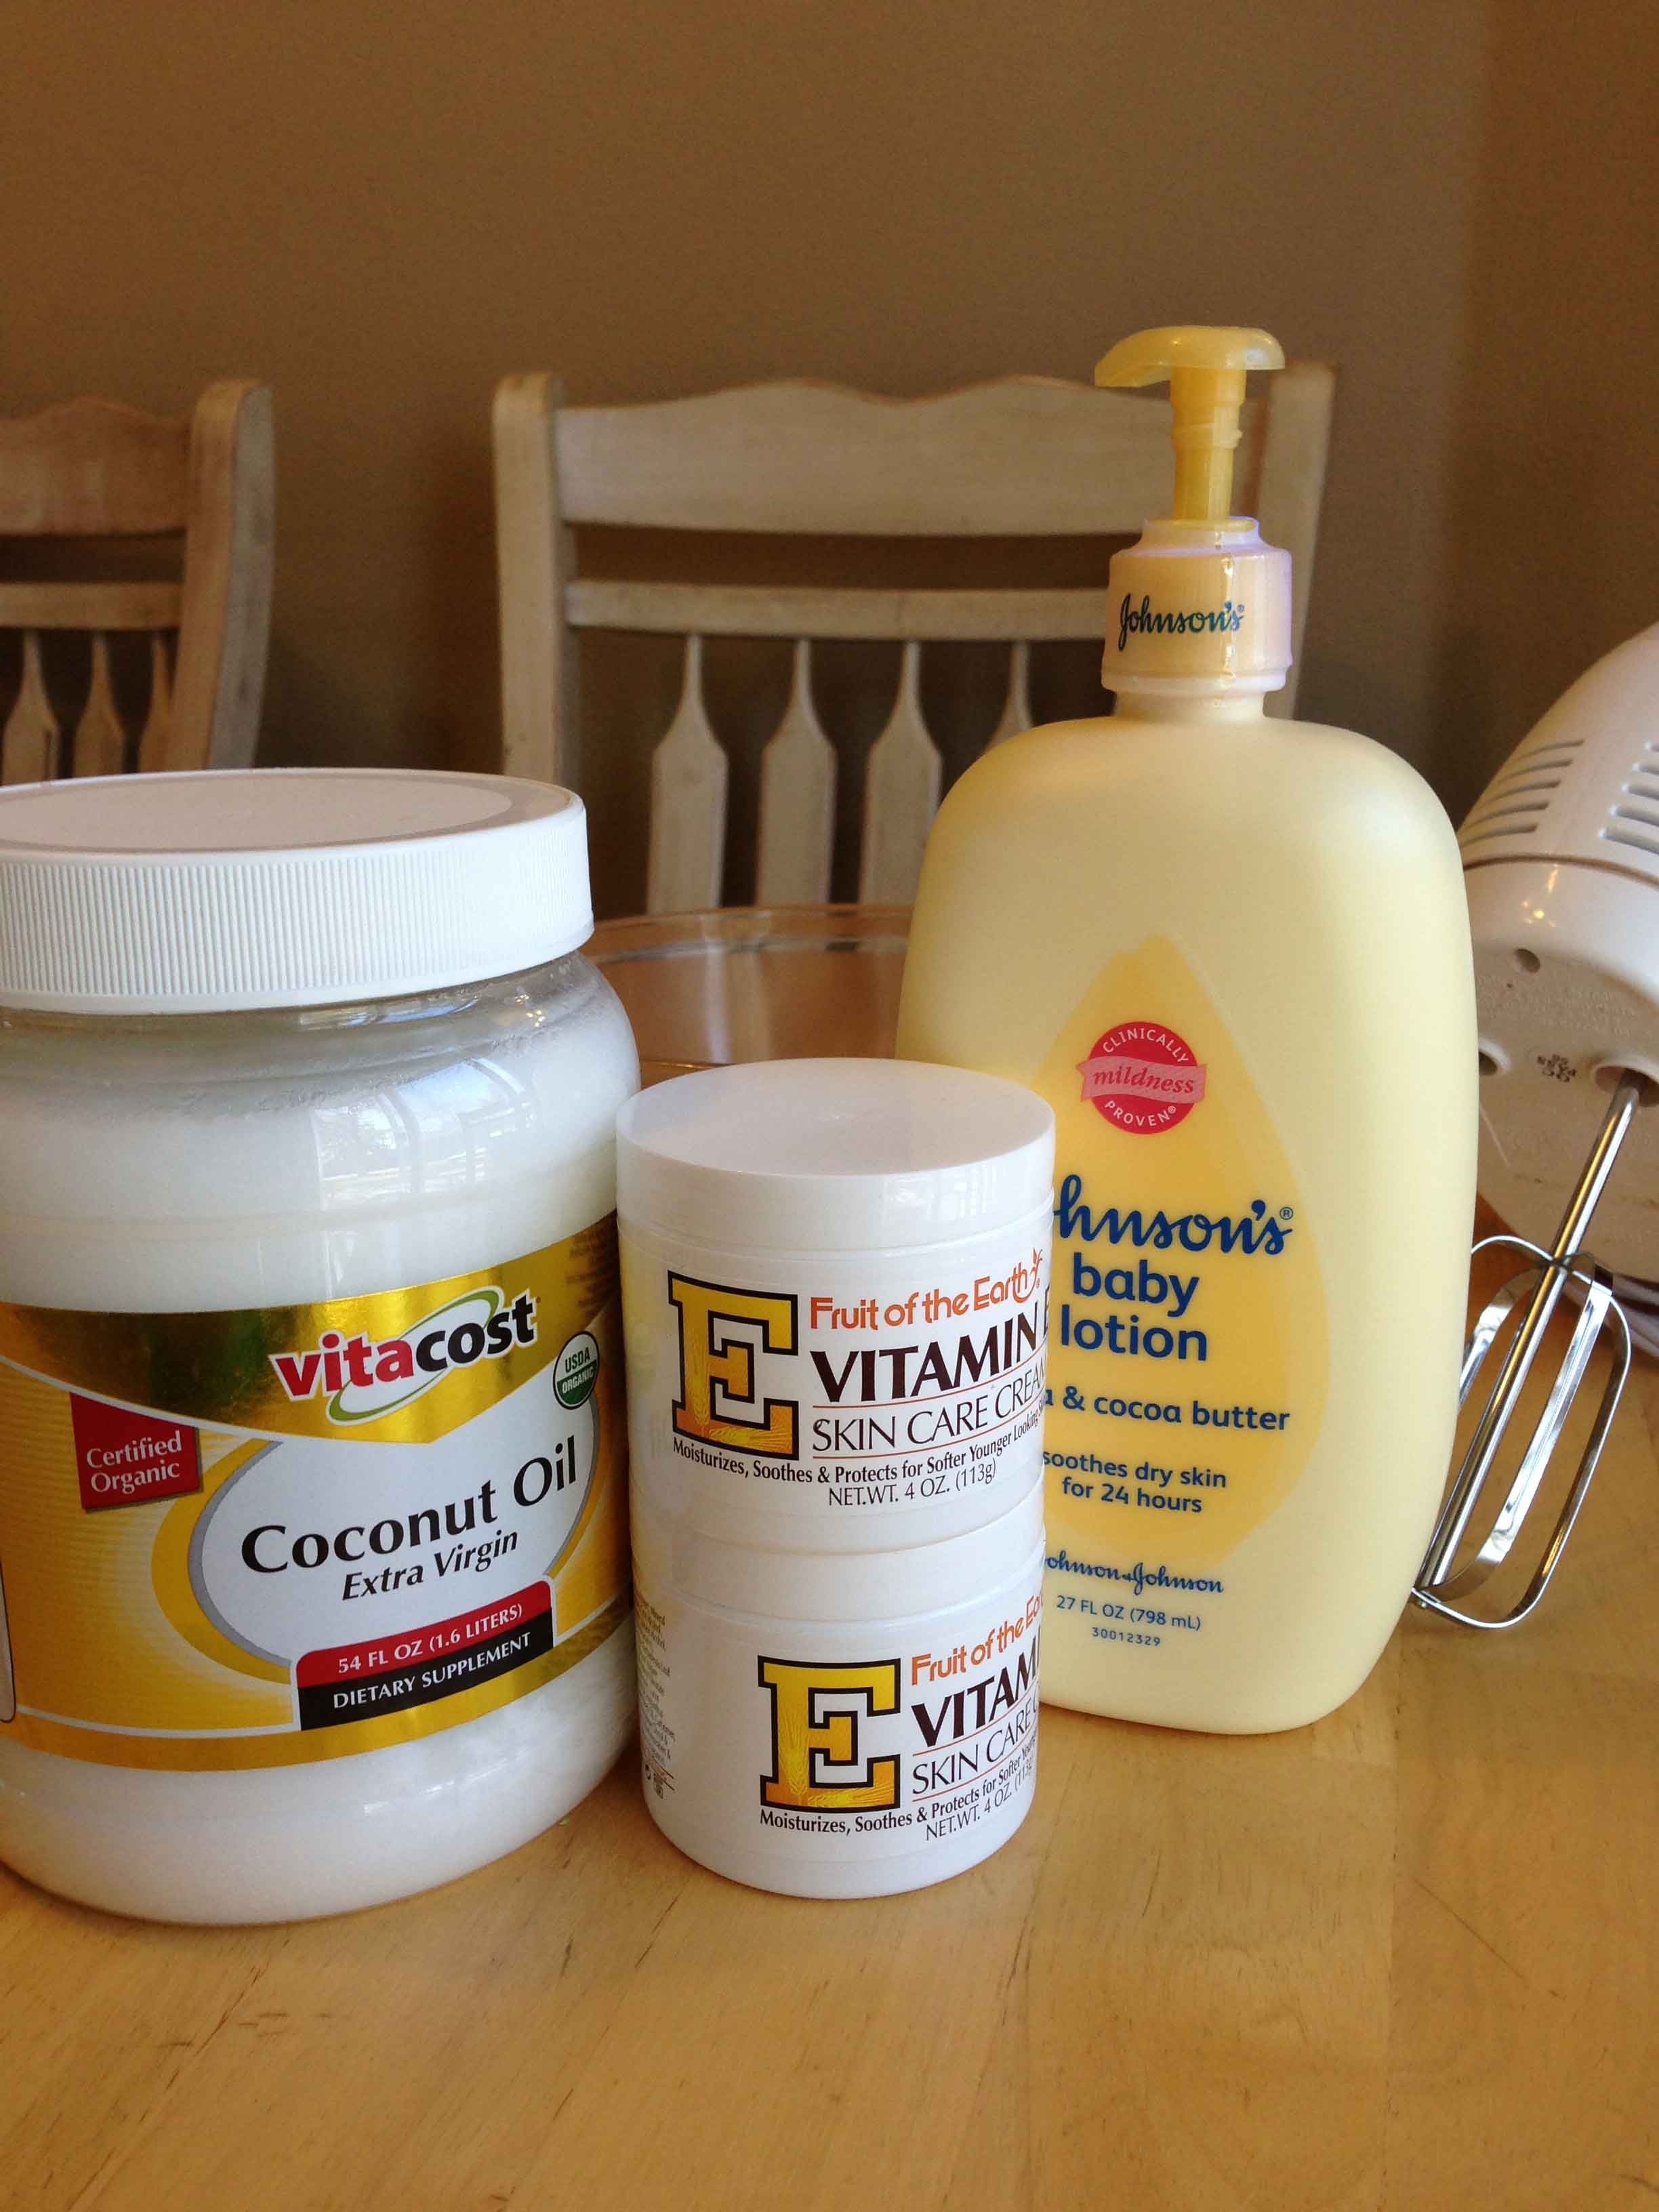
16 oz baby lotion (I like using Johnson & Johnson baby lotion, but you can use whatever you like)
16 oz coconut oil (you can also use Vaseline if you don’t have coconut oil)
8 oz Vitamin E cream (found at Walmart in the lotion section)
Large bowl
Hand mixer
Next, you will want to put your ingredients into a bowl to mix up together. This is the fun part, it is kinda cool to whip up.
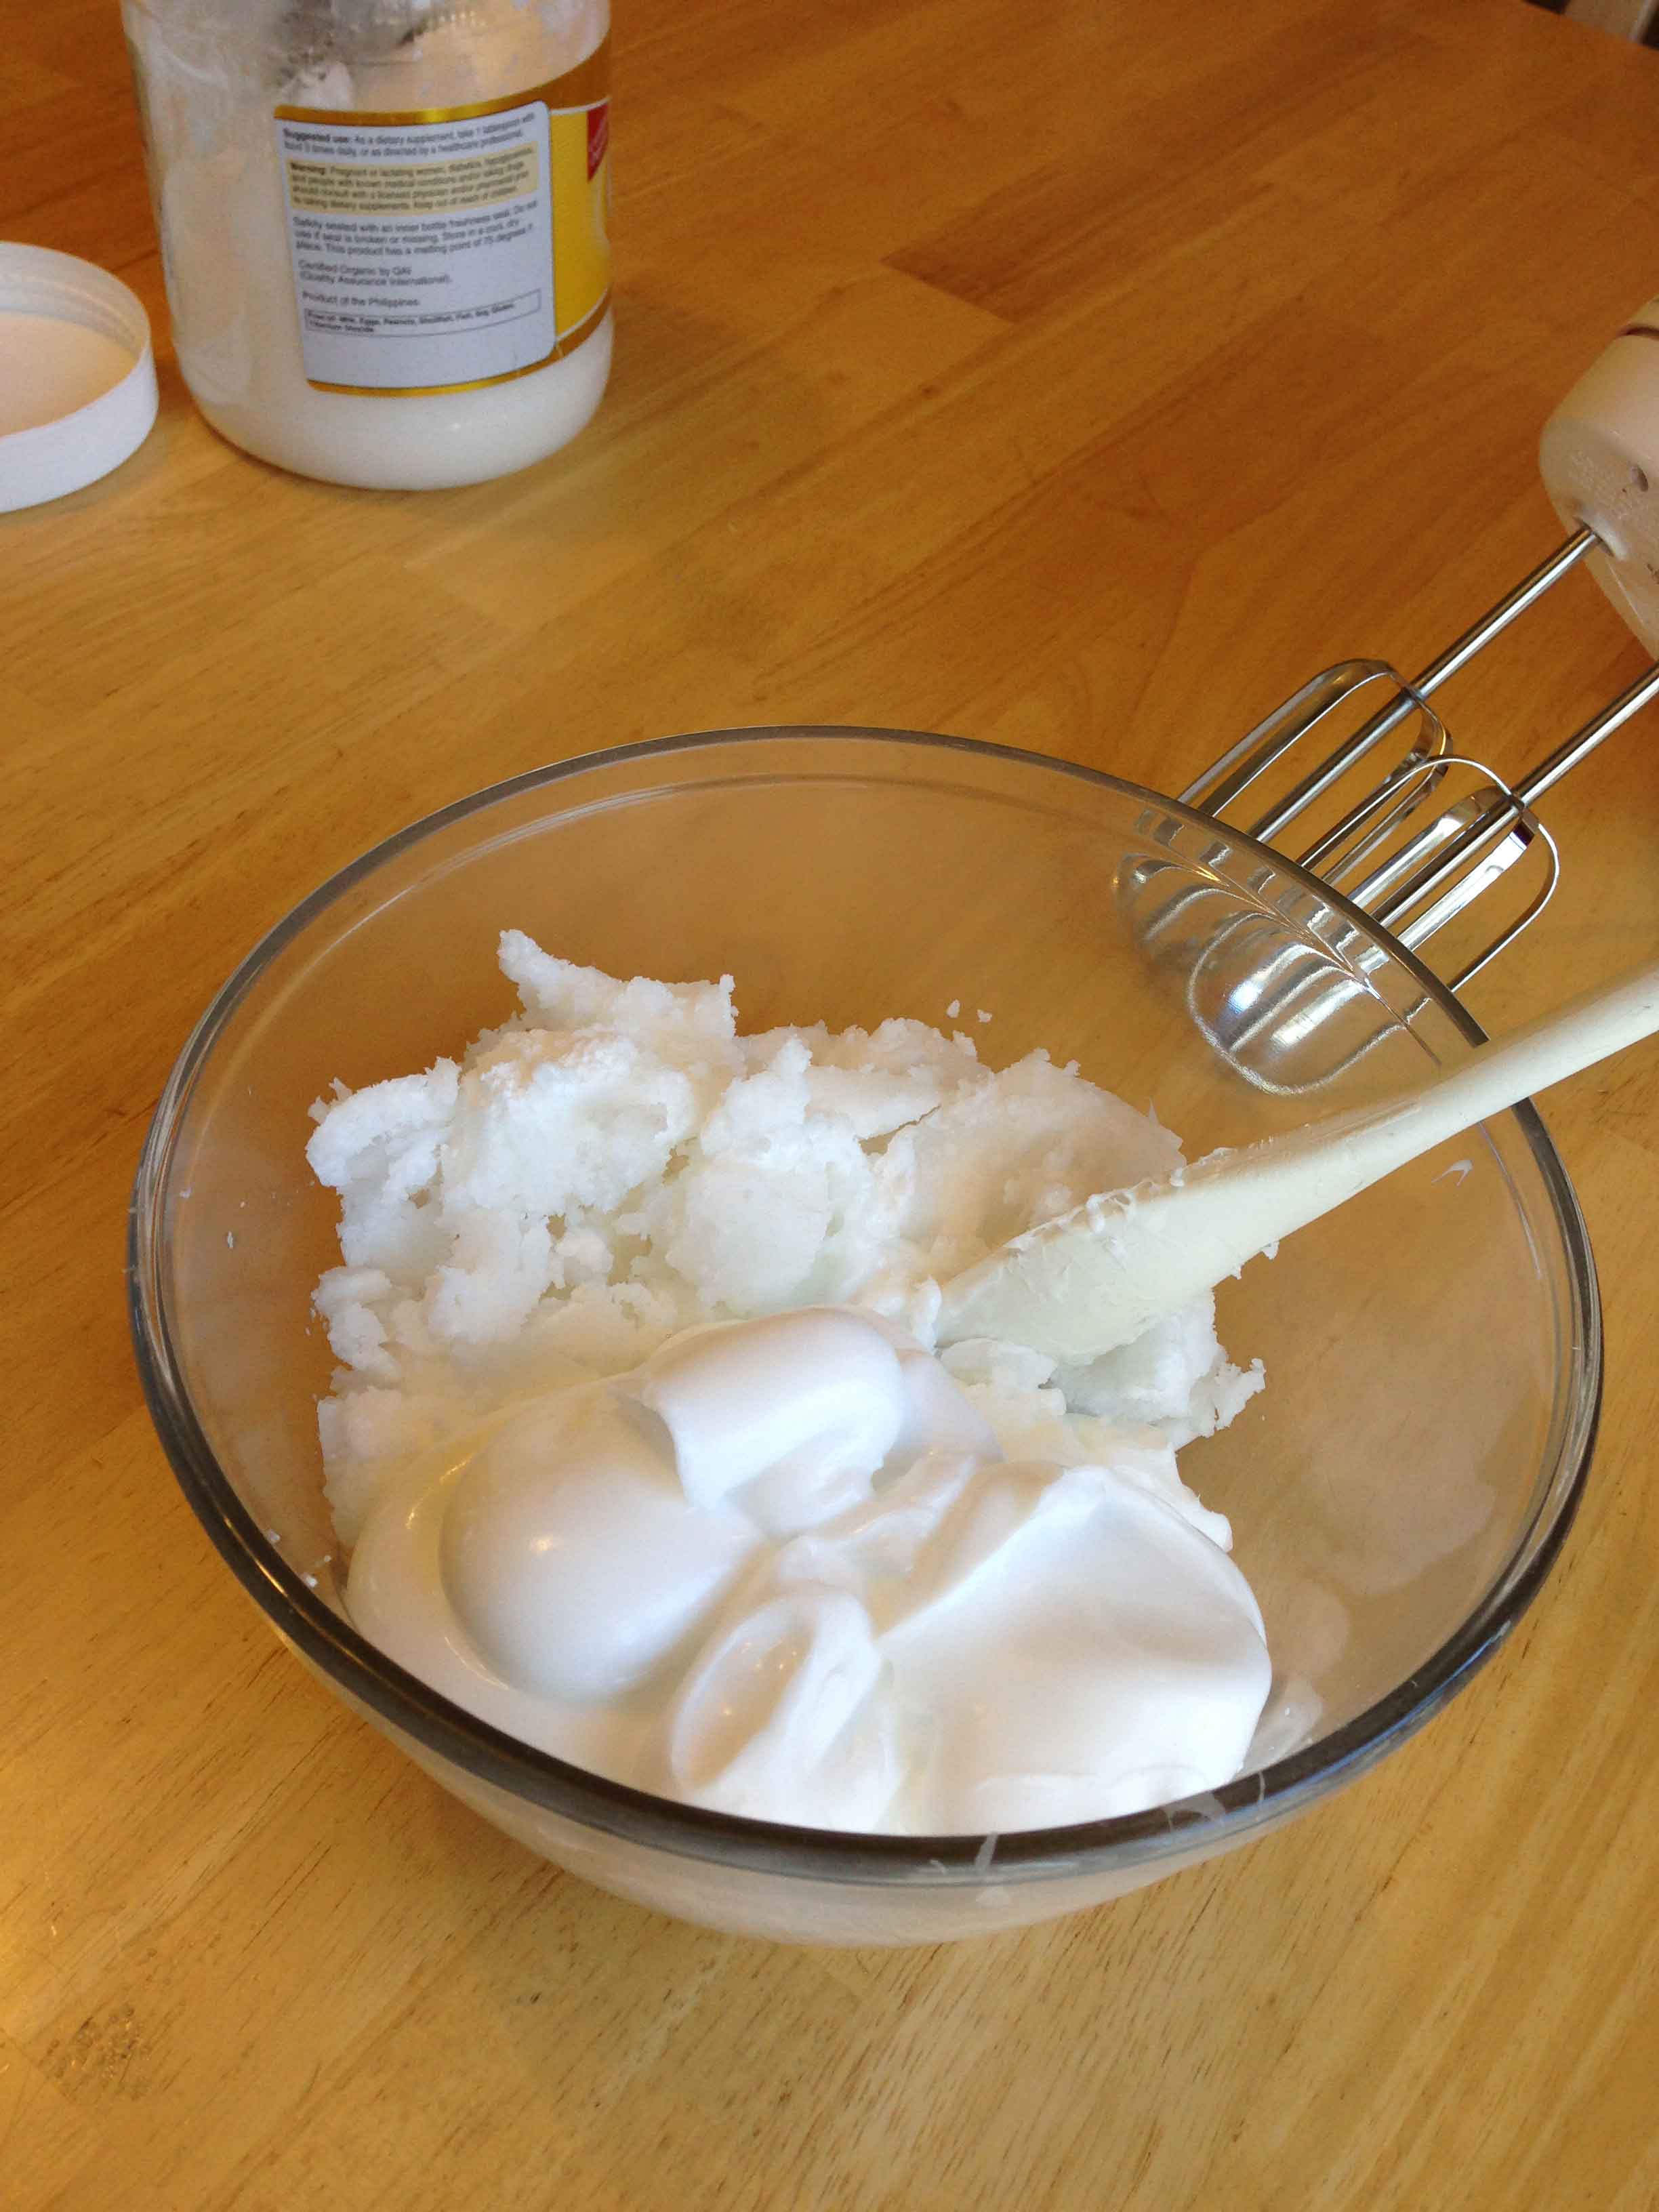
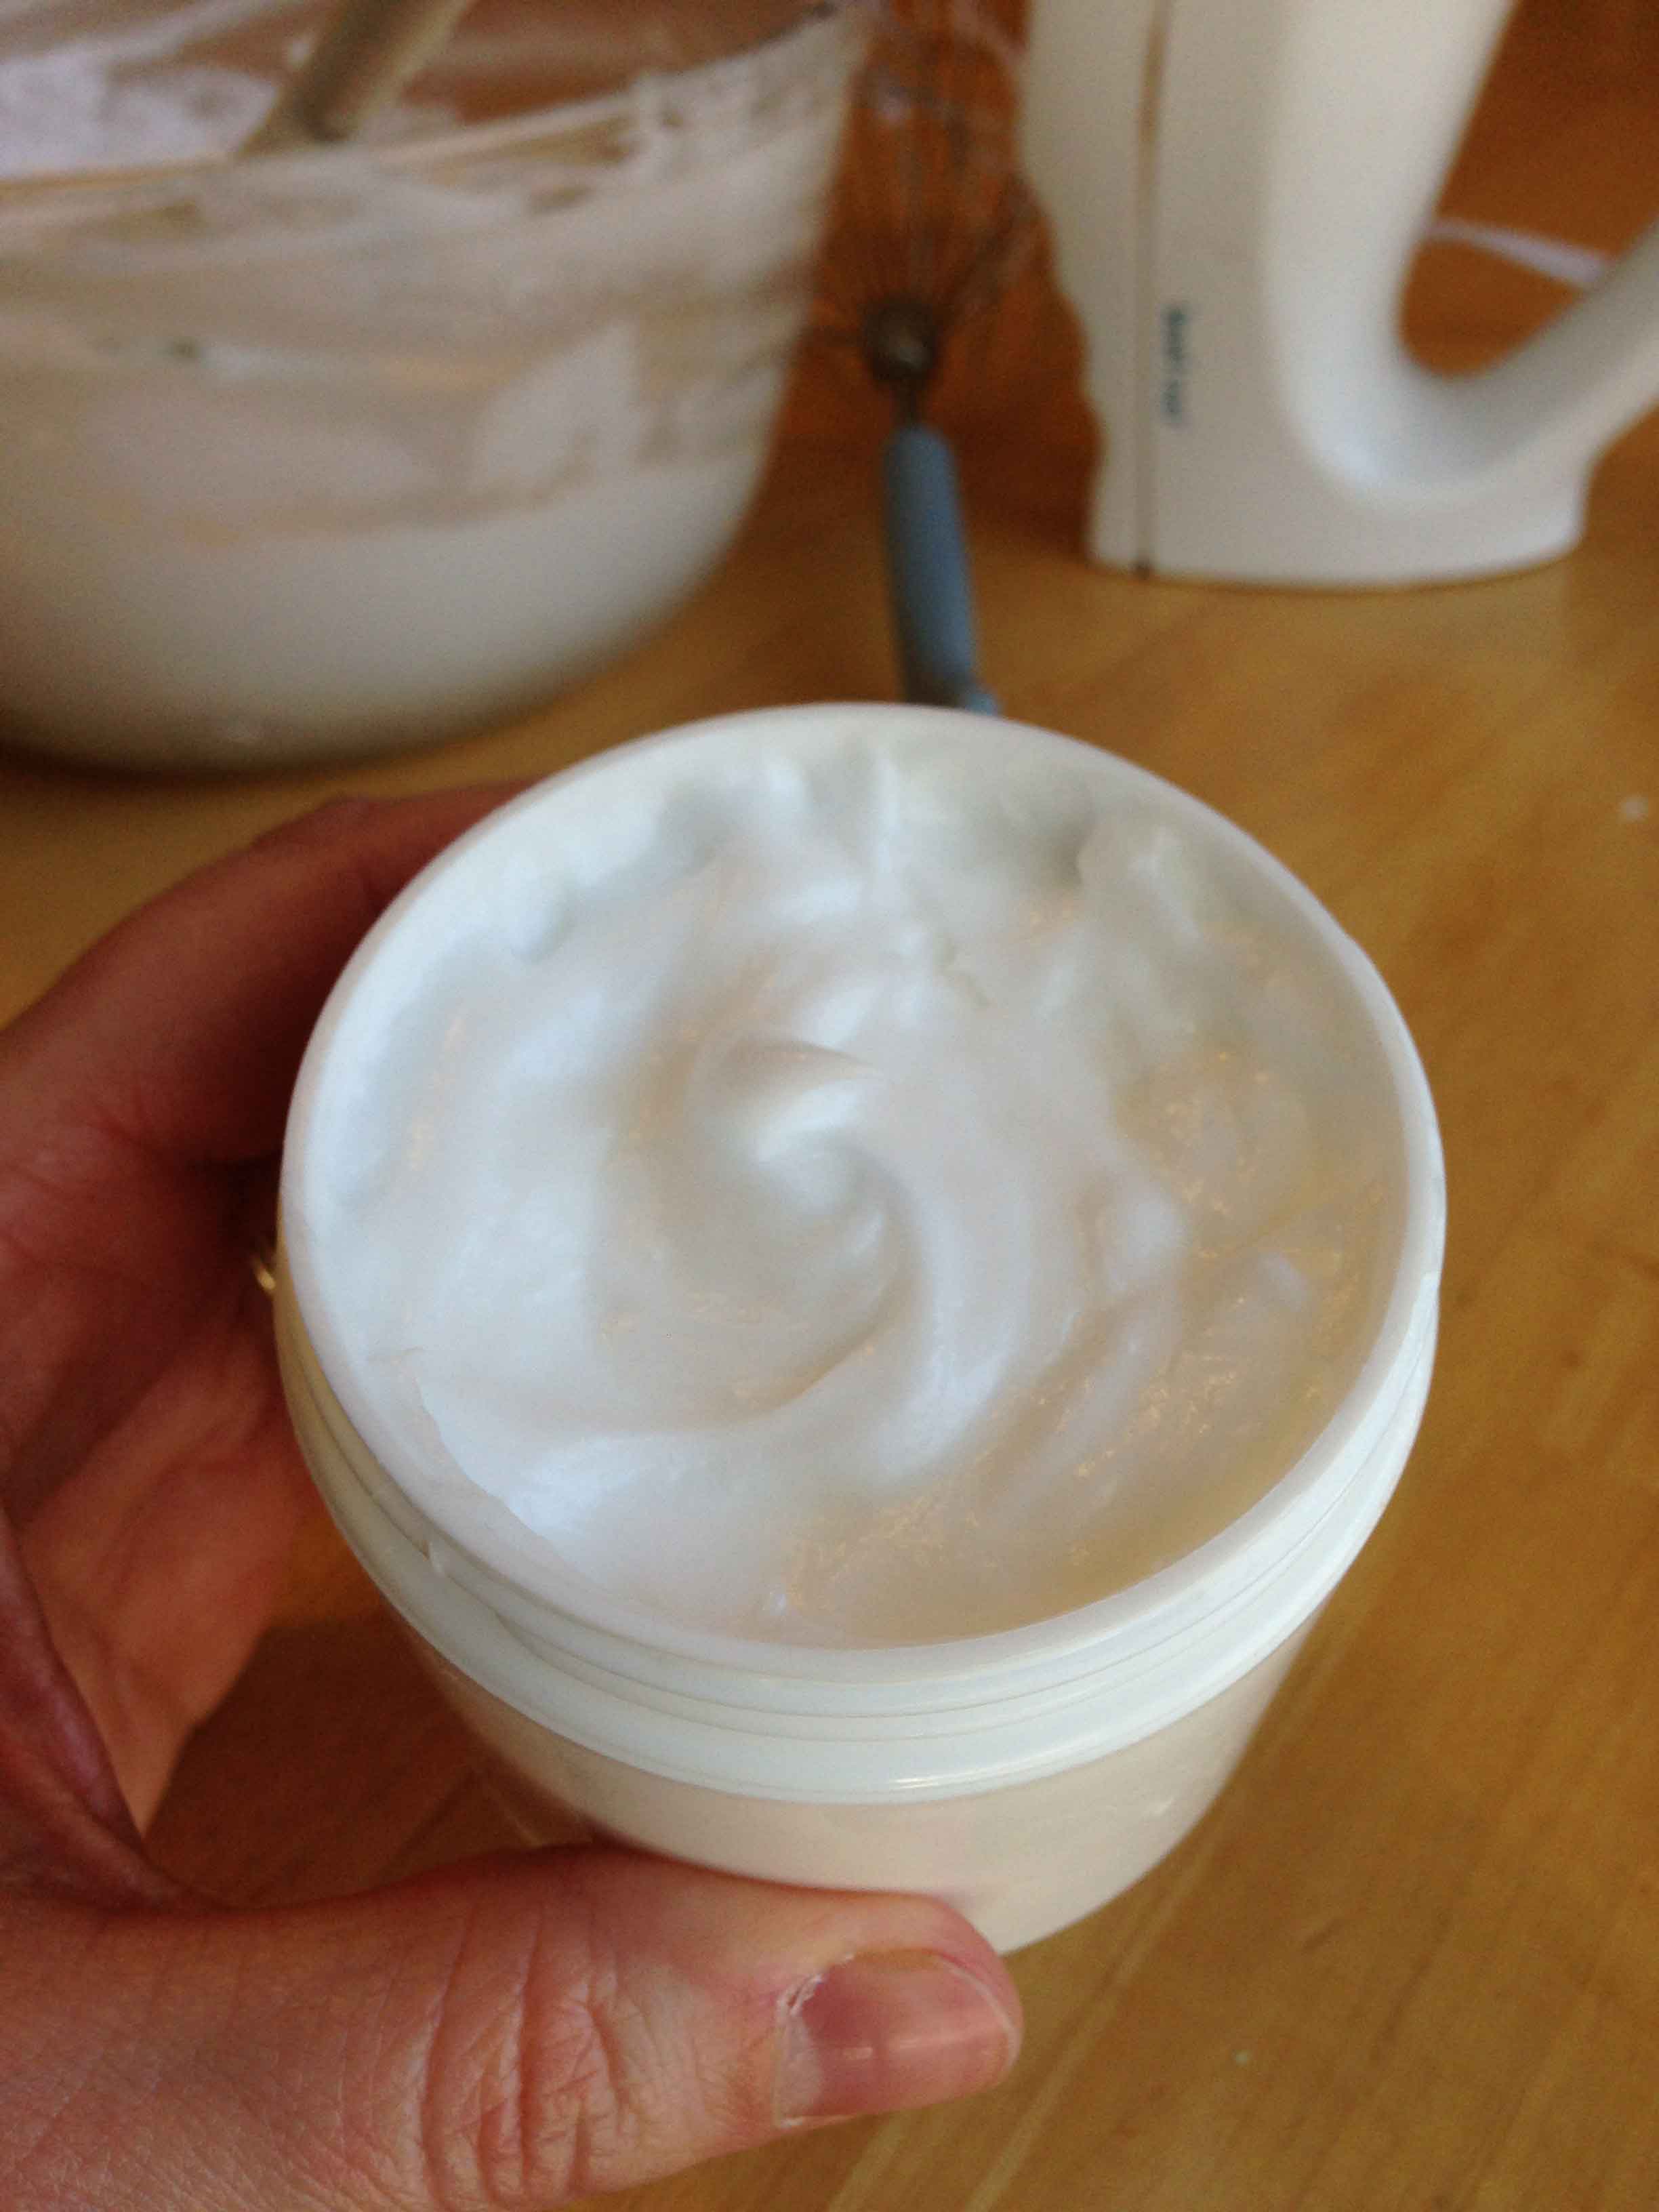
This is what it looks like all whipped up! Nice and creamy. Don’t worry if there are small chunks of coconut oil. They melt easily when you rub it onto your skin. If your coconut oil is in larger chunks, you might want to soften it a little before mixing together. Just don’t melt it!

Now its time to put the lotion in containers so it is ready to use. Those cute containers that the vitamin E came in? The labels peel off really easily! They are perfect for putting the lotion in.
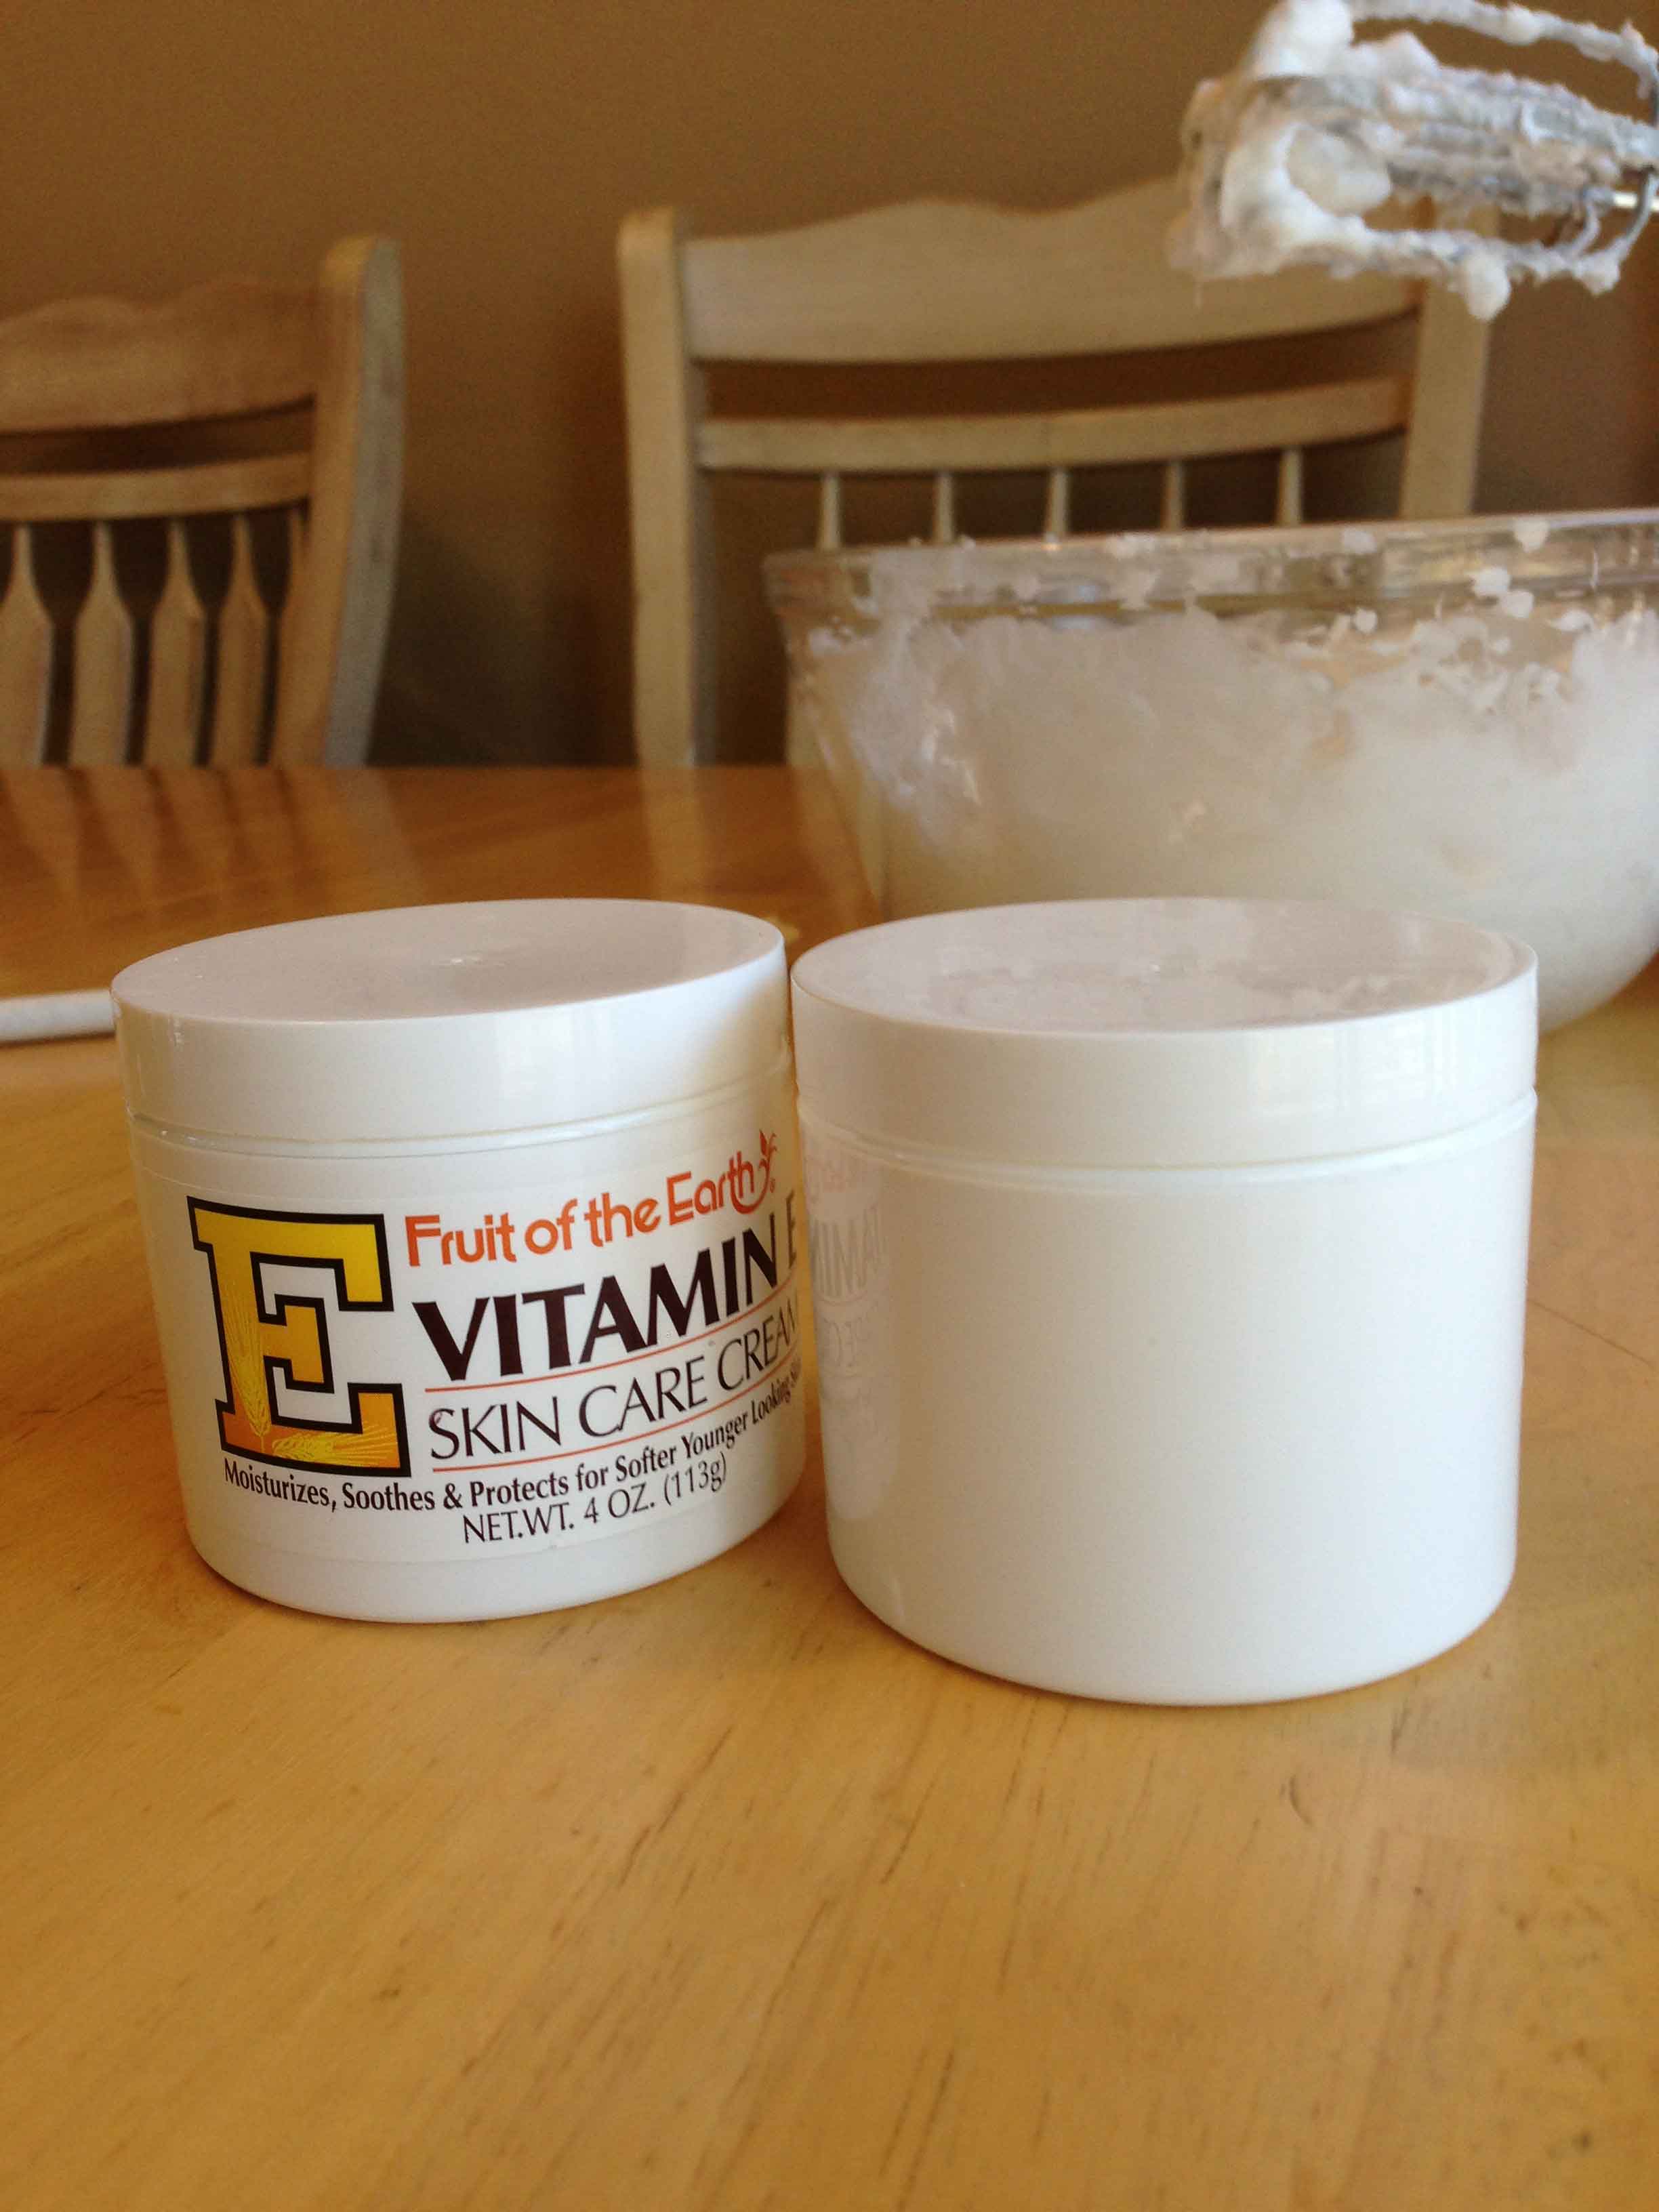
Granted, this makes A LOT of lotion, as you see. These two small containers will not fit the lotion. So use whatever container you like. 🙂 As you keep making the lotion you will aquire more of the vitamin E containers to use.
If you make this and try it, let me know what you think! I love this lotion and am hooked on it forever!
Get cash back this week with Checkout 51 WYB milk, tomatoes, bananas, salsa & more
Get cash back on your groceries! To save money with Checkout 51, all you have to do is…
- Browse the offers that are updated every Thursday
- Buy the products from any store
- Take a photo of your receipt to redeem your deal
- Get cash back!
This week’s offers include these & more:
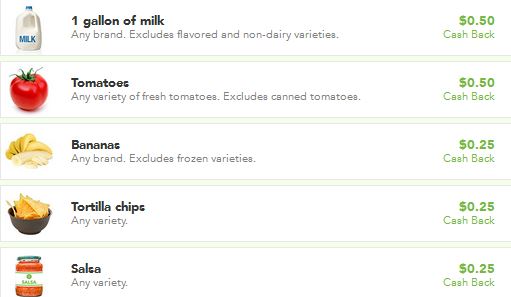
Checkout 51 LINK
Get cash back this week with Checkout 51 WYB milk, yogurt, bananas & more!
Get cash back on your groceries! To save money with Checkout 51, all you have to do is…
- Browse the offers that are updated every Thursday
- Buy the products from any store
- Take a photo of your receipt to redeem your deal
- Get cash back!
This week’s offers include these & more:
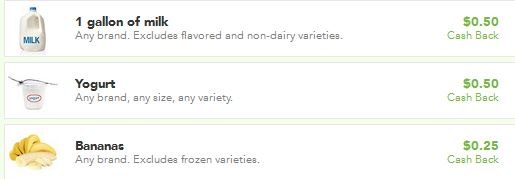
Checkout 51 LINK
Saving Money on Halloween Activities
 I don’t want to spend a lot of money on Halloween activities. Truth be told, I really do not like Halloween. But I am a good mom and I go along with the festivities for the sake of my children. Occasionally I even dress up.
Here are a couple of ideas for Halloween activities that won’t break the bank:
Host a Halloween potluck:
Throwing a Halloween party doesn’t have to break the bank. Offer to host a potluck at your place and provide the main dish. Halloween food to me is things like Hot Dogs, Soup, Pizza, etc…
You can ask a few guests to bring a crock-pot of soup or chili for a cook-off.
Or you can even recommend that your guests bring a Halloween-inspired side like “mummified” pigs in a blanket, a blood red drink with floating eyeballs.
Games could include Clue, Bobbing for Apples, Fish Ponds, etc….
To keep the Halloween spirit alive, you can opt to have a themed party or simply make it mandatory for all guests to be in costume.
Haunted Houses & Theme Parks:
Watch for deals for the haunted houses on sites like Groupon or Living Social. Keep your eyes open for places that have discount nights, early bird specials or discounts for canned food donations.
Community celebrations: Almost every city provides Halloween entertainment in the form of festivals, parades, Trunk or Treats or Halloween mazes. Often, community events have activities that are age-appropriate for all, making them fun for the entire family. Local schools, churches and your city’s chamber of commerce typically provide these festivities at low to no cost. Also check with your local retirement villages or nursing homes, they frequently will have special nights where the old folks love to see the kids in costume.
Halloween movie marathon:
If all else fails, there are always Halloween movies! Rent a few movies or check out Netflix for free or almost free entertainment in the form of horror flicks. Invite a few friends for pizza or popcorn! Don’t forget your blanket so you can cover your eyes for the scary parts!
What inexpensive Halloween activities do you and your family participate int?
A PYP Best Blog! DIY Cleaner for Kitchen Cupboards!
Just in case you missed this article on DIY cleaner for kitchen cupboards the first time we shared it a couple of years ago, we are republishing it. After Marne wrote this blog originally, we got an awesome response. This is one of the PYP Best Blogs!
I am embarrassed to admit how dirty my kitchen cupboards are. So dirty! I decided to try a recipe that I found on Pinterest yesterday, and it worked great! I wanted to share it with you today.
I actually tried two different cleaners. The first one was a mixture of:
one part canola oil
two parts baking soda
Mix up until a thick paste, then use a cleaning toothbrush to scrub the crevices and outside of your cupboards. It is really thick, and kind of balls up while you are using it. The paste will turn dark with the grime. Here is a side by side comparison.
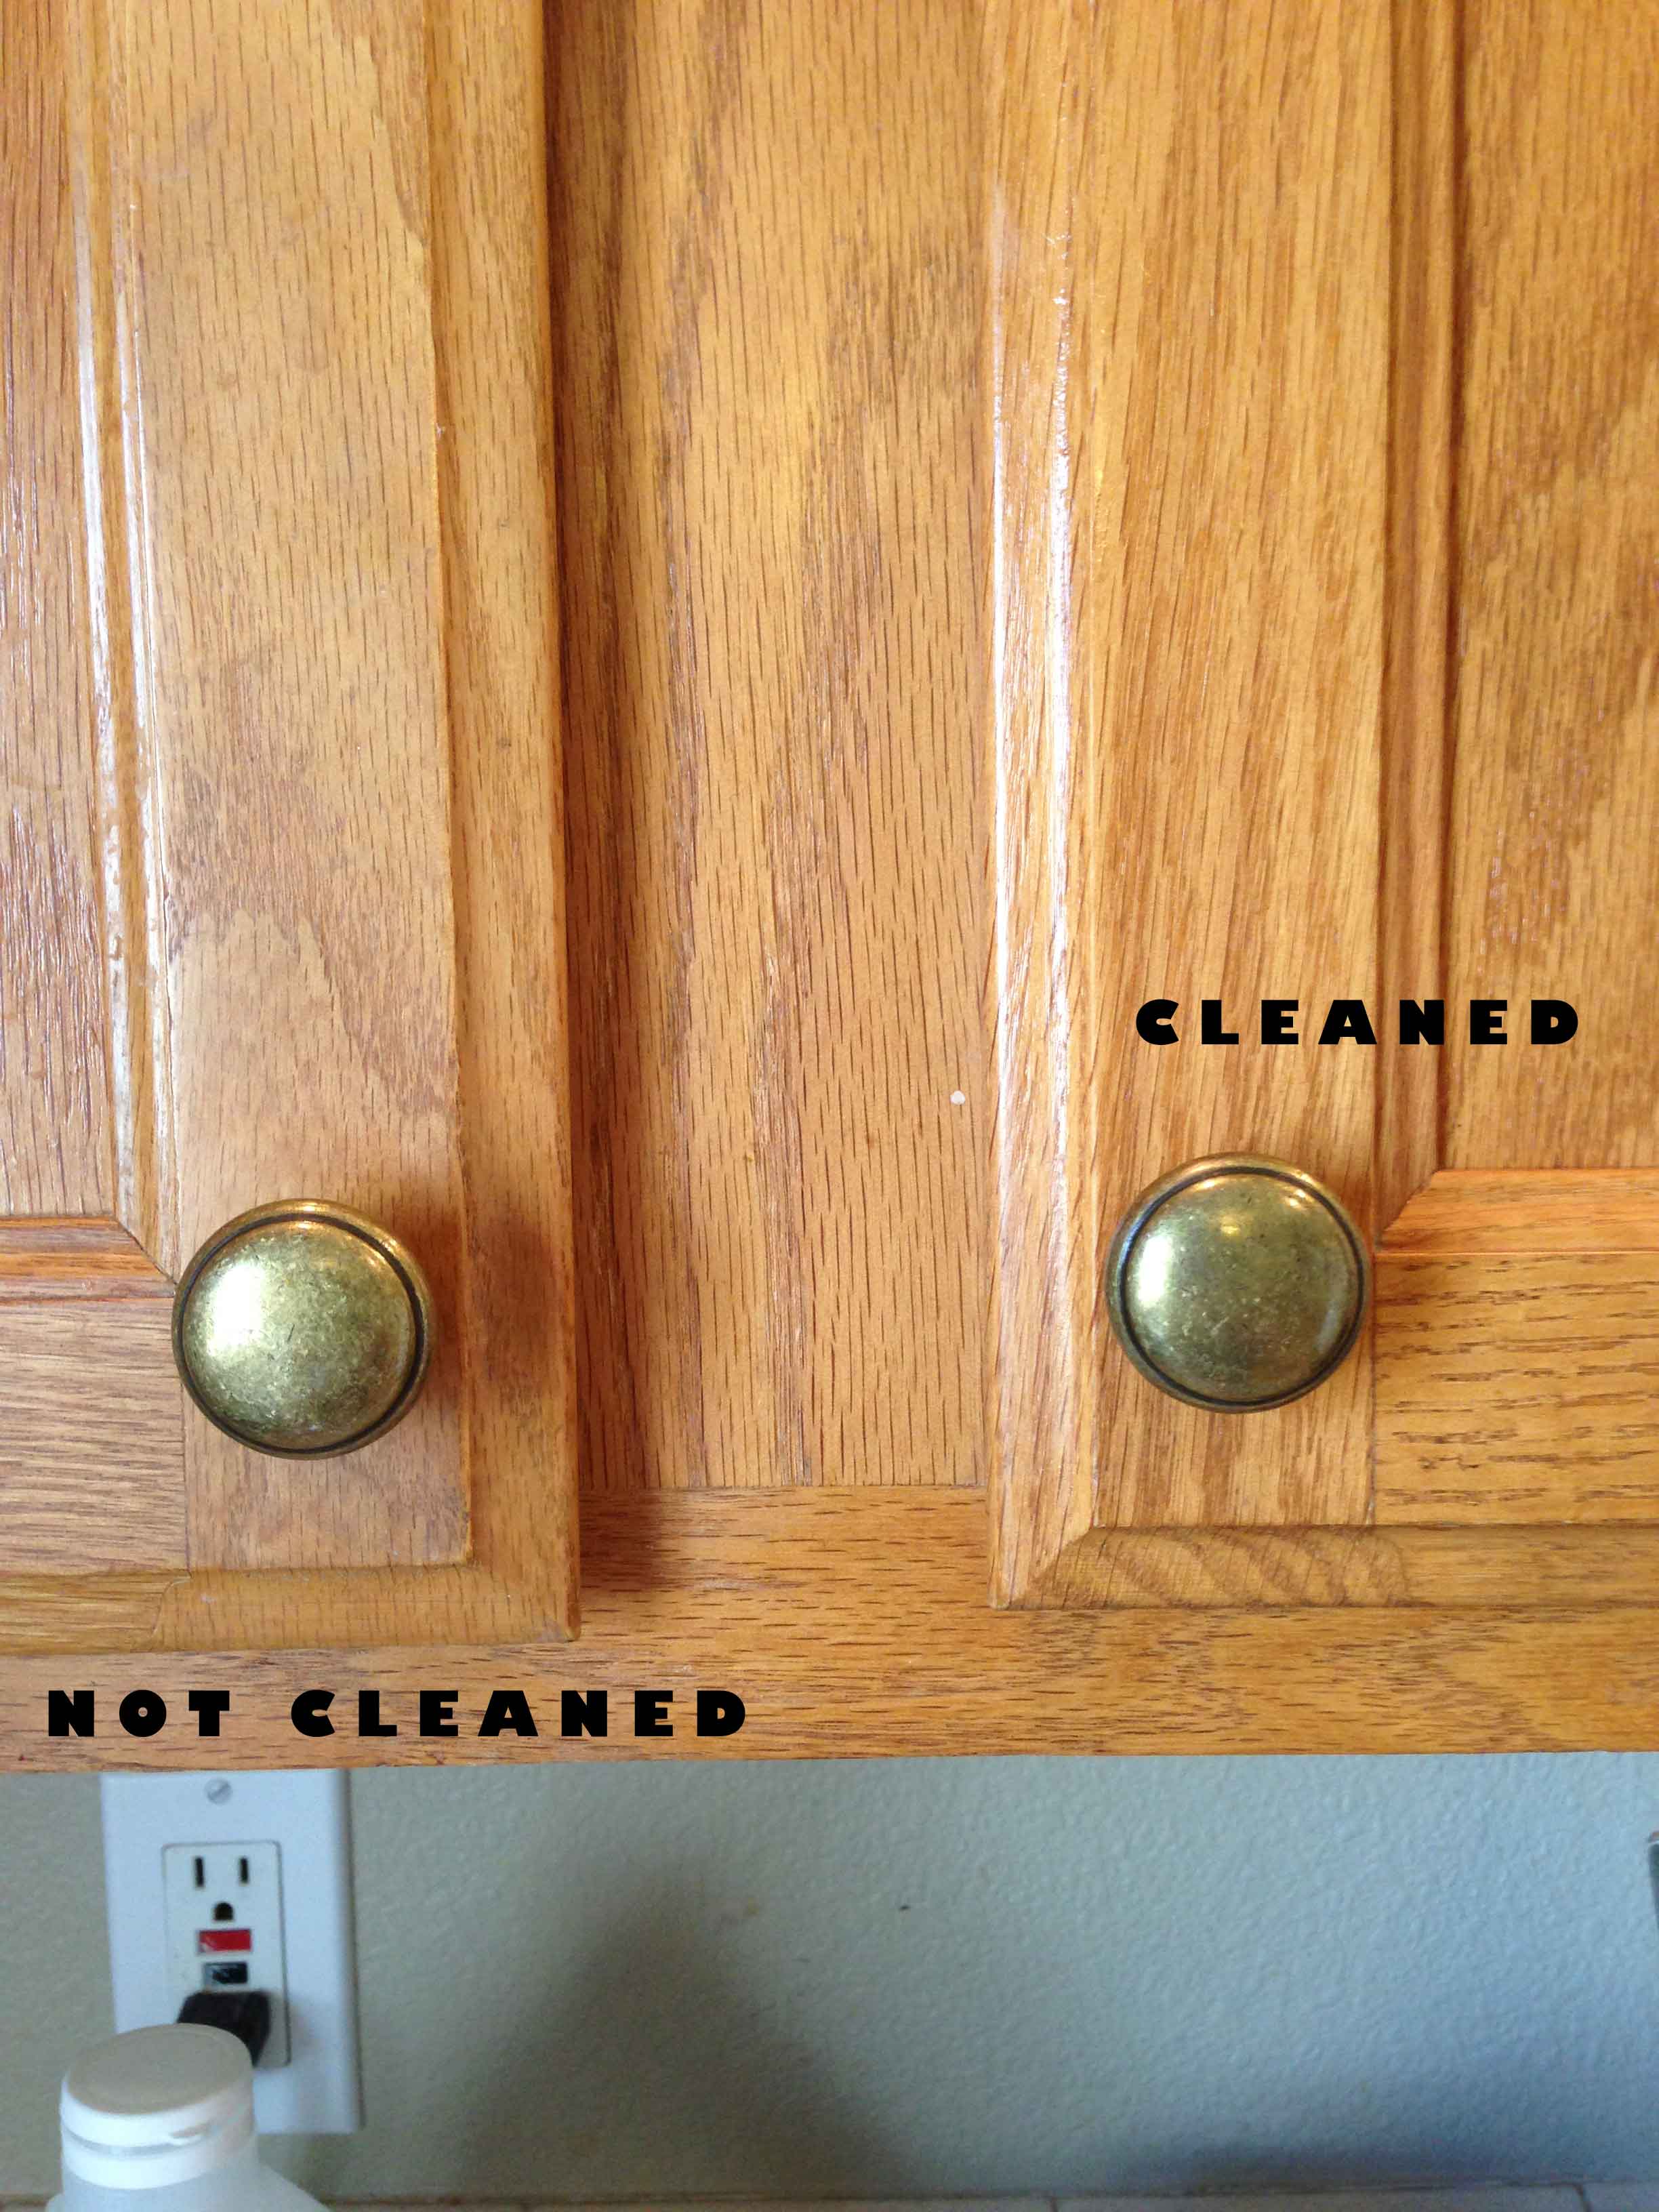
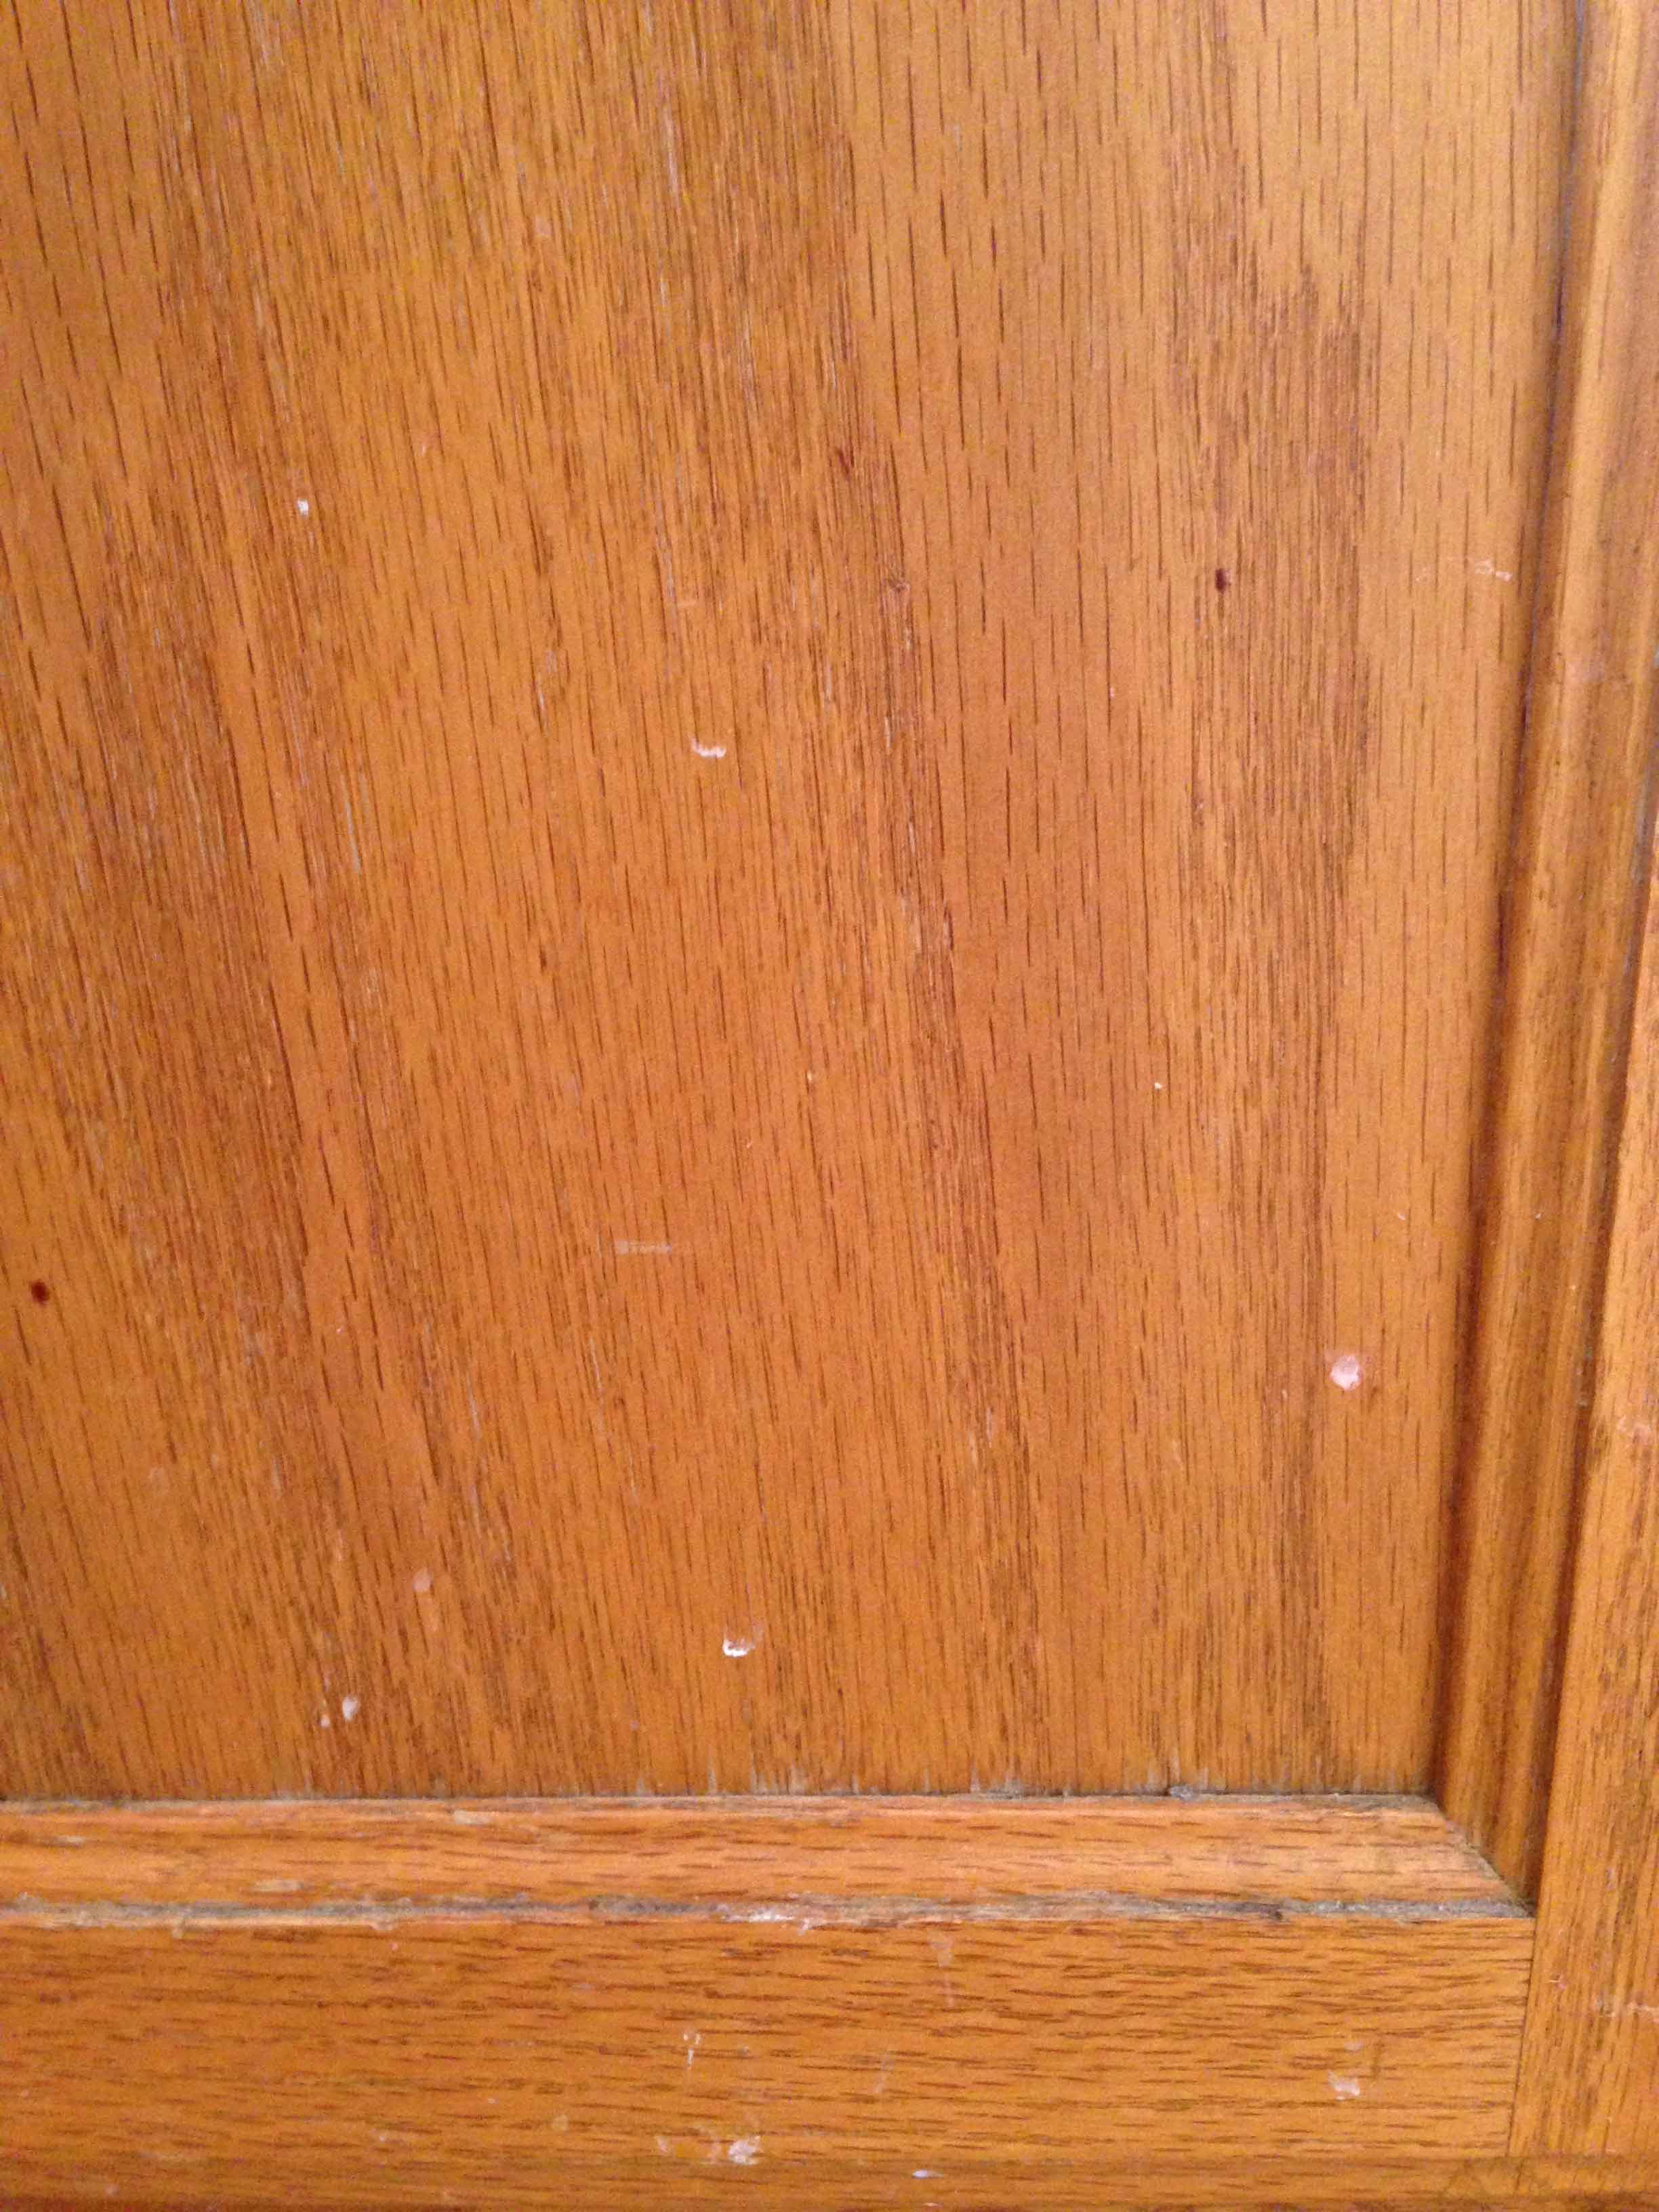
There is obviously a difference, but these cupboards were not as dirty as the ones below. It is just me or do the cupboards on the lower level get filthy? Since these cupboards were much dirtier, I tried an additional solution besides the baking soda and oil. For this one, I mixed:
about 1/2 c. white vinegar
2 cups warm water
4 TBL. baking soda
a few drops of dish-washing liquid
I scrubbed that on with the toothbrush as well. This solution worked great on the caked-on grime. Here is a before and after using that:
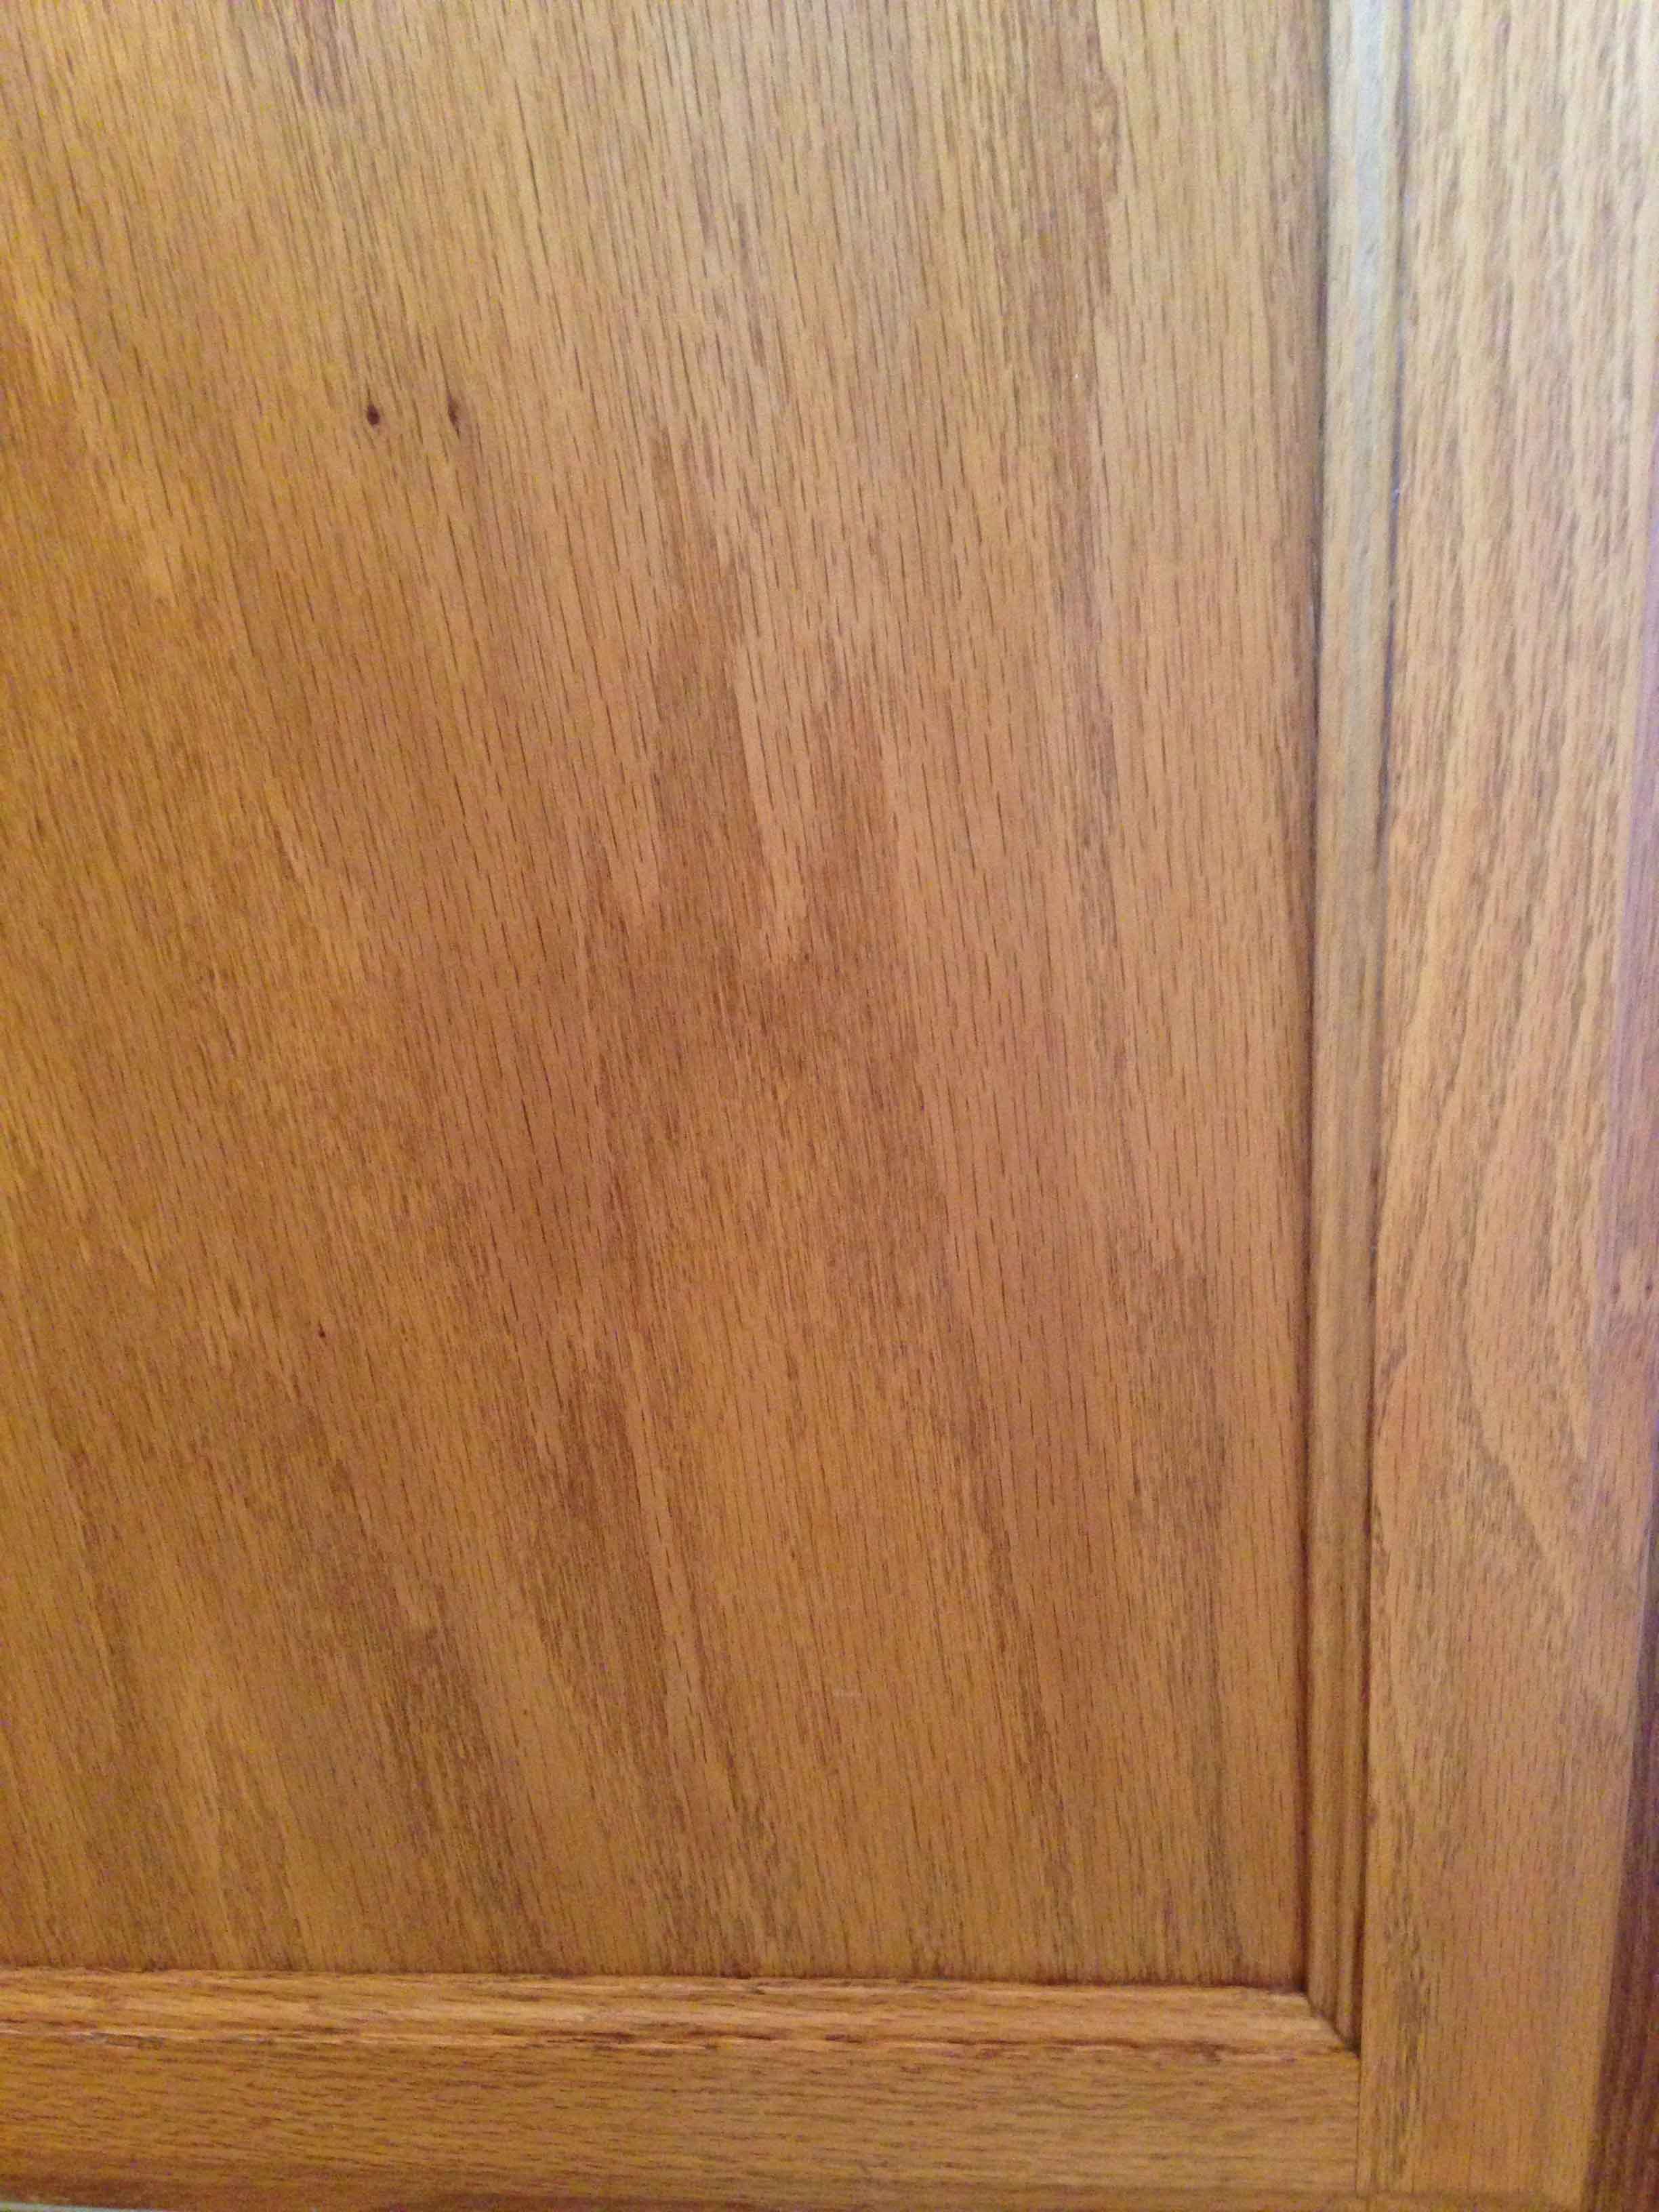
Now you have to admit that those pictures definitely speak for themselves! I can’t believe how clean they got. I am sold on cleaning my cupboards using these two solutions. I was able to clean several yesterday and I will finish more today. This is a very cost effective way to clean your cupboards and most likely you already have everything in your pantry to do the job!
A PYP Best Blog! DIY Common Sense Appliance Repairs!
Just in case you missed this article on DIY common sense appliance repairs the first time we shared it a couple of years ago, we are republishing it. After Marne wrote this blog originally, we got an awesome response. This is one of the PYP Best Blogs!
Have you ever found yourself calling a repairman for a home appliance problem? Then when they get there & inspect the issue, you find out the repairs are a simple fix? Then you are stuck paying a large service call fee when you could have fixed the problem yourself.
Here is an example. For a week or so I have noticed that our refrigerator wasn’t getting as cold as it should. We turned up the temperature but it was not getting colder. My husband said he would look at it. The next morning as I got the milk out it was very cold! After talking to my husband, I learned there were no big, hard repairs. It was a simple, quick fix.
The fridge and freezer work together to keep the temperature regulated properly. See this vent? It is in the top left of the fridge, and it goes to the freezer on the other side.

The problem was this: That bag of bacon bit was standing up blocking the flow vent. That’s it! Once my husband folded down the bag the fridge started to become colder within the hour. If we had called a service man to diagnose and make the repairs we would have paid at least $75 for him to just tell us that.
If you have something wrong with an appliance, toilet, or other item in your home, take some time to check into what might be wrong and see if you can make the repairs before you pick up the phone to call a repairman. My husband is handy, but if you are not maybe you know someone who is that could give you some tips. It just might save you lots of cash.
A PYP Best Blog! Giving Your Kids Jobs or Chores!
Just in case you missed this article on giving your kids jobs or chores the first time we shared it a couple of years ago, we are republishing it. After Marne wrote this blog originally, we got an awesome response. This is one of the PYP Best Blogs!
Most of us try to enlist our children with doing chores around the house. We feel it is something that will develop a strong work ethic for them, as well as teach them basic principles of how to take care of themselves and be a decent, clean and orderly human being. Am I right?
I have read that children who help out at home or have regular chores may have some of the following characteristics:
*can be better behaved when they are away from home
*can have more self-confidence
*may be able to be more self-disciplined when they live away from home
*could take initiative when it comes to taking care of themselves when they move away from home
*may be better at multi-tasking
*learn how important it is to keep themselves and their environment clean and orderly (and how that can affect their behavior)
Granted these may not apply to all children, but I do think it is true to a degree. I have seen it with chores and my own four children.
We all will also agree on the fact that is sometimes if more like babysitting or pulling teeth when it comes to getting our kids to help around the house and get their chores done! We started something in our house a few months ago that seems to be working. Granted, I don’t follow this religiously as life does happen…either we forget or we are out and about so much there is no time….but when we do use it with our chores, it does work!
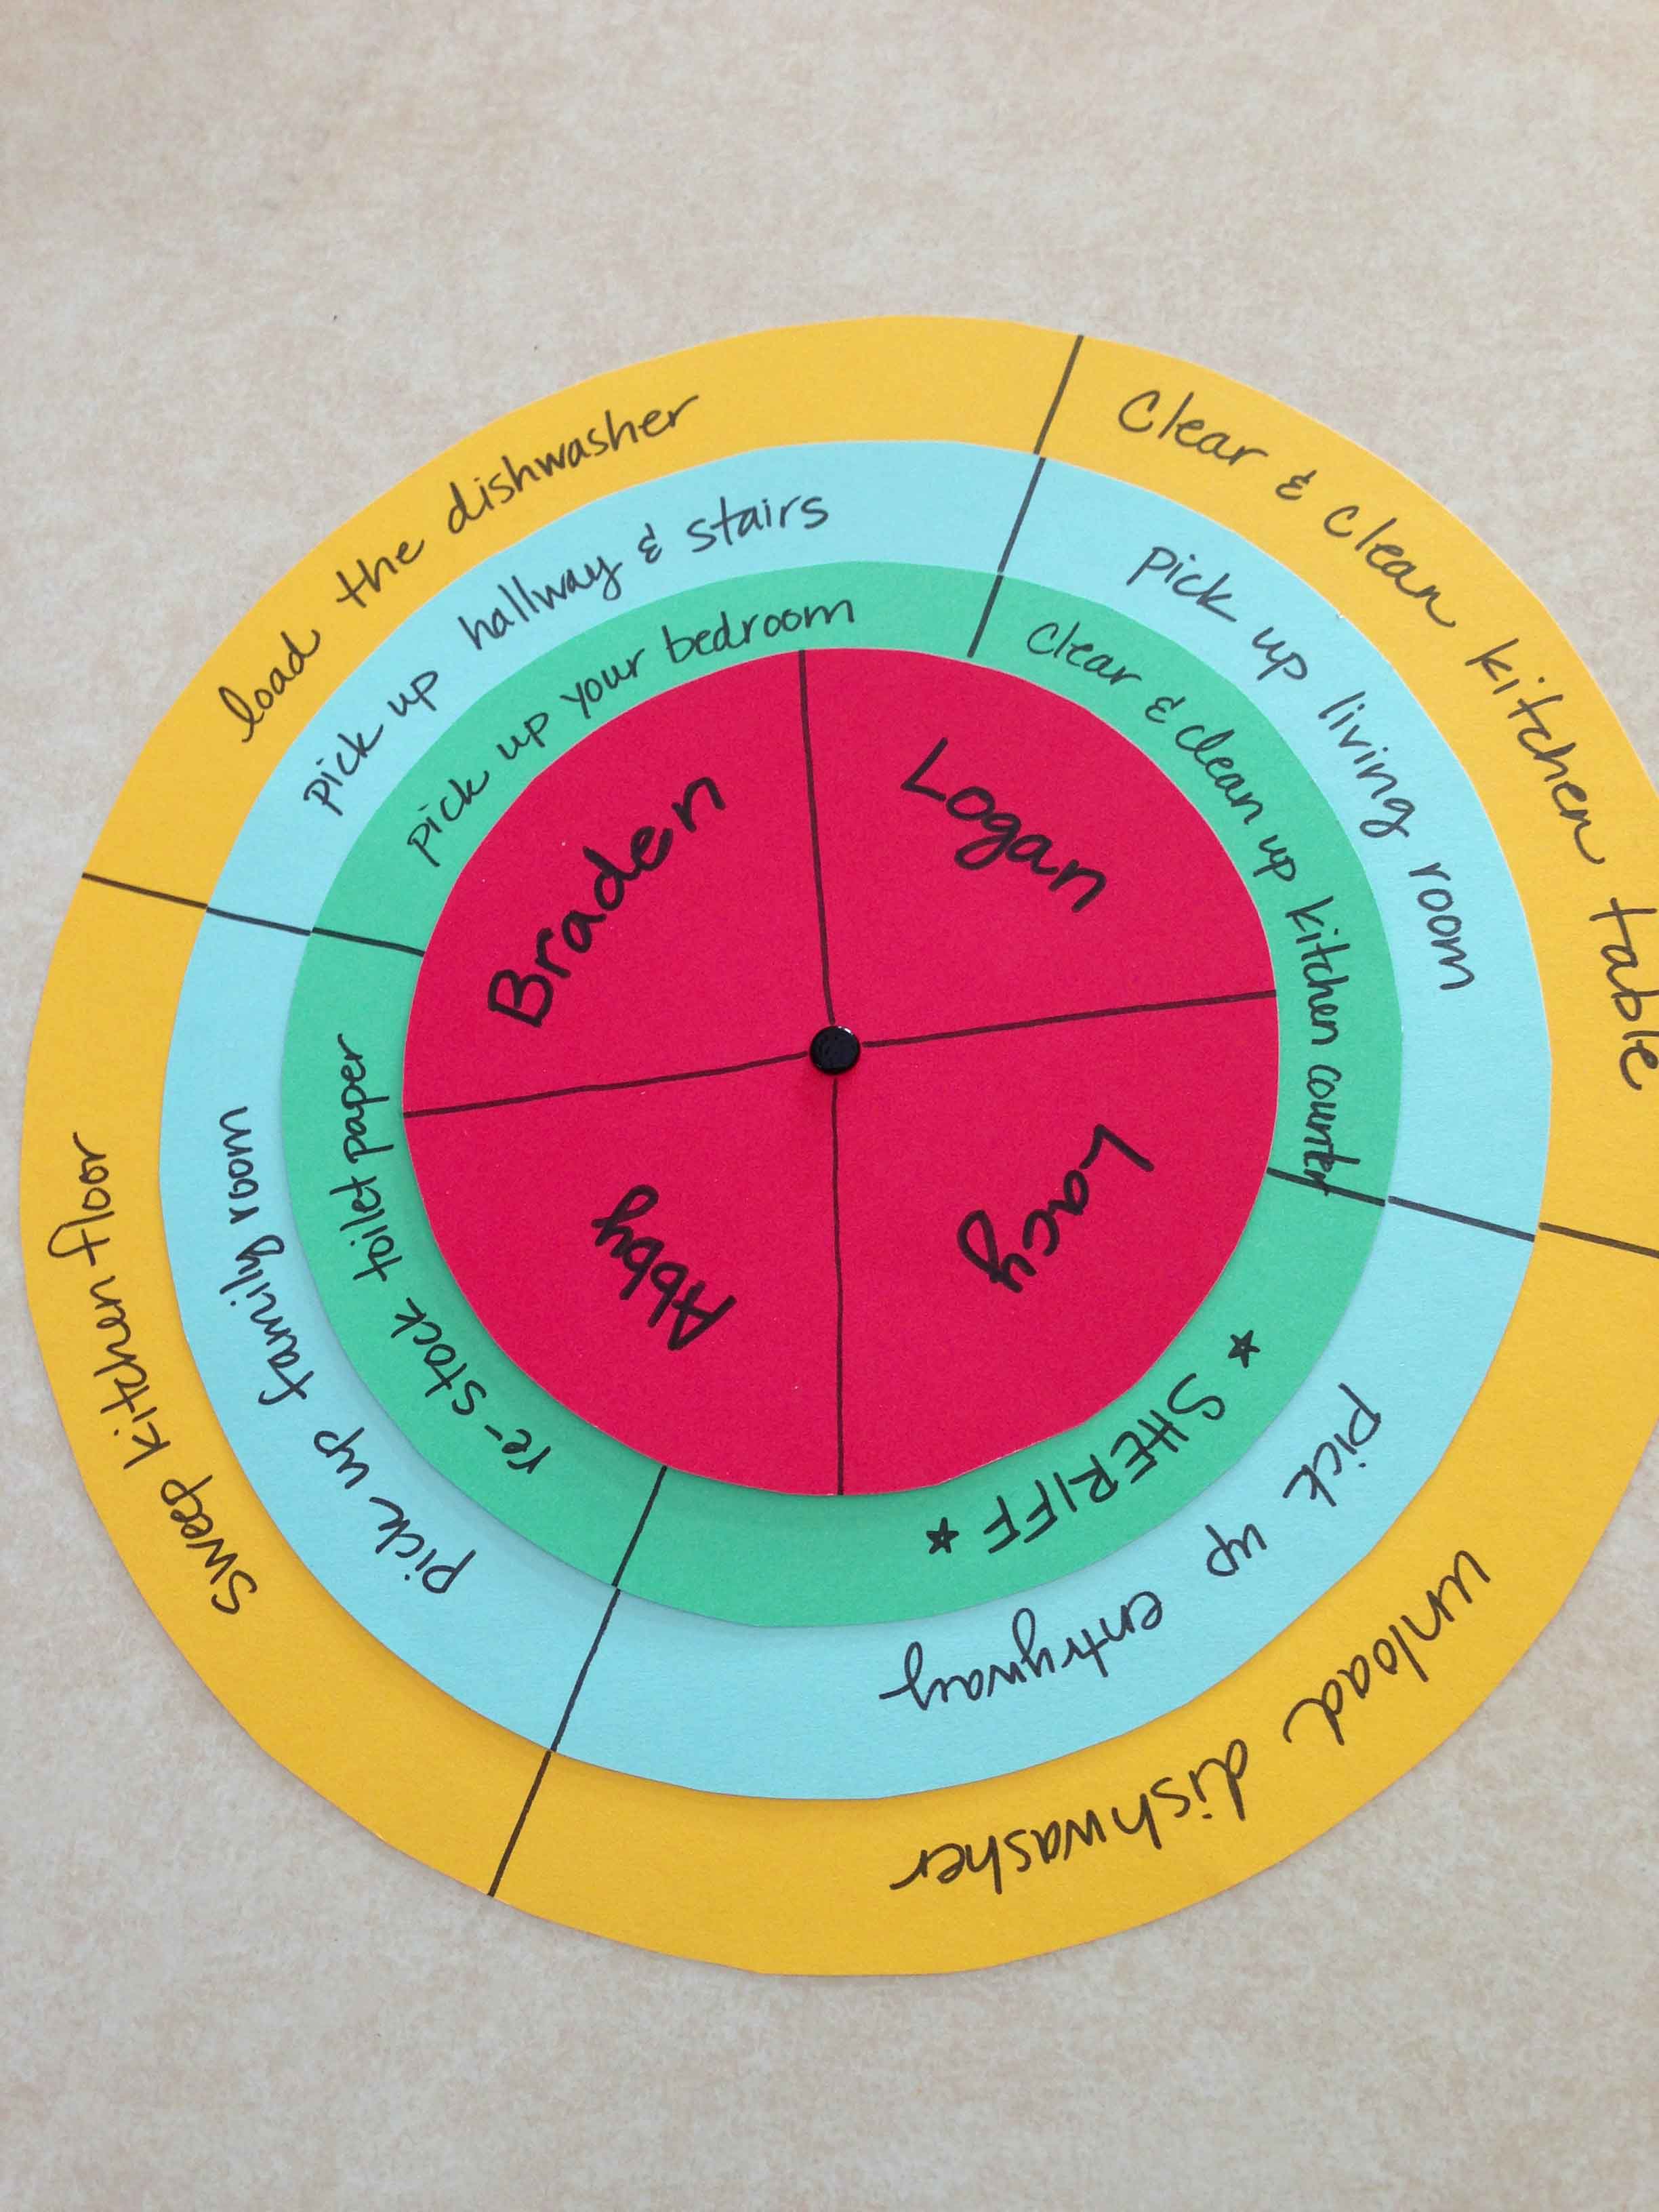
I made a wheel out of card stock (I just traced them using different items in my kitchen for the circle) and attached them with a large brad. Then I used a Sharpie to write on the assignments. We agreed to do these things each evening before bed. Each child is assigned a “zone” to work on (the first two colors) then the inside color (green) are a few random quick jobs to do. My kids LOVE the idea of being a sheriff! I had a hard time coming up with another job, then I thought of having one of them be the person who helps those who need it, checks up on them, and makes sure the job is done. So far it has worked beautifully! The kids aren’t perfect of course, but for the most part they are really good about helping out, and they know what is expected of them.
What I like about this system most is that:
*it is easy, quick, and everyone understands
*simple to put together with supplies almost everyone has on hand
*kids can be involved creating it
*you can rotate the wheel to mix it up to any combo you like
If you are needing to change your current chore system or want to start one, this idea is a great one! Tweak it to how it will work for you. It has sure worked for us.
A PYP Best Blog! Making a DIY Bandana Tablecloth!
Just in case you missed this article on making a DIY bandana tablecloth the first time we shared it a couple of years ago, we are republishing it. After Marne wrote this blog originally, we got an awesome response. This is one of the PYP Best Blogs!
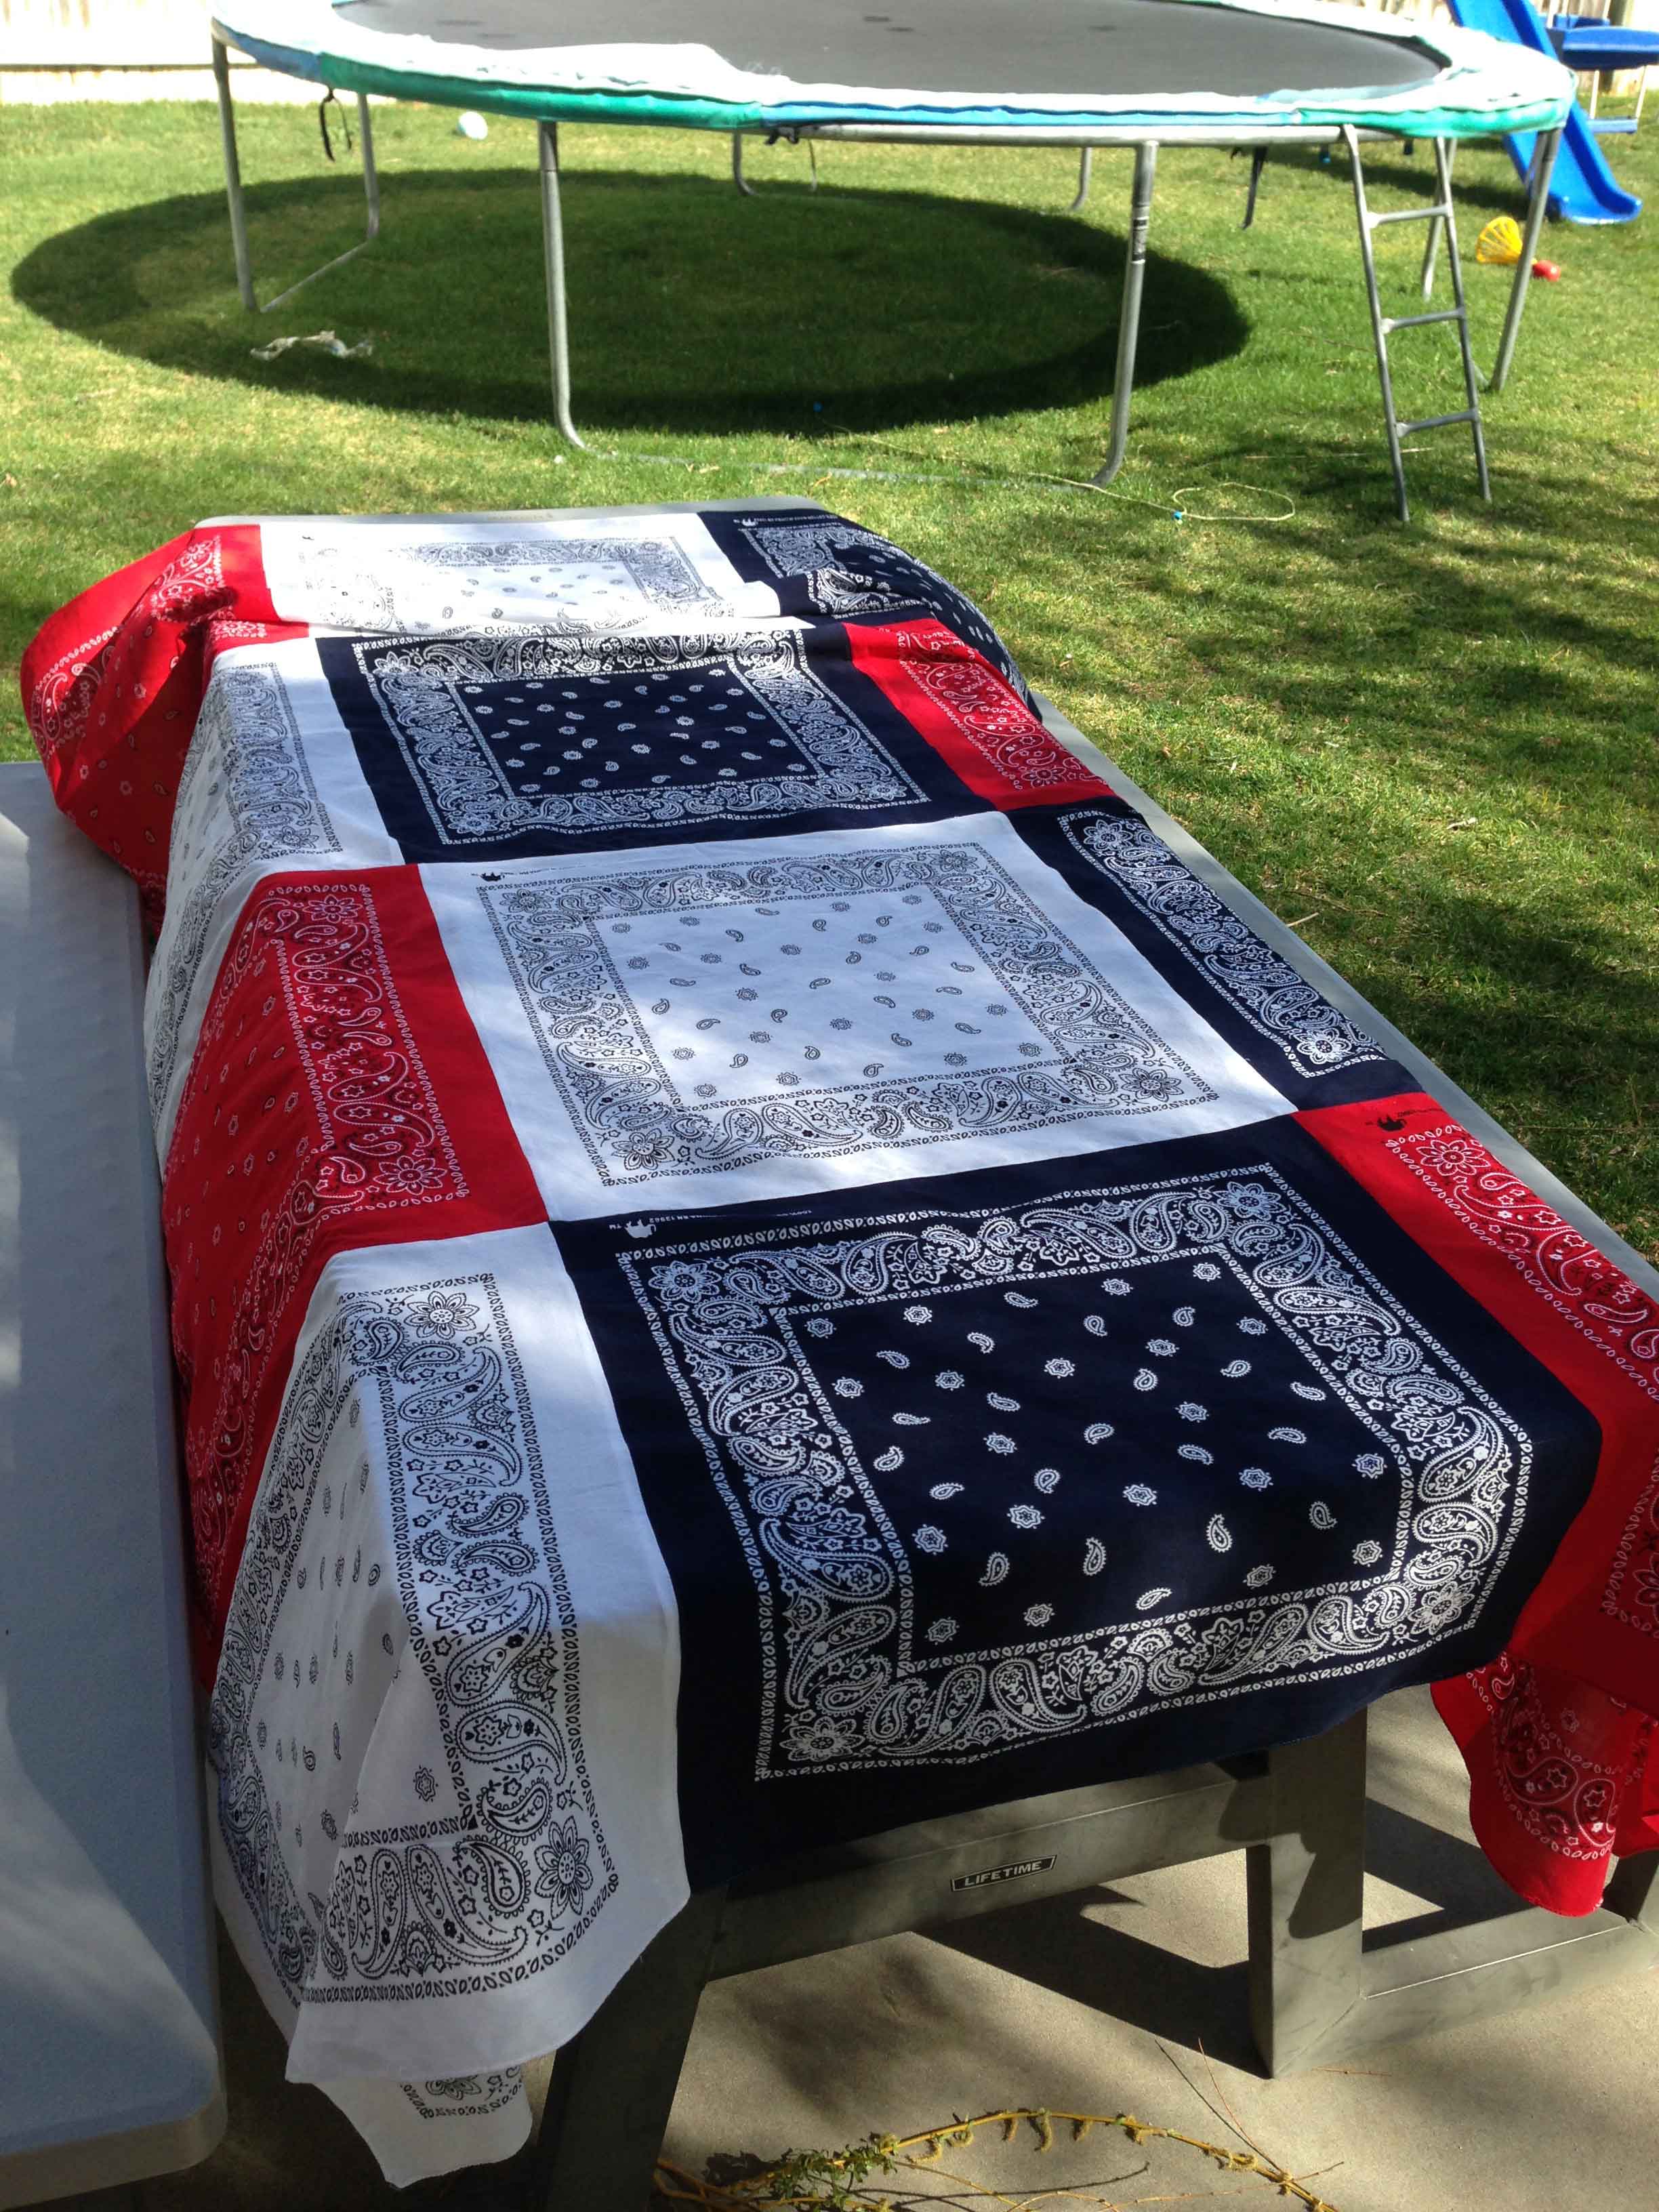
I have been wanting to make a bandana tablecloth, and I finally did! It was so easy that I wanted to share with you how I did it. I chose to make one for the 4th of July, and I LOVE IT! It turned out just like I wanted.
You will need:
bandanas in the color of your choice, I needed 12 (I got them at Walmart for $1 each)
sewing machine
iron
Wash, dry, and iron your each bandana. Then lay them out on the floor how you want the finished product to look.
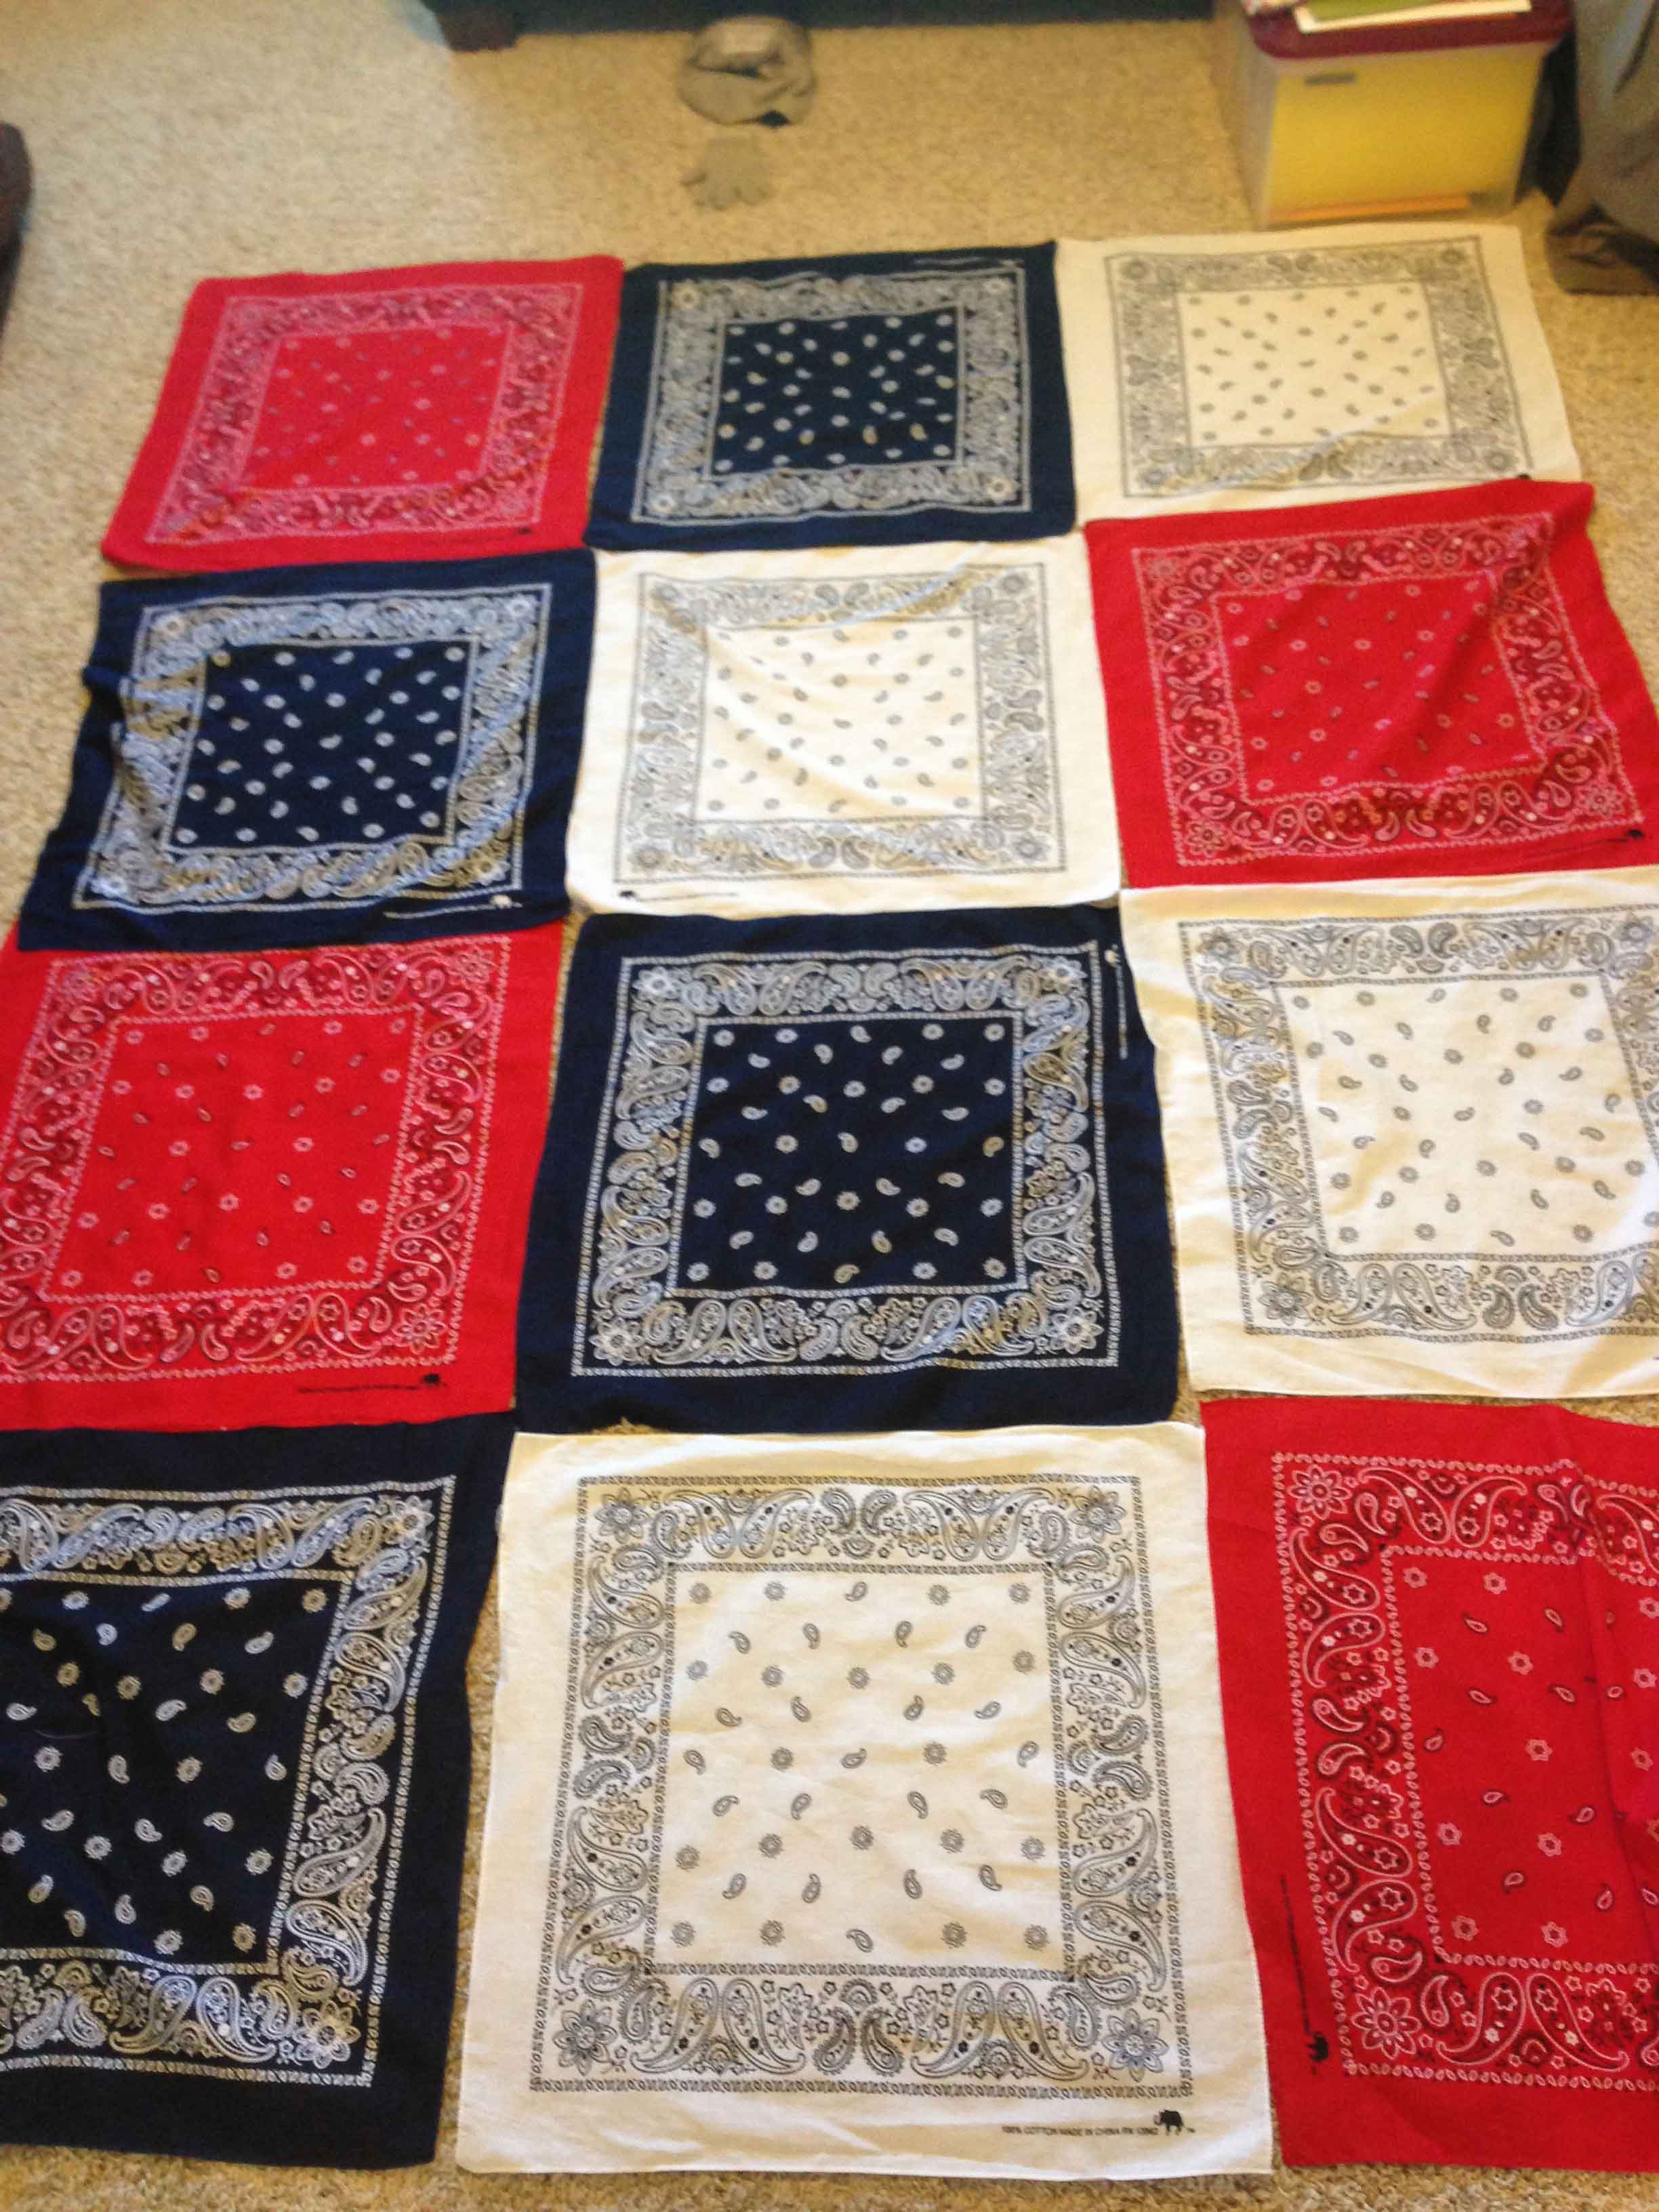
After you are finished with that, take them 3 at a time and sew them in order of how you placed them. Make sure you are sewing each bandana wrong sides together so they will all be uniform. I used a 1/4 inch seam allowance.
I sewed 3 bottom together, the next 3 together, then I did the two top rows of three. Then my last row of sewing was the middle when I sewing the two sections of six together. Make sense?
I have a picnic table in the backyard I was making this for, so I knew that I needed 12 bandanas. You can make yours as small or any size you wish! The possibilities are endless. Here is what mine looked like when I finished. I’m excited to use it soon!
NOTE: You can purchase bandanas at the dollar store for 2/$1, but they are very thin and not as good of quality. I recommend purchasing them for at least $1 each so the table cloth will be more durable.
Walmart Savings Catcher
Have you heard about the new Walmart Savings Catcher?
I price match at Walmart all the time. I like the idea of the Savings Catcher though. You can still ad match the same as you always have but save your receipt and go to walmart.com/savingscatcher and enter your receipt number. If there are any items on your receipt that were on sale that week somewhere else and you forgot to ad match Walmart will send you a gift card.
This will probably come in real handy here soon with Christmas shopping.
Here is some more information:
How It Works
What is Savings Catcher?
At Walmart we have low prices everyday on everything. If a local competitor offers a lower advertised price on an item you purchased at Walmart, we have a new program called Savings Catcher that allows you to get back the difference on a Walmart Rewards eGift Card.
Here’s how it works:
Submit your receipt to Savings Catcher in any one of three ways:
- Enter the receipt number (the TC number) into Savings Catcher at Walmart.com/savingscatcher. You’ll find this number located near the bottom of your printed Walmart store receipt.
- Or, scan the code at the bottom of your printed store receipt, using the scanner in the Savings Catcher section of the Walmart app.
- Or, register your phone number using the Walmart app or debit card reader located at in-store checkout. Then each time you check out at a Walmart store, enter your phone number and we’ll submit your receipt to Savings Catcher for you.
Savings Catcher compares the prices of the eligible items you bought at Walmart to the advertised prices found in the print and online versions of the weekly ads of top retailers in your area. The ads must be valid at the time you made your Walmart purchase.
If Savings Catcher finds an advertised price that is lower than what you paid for the same exact item at Walmart, you’ll get back the difference on a Walmart Rewards eGift Card.
Is there a minimum purchase required?
No. There is no minimum purchase requirement. Simply submit your receipt to get started.
How many receipts can I submit?
You can submit up to 7 receipts per week to Savings Catcher.
Is Savings Catcher available on my smartphone?
Yes. You can access Savings Catcher by downloading the Walmart app or by going to www.walmart.com/savingscatcher on your smartphone.
What types of promotions does Savings Catcher include?
Savings Catcher compares eligible items on your receipt to items found in the print and digital weekly ads of top retailers in your area. The ads must be valid at the time you made your Walmart purchase and include a specific item price.
What types of promotions does Savings Catcher not include?
Savings Catcher does not compare the following types of offers:
Items that require a separate purchase to get the advertised price (example: “Buy oatmeal to get cereal for $1.”)
Items with no actual price that require a purchase to get a free product (example: “Buy both oatmeal & cereal to get milk for free.”)
Items that require a purchase to get a gift card (example: “Buy a 12 pack of paper towels to get a $5 gift card.”)
Buy one get one free (BOGO) deals where no item price is listed (example: Peter Pan Peanut Butter, buy one, get one free. Save up to $2.50.”)
Going out of business or closeout prices.
Percentage off (example: “All mascara, 40% off.)
Does Savings Catcher apply to my online purchases?
No. Savings Catcher applies to your in-store purchases only.
Do my savings accumulate?
That’s entirely up to you. You have the option to accumulate your Rewards Dollars and build your balance in Savings Catcher or transfer it onto a Walmart Rewards eGift Card whenever and as often as you choose. If you haven’t redeemed your Rewards Dollars at the end of the calendar year, Walmart will automatically transfer them onto a Walmart Rewards eGift Card and notify you.
What happens if I use coupons?
No problem, you can still use Savings Catcher. If you use a coupon, Savings Catcher will compare the original Walmart price of the item, before the coupon was applied, to other stores’ advertised prices for the same item. For example: You bought cookies at Walmart. The shelf price was $3 and you used a coupon for $0.25, so you paid $2.75. If Savings Catcher finds that a competitor advertised those same cookies for $2.00, Savings Catcher will still credit you $1.00, even though you paid only $2.75 at Walmart.