
Seventh Generation Natural Dish Liquid Soap, Free & Clear, 25oz. – Just $1.99!
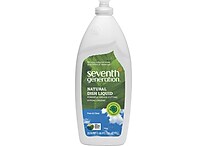
Seventh Generation Natural Dish Liquid Soap, Free & Clear, 25oz.
was $3.99
Save 50%
$1.99
FREE Shipping to store!
Bissell PowerForce PowerBrush Deep Cleaning System – $79.00!

Bissell PowerForce PowerBrush Deep Cleaning System
Was: $129.00
$79.00
Free in store pick up!
Dyson DC50 Animal Compact Upright Bagless Vacuum with Tangle Free Tool – $199.99!
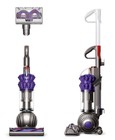
Dyson DC50 Animal Compact Upright Bagless Vacuum with Tangle Free Tool
High-power suction, collapsible handle, super compact! Buy Direct From Dyson! Manufacturer refurbished!
List price: $449.99
You save: $250.00 (56% off)
Price: $199.99
Free shipping!
A PYP Best Blog! DIY Garage Mudroom on a Budget!
Just in case you missed this article on DIY garage mudroom on a budget the first time we shared it a couple of years ago, we are republishing it. After Marne wrote this blog originally, we got an awesome response. This is one of the PYP Best Blogs!
I have been looking at mudroom ideas online for months. The idea of making a garage mudroom is not a new one, but I needed to really tweak all these ideas I was finding. Simply because we have hardly any space. We have a 2-car garage and are pretty cramped. But I KNEW I could do it, and we did! My only regret was that I forgot to take before pictures! We were too anxious to get it done before we left for Thanksgiving. This post is proof that you don’t have to spend much money to have a functional and organized mudroom! Here is what we did.
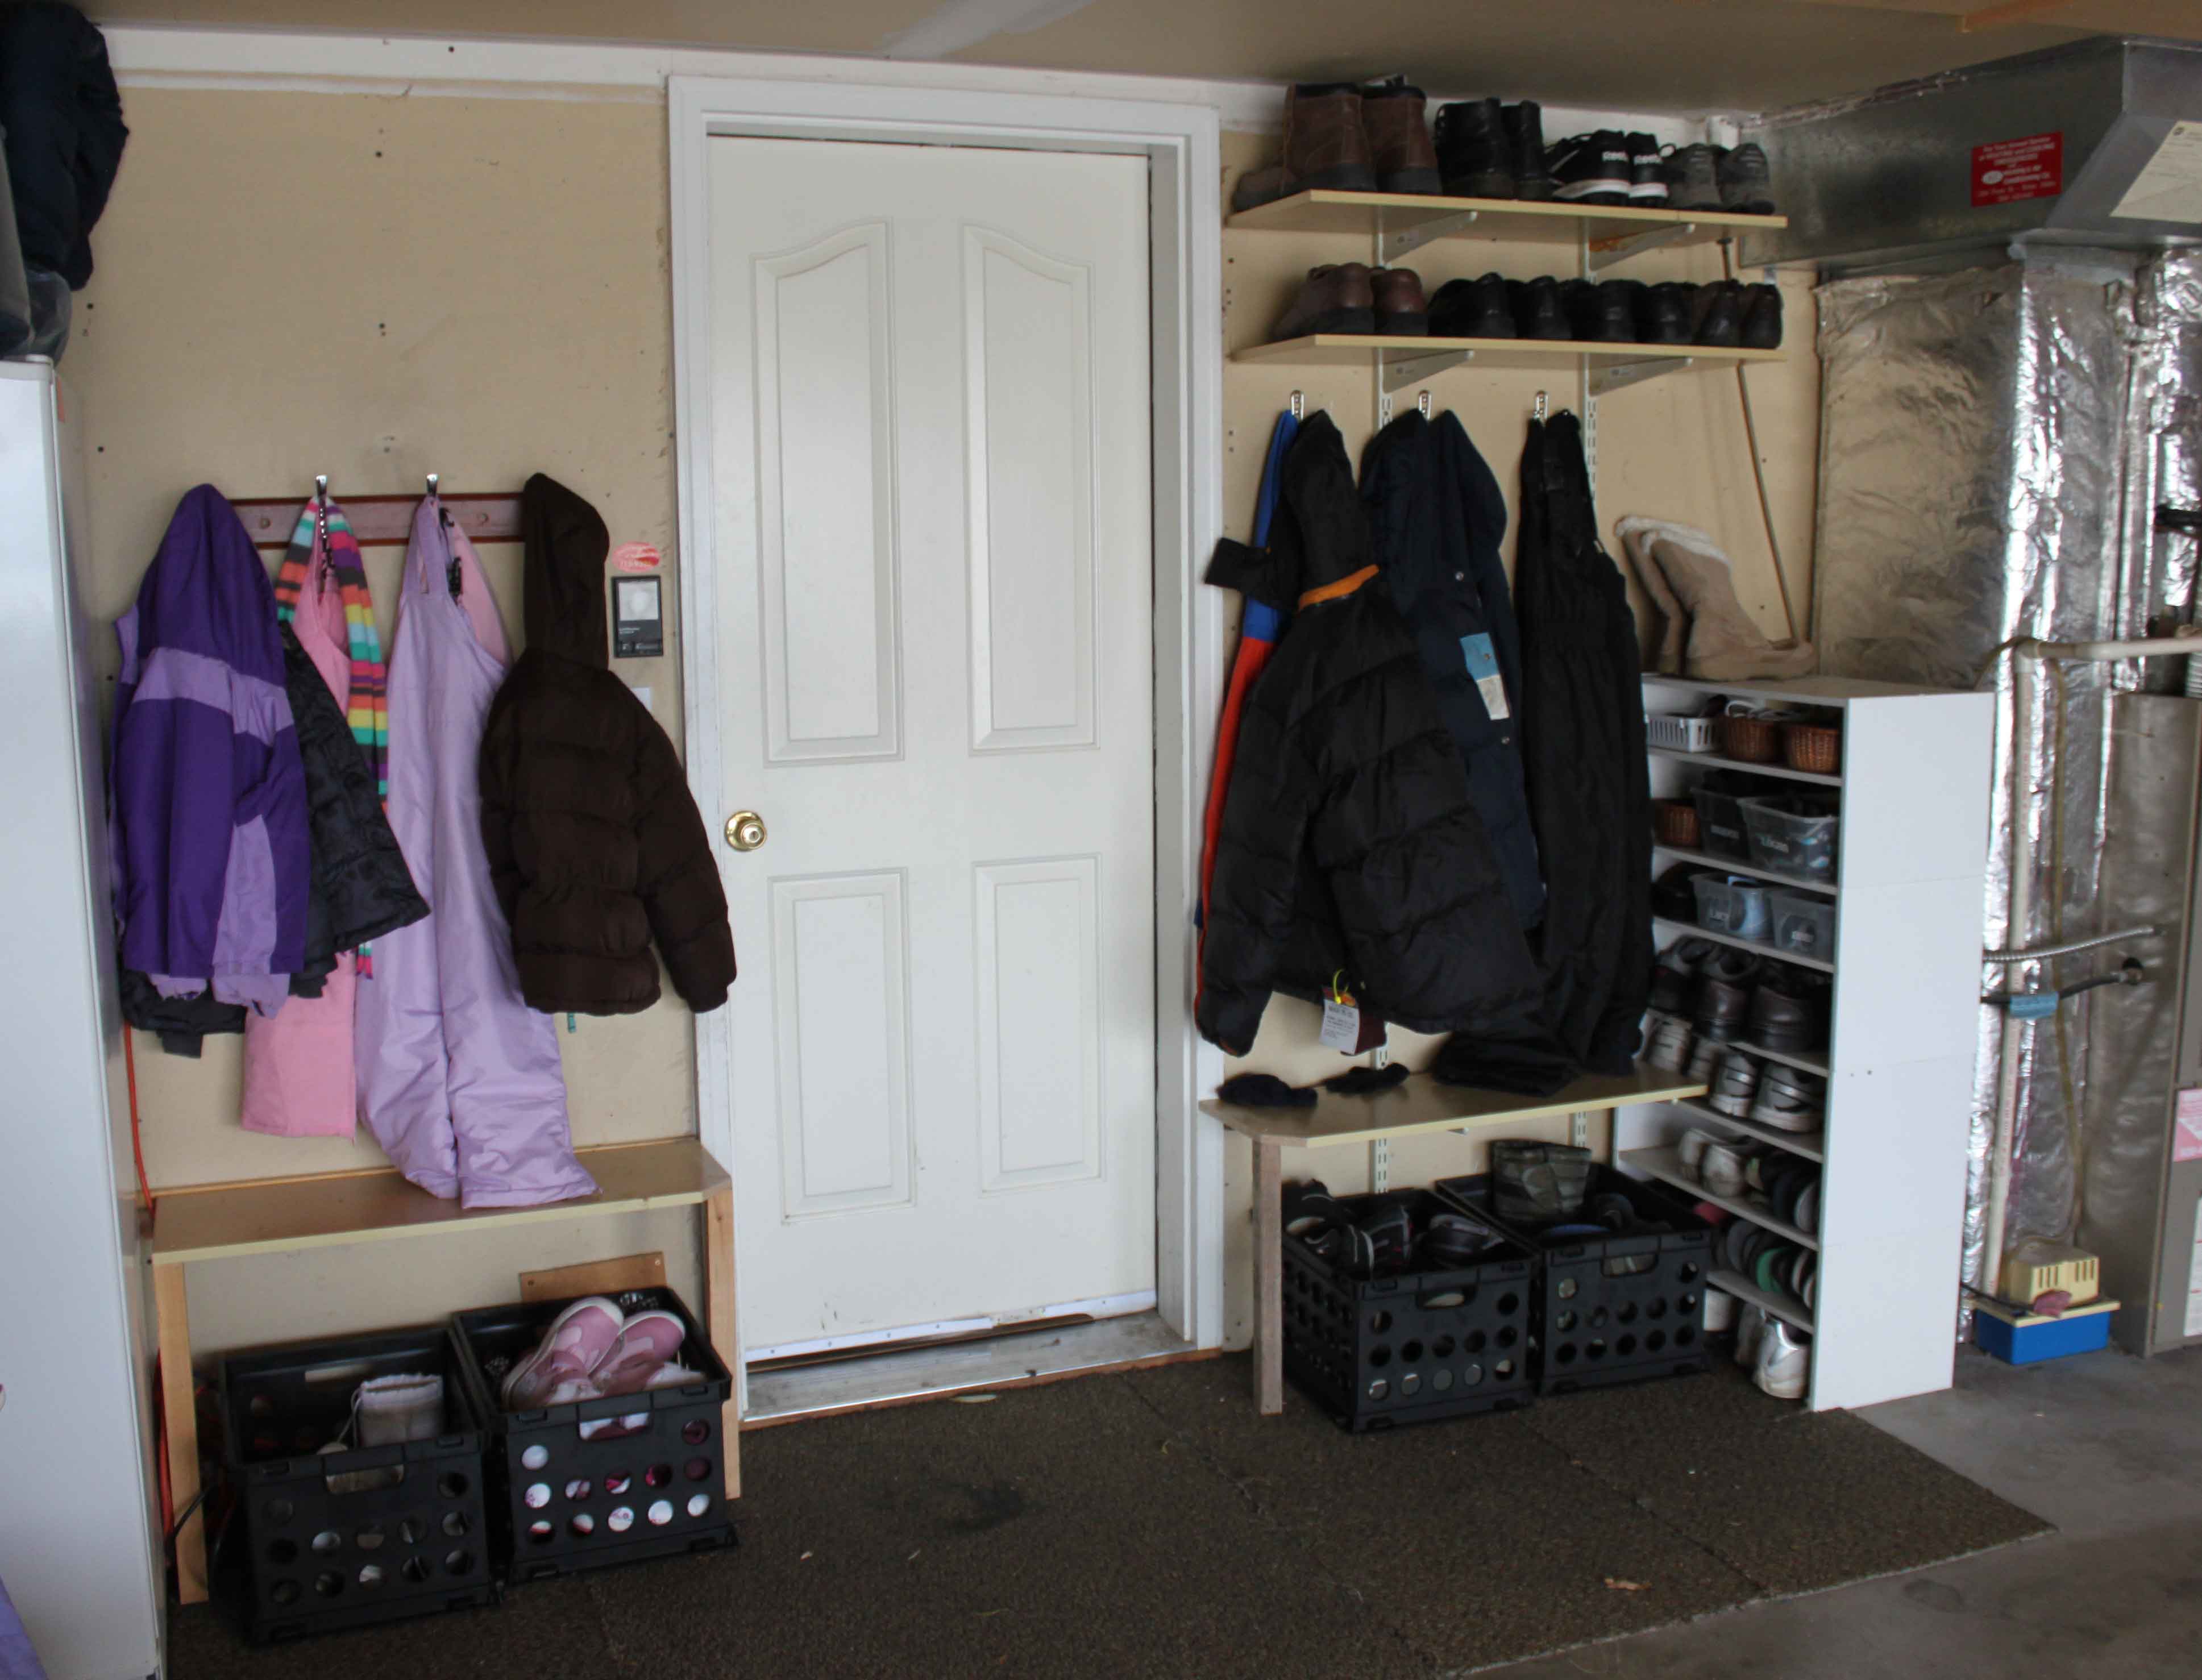
1. I originally wanted cubbies, but when I looked at the space we had, I realized that wasn’t possible. So we just did hooks. We already had the 4-hook one on the left, then I bought 3 hooks for the right side.
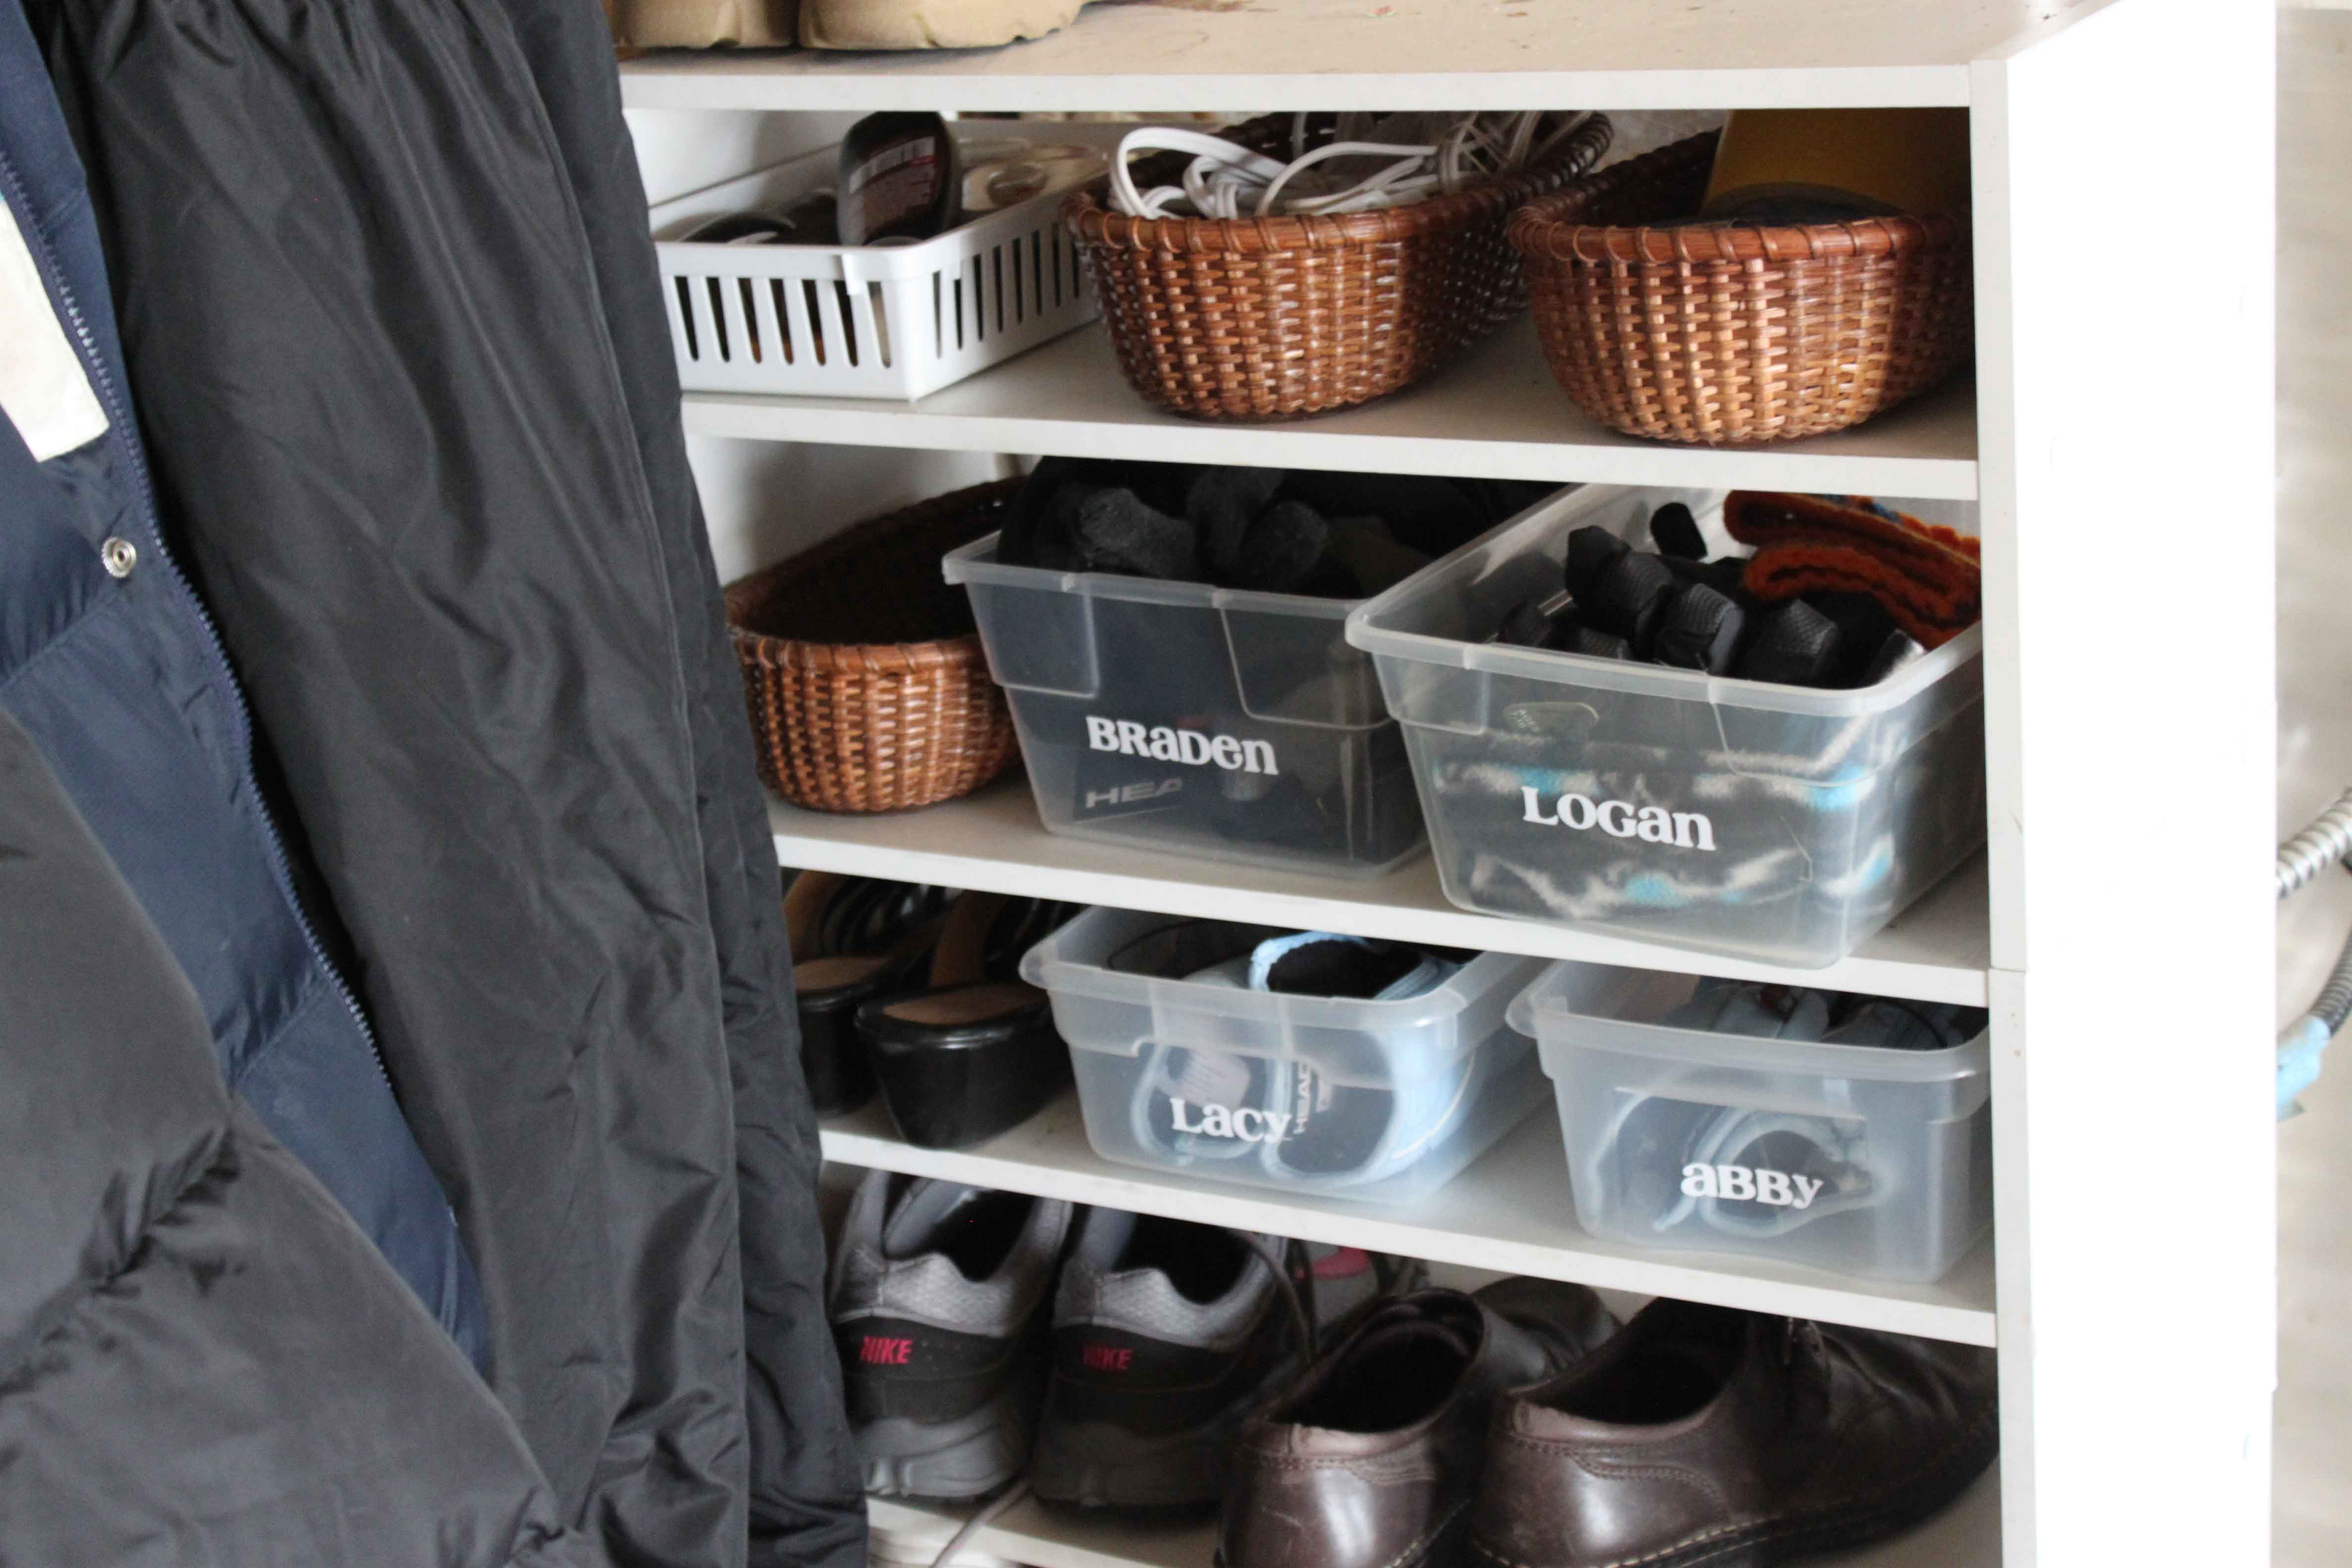
2. I bought a black bin for each child ($7 at Walmart in the office supply section) to put their shoes in.
3. My hubby build two benches for each side with wood scraps already in the garage.
4. We put two shelves up high (that we already had, just stored away) for hubby’s shoes. He can reach them!
5. We moved around & cut some carpet scraps we had to make them fit perfectly around the area.
6. The original shoe shelf on the left still hold my shoes and hubby’s. As you can see, I gathered up 4 clear bins in my house I wasn’t using and made them homes for the kids’ winter gloves, hats, and scarfs. Then I used 3 small baskets I already had to store duct tape, shoe shine/shoe brush, and electrical cords that we always use.
We spent a grand total of $35.45 on this garage mudroom! I know it isn’t the fanciest, but if you saw the mess before (shoes EVERYWHERE, and coats all over the house & not enough room for them) you would be so impressed! I love that is is so functional for our family. I was proud of myself for trying hard to use what we already had instead of spending more money.
We are still planning on doing the following things:
1. Putting 4-5 more hooks on the left side above the girls’ hooks for all hats we have. That will also be a big help for us.
2. Putting a wire shelf (that we already have) on top of the white shoes racks to make one more level for the winter boots.
So what do you think? Have you done a garage mudroom for your family?
Household Essentials Tapered Bin with Wood Handles – Just $14.99!
Get organized with these cute baskets! Love it!
 Household Essentials Tapered Bin with Wood Handles
List Price: $29.99
You Save: $15.00 (50%)
Price: $14.99
Eligible for free shipping on $35+ orders or on ANY order with Amazon Prime.
Don’t have a Prime membership? Get a one month free trial! Click here for details!
Deal of the Day – iRobot Roomba 790 Vacuum Cleaning Robot Pets/Allergies – $474.99!

Deal of the Day – iRobot Roomba 790 Vacuum Cleaning Robot for Pets and Allergies
was $699.99
(32% off)
$474.99
The iRobot Roomba 790 Vacuum Cleaning Robot removes up to 98% of dirt, dust and pet hair – on its own – at the touch of a button. Perfect for homes with pets or without, Roomba cleans deep to pick up dirt, hair, fur, and other debris. Using iAdapt Responsive Navigation Technology, the robot thoroughly vacuums the entire floor including hard-to-reach spots under furniture.
LINK to Gold Box Deals at Amazon
Eligible for free shipping on $35+ orders or on ANY order with Amazon Prime.
Don’t have a Prime membership? Get a one month free trial! Click here for details!
A PYP Best Blog: Homemade Shower Cleaner and the many uses for vinegar
 So for today’s PYP’s Best Blog post I am combining 2 of our best blogs into one post! I recently needed an amazing shower cleaner and I was reminded of this post that we did several years ago. Since one of the ingredients is vinegar I also wanted to re-share a post we did on the many uses of vinegar, bringing 2 of PYP’s Best Blog posts together!
Everybody’s making this stuff. Are you? Simply put 1 C white vinegar in the microwave until warm and mix with 1 C Dawn Dish. Put this into a spray bottle and you have an AMAZING shower cleaner. For tough soap scum, you can spray and leave overnight. This stuff really works!!
.
PS – You can actually use ANY amount of vinegar and an equal part of Dawn. Also, you don’t need to reheat this every time you use it. You just heat it once to get the ingredients to combine well.
The many uses of vinegar:
There are so many ways that you can use vinegar in your home. It is very inexpensive and not harmful at all to children or the environment. It is a go-to staple in my home. I have a gallon in my kitchen and laundry room at all times. It is also something that we keep in our food storage. I use it for cooking, cleaning, canning, and even in my dog’s water bowl!!
FOOD
When you can’t get the last bit of mayonnaise or salad dressing out of the jar, try dribbling a little of your favorite vinegar into it, put the cap on tightly and shake well. You’ll be amazed at how much you’ve been wasting.
Try soaking fish in vinegar and water before cooking it. It will be sweeter, more tender and hold its shape better. When boiling or poaching fish, a tablespoon of vinegar added to the water will keep it from crumbling so easily.
Cake icing can be prevented from becoming sugary if a little vinegar is added to the ingredients before cooking. The same is true when making homemade candy.
When boiling an egg and it’s cracked, a little vinegar in the water will keep the white from running out.
A teaspoon of white distilled or cider vinegar added to the water in which you boil potatoes will keep them nice and white. You can keep peeled potatoes from turning dark by covering them with water and adding 2 teaspoons of vinegar.
Freshen up slightly wilted vegetables by soaking them in cold water and vinegar.
Add 2 tablespoons white distilled vinegar to 1 pint water and use to wash fresh fruits and vegetables, then rinse thoroughly. Research has shown that vinegar helps kill bacteria on fruits and vegetables.
Before frying doughnuts, add ½ teaspoon of vinegar to hot oil to prevent doughnuts soaking up extra grease. Use caution when adding the vinegar to the hot oil.
Perk up a can of soup, gravy or sauce with a teaspoon of your favorite specialty vinegar. It adds flavor and taster fresher.
As a tenderizer for tough meat or game, make a marinade in the proportion of half a cup of your favorite vinegar to a cup of heated liquid, such as bouillon; or for steak, you may prefer to a mix of vinegar and oil, rubbed in well and allowed to stand for two hours.
Remove fruit or berry stains from your hands by cleaning them with vinegar.
For fluffier and great tasting rice, add a teaspoon of white distilled vinegar to the boiling water before adding rice. Rice will be easier to spoon and less sticky.
CLEANING
It is easy to take out the heavy stale smell often found in lunch boxes. Dampen a piece of fresh bread with white distilled vinegar and leave it in the lunch box overnight.
Get rid of cooking smells:
Let simmer a small pot of vinegar and water solution.
Soak a paper towel with 1-2 Tablespoons of white distilled vinegar. Wipe mixing bowl and beaters or whisk with the vinegar-soaked paper towel, then dry with a cloth or paper towel prior to whipping egg whites.
Bathtub film can be removed by wiping with white distilled vinegar and then with soda. Rinse clean with water.
Rub down shower doors with a sponge soaked in white distilled vinegar to remove soap residue.
Corrosion may be removed from shower heads or faucets by soaking them in diluted white distilled vinegar overnight. This may be easily accomplished by saturating a terry cloth towel in vinegar and wrapping it around the shower head or faucet.
Stubborn stains can be removed from the toilet by spraying them with white distilled vinegar and brushing vigorously. The bowl may be deodorized by adding 3 cups of white distilled vinegar. Allow it to remain for a half hour, then flush.
PETS
A teaspoon of white distilled vinegar for each quart bowl of drinking water helps keep your pet free of fleas and ticks. The ratio of one teaspoon to one quart is for a forty-pound animal.
Test the color fastness of the carpet with white distilled vinegar in an inconspicuous place. Then sprinkle distilled vinegar over the fresh pet accident. Wait a few minutes and sponge from the center outward. Blot up with a dry cloth. This procedure may need to be repeated for stubborn stains.
.
.
Dyson DC39 Ball Canister Vacuum – Factory Reconditioned – $179.99!

Dyson DC39 Ball Canister Vacuum
Choose from 4 colors.
Factory Reconditioned
$179.99
Limit 1 per customer.
A PYP Best Blog! Making Your Own Laundry Detergent – An Update!
Just in case you missed this article on DIY an update on making your own laundry detergent the first time we shared it a couple of years ago, we are republishing it. After Marne wrote this blog originally, we got an awesome response. This is one of the PYP Best Blogs!
Remember my previous post on how to save money and make your own laundry detergent?
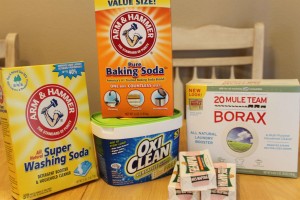
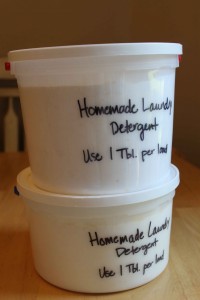
Well, I wanted to post an update for you. I just ran out of it about a week ago. So this mix lasted me 7 months. Not quite as long as I had thought, but I do A LOT of laundry. With four kids and three of them in sports (and the other a messy 3 year old0, my washer rarely gets a rest. Here is the breakdown for you for me and my lifestyle:
Cost of original detergent: approx. $20
Amount made: approx. 2 gallons (see photo above)
Length of use: 7 months (29 weeks)
Loads done: 10-15 loads per week (average)
Amount of detergent used:1-2 Tbl. per load
So, if I am doing my math correctly, for each week I did laundry for 29 weeks my detergent cost me $.69 cents (I divided $20 into 29 weeks). And…as I am doing between 10-15 loads per week, that means each load of laundry was between $.04-$.06 cents per load!
That is pretty awesome.
For now I am going to keep on making my own detergent. I like how easy it is to make, how well it cleans my clothes, and how cost effective it is to make. Remember, the recipe I gave you has Oxi Clean in it, which does raise the price of the original cost. You can leave it out of the recipe in order to lower your overall cost. HOWEVER, I think it is worth it because it helps keep my whites from getting too dingy.
Did you make this recipe of detergent? How has it worked for you?
A PYP Best Blog! Give your Washer a Good Cleaning!
Just in case you missed this article on giving your washer a good cleaning the first time we shared it a couple of years ago, we are republishing it. After Marne wrote this blog originally, we got an awesome response. This is one of the PYP Best Blogs!
I am not one of those people that has the new, nice, front loading HE washing machines and dryers. I would love a set, but I still have a normal, ordinary, top loading washer and front loading dryer. I’ve had this set for over 10 years, and I bought it used then. Works great still. But it helps if I keep it in top-notch running order.
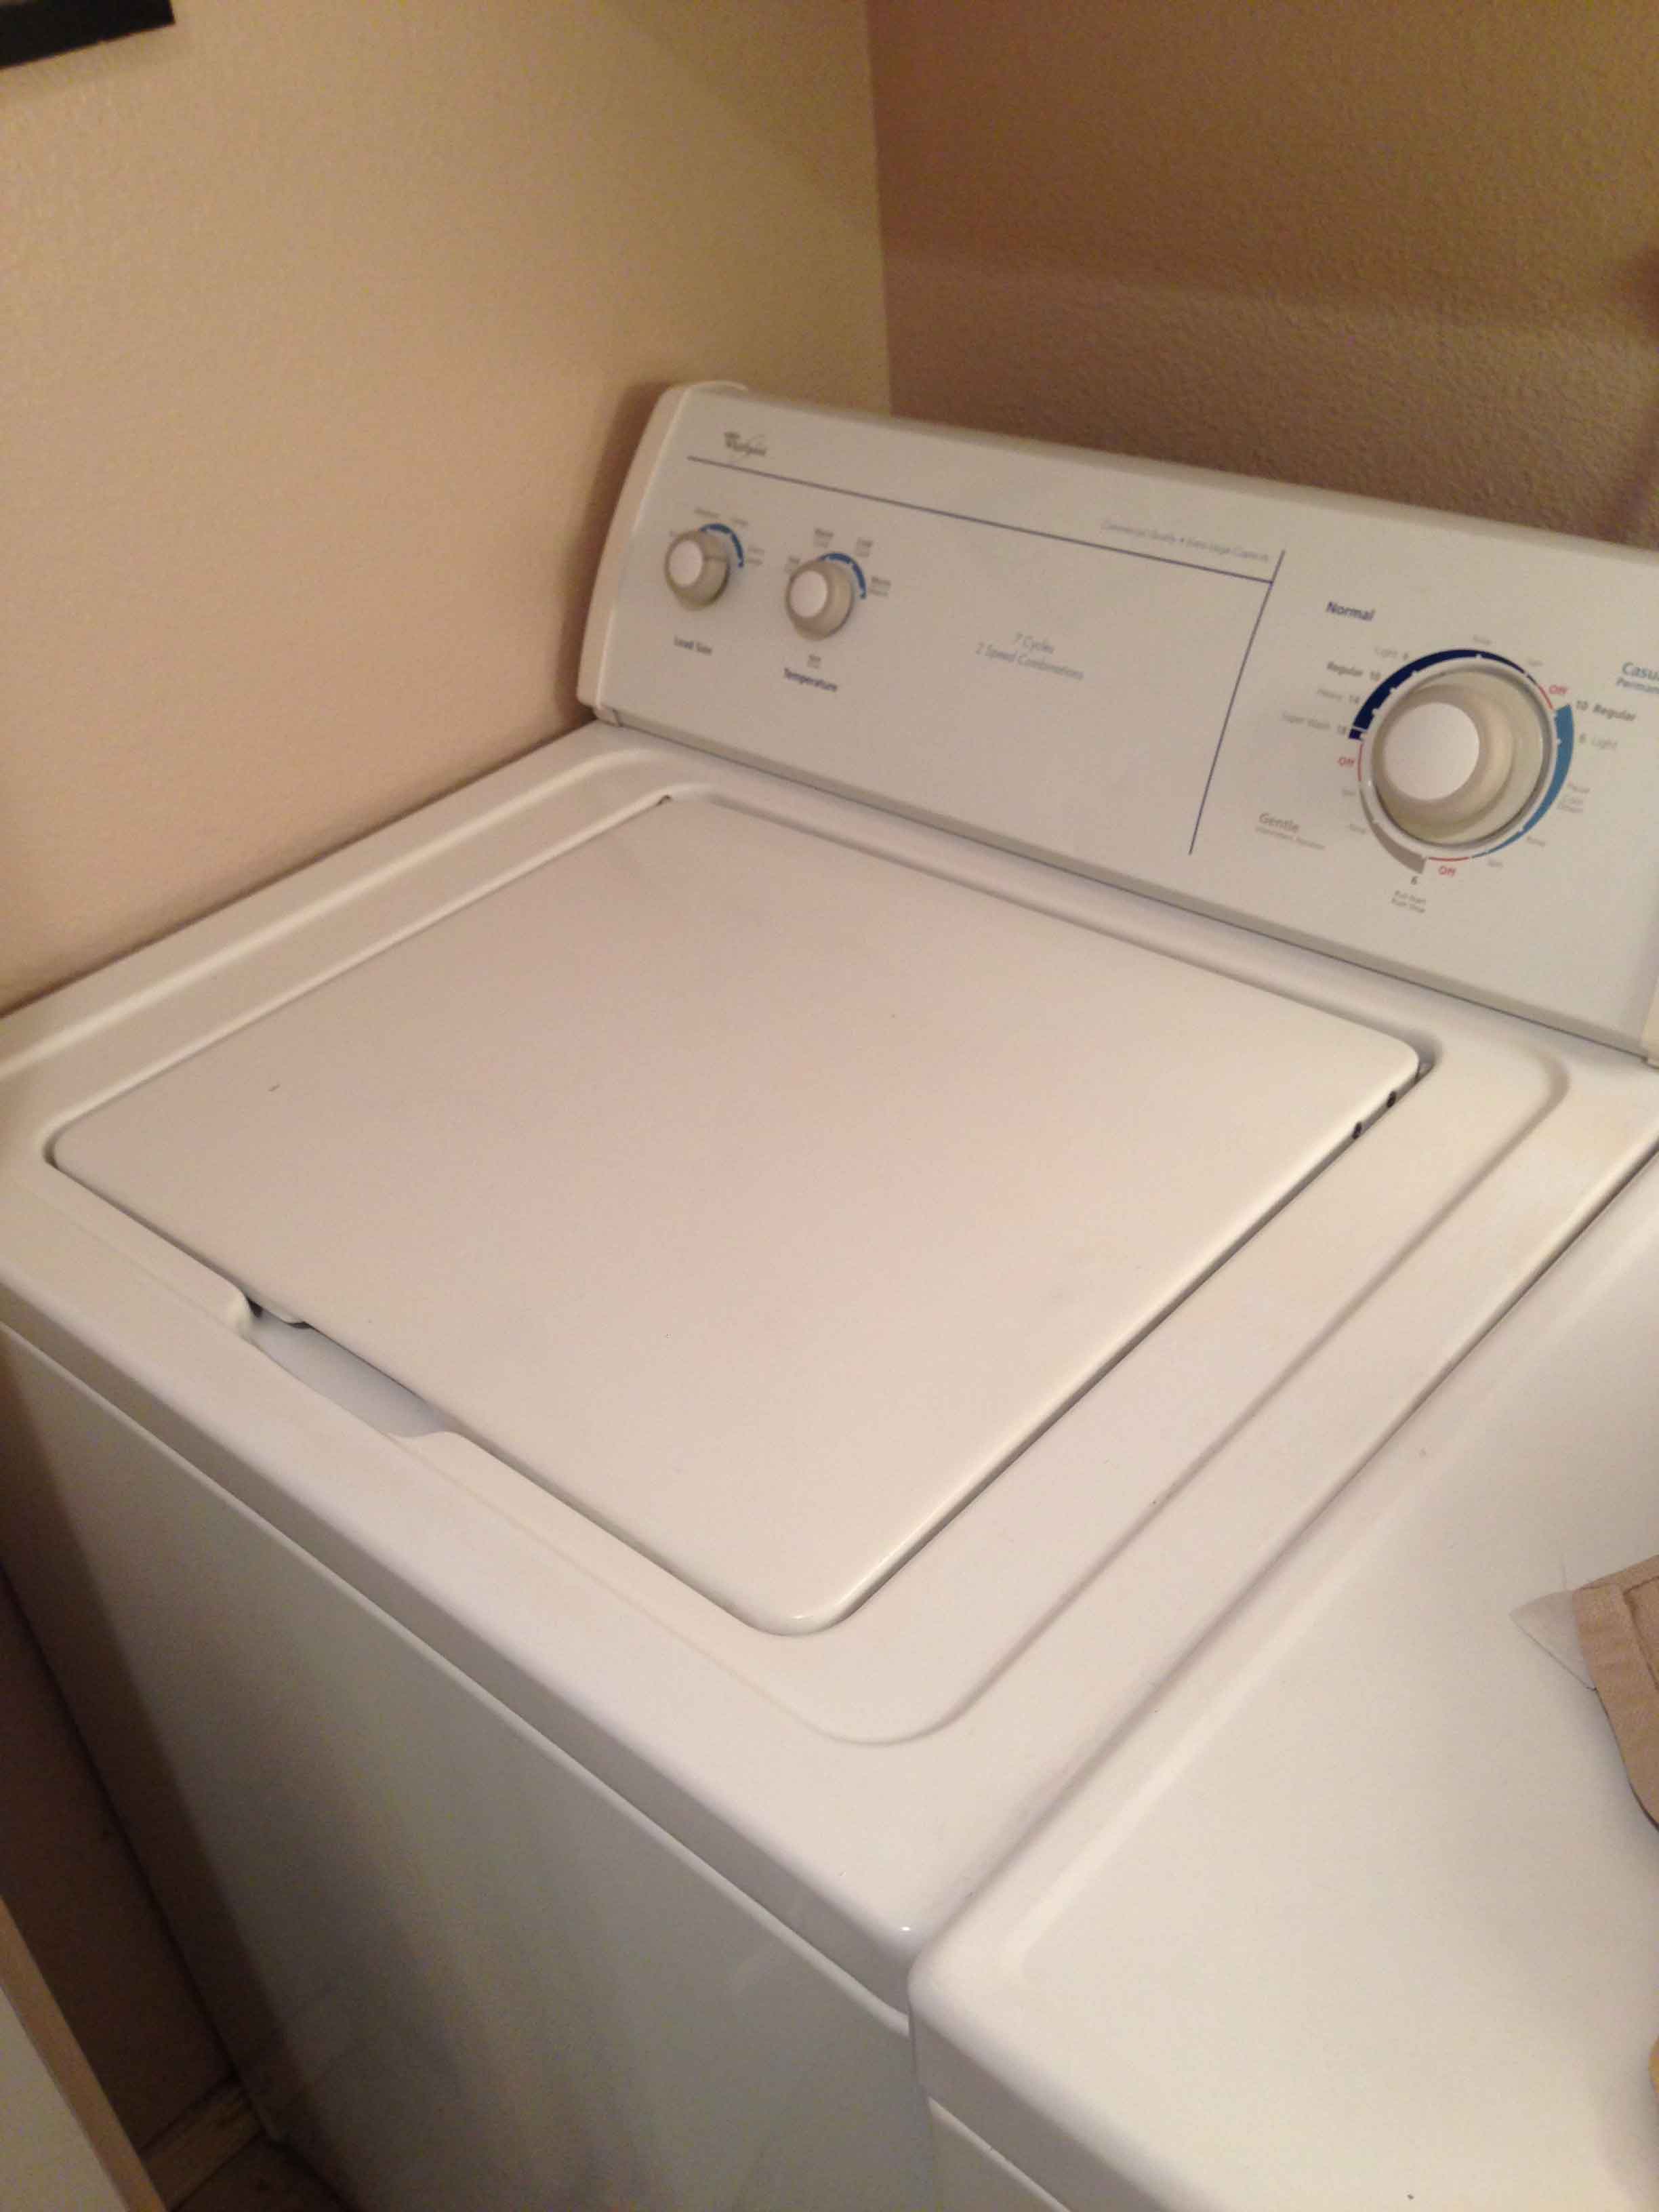
If you have ever noticed your washer smelling a bit musty or with a slight odor, or a film building up in it, then you need to clean it. This is a great way to clean your top loading washer. Really easy and costs pennies. There are several ways to do this, but this method is my favorite. Mt friend taught me how to do this and I am so grateful.
1. Fill your washer with HOT water and one quart of cholrine bleach.
2. Let it agitate for a couple of minutes, then let it sit for ONE HOUR.
3. After the hour is up, let the washer go through it’s longest wash, rinse and spin cycle.
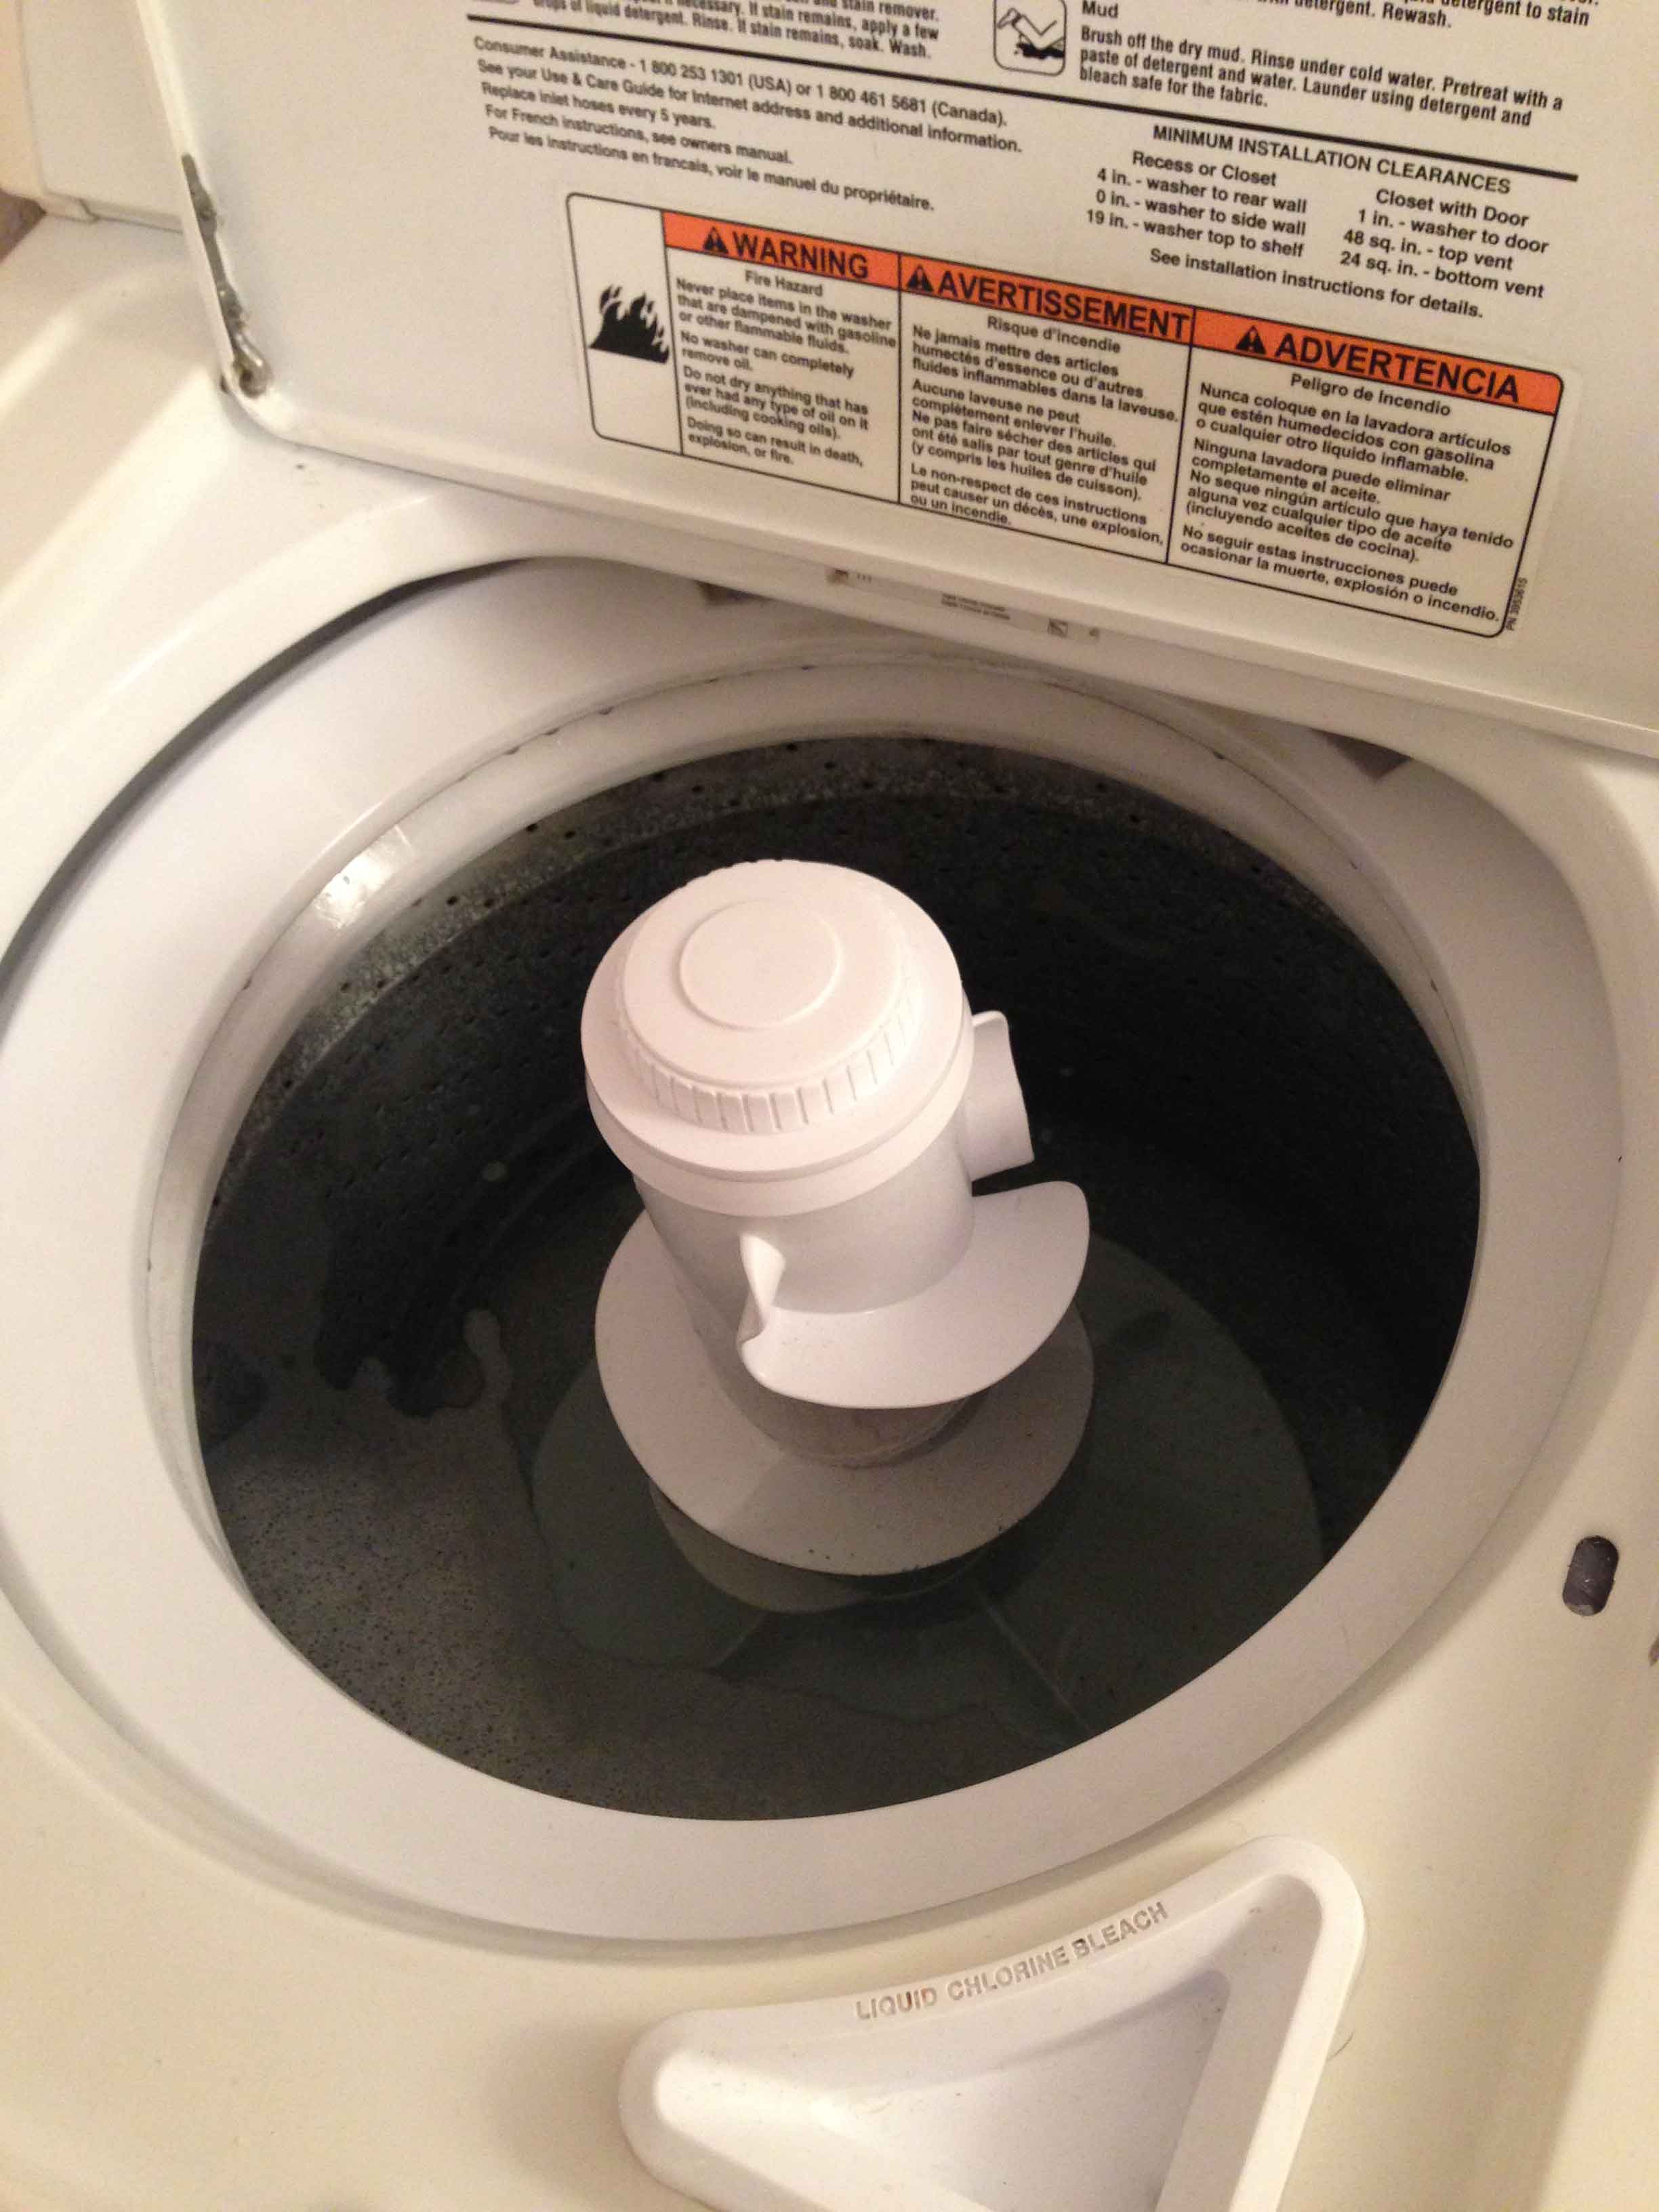
4. Fill the washer with HOT water again, and this time put in 1 quart white vinegar.
5. Let it agitate again for a few minutes, then let it sit for ONE HOUR.
6. Let it go through the regular cycle again, like in the step above.
You now have a clean washer! The bleach and the vinegar clean away bacteria and sanitize your machine. It can also help with mineral deposits and soap scum. You will also want to take a wet rag (it works great to dip it into the vinegar water while the machine is soaking) and wipe down the outside of your machine and under the rims too.
How do you clean your washer?
Deal of the Day – Ecosmart Electric Tankless Water Heater – $360.00!

Deal of the Day – Ecosmart Electric Tankless Water Heater
was $569.00
(37% off)
$360.00
Never run out of hot water again with the Ecosmart ECO 27 electric tankless water heater. This compact water heater only heats the water needed and provides significant energy cost savings. This product also includes a lifetime warranty for residential use.
LINK to Gold Box Deals at Amazon
Eligible for free shipping on $35+ orders or on ANY order with Amazon Prime.
Don’t have a Prime membership? Get a one month free trial! Click here for details!
Febreze Allergen Bundle with BONUS Swiffer Dust & Shine – $16.41!

Febreze Allergen Bundle with BONUS Swiffer Dust & Shine
$16.41
This Febreze Allergen Bundle with BONUS Swiffer Dust & Shine includes your choice of:
1 Febreze Air Effects
1 Febreze Fabric Freshener
1 Swiffer Duster Starter Kit or Refills
1 Bonus Swiffer Dust & Shine
Shop the Value of the Day and Grab It Before It’s Gone at Walmart.com!
Free in store pick up!
A PYP Best Blog! DIY Common Sense Appliance Repairs!
Just in case you missed this article on DIY common sense appliance repairs the first time we shared it a couple of years ago, we are republishing it. After Marne wrote this blog originally, we got an awesome response. This is one of the PYP Best Blogs!
Have you ever found yourself calling a repairman for a home appliance problem? Then when they get there & inspect the issue, you find out the repairs are a simple fix? Then you are stuck paying a large service call fee when you could have fixed the problem yourself.
Here is an example. For a week or so I have noticed that our refrigerator wasn’t getting as cold as it should. We turned up the temperature but it was not getting colder. My husband said he would look at it. The next morning as I got the milk out it was very cold! After talking to my husband, I learned there were no big, hard repairs. It was a simple, quick fix.
The fridge and freezer work together to keep the temperature regulated properly. See this vent? It is in the top left of the fridge, and it goes to the freezer on the other side.

The problem was this: That bag of bacon bit was standing up blocking the flow vent. That’s it! Once my husband folded down the bag the fridge started to become colder within the hour. If we had called a service man to diagnose and make the repairs we would have paid at least $75 for him to just tell us that.
If you have something wrong with an appliance, toilet, or other item in your home, take some time to check into what might be wrong and see if you can make the repairs before you pick up the phone to call a repairman. My husband is handy, but if you are not maybe you know someone who is that could give you some tips. It just might save you lots of cash.
Hoover FloorMate Hard Floor Cleaner with Bonus 64oz Solution – $89.00!

Hoover FloorMate Hard Floor Cleaner with Bonus 64oz Solution
Was: $149.00
$89.00
Shop the Value of the Day and Grab It Before It’s Gone at Walmart.com!
Free in store pick up!
$15.84 – Bissell 3-in-1 Vacuum – Perfect for Dorm, RV, Stairs & More!
 $15.84 – Bissell 3-in-1 Vacuum
Free shipping when you spend $50 or more or free in store pick up!