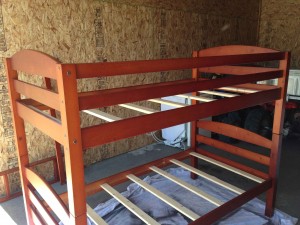
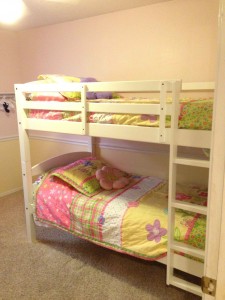
I recently decided to paint some bunkbeds that I found on Craigslist for my daughters’ bedroom. It was quite the undertaking, and I learned alot in the process. I consulted the internet and friends of mine who know how to refinish furniture. I want to share with you the process that I did, and hopefully it can help someone!
Before beginning, make sure you:
1. Take the bunkbed apart to paint. You will get better coverage, and will be glad in the long run! Make sure you save the screws and all parts and label them if needed.
2. Pick out a good quality paint (I used Behr Paint Plus Primer in Decorator White)
3. Have all your supplies ready: sander, rags, small foam rollers, high quality paint brushes, etc
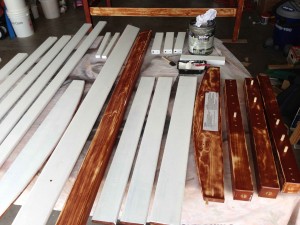
Have a workstation ready to do the painting. I covered some long tables with cloths to paint. Worked great.
1. First figure out what kind of wood you are dealing with. Mine were pine with a cherry finish. If it isn’t real wood, you may want to google different options. I am not a paint expert, but that is what I was told.
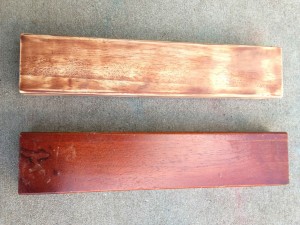
2. Give your wood a good roughing-up. I used a sander with 220 grit sandpaper on it. In these photos here you can see that I got down to the bare wood in some areas. I did sand a little too much. All you need to do is rough it up so the paint has something to stick to.
Another option is liquid sandpaper. I used liquid sandpaper on part of the bunkbed when I got tired sanding. If I were to do this over again, I think I would do liquid sandpaper on the entire project. It was just as effective and easier.
3. After sanding, make sure you wipe down the bed really well. You don’t want any fine sand in your project.
Use rags that are lint-free.
4. Now you are ready to begin priming your project! If you are using a Paint + Primer, you may not need to use regular primer. A good primer to use is Kilz or Zissner. Primer it well with a high-density foam roller. After it has dried, sand with a 320-grit sanding block to smooth it out before painting. Wipe down good again to clean off.
5. Now you can paint! For my bunkbed, I ended up using 3 coats of paint. It sounds like a lot, but since the boards are small it wasn’t. Judge for yourself on how it looks to know if you want to do more coats. Let dry on each side before turning over to paint on the other side.
6. After you are done with the final coat of paint, give it another light sanding with the 320 grit sanding block to smooth it all out. You will be more happy with it if you do!
7. Now you are ready to put on the Polycrylic coat. This will help seal the paint, make it more durable, and in my case since I was using white paint, it will keep my paint from yellowing over time. Make sure you get polycrylic, NOT polyurethane! Polycrylic is water-based, it doesn’t stink and cleans up easily with water. It also dries quickly so make sure you apply it according to the directions on the can. Use a high quality paint brush to apply, like Purdy. You will notice a difference!

8. Let the paint cure for several days before putting together. Then you have a wonderful finished masterpiece to be proud of!


